Close
0%
0%

Haptic Input

Device to relay digital information to the brain via touch

Similar projects worth following
Our world becomes more and more digital and we are increasingly relying on digital input in our daily lives. We get this digital information mainly by using our eyes to look at computer screens where digital information is displayed. However, there are situations where we need our eyes for more pressing things, and it might be a risk to look at a screen. Think of driving a car, performing surgery or being a security guard. The Haptic Input device is intended to deliver digital input to the user without distracting the eyes and ears. It uses a grid or line of points that can be pressed down into the skin to form a specific pattern. After the user learned to read these patterns, digital information can be relayed to the user by only briefly shifting the attention to the skin. It is a new form of digital input that anyone can use.

The Haptic Input device enables the user to get digital information of any kind through the skin. Currently we manly use our visual or auditory system to get digital information to our brain. However, in some situations the eyes and ears are needed for other tasks. Luckily, we have many senses, or in other words, we have many routes to deliver input to our brain. The Haptic Input devise does just that by using tactile stimuli to convey the message. 

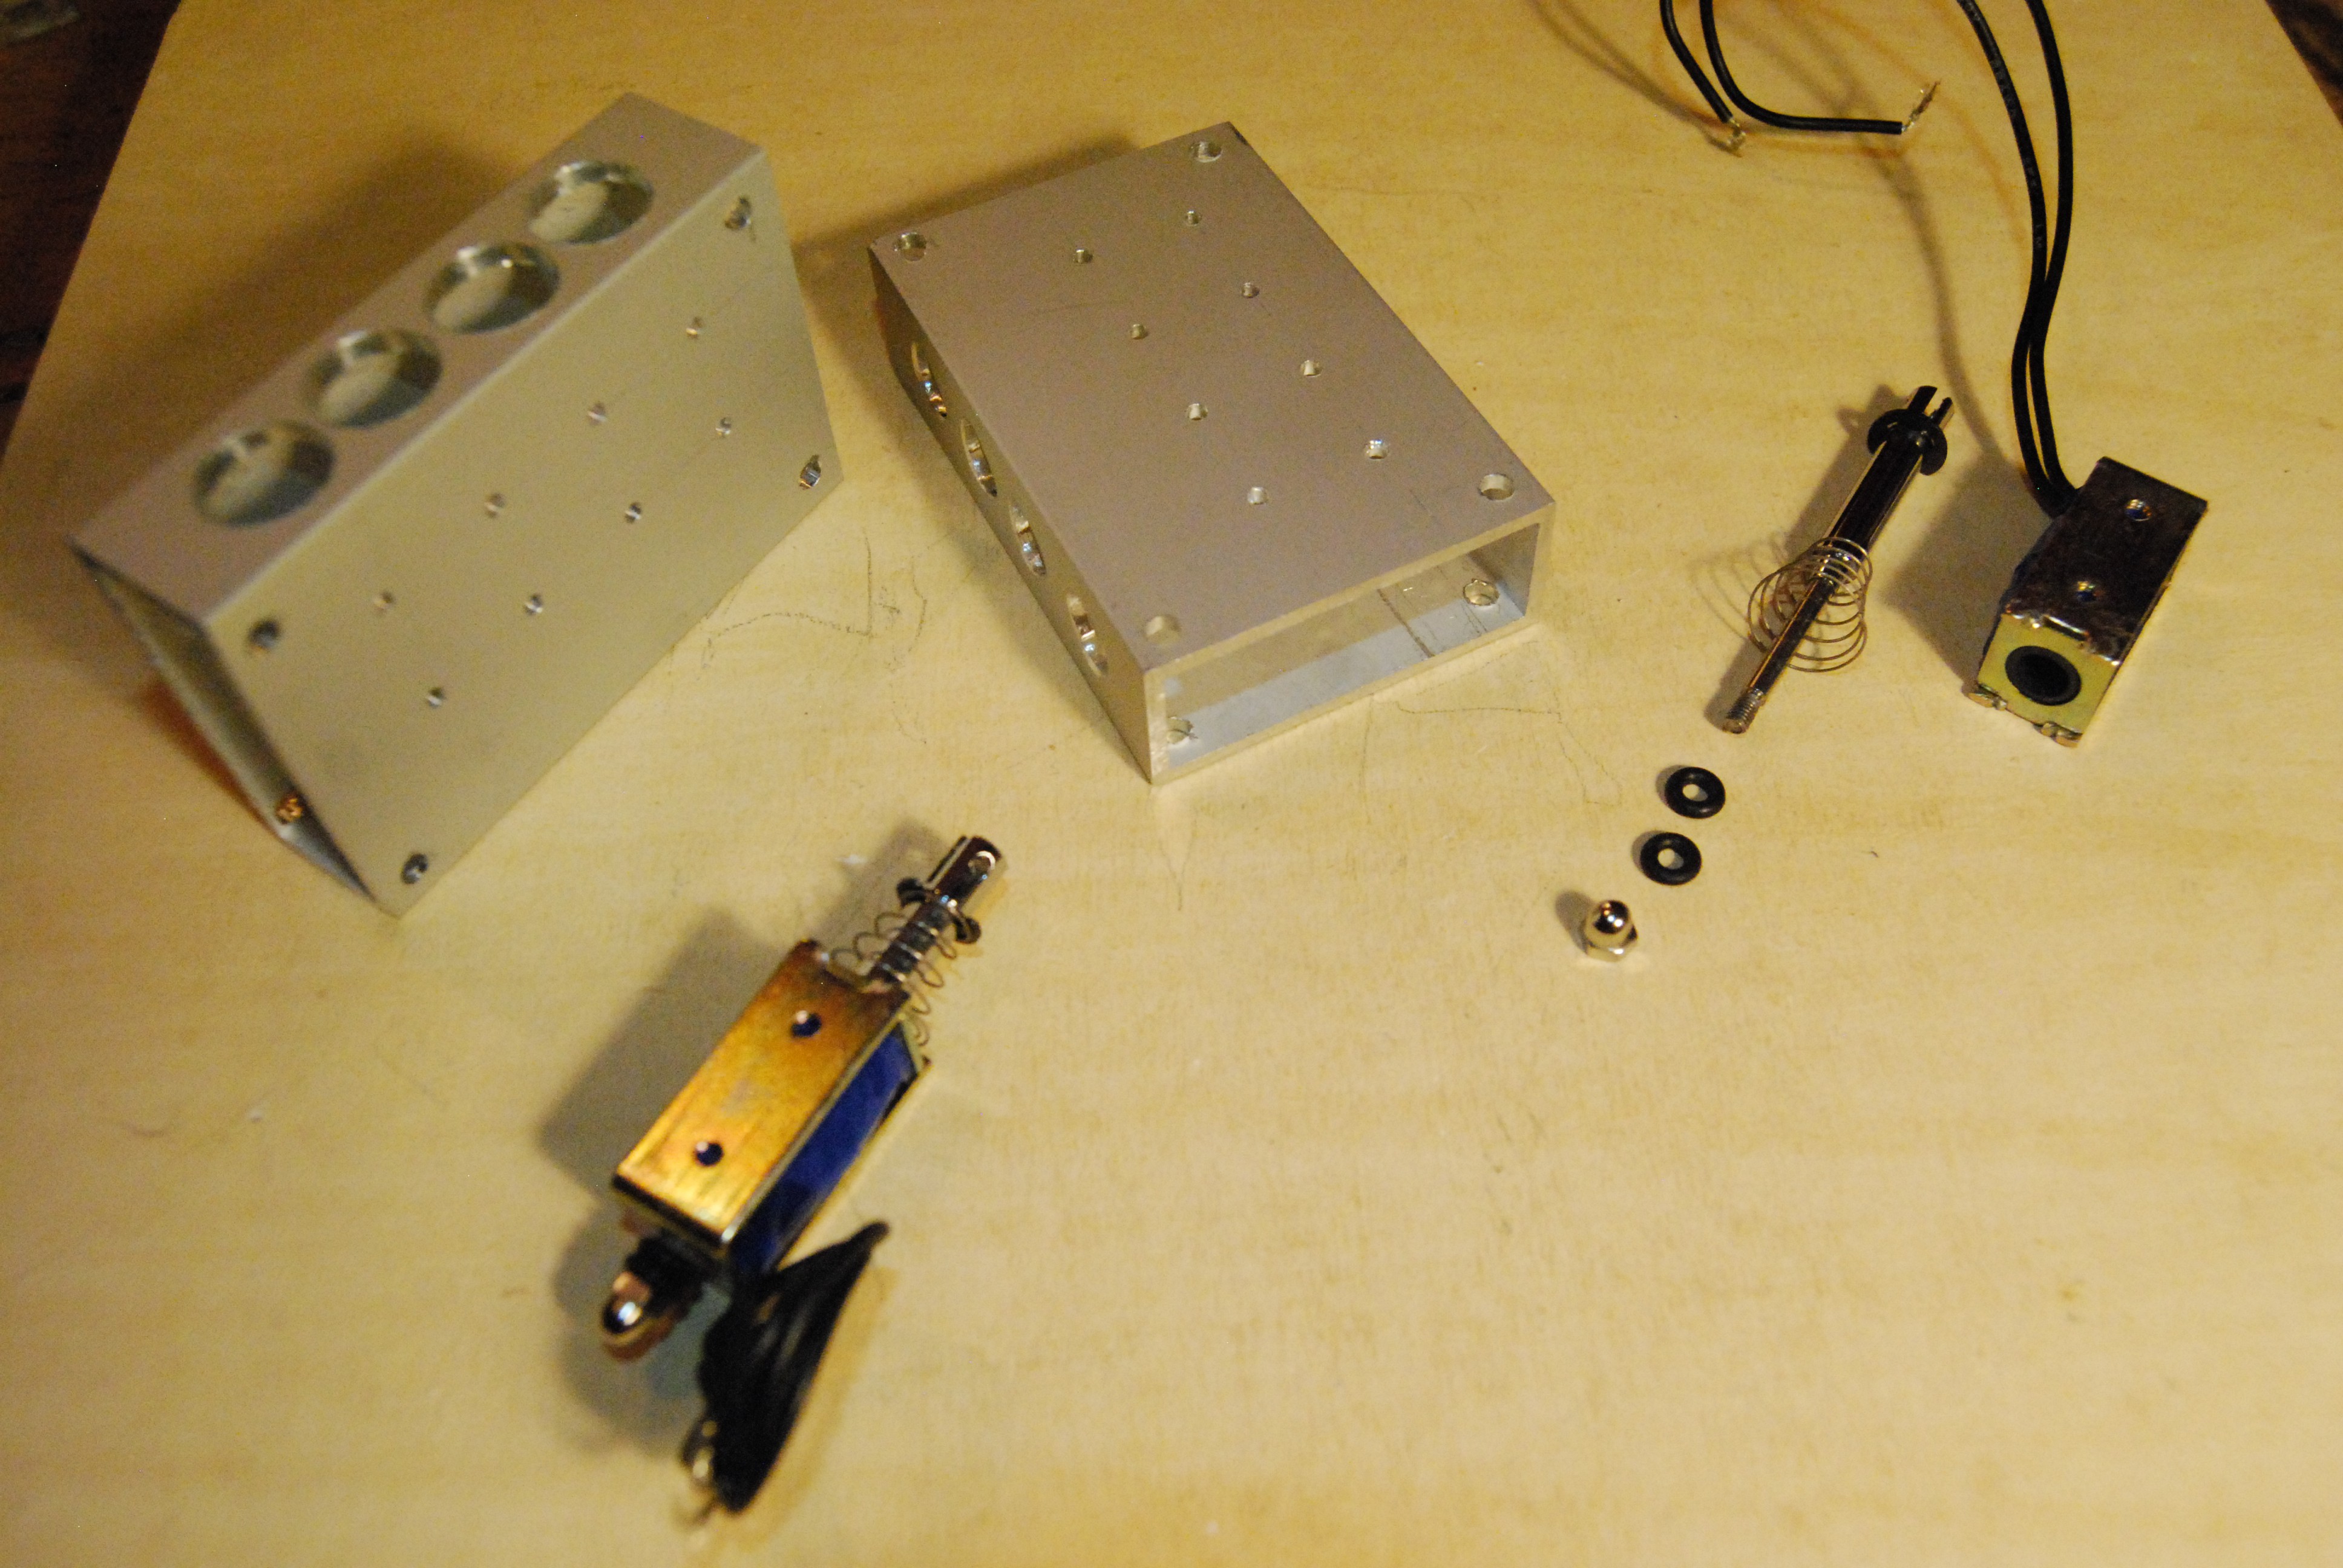
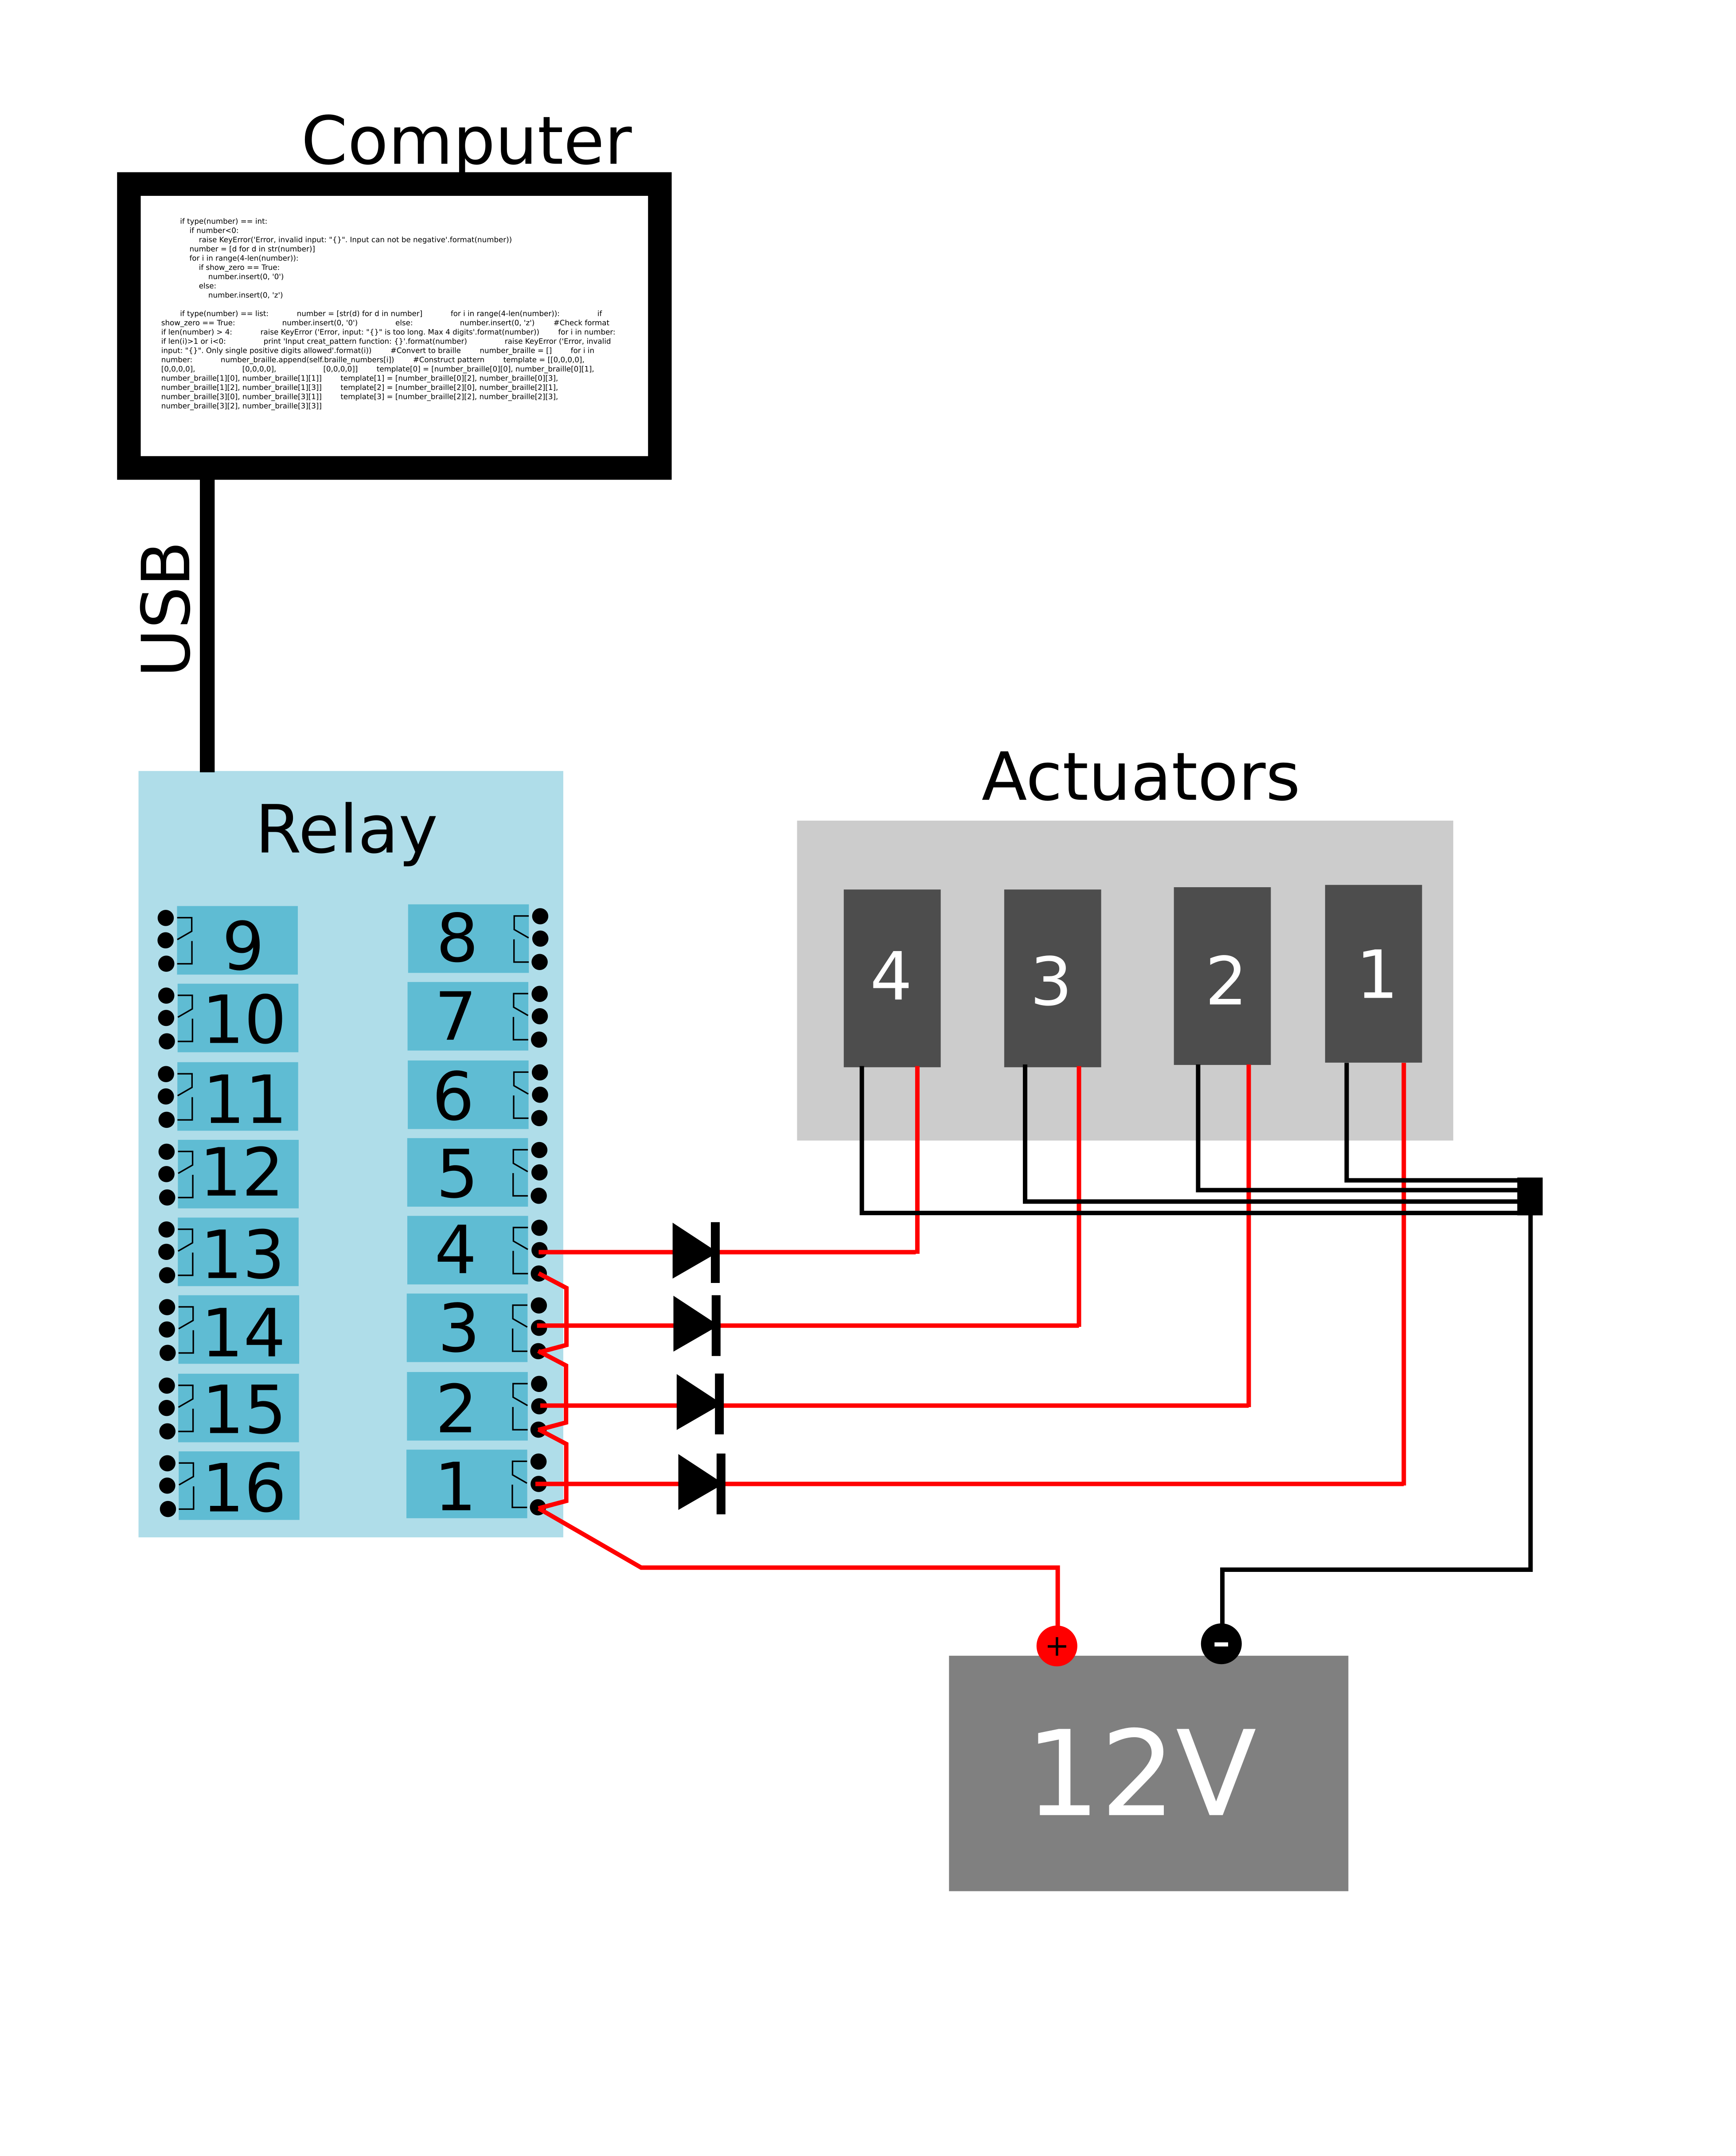
Basically, the Haptic Input device is a line or grid of solenoid actuators that are placed just above the skin. Once they get activated they push down a rod into the skin which the user will feel. Every actuator can be individually controlled to create patterns which corresponds to messages. 

In the current implementation 4 actuator in a line can be used to relay one binary number between 0 and 15 to the user. Or 4 of these lines can be used to create a grid of 16 points. With this 16 point grid, up to 4 binary or braille numbers can be made.

Here the Haptic Input device can be seen in action. A random number is generated and is converted to binary. Then the actuators are activated in that pattern. (sorry for bad video quality)

Of course the Haptic Input device is similar to braille, but what distinguishes it is that it does not use the fingers, so that these can be used for something else. However, the biggest difference is the idea that everyone can benefit from it, not just the blind. It can be used for any kind of digital information in any situation, and it can be hooked up to any other device to meet the needs of the situation. 

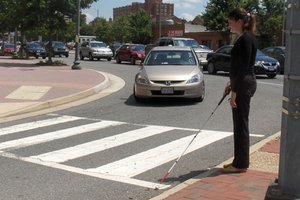
Like mentioned before, it will be most useful in situation where the eyes are occupied or in situations where it is not practical to look at a screen. For example, how many times have you bumped into something when you were looking at your phone while walking. What if you can get all your text messages without even looking at your phone or having someone reading it to you. Haptic input could be a new way of getting our digital information, in addition to visual and auditory ways.

Wristband_mount.STL

Bracket mounted to either side of the Haptic Input device for the wristband.

Standard Tesselated Geometry - 27.23 kB - 09/04/2017 at 14:43

Download

Wiring_diagram.pdf

Wiring diagram. For simplicity only the first 4 actuators are connected but all follow the same rules.

Adobe Portable Document Format - 19.63 kB - 09/02/2017 at 10:16

Preview
Download

Haptic_input_py27.py

Control code for the Haptic Input device. Dependencies: hidrelaypy https://github.com/tatobari/hidrelaypy/blob/master/hidrelay.py

x-python - 11.96 kB - 08/31/2017 at 22:06

Download

Haptic_input_frame.PDF

Dimensions of frame to hold 4 actuators.

Adobe Portable Document Format - 36.75 kB - 08/31/2017 at 16:53

Preview
Download

Haptic_input_frame.SLDPRT

3D model of frame to hold 4 actuators.

sldprt - 226.50 kB - 08/31/2017 at 16:52

Download

  • 16 × Solenoid actuator Electronic Components / Misc. Electronic Components
  • 1 × Sainsmart 16 relay board Relay board
  • 1 × Power supply 12 Volt Power supply for actuators and relay board
  • 1 × Aluminum beam Beam that is used to mount the actuators in
  • 1 × Electrical wire wire

View all 11 components

  • Learning Haptic Input

    Lars Borm09/03/2017 at 20:11 0 comments

    Here I will document my learning curve. The number of correct interpretations of the patterns are tracked and I will regularly update the plot below.

    I practices a little bit less than I had hoped, but even with so few trials I am happy with the improvement. It must be said that each trial lasted about 10 minutes and had on average just 20 different patterns. 

  • Technical considerations

    Lars Borm09/02/2017 at 11:55 0 comments

    Size and shape:

    The current implementation of the Haptic Input device is more a proof-of-principle that a handy wearable. The actuators in the frame are quite bulky and heavy, and the relay board is also quite big. However, one of the biggest problems is that the device gets very hot after ~10 minutes. I think there is a design flaw with the power supply. The actuators are just coils and I think that if they are activated they draw as much power as possible. Because the current power supply can deliver up to 10 Ampere, this is a lot of energy. Maybe it is better to use a lower Amperage. but take in consideration that there should still be enough energy to push into the skin.

    Future versions:

    Next versions should be a lot smaller and lighter. I can see two ways of doing this. 

    One is to use a flexible patch made out of some silicon rubber that can be glued onto the skin. In the patch channels should be made and connected to a grid of cavities. Using air pressure individual cavities can be inflated to generate the input patterns. 

    Another option is to use electricity directly to stimulate the skin receptors directly without touch. This should make the device a lot simpler and smaller. A 12V battery should be sufficient to power the device and stimulate the skin.

  • Biological considerations

    Lars Borm09/02/2017 at 11:44 0 comments

    Playing around with the Haptic Input device taught me a couple of things that are important for efficient Haptic Input.


    Body:

    Our skin has different neurons that sense different modalities of touch. We have mechanorecpetors for touch and vibrations, nociceptors for pain and thermoreceptors for temperature. However, the density of the receptors is not the same for every piece of skin of our body. The lips have the highest density, followed by the hands and the rest of the body has quite a poor sensory density. A good illustration is the sensory homunculus:

    In this drawing the body parts are sized relative to the density of the receptors. It is clear that the face and the hands have the highest density. What this means is that if you are touched by two points they can be much closer to each other on the hands and lips for you to be able to distinguish them, compared to other points of the body.

    For the Haptic Input devide it is very important that you can distinguish the individual points. Therefore, the points need to be sufficiently far apart. I found that for the arms and legs about 2cm is sufficient for this, but that closer to each other is doable after some learning. I choose a distance of 15mm to keep the machine compact.

    Stimuly:

    First I used the actuators with the domed nut: 

    However, because the surface is so smooth, it was hard to feel them. When I took them off and used the bare rod, it was much easier to feel them. Possibly also because it hurts a little bit, so that also the pain receptors are activated.

    Plasticity:

    The Brain is quite plastic and therefore it is possible to re-purpose some parts of your body. I think that if you place the Haptic Input device always on the exact same place on your skin, your brain will learn that a certain patch of skin is connected to one of the positions of the device. For example, if you are teaching yourself binary with the Haptic Input device and you place it always in the same manner. Your brain will start to associate a certain group of receptors with the corresponding number. 

    When teaching myself binary Haptic Input, I usually have to explicitly calculate the number from the binary pattern, but sometimes I just know the number without doing that. I think that my brain is learning to associate certain patterns with certain numbers. Further learning to "read" these patterns will show if I can actually connect the patterns to numbers without doing the arithmetic of converting binary to numbers.

View all 3 project logs

  • 1
    Frame construction

    Take a 76mm x 50mm x 20mm aluminum hollow beam.

    To accommodate the rod af the actuator, drill  four 13mm holes in the top and four 10mm holes in the bottom. 

    On the back, drill two holes per actuator to mount the actuators. For the Actuators used in this project, the holes should be 15mm apart and they have a M3 thread that can be used to mount them in the frame. You can either drill 3mm holes or drill slightly smaller and make a M3 thread in them for extra security. I choose to drill a 2.4mm hole and thread them with a tap drill. 

  • 2
    Actuator mounting

    Take apart the actuators by unscrewing the domed nut, and pulling out the rod.

    Place the actuator body in the aluminum frame. Align the holes of the actuator and the frame and mount with a M3 screw.

    Re-assamble the actuators by first twisting the spring into the frame and then placing the rod back.

    Make sure the cables go to one side.

  • 3
    Wiring

    Use a 12V power supply to power the relay board and the actuators. 

    It is advisable to place a diode between the relay board and the actuators. Because the actuators are essentially electromagnets, they will give a back current once the activating current is released.

    Wire the system according to the scheme below:

    For simplicity only the first 4 actuators are wired, but all other follow the same scheme. Take note of the jumper wires between the relays. The relay board can be powered with the same 12V power supply.

View all 5 instructions

Enjoy this project?

Share

Discussions

Similar Projects

Does this project spark your interest?

Become a member to follow this project and never miss any updates