 Dmitry
Raspberry Pi backup is what you really need if you work on Raspbian. Believe me, you do! If you иackup your Raspberry Pi SD card in due course, someday it may save your files and your project. Alike any other hardware, the RPi devices may sometimes simply stop working.
It can occur due to a number of reasons: overheating, errors, energy supply issues, cable connection failure… All these problems will make you unplug and plug-in again the device to restart it. And such actions taken repeatedly will certainly lead to spoiling your SD card you are saving your work files to.
|
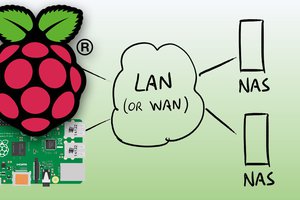
On the other hand, you can damage or delete your files occasionally with your own hands! There a lot of examples when we do something wrong because of the overall tiredness, inattentiveness or just being in a hurry. Also, another reason to backup Raspberry Pi is the simplicity of starting all of the work over. I mean if you are completely messed up while doing some project on your RPi, it takes very short time to delete everything, reinstall the Raspbian and start from the last succesfull point! This is very simple in case you back up the file system properly. Finally, you may want to duplicate what you’ve done. In this case, it is very convenient to clone the Raspbian image (which is also a kind of backup) and reuse it again somewhere else. So, you should do the backup of your Raspberry Pi over the network or literally make your RPi clone to keep your life in harmony! OK, now I hope you understand the importance of backing up your Raspberry Pi SD card. Below we describe 3 ways to do that. |
How to backup Raspberry Pi SD card
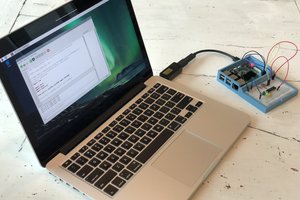
This way fully depends on your particular goals and wishes. By using SD card backup approach you may either copy the entire image of your file system or choose only to copy selected data to your SD card. If you would like to act the simplest way by storing the separate data or files, simply set up WinSCP client on your Windows PC device, connect to Raspberry Pi via SFTP connection and copy the particular files you need directly from RPi.
On the other hand, creating the whole image of Raspbian may be quite reasonable. It implies cloning the whole file system structure. So, you make a clone of SD card, write the copied image to a new SD card then just plug it in a new RPi and you have a full clone of the original device. If you chose to build this way of a backup, everything will depend on the operating system you are going to use: Linux, Mac or Windows.

LINUX It’s quite easy, as you have to fulfill the standard command:
dd if=/dev/sdx of=/path/to/image bs=1M |
Note, that “/dev/sdx” should be your SD card
MAC You can use the same “dd” command here, but have to change your SD card designation:
dd if=/dev/rdiskx of=/path/to/image bs=1M |
As you’ve already understood, /dev/rdiskx goes for your SD card.
WINDOWS You’ll need a small additional app here, called Win32DiskImager. This app will help you to create the Raspberry Pi image from files kept on your SD card and store it safely on your PC. To make the Raspbian image follow these steps
- Download Win32DiskImager from the SourceForge
- Safely remove your SD card from the RPi and insert it into your PC slot
- Open Win32 Disk Imager
- Choose the name and location of the backup file and the letter for your SD card and
- Click “Read”
Wait for a little while for the system to create an image of the SD card. Usually, it takes several minutes, depending on the size of the card memory. After that, your Raspbian is fully backed up.

Raspberry Pi Backup with CrashPlan
CrashPlan on Raspberry Pi is what I have already written about. Copying files or full image are a manual kind of work. But you definitely need the automatic backup for your Raspberry Pi. CrashPlan is one of the kind. CrashPlan can back up your files to both cloud and your PC or laptop and even on PC of your friend Backup to the cloud is a paid option which includes different pricing plans....
Read more »
 Anton
Anton