Close
0%
0%

IoT Household Plant Watering System

As I work the plants wither, possibly because of the solder fumes, but most probably because I keep forgetting to water them.

Similar projects worth following
This project is about building an internet connected switch and use it together with a water pump to automatically irrigate household plants.

It is meant to be part of a larger home automation network, where nodes are controlled from a central hub via a Node-RED server, it can also be used as stand-alone.

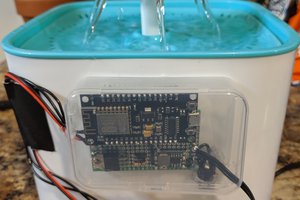
The IoT Household Plant Watering System integrates some useful features such as:

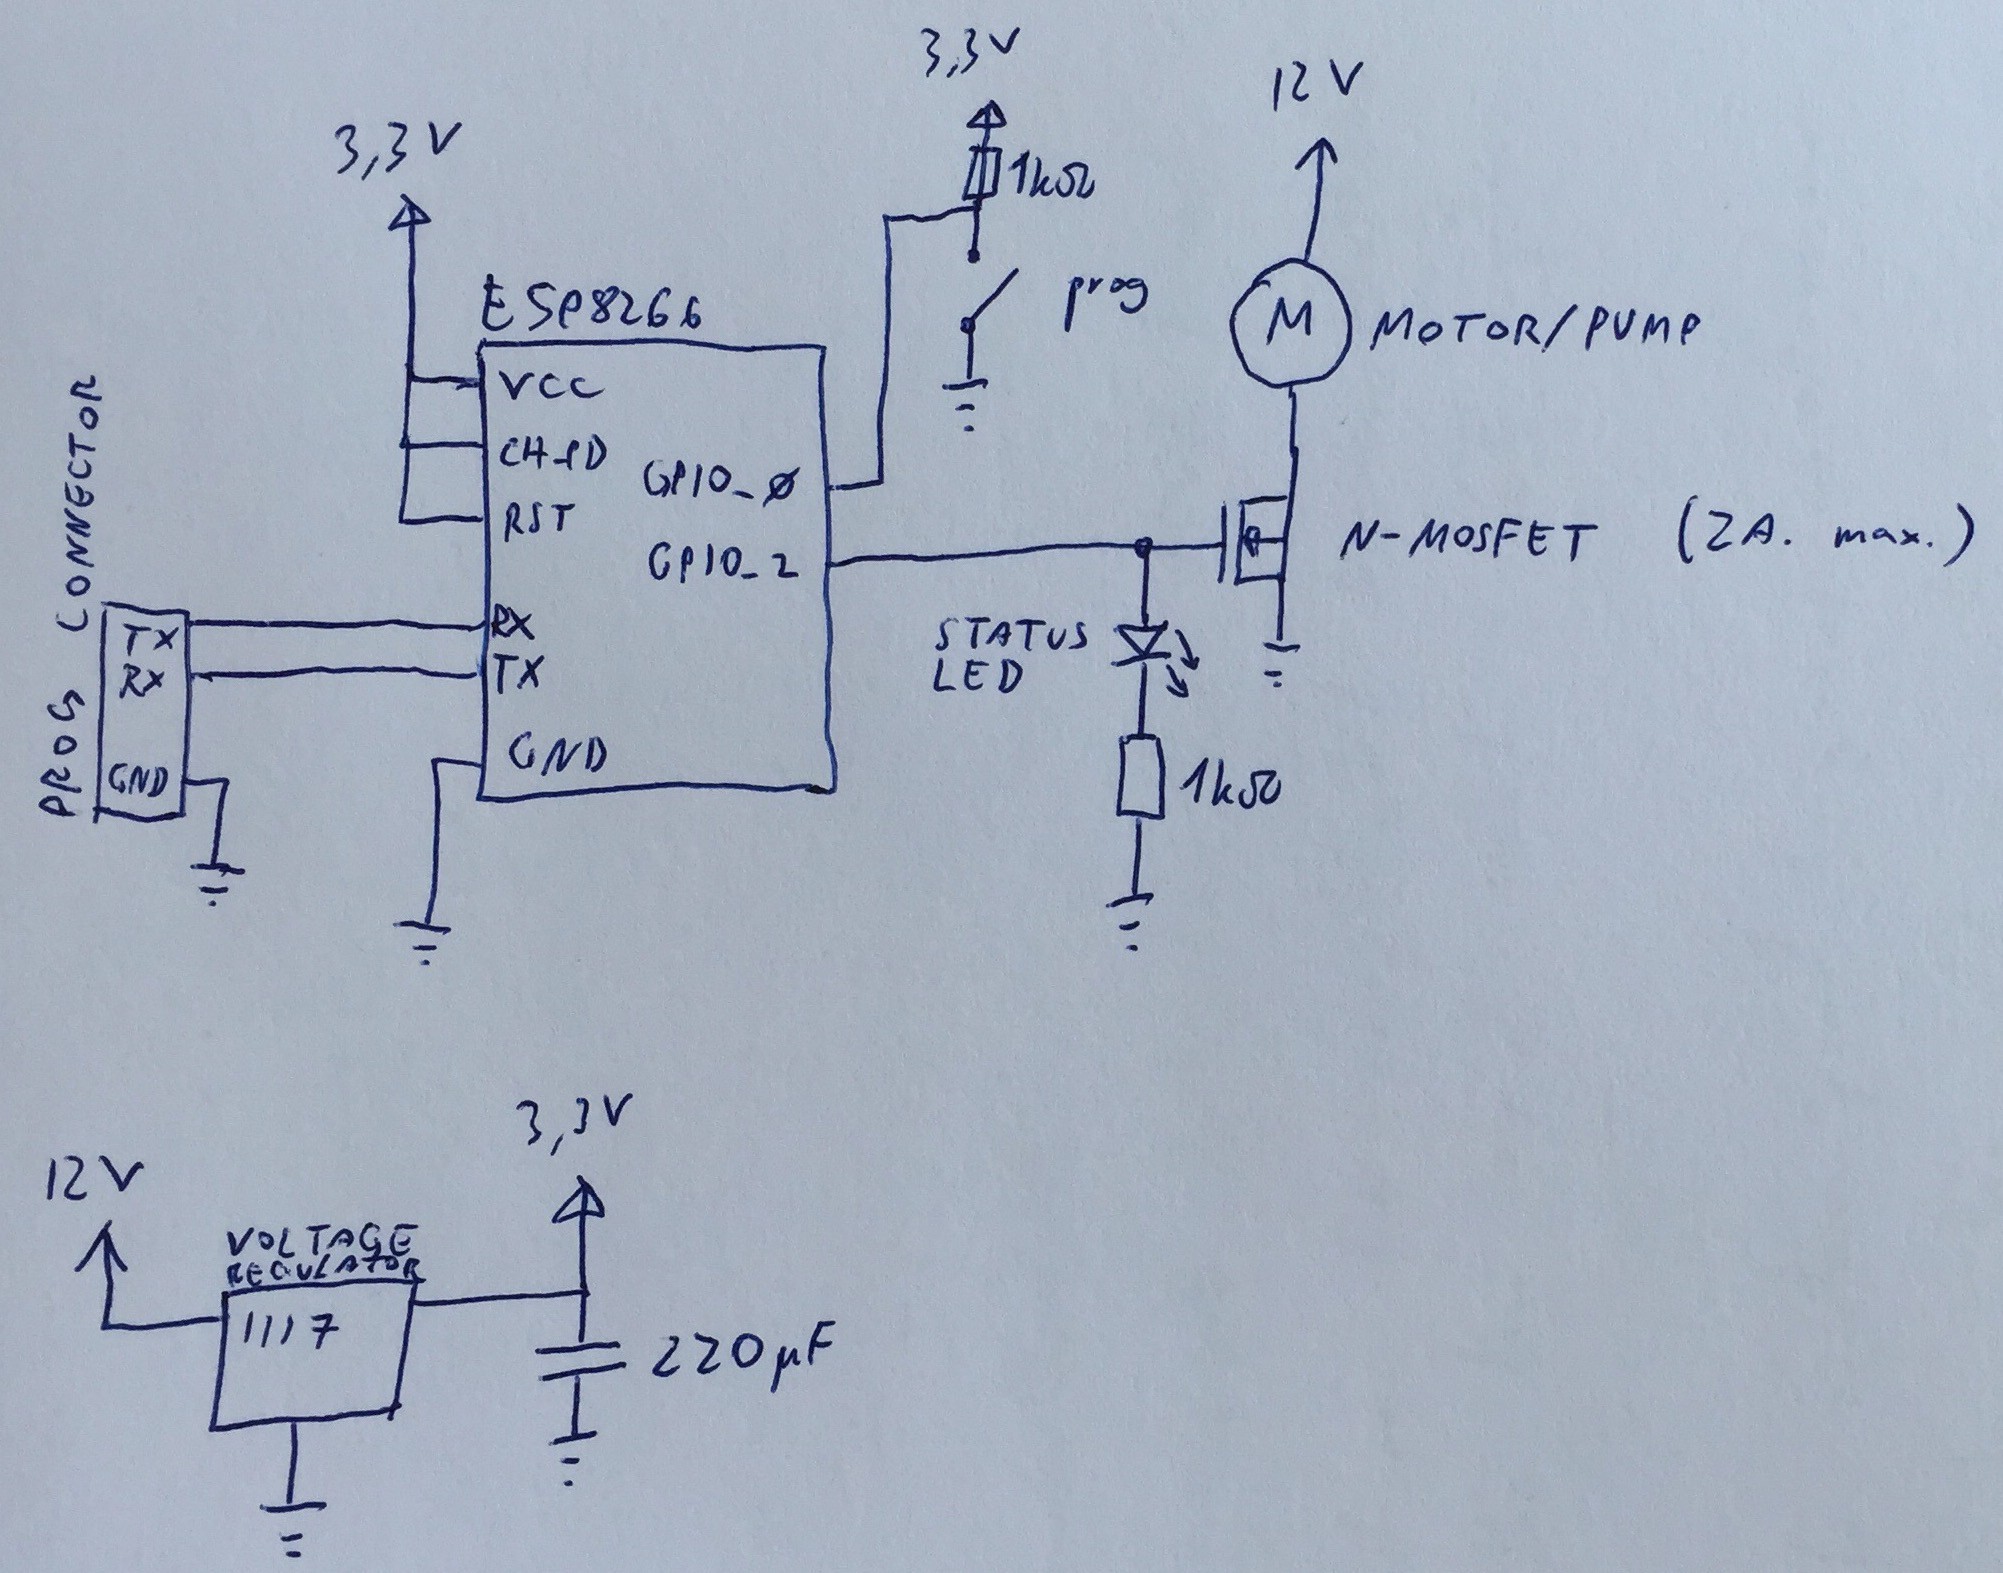
  • Large input range (5-20V)
  • High current (theoretically up to 24A)
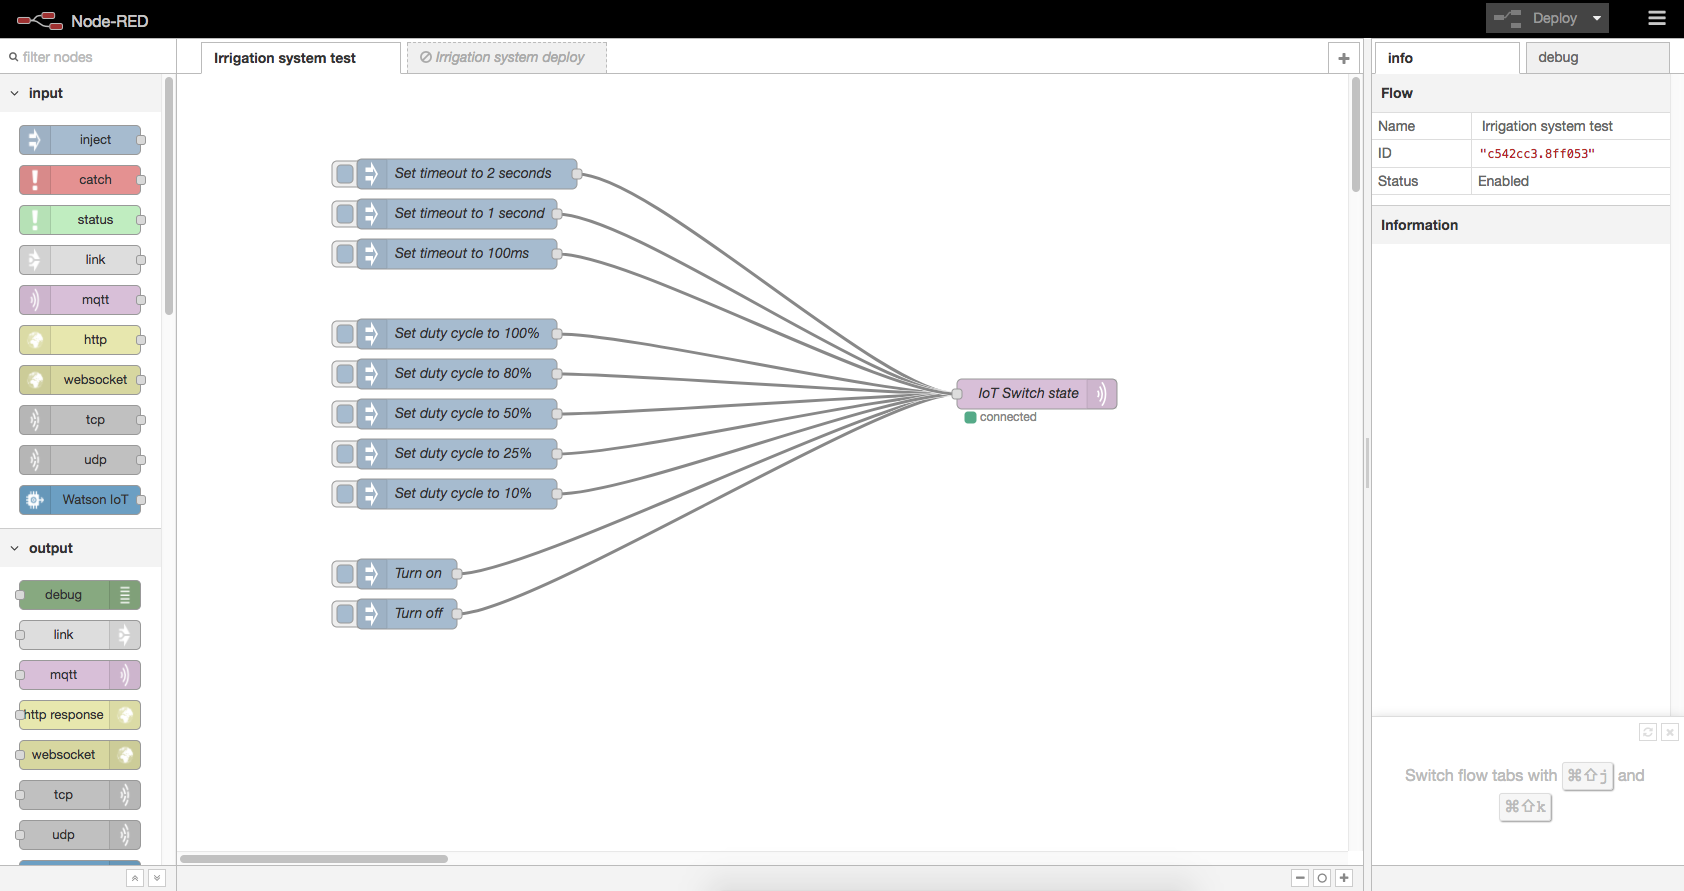
  • Configurable PWM output
  • Configurable timeout for safety
  • Persistent configuration across reboots
  • Uses MQTT protocol
  • Controllable from Node-Red server
  • Uses the cheap ESP8266-01 module
  • Program can be updated over WiFi (Over-The-Air Update) or FTDI module
  • Open software and hardware
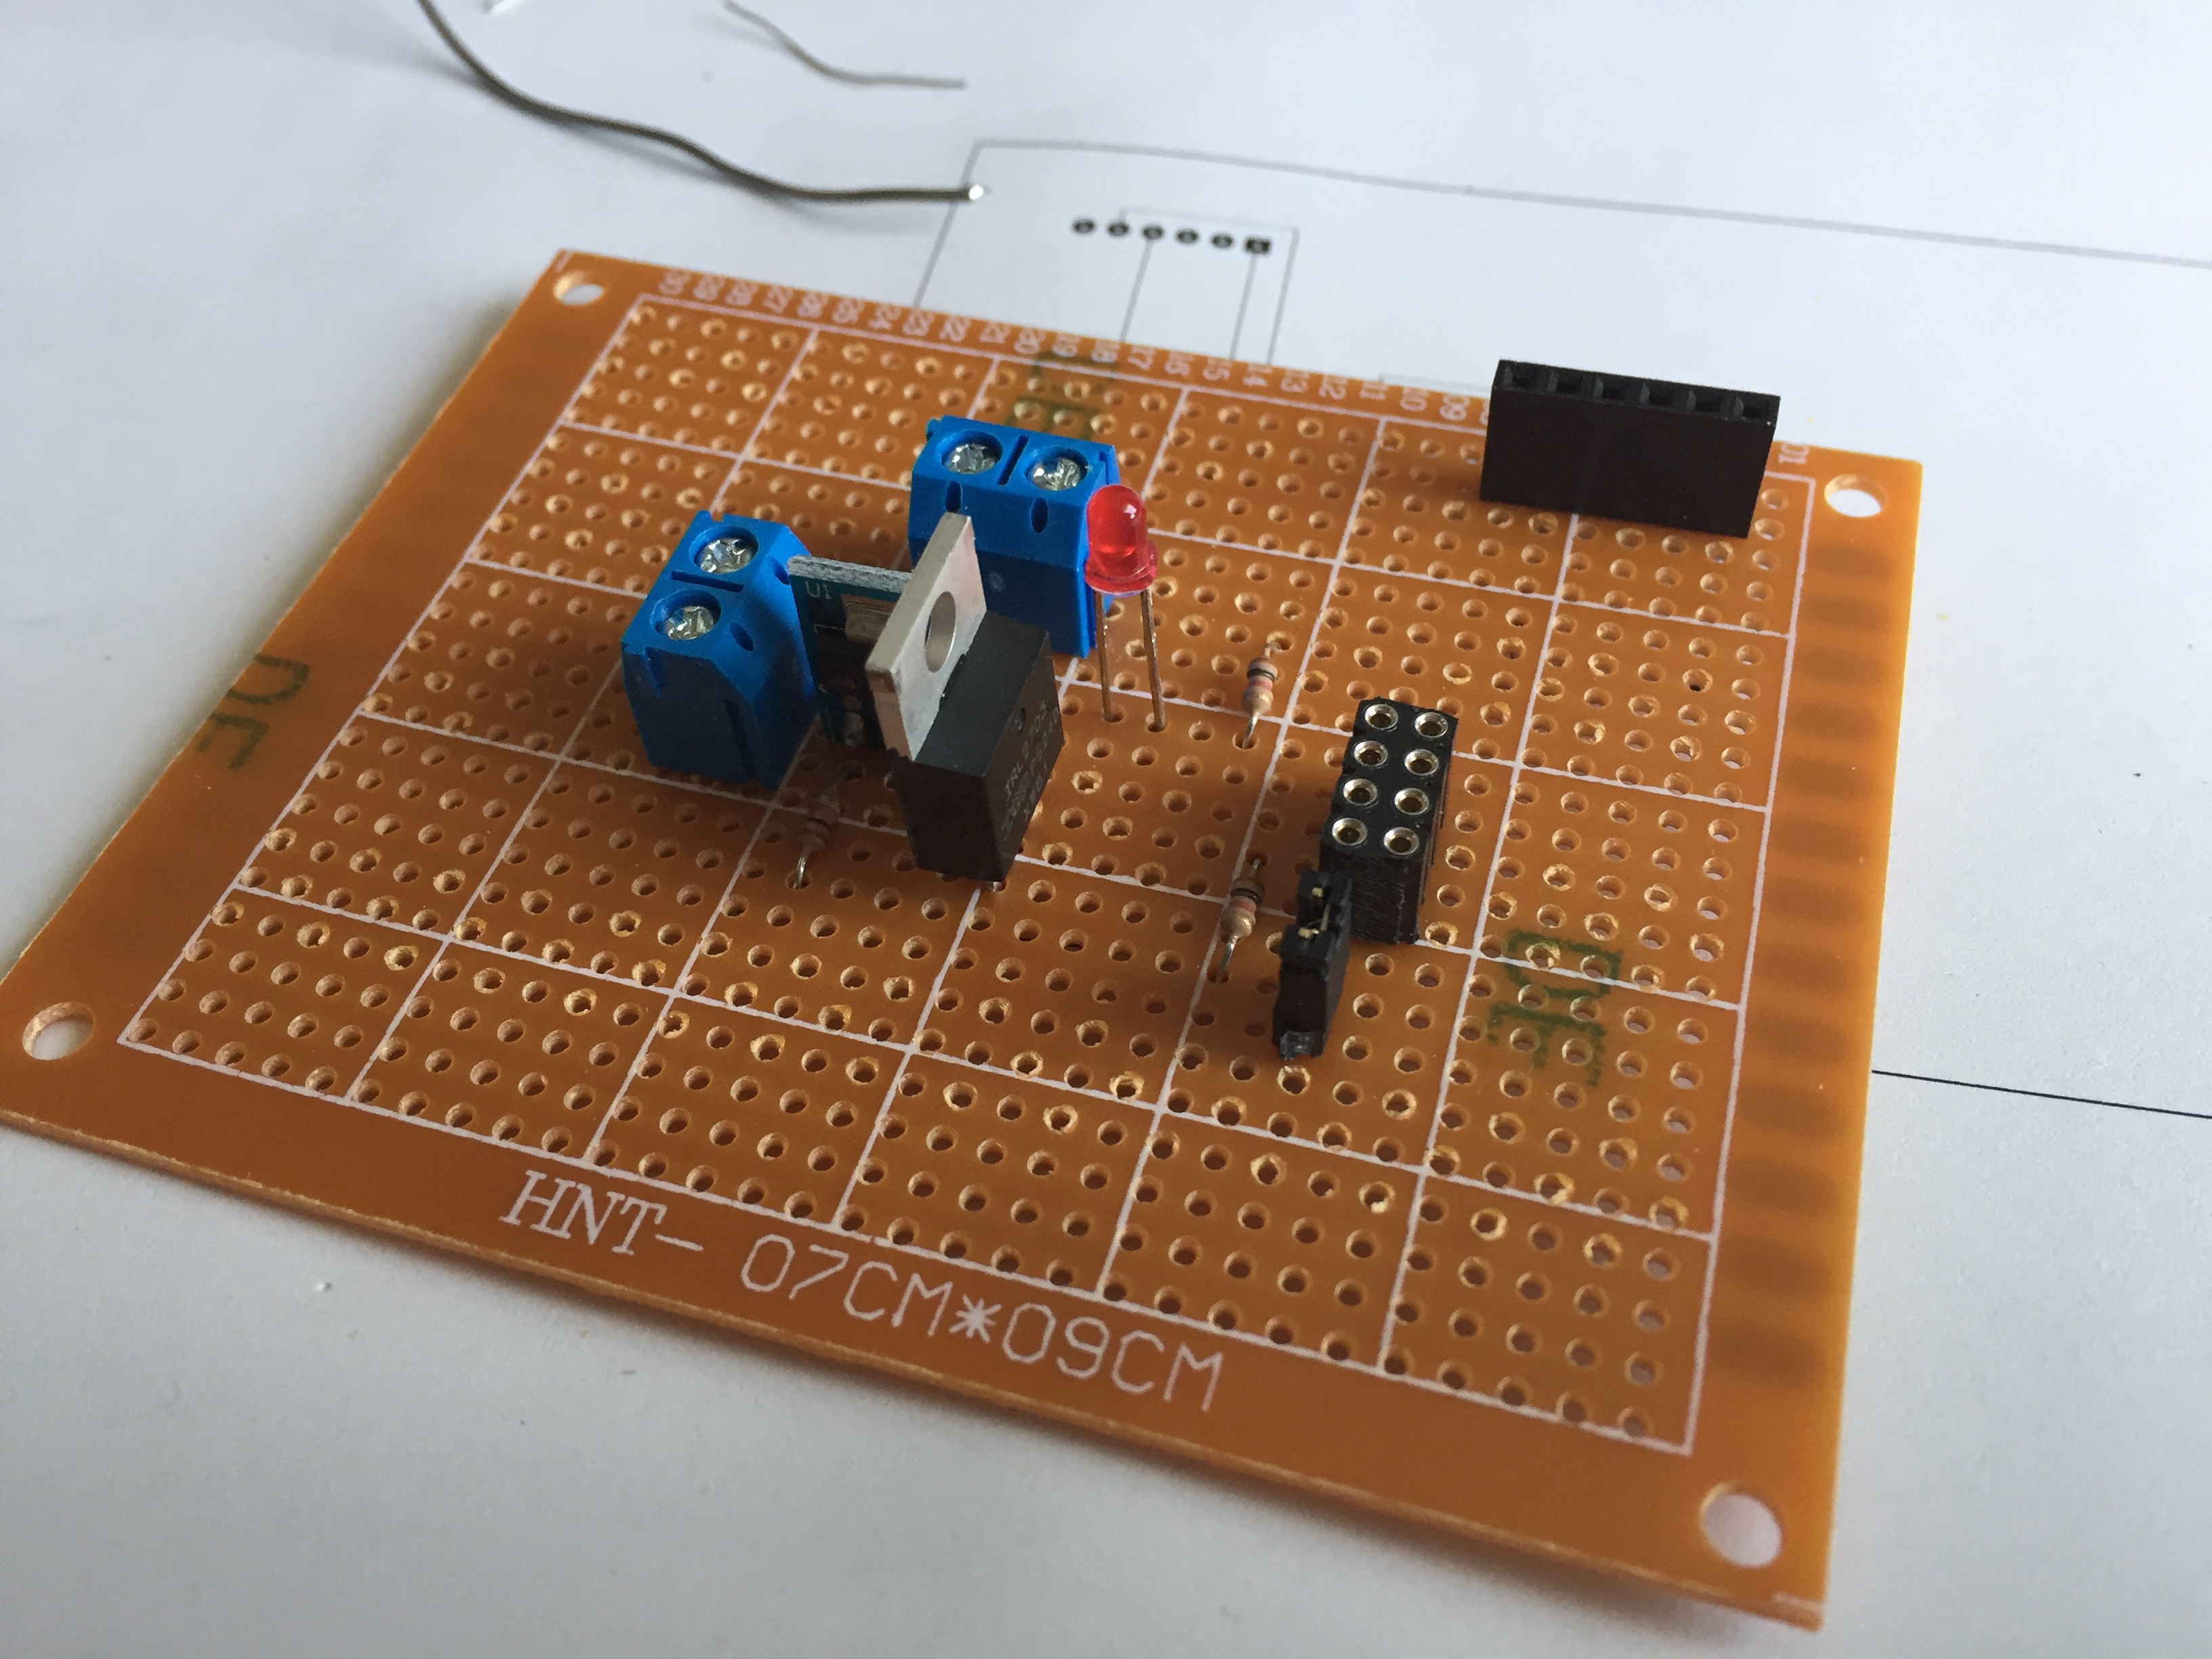
  • Made with cheap discrete COTS parts
  • Open software used to develop (Arduino IDE and KiCad)

It can be used for many different applications, the N-MOSFET can be replaced with a relay if higher power or AC switching is required.

Both the software and hardware are made with safety in mind, if it reaches its set timeout or the program crashes the switch will turn off.

schematic.pdf

Electronic schematic

Adobe Portable Document Format - 75.26 kB - 09/11/2017 at 17:31

Preview
Download

pcb.pdf

Circuit board

Adobe Portable Document Format - 56.46 kB - 09/11/2017 at 17:31

Preview
Download

  • 1 × ESP8266-01 module $2 or less
  • 1 × Self-priming diaphragm pump for 12V About $3
  • 1 × Protoboard
  • 3 × 1K through-hole resistor Pull-up, pull-down and LED current resistor
  • 1 × Through hole LED 2.54mm pitch

View all 17 components

  • Happy plants

    Solenoid09/30/2017 at 16:02 0 comments

    I tested the system with a 9V, 1.6A supply I found. The pump is much quieter with water inside. While testing it with 12V, 1A supply I got voltage drops, enough to restart the ESP, so I would suggest 1.5 to 2A minimum.

    No more tedious lifting of the watering can for me, or remembering to water the plants, or remembering I have plants. What is more soothing than listening to a robot take care of your plants anyway...

    The system can be made small enough to be strategically hidden and the self-priming pump allows to have the water reserve anywhere. The pump will not pump the water backwards and holds it in the tube while not powered, so it only needs to be primed once.

    I would like to have some more features, such as a water flow meter (in order to define the water quantity to be delivered instead of the pump timeout) and a reserve water level indicator (that could alert me in case water runs out), these will be integrated as I receive the parts from eBay.

  • N-MOSFET pull-down

    Solenoid09/03/2017 at 18:17 0 comments

    The thing about the ESP8266 is that it's so versatile and cheap that any excuse is good to make an IoT device out of anything. But its usage is not always straight forward. For example both of the ESP8266-01 usable outputs (GPIO0 and GPIO2) must be pulled high in order for it to start the program.

    This is a problem as an N-MOSFET Gate pin needs to be at 0V for the transistor to be off, I want to add a pull-down resistor to make sure it's off when the module starts or crashes for some obscure reason, but this also affects the pin it is attached to.

    On the ESP8266-01 module there are technically 4 usable pins: GPIO0 and 2 and the UART TX and RX (pins 1 and 3 respectively). The TX and RX pins are used to program the device, but they can technically be used as any other GPIO pin during runtime.

    I tried to use the TX for the MOSFET signal as it's a low impedance anyway (output), but it turns out that the module doesn't like to have its TX signal pulled low during boot either (the program doesn't start properly). Thus my last chance was the RX pin, fortunately it didn't complain this time and that's what I ended up using.

  • Available products, preliminary requirements

    Solenoid09/03/2017 at 17:30 0 comments

    Before starting a project it's good to see what is commercially available, not because it might be cheaper and take less time to buy something similar, but because the project might be unfeasible because of some reason or somebody has already made a similar project with some software that can be recycled.

    I found some ESP8266 modules strapped to relays on eBay, very nice modules for AC switching and I'll probably buy some later, but now I know that it has been done and is even commercially viable so how hard can it be to build such a device? I was also lucky enough to have just the right components in my electronics box.

    From previous projects I've learned that it's time consuming and sometimes frustrating to program for the ESP8266. It's a great module, but if the inputs are not pulled to the right voltage, if the power supply is not smooth enough, or some other issue due to the fact that its software is still partly undocumented and hidden make it tedious sometimes. Thus I wanted to try out Node-Red, an online graphical programming tool for IoT devices.

    The idea is to unload the high-level programming to a Node-Red server running on a local computer (Raspberry Pi in my case) and the only intelligence the switch must have is to react to turn-on and turn-off signals.

    That was the initial plan, get the GPIO2 to toggle the N-MOSFET, throw in some code and the rest would happen on the Node-Red side on the Raspberry Pi.

    The requirements were:

    • 2A switching capability for the MOSFET
    • 12V supply
    • Linear 3.3V regulator, allowing for a large input range
    • Status LED to show the state of the output without having to connect a load

View all 3 project logs

  • 1
    Draw out rough electrical schematic
  • 2
    Place components on the breadboard
  • 3
    Set components on a protoboard

View all 6 instructions

Enjoy this project?

Share

Discussions

Similar Projects

Does this project spark your interest?

Become a member to follow this project and never miss any updates