Radu Motisan
IOT stands for Internet of Things and refers to small devices equipped with direct internet connectivity, without needing an external computer. They are usually composed of a main microcontroller and an additional connectivity (eg. ESP8266 for Wifi, ENC28J60 for Ethernet) or they are complete SOC including both the processing unit and the connectivity modems in one single package. Regardless of their form or shape, these devices open new applications for remote sensing and controlling, and bring system automation to a new level of performance. Examples of such devices were presented on this blog even before IOT was coined as a buzzword. See the Ethernet controlled power relay based on enc28j60 or the development of first prototypes of what is now uRADMonitor.
Simple IOT temperature sensor
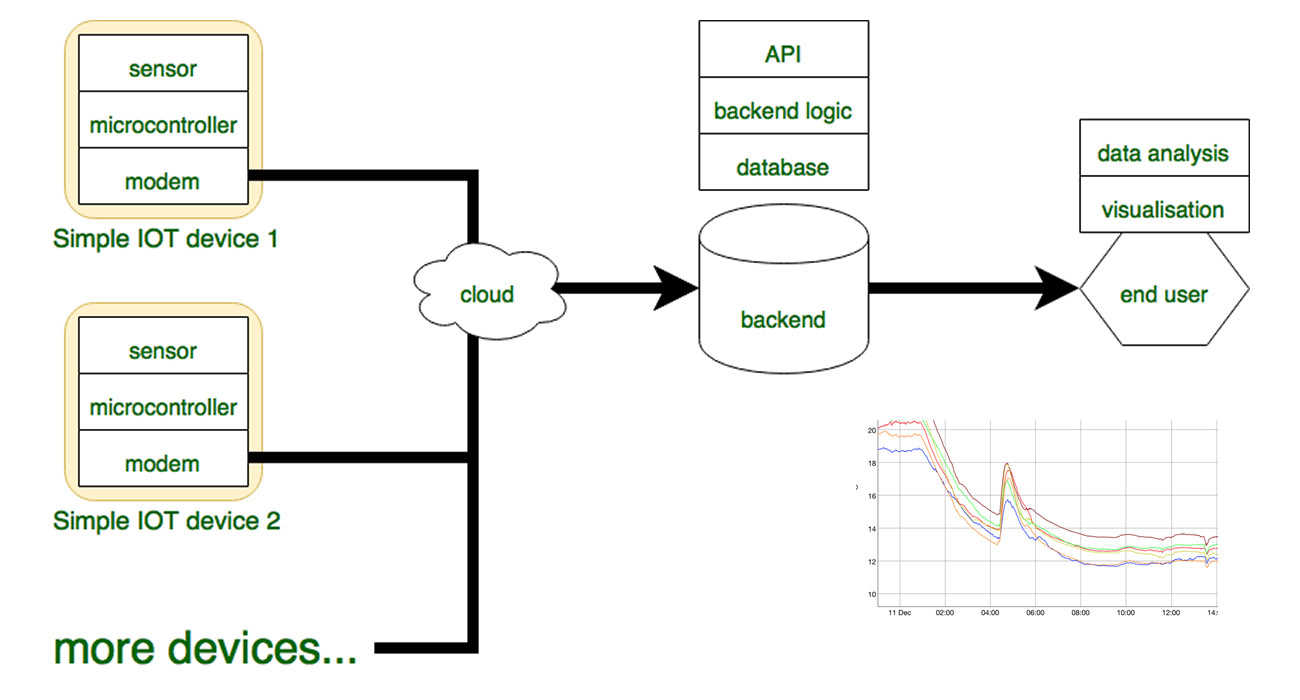
To exemplify the IOT concept I propose the following architecture:
Requirements
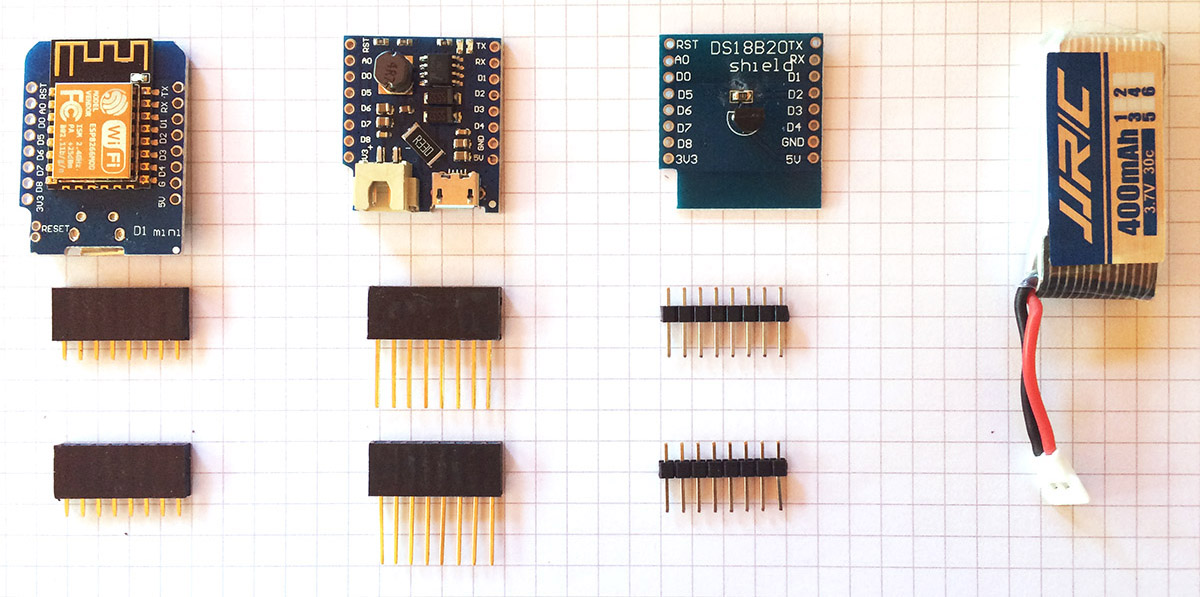
On the hardware side, we need the following components:
 For the backend I will demo using the open source EXP server protocol introduced with the KIT1. This is handled by the uRADMonitor server, but alternatively a simple PHP script can be used too.
Assembling the hardware
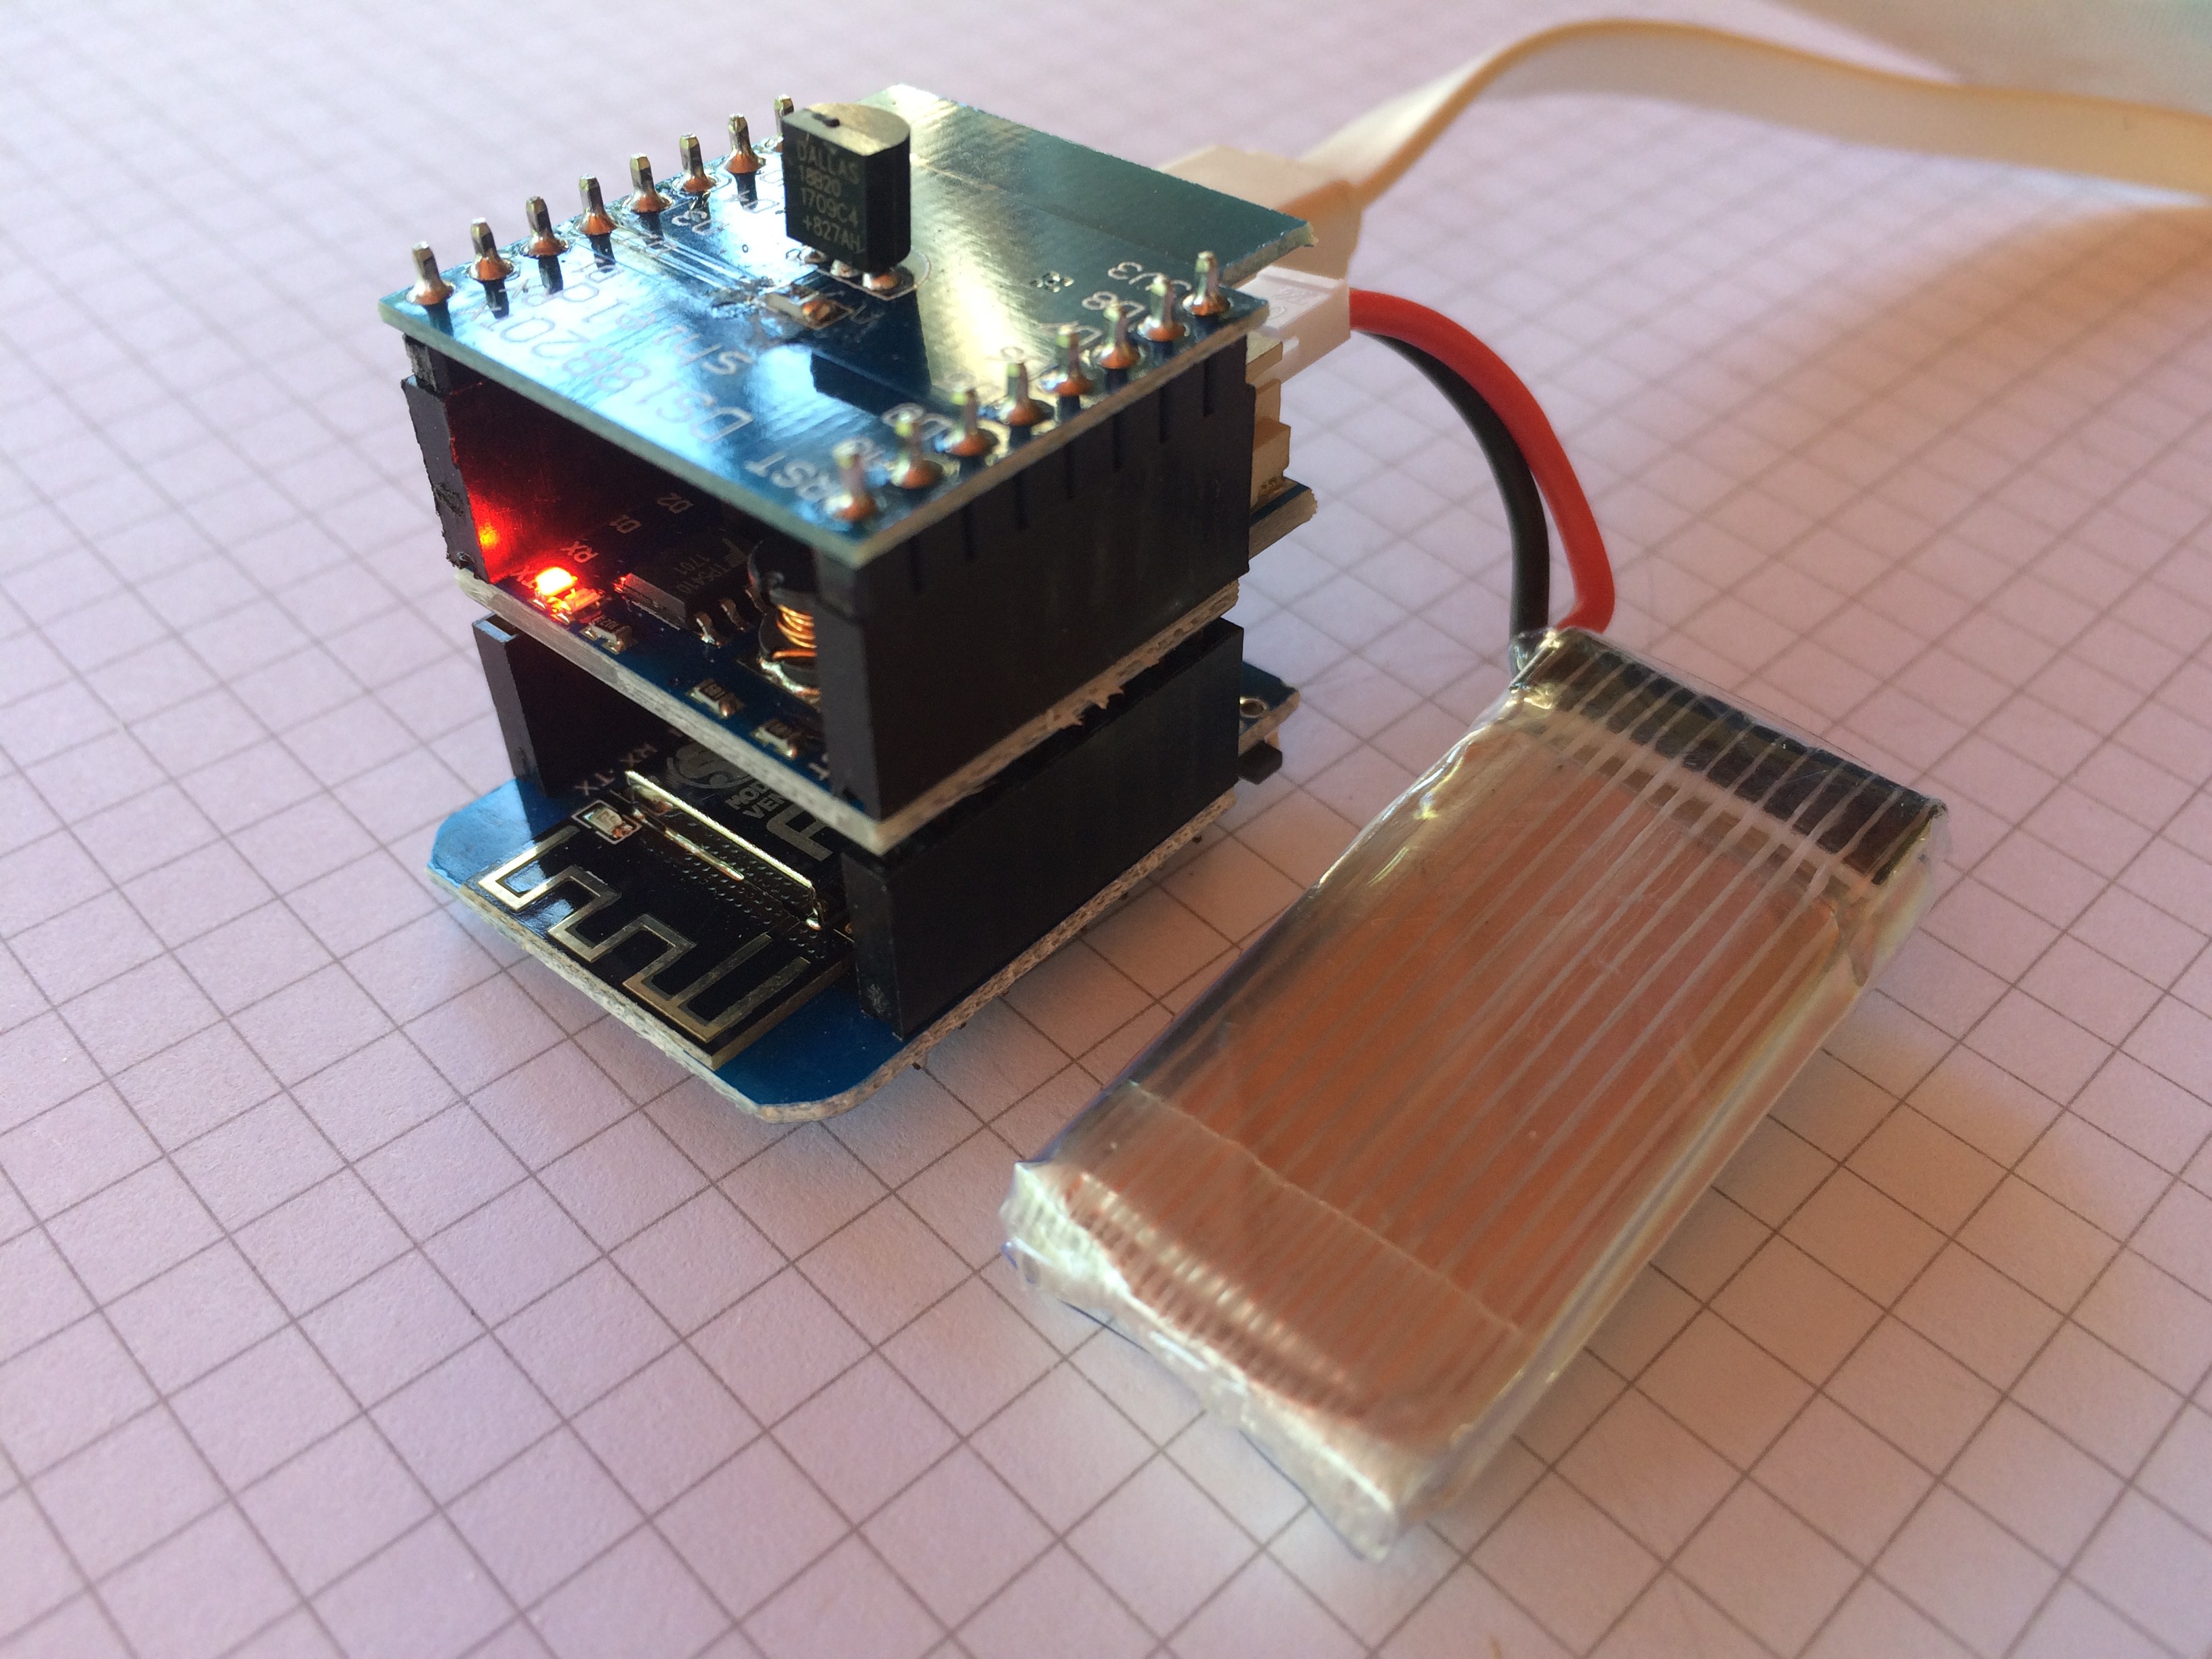
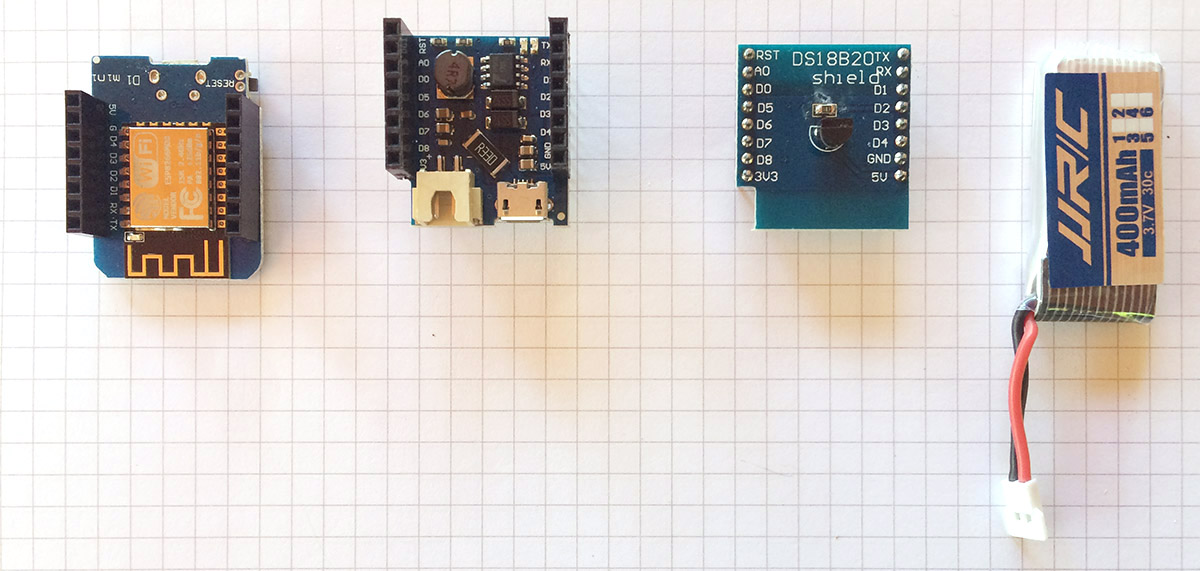
There are multiple way of putting these together, I went for putting the Wemos D1 at the bottom, the battery shield in the middle, and the Temperature shield at the top for better air contact and less internal heating interference. This means we solder the female headers to the Wemos D1, the mixed headers to the Battery Shield and the male headers to the DS18B20 Temperature shield. Here's the result:
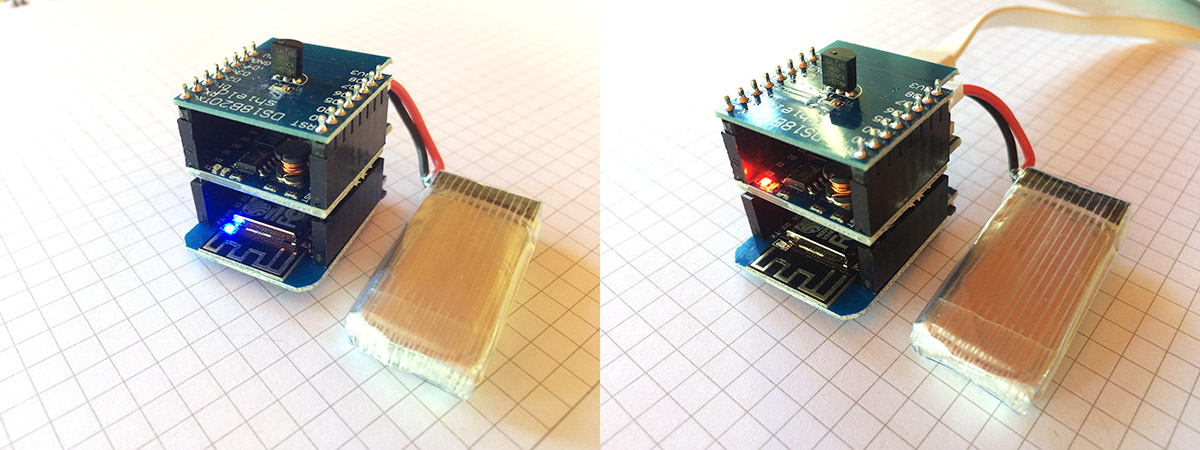
 The PCBs can now be stacked in the proposed order, with the Wemos at the bottom and the DS18B20 sensor at the top. Here's the assembled device:
The software
With the simple IOT device ready, we need to program it. The firmware needs to setup the Wifi connection to an Internet Wireless Router, then periodically read the temperature values and send them to the backend. Before we can start, there are few tools we need to install:
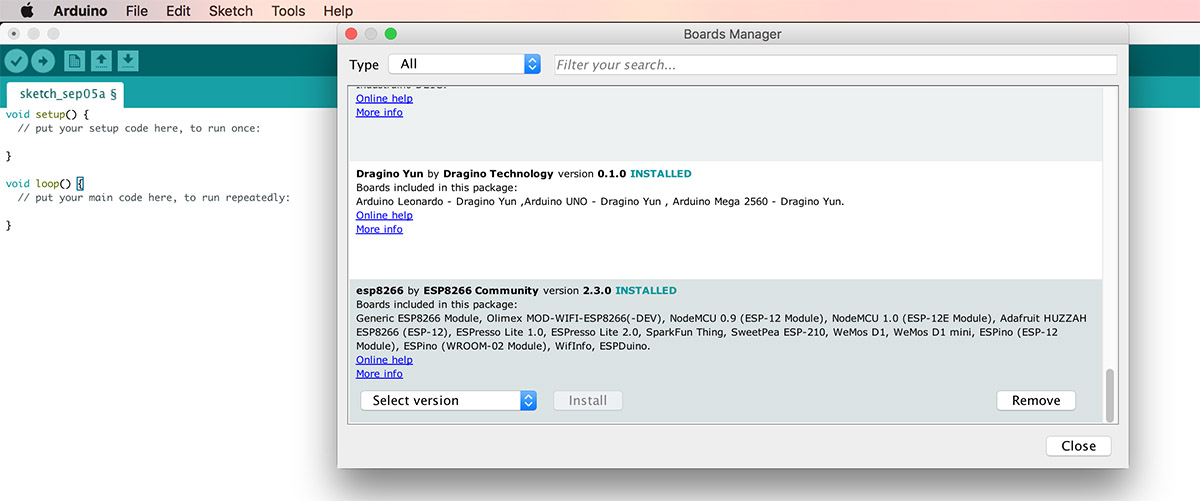
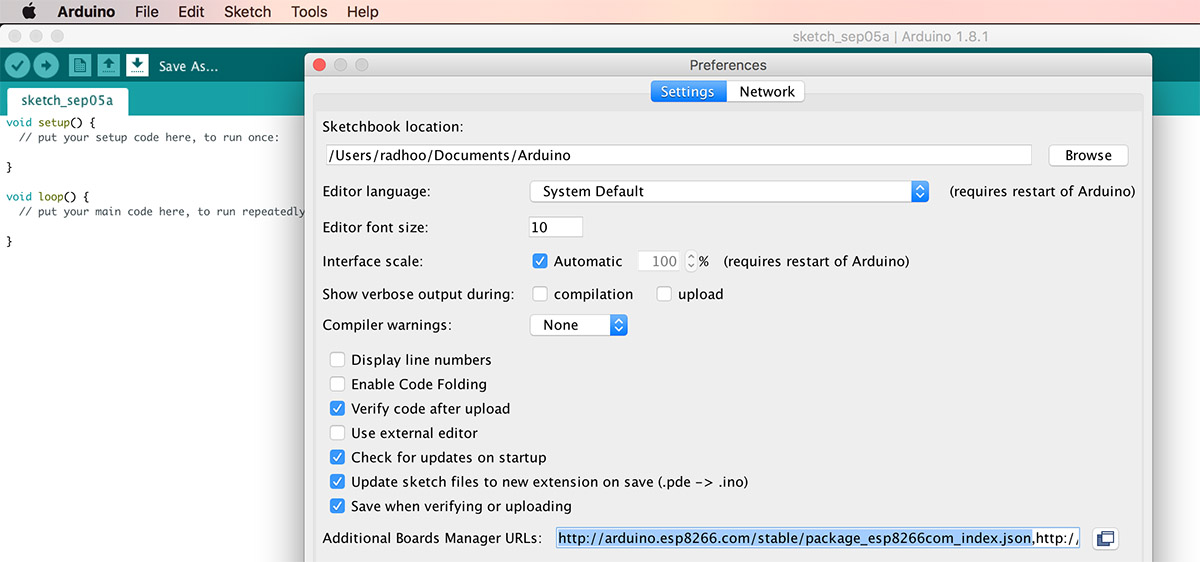 Open Boards Manager and install the esp8266:
 Finally, we're all set and you can select the Wemos D1 R2 & mini from the Tools -> Board menu:
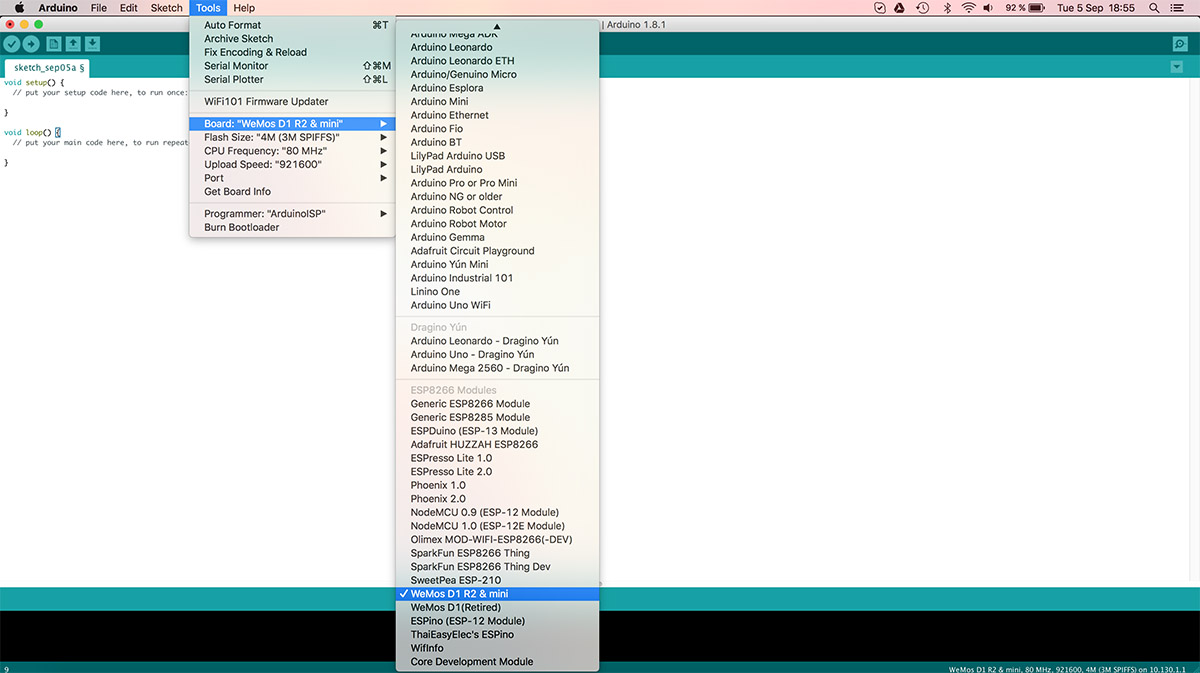 Under Tools -> Port, select the corresponding serial port as allocated to the CH340G connected to your USB port. Go to Tools->Upload speed, and select 921600.
Simple IOT firmware
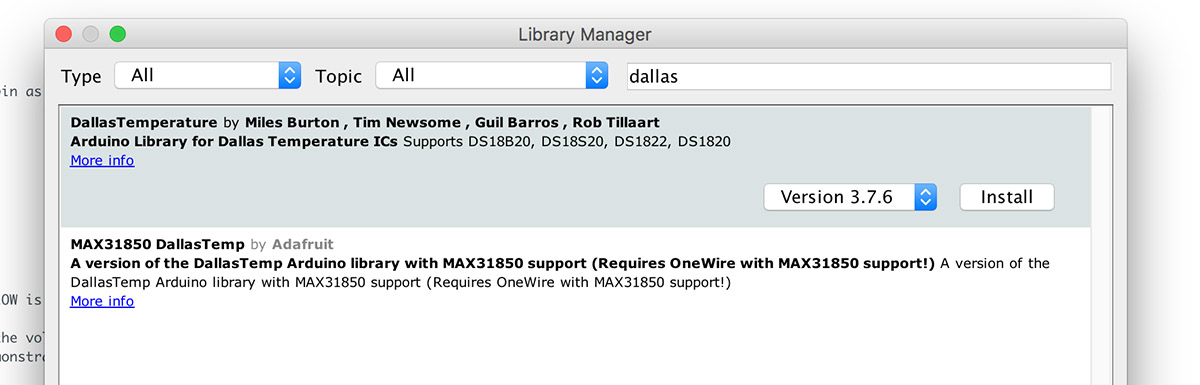
Create a new Arduino sketch. We will be using a few extra libraries: the OneWire and the DallasTemperature, so go to Sketch->Include Library->Manage Libraries and add them:
 The following code reads the DS18B20 temperature:
// DS18B20 libraries
#include <OneWire.h>
#include <DallasTemperature.h>
// sensor settings
#define SENSOR_BUS D2               // the DS18B20 has the sensor connected to D2
OneWire oneWire(SENSOR_BUS);        // Setup a oneWire instance to communicate with any OneWire devices (not just Maxim/Dallas temperature ICs)
DallasTemperature sensor(&oneWire); // Pass our oneWire reference to Dallas Temperature.
...
sensor.begin();                   // Start up the sensor library
...
sensor.requestTemperatures(); // Send the command to get temperature readings
Serial.print("Temperature is: ");
Serial.println(sensor.getTempCByIndex(0));
Now we need to add ESP8266 code logic, to make the module connect to an Internet Wireless Router at program start, then periodically read temperature and send it to the backend.
The uRADMonitor EXP Protocol
The EXP protocol was introduced with the open source KIT1 design, to implement a way of building custom IOT devices...
Read more »