 Vishwas Navada B
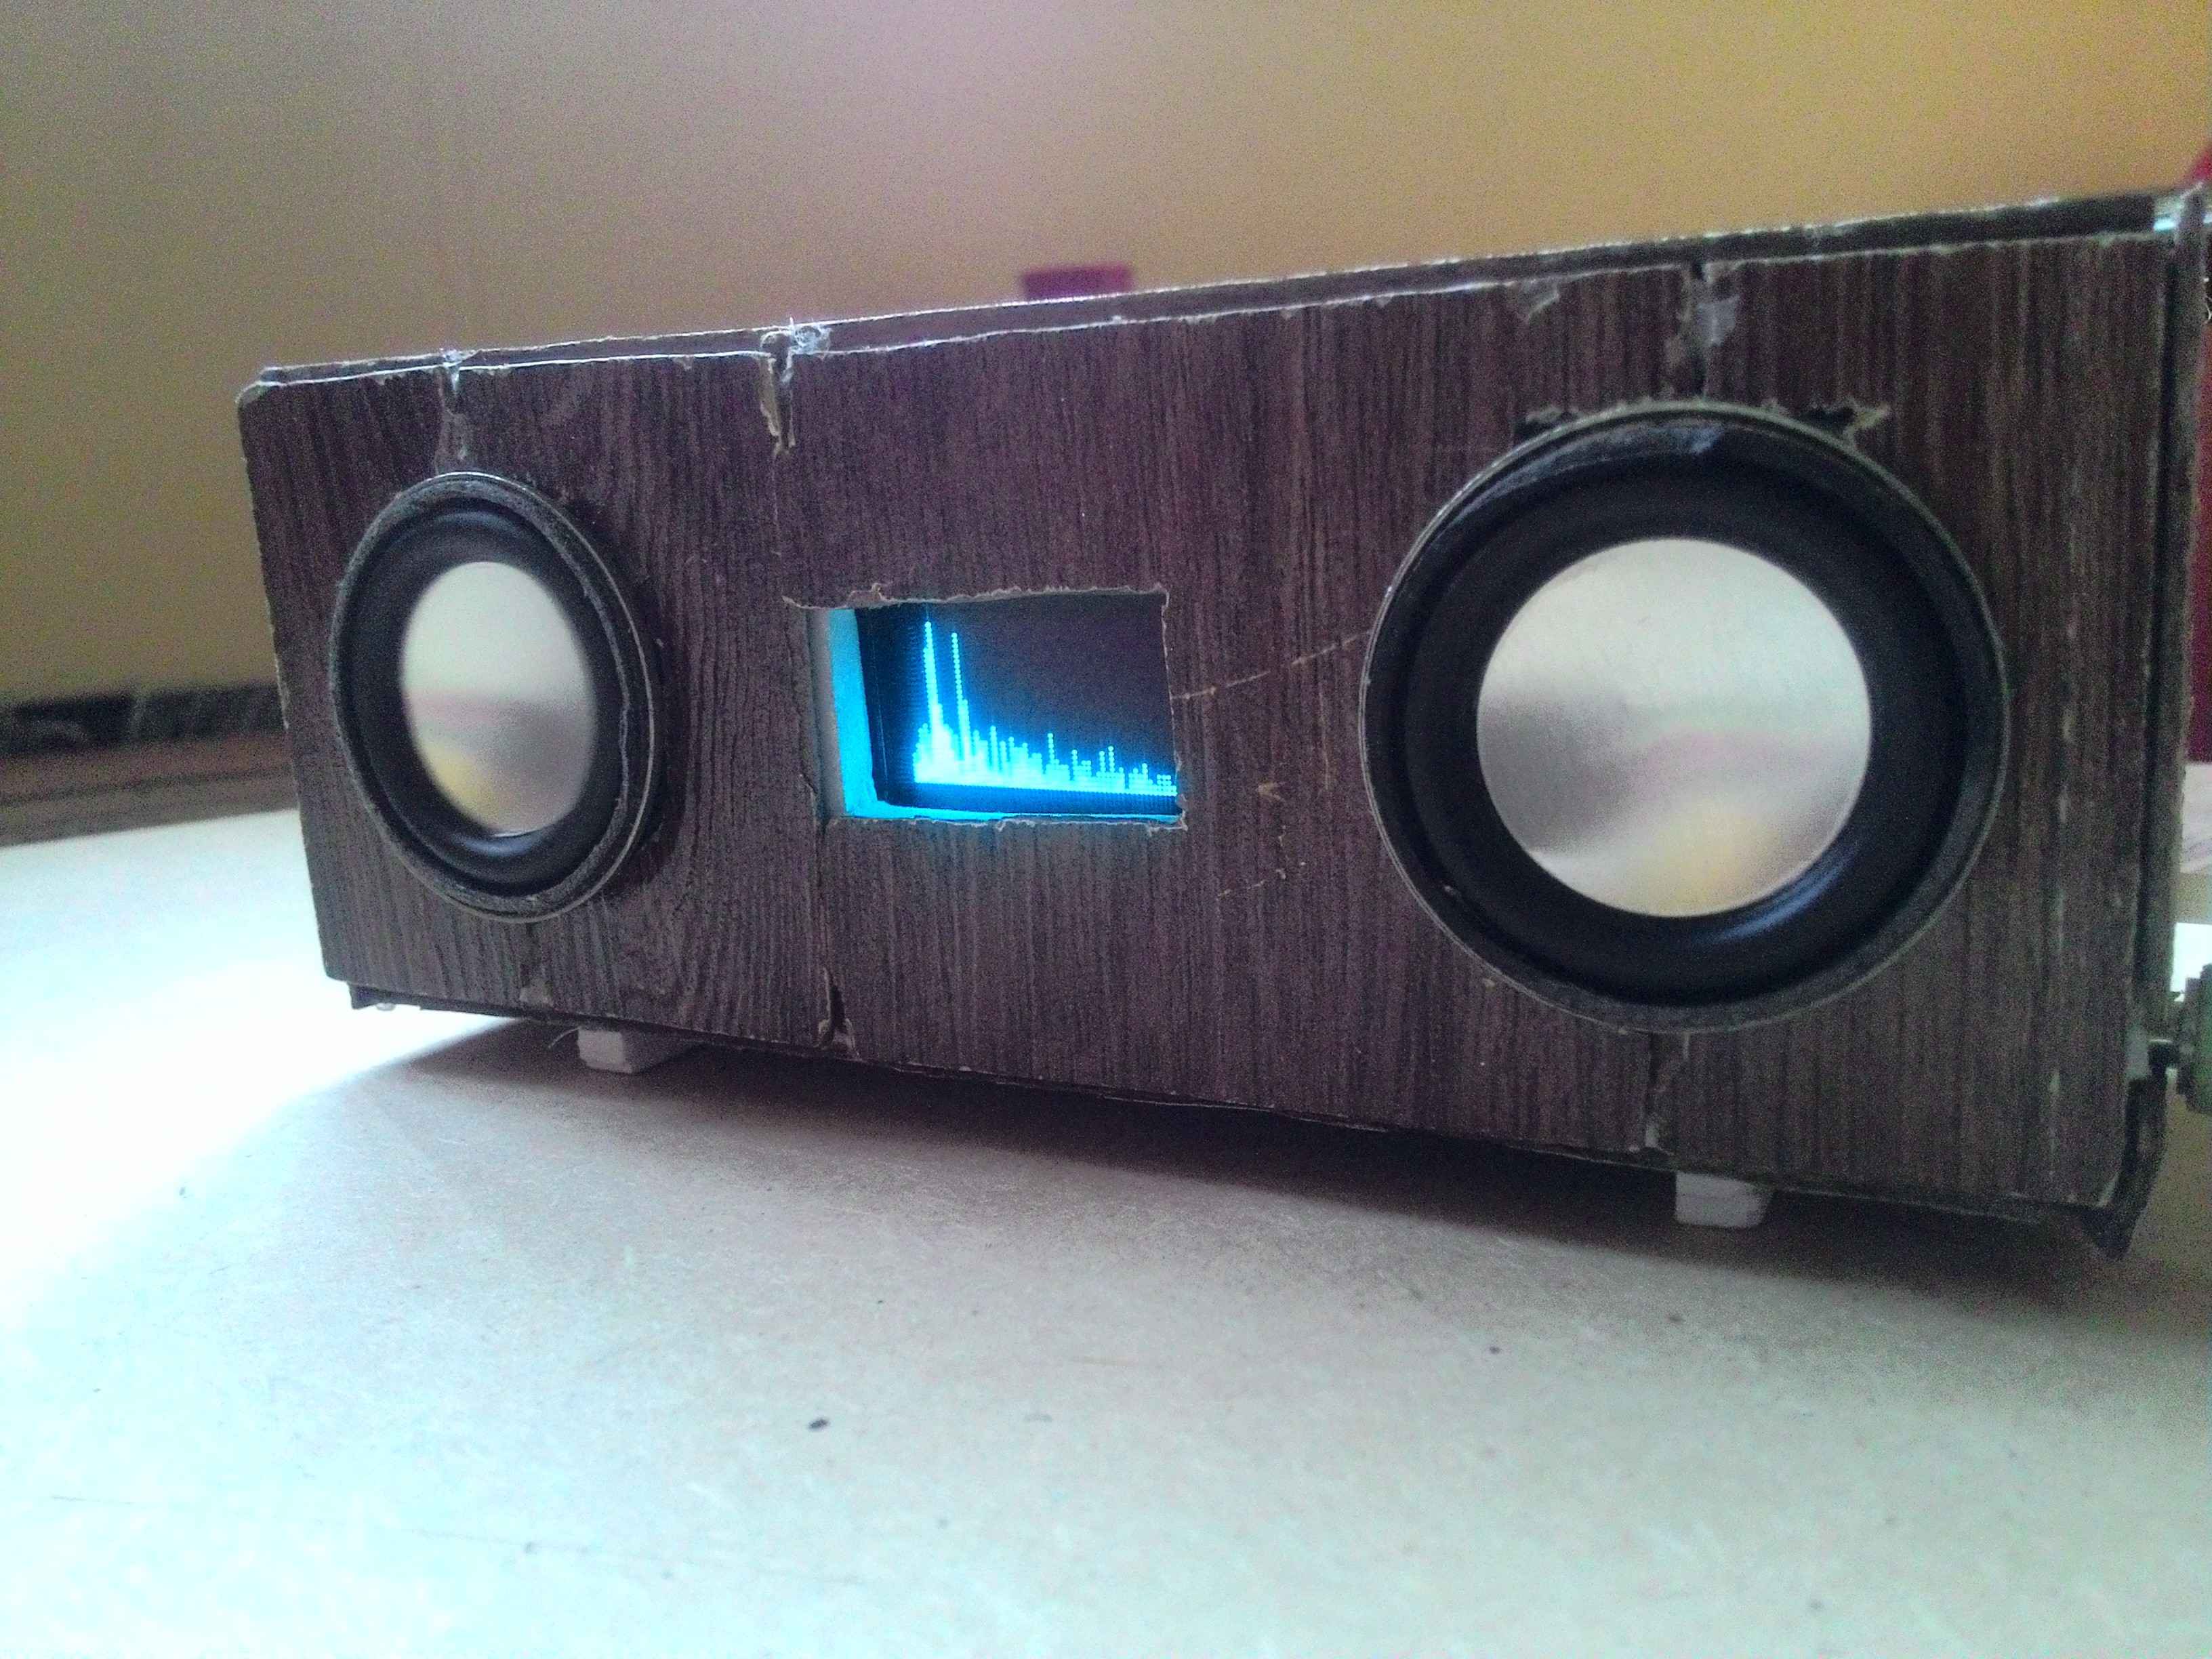
In this project, I would like to explain how to build a powerful smart Bluetooth speaker in a very simple way. The radios made a revolution in the 20th century every NEWS including war alerts were sent through the radio communication only. But the due to the use vacuum tubes during those days, size of radios were very big and most of them are packaged in a huge cuboid box with 2 speakers. In this project, I've tried to give the retro look to my smart speaker. It has following features,
1. OLED display to show Date, Time, Day, Humidity & Temperature
2. Spectrum analyser to visualise the Music frequency Spectrum
3. Powerful sound output with around 10 hours of battery life
4. AUX input
5. TP4056 controlled charging unit
6. Bluetooth connectivity using F6188 Module
7. Hands-free mode to receive calls via Bluetooth
Features are cool, so let's make one...
Here are the materials required to build this.
1. Foam sheets
2. 18650 batteries 2
3. Arduino Pro mini
4. OLED display 0.96" I2C
5. PAM 8403 audio amplifier module
6. TP4056 charging circuit
7. F6188 Bluetooth module
8. DHT 11 Sensor (optional)
9. RTC DS3231 Module
10. 2 Speakers (From local electronics store or you can scavenge it from old radio) 2W-3W
11. Wood laminate material sheet
Tools required
1. Soldering Iron
2. Hot glue gun or any strong glue
3. Cutter knife
If you have access to laser cutter then it will be easy to cut everything neatly, especially the wood laminate sheets, because it is very difficult to cut it with the cutter knife as it is brittle.
Step 2: Cutting the Layout


The layout design is easy and you can design the way you want, I have attached my design plan which you can directly print it and paste it on material like foam sheet, cardboard sheet or plywood sheet etc. and directly you can cut it. The design attached has a dimension of 12cmx4cmx4cm. The speaker hole is dependent on your speaker dimensions. My speakers were 3cm in diameter so I made a hole using cutter knife and placed my speaker.
You might have to cut the small portion for charging, AUX input and Switch connections on one of the side faces.
Step 3: Let's Connect Everything

The Bluetooth module is the F6188 module which is good and works very well. You might need to add a heatsink on top of the module as it heats up sometimes. The speakers are connected to PAM 8403 module and input to the module is given by the both AUX and Bluetooth module. You can use female AUX connector with the switching mechanism to toggle between Bluetooth and AUX input. The battery is connected charging circuit and switch which is inturn connected to PAM 8403 and RAW pin of Arduino Pro Mini. You can use 2 18650 batteries in parallel to increase the capacity of your speaker .The OLED display talks to the Arduino pro mini via I2C so the Arduino pins A4 and A5 are connected to SDA and SCL pins respectively Since we're using the RTC module to display the time and the date we need to connect the RTC module DS3231 to the Arduino in an above-mentioned manner as DS3231 is also an I2C device. The DHT11 Temperature and Humidity sensor is optional and can be conneted to pin no. 2 of arduino pro mini Connect the A0 pin of arduino to one of the signals such as audio right or audiio left to see the spectrum of audio.
Step 4: Fixing


Using hot glue gun or petroleum glue fix everything after you finish connecting the circuitary. You can cut wood laminate plates in the same shapes and stick it over your speakers. This gives the retro or the 20th-century radio look.
Step 5: Working


For the spectrum analyzer, I'm using fix fft library with the help of which I can draw lines on OLED display depending on the frequency variation. Humidity and temperature data is acquired by DHT 11 Sensor. Date and Time are acquired by the RTC DS3231 module. When AUX input is plugged in, the Bluetooth gets switch off automatically by ring switch of the 3.5mm female jack. This Bluetooth module is detected as BK8000L then you can...
Read more »


 Michael O'Toole
 Jack Gassett
 Hulk
Hulk