slantconcepts
We wanted to build a STEM kit that gets kids excited about technology. So we have created the LittleArm, a simple, trainable, programmable, Arduino robot arm.
In 2016, a guy in a garage built a small robot arm using an Arduino Uno and his 3D printer. After tons of people asked him to turn it into a kit, Slant Concepts put it on Kickstarter. It was funded in under a week and hit more than 260% of it goal by the end.
 LittleArm Original
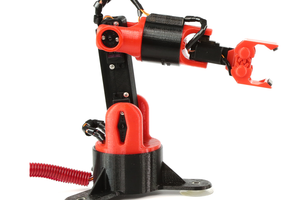
After sending out those first arms, the feedback started coming in. We are smart enough to listen to the people who are using our stuff. So we took every comment and common problem and eliminated them with extreme prejudice. When we were done we had created a great machine. This is the LittleArm 2C. The desktop Arduino robot arm we created for kids to learn about robotics and technology.

The LittleArm 2C is designed to be the kit that kids can easily use so that STEM classes can implement more robotics curriculum.
We were very successfully funded on Kickstarterat the beginning of 2017. We continue to manufacture the kits andprovide the parts and files for kids and schools everywhere to build real working robots.
Whats the "2C"
The 2C is actually very important. First of all, this is the second version of the LittleArm, hence the 2. The original LittleArm was launched in 2016 and the response has been amazing.
The C? Well, the "C" encompasses a lot of things. Here they are.
Clean - This are has no rough edges. We tweaked everything so that it is a perfect little machine. We even have loops to hold the wires against the arm, so they aren't flapping out in the breeze.
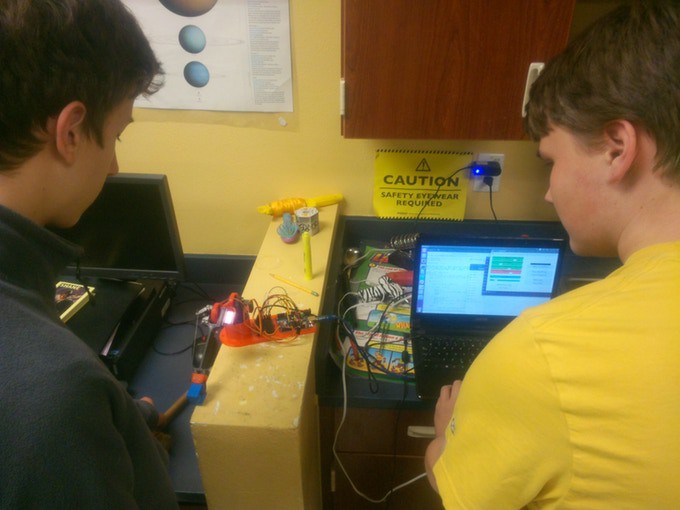
Children - The original LittleArm was built primarily for makers and kids with adult supervision. This Littlearm is so easy to put together that a 6 year-old can do it. We know because we spent hours in classrooms with kids teaching and watching the kids play with them. The 2C is practically child-proof.
Complete - This might be a stretch, but we don't know what we will tweak in the future. We consider it finished, except for electrical and software expansions.
Software
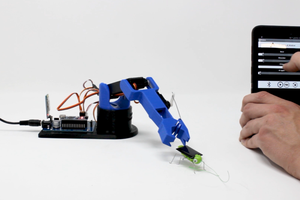
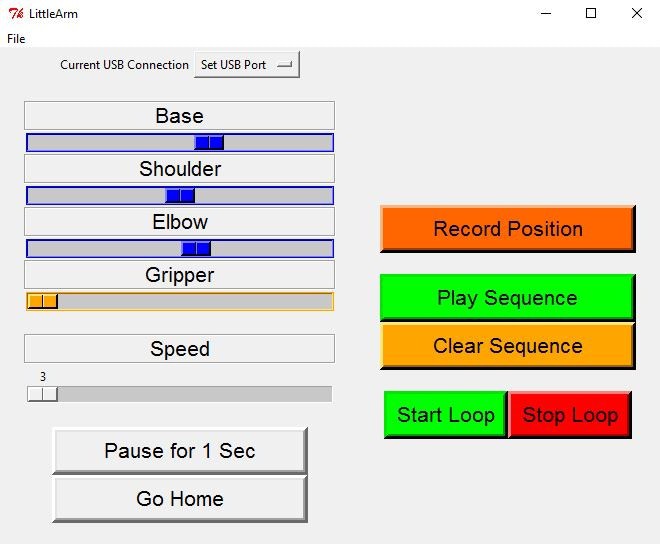
Controllable and Trainable through USB or Bluetooth Apps
The LittleArm 2C uses the same free Desktop and Android App that we developed for the original LittleArm. They allow you to move the arm and record a set of waypoints that you can play back.
Kids learning about robotics for the first time will be introduced to basic functions and behaviors that all modern robots use.
The full LittleArm 2C kit comes with a Bluetooth module so that it can be controlled with an android smartphone using our free android App in the appstore.
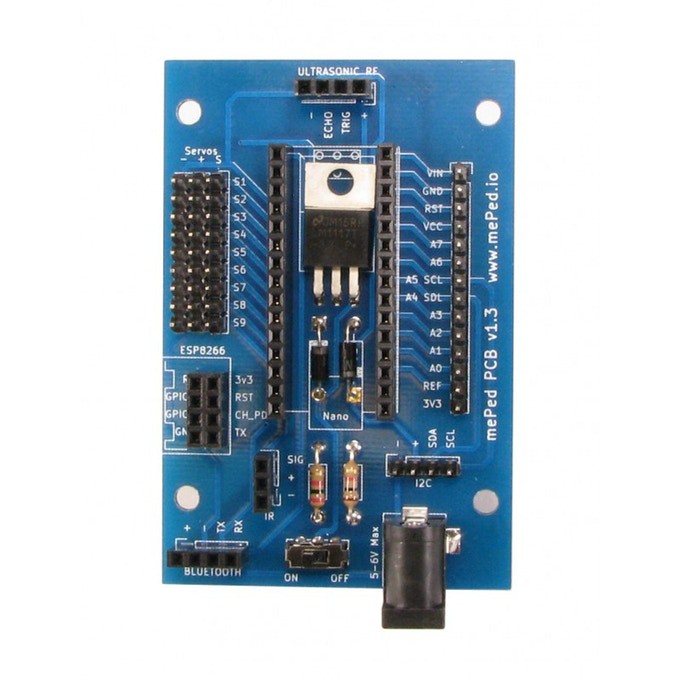
Electrically, it is just plug and play. Plug in the servos to the spot on the board labeled "Servos," and plug in the Bluetooth module where is says "Bluetooth," then give it some power. That is it.

Reprogram with Arduino or Blockly
Since the entire LittleArm is built on the Arduino Nano, it can be reprogrammed from scratch using either the Arduino IDE or graphical tools like BlocklyDuino

Electronics
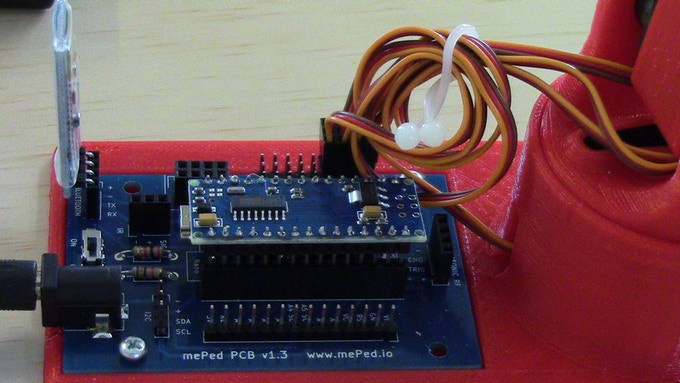
We are using a custom-designed PCB originally created for the MePed robot, which makes using the Arduino even easier. It also allows expansion to new sensors like ultrasonic and IR by just plugging them in. You can also re-write the Arduino code so that you can control two LittleArms with a single board.
Arduino Nano
The original LittleArm used an Uno. But we wanted the 2C to be more compact, so we used a Nano. We love the Arduino because it lets students and makers tap into the huge global community built around Adafruit. We don't want to hinder the creation and hacking of this thing.
Bluetooth
Bluetooth now comes with every LittleArm kit with an electronics package. We are very proud to make this available with the new arms.
Mechanical Design Upgrades
The LittleArm 2C is the second generation of the LittleArm. What have we done? A Ton.
Faster 3D Printing
The LittleArm is the among the first really...
Read more »


 gabebentz