 slantconcepts
-
1Parts List
All of the parts for the LittleArm can be purchased from the LittleArm website as a package or from most hobby retailers.
![]()
-
2Step 2
If you building the LittleArm entirely from scratch, then go ahead and download the files from here. You do have to purchase the core files for the arm, but grippers, and peripherals are all free downloads. Alternatively you can purchase the entire kit from the Littlebots Website
Note: Some peripherals may need to be scaled 10x when entered into your software.
Print the files using your preferred settings, though the lowest resolution (300 microns) is perfectly acceptable.
![]()
-
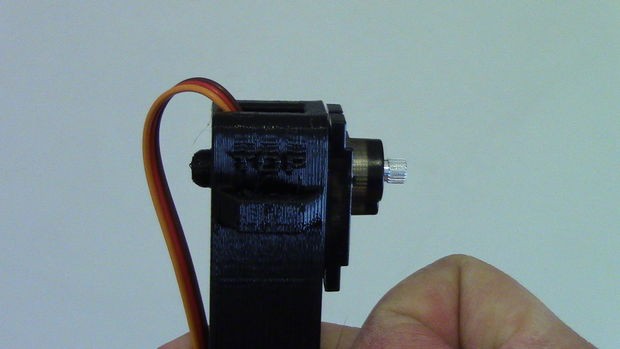
3Assembly Base Servo
- Insert Servo into Base so that wire feeds out rear slot.
- Secure the Base Servo with two servo mounting screws.
![]()
![]()
-
4Attaching Shoulder
Use a spare Servo Horn to rotate the armature of the servo fully clockwise. Note: Perform this step gently as servos can be damaged from rapid forced rotation.
- Place a Servo Horn into the slot on the shoulder piece.
- Fit the Shoulder piece onto the Servo in the base so that the arrow on the Shoulder points approximately 90 degrees to the right, with respect to the Base.
- Use a horn mounting screw to secure the shoulder to the Base.
- Gently rotate the shoulder so that the arrow points forward.
![]()
![]()
![]()
![]()
![]()
-
5Insert Servos into Upperarm
Press two servos into the upperarm so that their wires face and feed out the available slots. Note: If the servos are to difficult to insert, remove one sticker from the side of the servos.
![]()
![]()
-
6Feed Wires Through Organizing Loops
The location of the top Servo in the arm is denoted by the word “Top” on the Upperarm. Feed the wires of this servo through the organizing loops.
![]()
![]()
-
7Attach Upperarm to Shoulder
- Use a Spare horn to rotate the lower servo armature fully clockwise.
- Insert a Servo Horn into the shoulder slot on the Shoulder Piece.
- Insert a Servo Mounting screw into the second hole from the end of the horn and secure it to the shoulder.
- Hold the Upperarm horizontally and start the lower servo armature into the hole of the Servo Horn.
- Press and twist the Upperarm into position in the shoulder. If it does not set into the servo horn rotate slightly so that it can bind.
- Secure the horn with a Horn Mounting Screw.
- Gently position the Upperarm Vertically.
![]()
![]()
![]()
![]()
![]()
![]()
-
8Prepare the Forearm
- Insert a Servo into the Forearm so that the wire faces and feeds out the available slot.
- Run the wire through the organizing loops on the Forearm.
![]()
![]()
-
9Attach Gripper Palm to Forearm
- Start two Servo mounting screws into the palm of the gripper assembly
- Center the palm on the end of the Forearm and secure the screws.
Note: Orientation of the palm is irrelevant
![]()
![]()
![]()
-
10Attach Gripper Fingers
- Place the Servo Actuated finger on the side of the servo. Secure with Gripper Pin screw
- Place regular finger symmetrically to the Servo Actuated Finger and secure with Gripper Pin Screw.
![]()
![]()
LittleArm 2C: 3D Printed Robot Arm
A Fully 3D Printed Arduino Robot Arm for STEM Education


Discussions
Become a Hackaday.io Member
Create an account to leave a comment. Already have an account? Log In.