Not much of a hack, but it was a fun adventure. I got another cheap USBasp in the mail last week. I figured for the heck of it I'd swap out the Atmega8A that comes on the board fot an Atmega328P.
The first step was make an Atmega328P build of the USBasp firmware. I pulled the source code from Thomas Fischl's site. I then modified the Makefile and changed the target value to atmega328p. When i ran make I got some errors originating from files in the usbdrv folder. I quickly fixed that by replacing the usbdrv with an updated one from the vusb GitHub page. I ran make and this time I got a nice main.hex (which I'll put in this project's files section for download.)
It was now time to pull out my soldering station and cheap 858D hot air station and swap chips. I put some kapton tape on nearby passives and added some flux to the Atmega8.
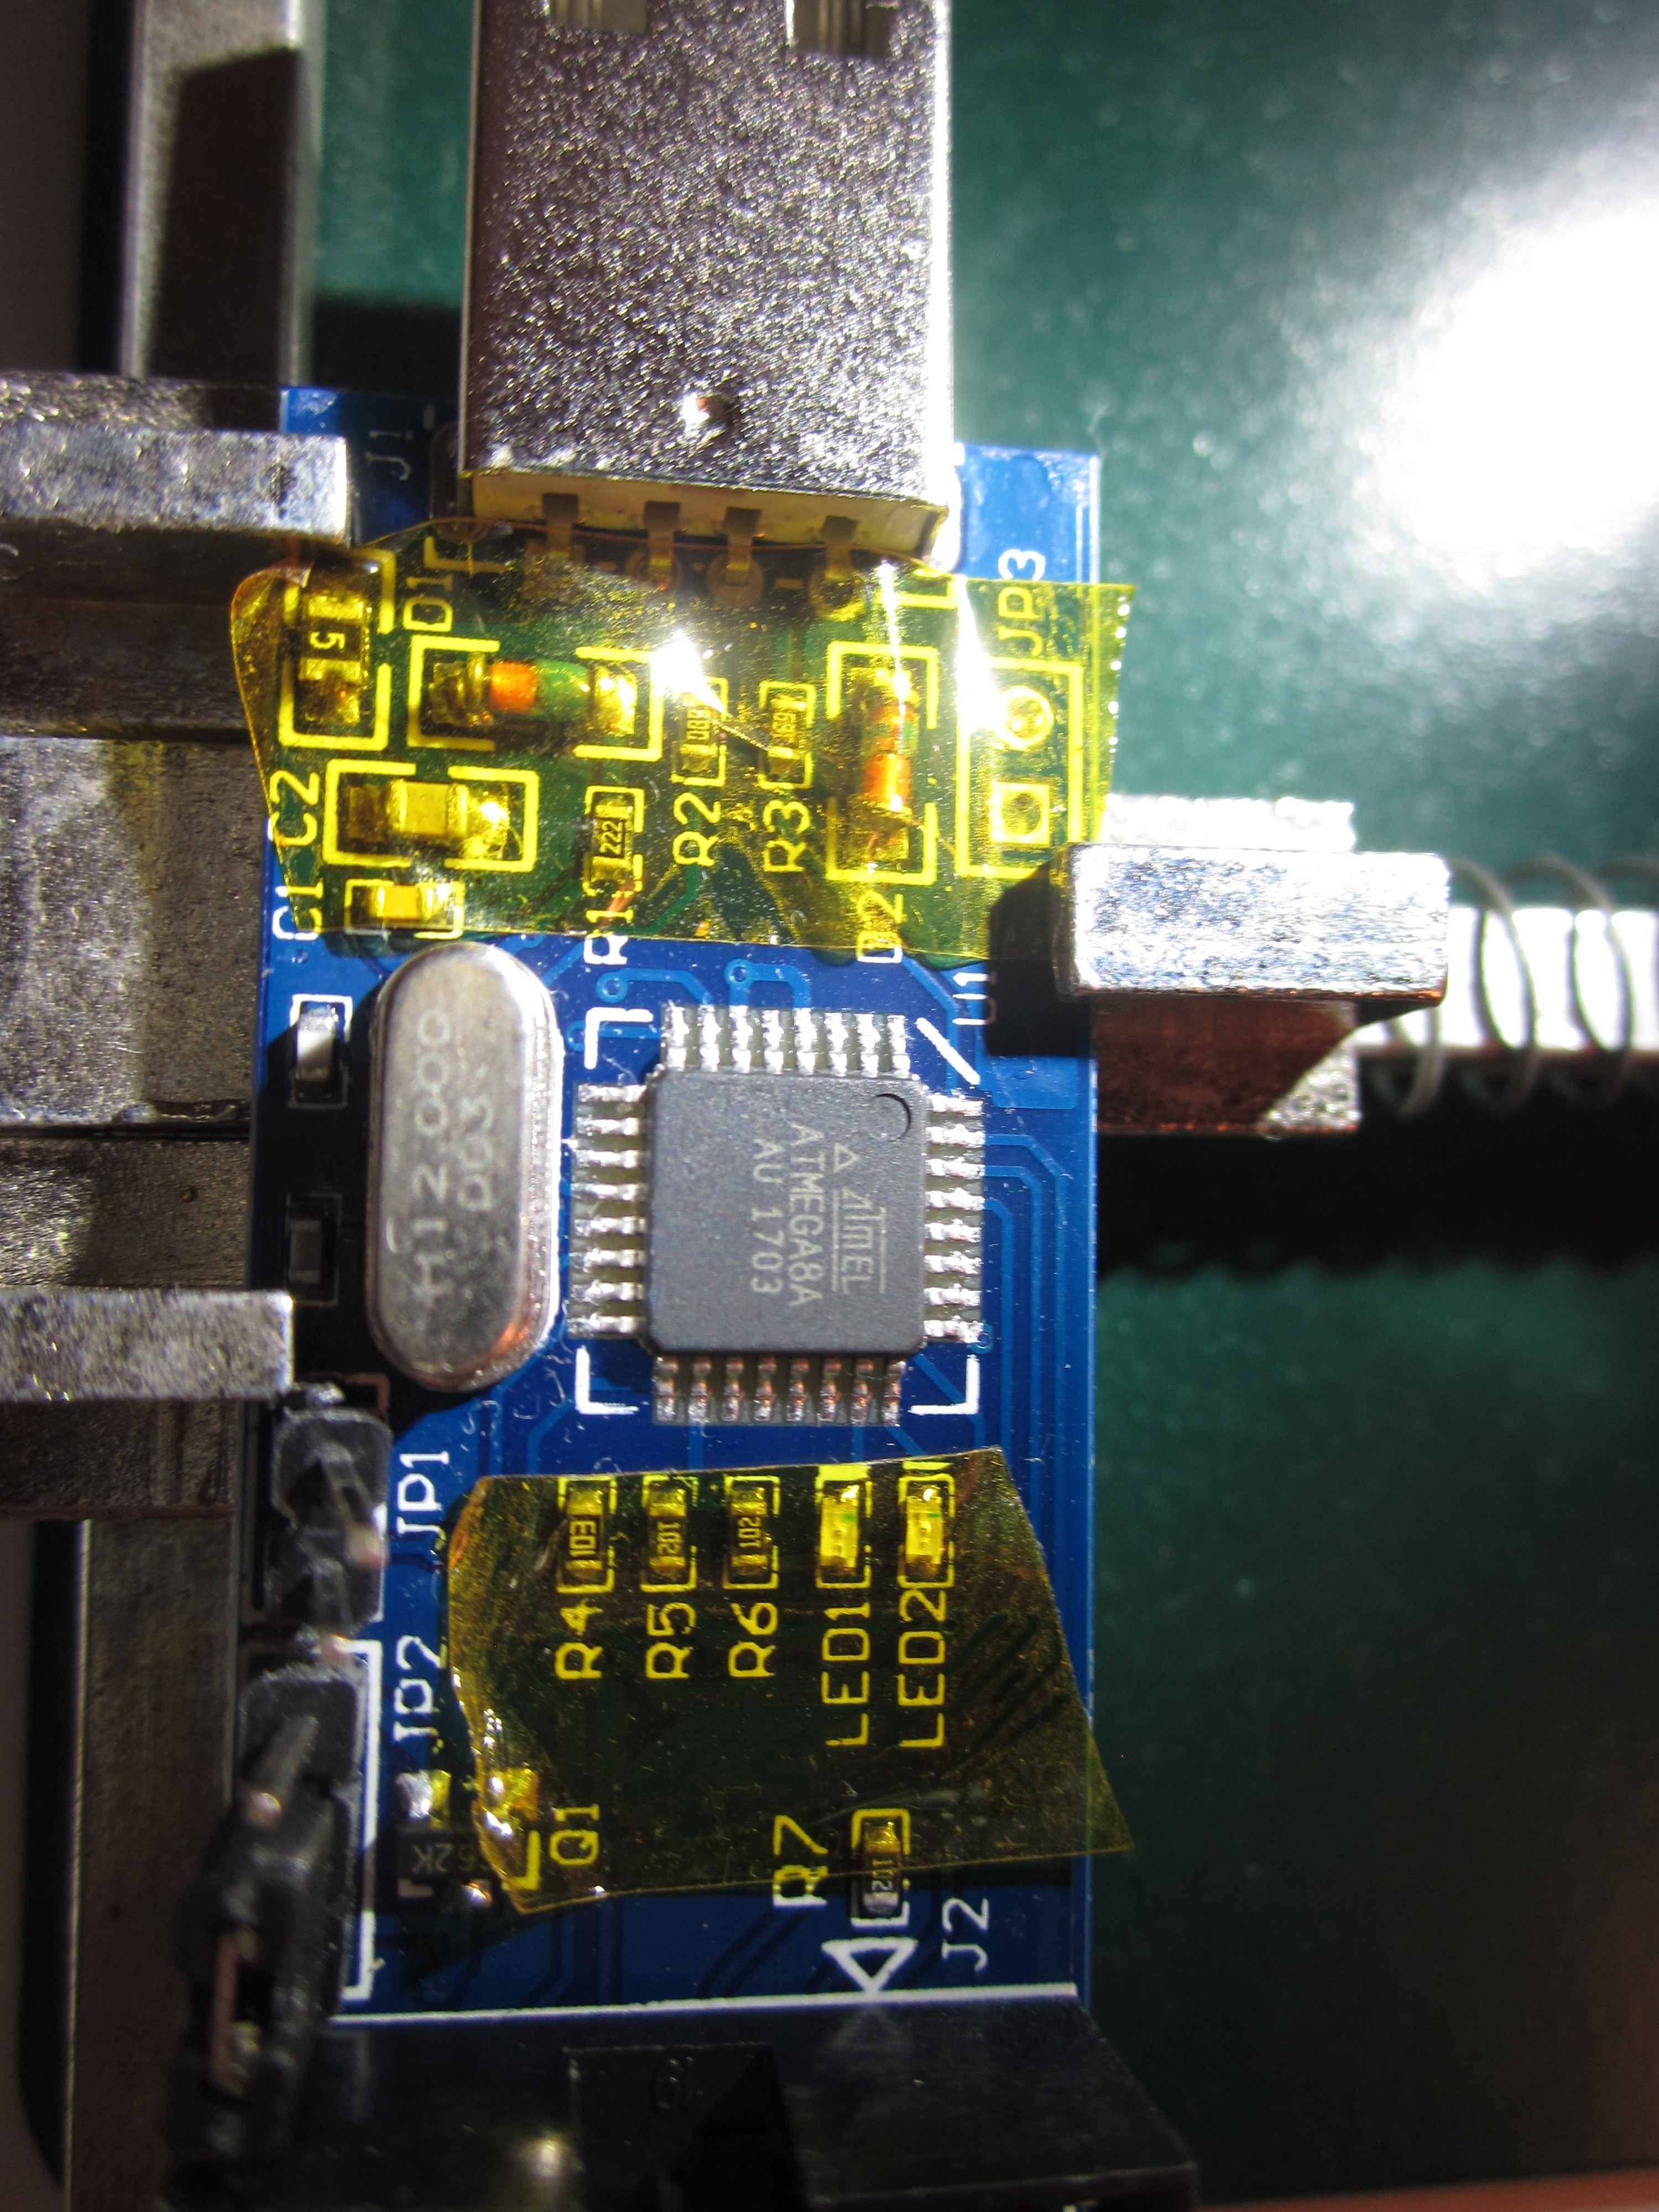
I've had experience soldering QFP's but I've never taken one off. I was surprised how long it took me to get the darn thing off. Later on, I checked to see the temperature I had to hot air station set to. It was on 300C. Typed that in google and it translated to 572F; well that might explain why it took so long for the dang thing to come off! It's surprising that I manged to get it off especially since it was likely soldered with that lead-free crap. It's also a miracle that I didn't rip any pads off. After I got it off II cleaned off most of the leftover solder on the pads with some wick and cleaned off some of the flux with some IPA.
Then came the challenging part; soldering on the 328P. Soldering on a QFN package itself isn't hard with a little practice BUT there were a few obstructions on the board that got in the way; the crystal, the 5x2 shrouded pin header, and to a lesser extend the usb connector. The technique that I use to solder QFNs which is putting some flux on the pins, putting a little bit of solder on the tip on the iron and dabbing a few pins at a time with the soldering iron at a low angle.
The crystal that was the worst obstruction could have been removed but I've had poor success with removing thru-hole components on plated thru-holes using a manual solder-sucker. Enough always remains in the hold that holds onto the component for dear life. Perhaps I should finally get a Hakko FR-301 but it's a bit pricey at around $260 USD (perhaps I should put up a GoFundMe? That feels a bit like begging though.)
I held my soldering iron close the perpendicular where there was an obstruction and did what I could. I cleaned it up a bit afterword with some wick and went over it with a hot air gun to clean it up a bit more. It's not my best work (a few pins could use some more solder, but I verified everything was connected with my multimeter. I also replaced the self-programming jumper pins that came horribly bent(which was a pain due to the plated thru-holes.) I then cleaned up the flux with some IPA.
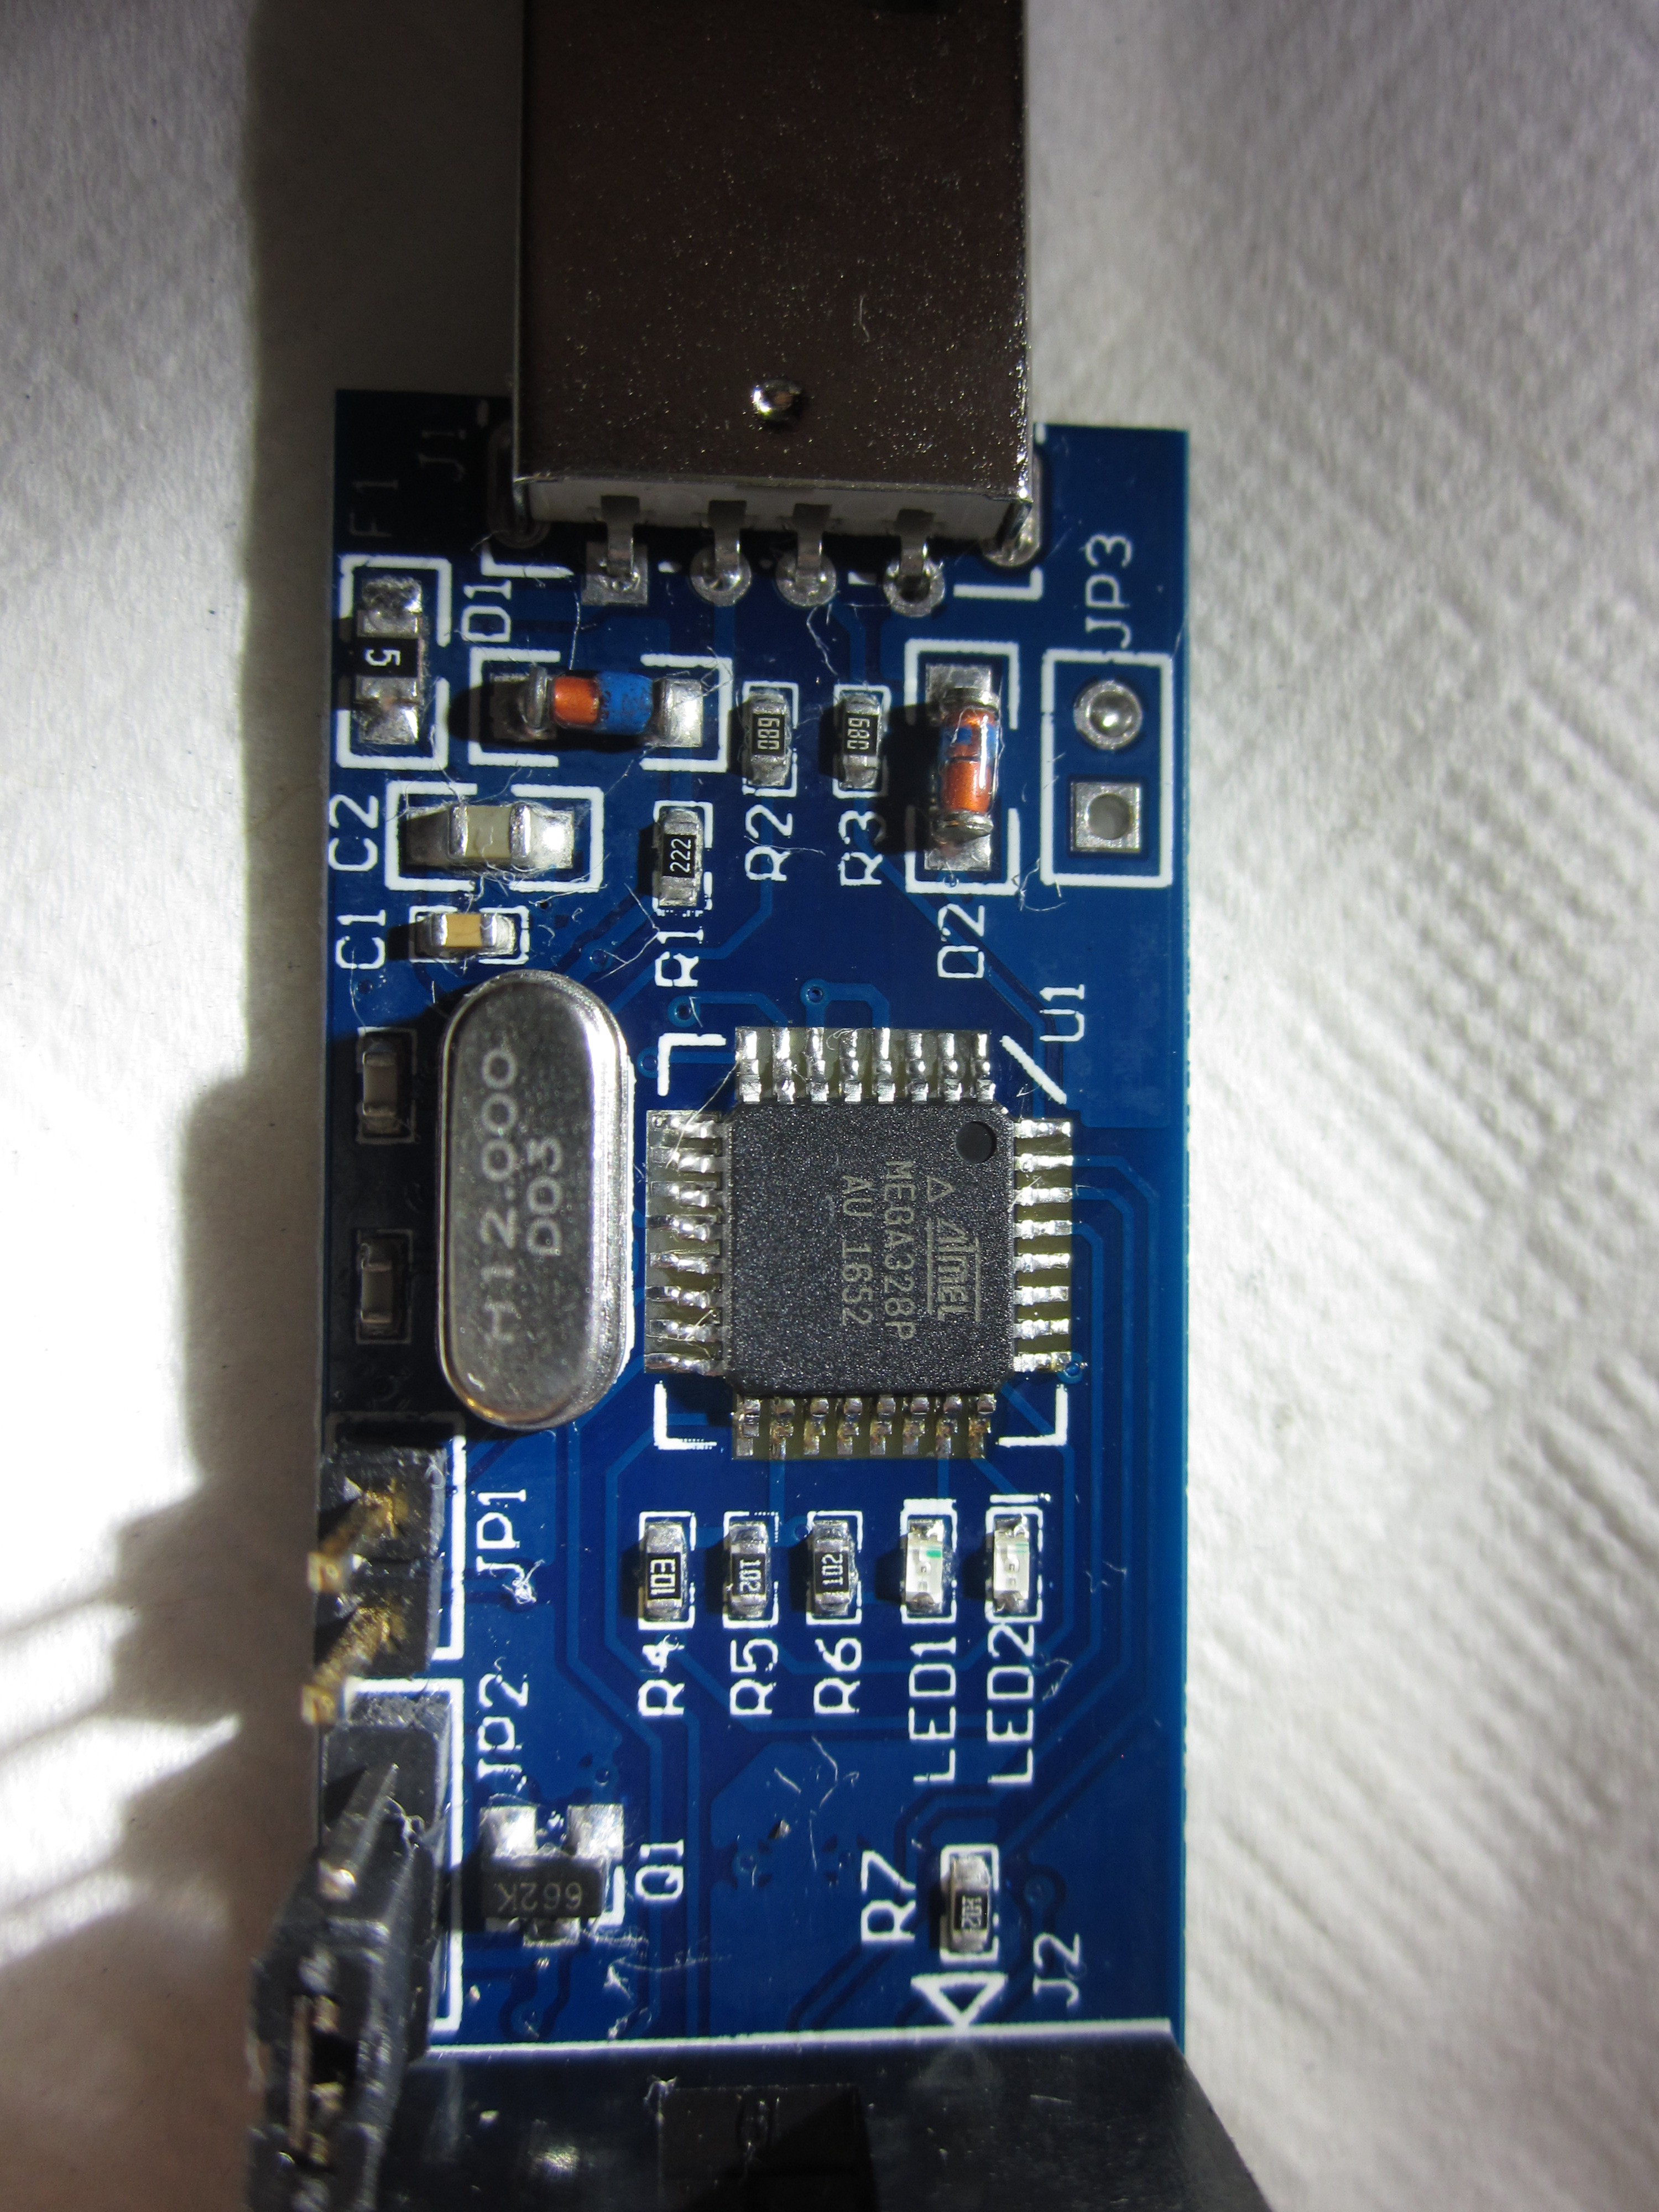
Now it was time to set the fuses and flash the the Atmega328P build of the USBasp firmware that I made earlier. I used another USBasp to set this one up.
First I checked to see if my Atmega 328P could be seen with this command:
avrdude -p atmega328p -c usbasp -vv -B 3The command I used to set the fuses:
avrdude -c usbasp -p atmega328p -U hfuse:w:0xD9:m -U lfuse:w:0xDE:m -U efuse:w:0xFF:m -B 3
The command I used to flash the firmware:
avrdude -c usbasp -p atmega328p -U flash:w:main.hex After I did the above I tested the newly programmed USBasp with one of my Atmega328P target boards and it worked fine.
Discussions
Become a Hackaday.io Member
Create an account to leave a comment. Already have an account? Log In.
Hello, I just came across this. I want to do the same thing. Can you please show me where the download section is so I can download hex file for Atmega328 firmware?
Are you sure? yes | no