Close
0%
0%

PantoProbe

Revolutionize how people troubleshoot SMD devices.

Similar projects worth following
A Pantograph can divide motion down mechanically. Jewelers us a pantographic engraving machine to engrave tiny inscriptions on rings. I've developed a pantographic probe that divides your motion down so you can freely probe the pads of a QFN who's pads are only 0.5 mm apart. The device is compact, portable, and you can build one for < $20.

I'm open sourcing the designs. I've put all the CAD files and 3D print models up on github. I've made a video of the entire build process, and also written detailed build instructions. This revolutionized the way I troubleshoot my electronics projects. I also designed a suction based pick and place tool with an extra degree of rotational freedom so you can do PantoPickAndPlace.

I'm releasing all the designs under the creative commons attribution license.

Right now there are three main designs as part of this project.  The basic PantoProbe which has a 3x precision multiplier.   The basic probe is somewhat complicated to assemble because it require you to cut some brass tubing, and drive some pins in order to make very stable smooth joints.   So I also designed a  version of the probe that uses the flexibility of the 3D printed material to form the "joints".     I call that the PantoFlex, and it is WAY simpler to build, but isn't as good in terms of strength/compactness/range of motion.   It has a 4x precision multiplier.

The final thing I made is a Pick and Place rig with an extra rotational degree of freedom so you can pick up/spin and place parts quickly and super accurately. 

  • 1
    Materials and Tools

    Things you'll need to build a PantoProbe:

    Materials:

    • 4 x 0.2" lengths of  3/16" brass tubing
    • 4 x 0.69" lengths of   5/32" brass tubing
    • 8   #8 SAE flat washers 
    • 1   1/4-20 nut
    • 1   1 " long 1/4-20 bolt
    • 5   3D Printed parts
    • 3   self adhesive rubber feet
    • 1   camera ball mount  careful to get ones that have the 1/4-20 threads. Search Ali Express for tripod mini ball head.
    • graphite powder

    For the most basic electrical probe you'll also need:

    • 1   1/8" length of stainless steel tubing (or brass in a pinch)
    • 1  1" length of 22 gage piano wire  (For the probe tip)

    Tools:

    • 54 tooth razor saw or other way of cutting the tubing
    • A file or sandpaper to de-burr the brass tubing/plastic parts
    • Some way of holding the tubing during cutting like a vice or clamp
  • 2
    Model Sizing

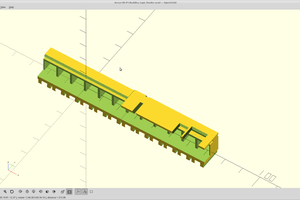
    In order to get a good press fit for the brass tubing I've done two things.  First all of the holes are octagons so minor changes in hole size don't have as big an impact on fit.  Second I created a sizing gage.   Print this first, and try fitting a piece of 5/32" brass tubing in the holes.  If the tubing slides in without any tapping you need to pick the next smaller size hole.

    The holes next to the - sign indicate you should use the under sized hole model.  The middle hole is for the standard model, and the + hole matches the over sized hole model.

  • 3
    3D Printing

    I've printed these models in both PLA and ABS.  In the videos all the things are printed using my Prusa i3 Mk2 with PLA.   I just use 0.2 layer height, and the default infill percentage.  No supports or brims required.   I'm sorry the main arms are somewhat long so they may not fit in some peoples printers.  Check out the PantoFlex model for a smaller printer based build.

View all 5 instructions

Enjoy this project?

Share

Discussions

Similar Projects

Does this project spark your interest?

Become a member to follow this project and never miss any updates