 Cloud4RPi
Preparing Hardware
Let’s start from the very beginning, as I did not use my Raspberry Pi for quite a long time.
We will need:
- Raspberry Pi board (or other IoT-oriented platform).
- SD or microSD card (depending on the platform).
- 5V/1A via micro-USB.
- LAN cable, which provides the Internet connection.
- HDMI display, RCA display, or UART port (to enable SSH).
The very first step is downloading Raspbian. I’ve chosen the Lite version, as I’m going to use SSH instead of display.
Things have changed since the last time I did it: now there is a great burning software called Etcher, which works perfectly, and has a stunning design.

After the image burning was completed, I inserted the SD card into my Pi, plugged the LAN and power cables in, and after a while, my router registered the new device.

Great! Let’s go on and SSH into it.

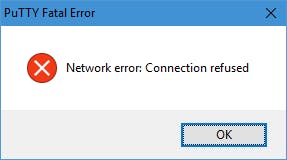
No way! SSH is disabled by default
Security is OK, I like it, but this makes things a bit harder. I’ll use UART-USB converter to access the shell and enable SSH.
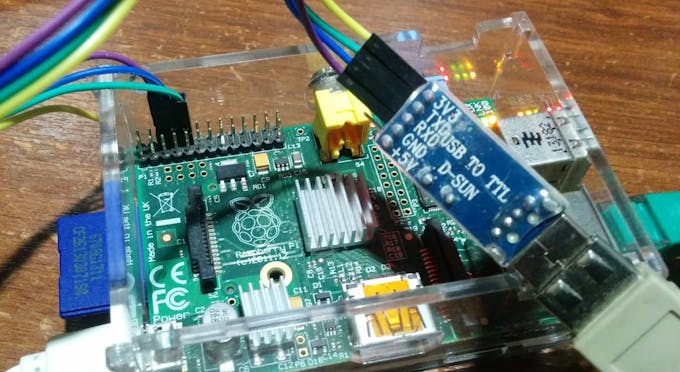
Using a display instead of UART makes it much easier.

After rebooting, I’m finally in.

First things first, let’s update:
sudo apt update && sudo apt upgrade -y
Now let’s connect this fresh device to the Cloud.
Installing Cloud4RPi
I decided to try the cloud platform called Cloud4RPi, which is designed for IoT. According to the docs, we need the following packages to get it running:
sudo apt install git python python-pip -y
The client library can be installed in a single command:
sudo pip install cloud4rpi
Now we need some sample code to ensure it works.
git clone https://github.com/cloud4rpi/cloud4rpi-raspberrypi-python.git && cd cloud4rpi-raspberrypi-python
git clone https://gist.github.com/f8327a1ef09ceb1ef142fa68701270de.git e && mv e/minimal.py minimal.py && rmdir -r e
I decided to run minimal.py, but I don’t like the fake data. Luckily, I noticed an easy way to make the diagnostic data real in this example. Add one more import to the imports section:
from rpi import *
Then delete these functions that provide fake data (the rpi.py defines them now):
def cpu_temp():
    return 70
def ip_address():
    return '8.8.8.8'
def host_name():
    return 'hostname'
def os_name():
    return 'osx'
Now we need a token, which allows Cloud4RPi to link the devices with the accounts. To get one, create an account on cloud4rpi.io and hit the New Devicebutton on this page. Replace the __YOUR_DEVICE_TOKEN__ string in the minimal.py file with your device’s token and save the file. Now we are ready for the first launch.
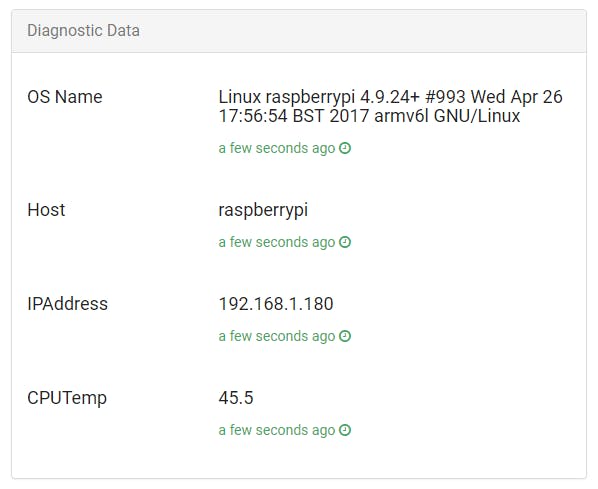
python minimal.py
Open the device page and check that the data is there.
Now let’s move to real-world data.
Connecting the sensor
We will need:
- DHT22 or DHT11 humidity sensor
- Pull-up resistor (5-10 KΩ)
- Wires
The DHT22 sensor measures temperature and humidity simultaneously. The communication protocol is not standardized, so we don’t need to enable it in raspi-config — a simple GPIO pin is more than enough.
To acquire the data, I’ll use Adafruit’s great library for DHT sensors, but it may not work as is. I once found a strange constant delay in the code, which did not work for my hardware, and after two years my pull request is still pending. I have also changed the board detection constants because my Raspberry Pi 1 with BCM2835 was surprisingly detected as Raspberry Pi 3. I wish it were true… Thus, I recommend using my fork. If you experience any problems with it, please try the original repository, maybe it works for somebody, but I’m not one of them.
git clone https://github.com/Himura2la/Adafruit_Python_DHT.git
cd Adafruit_Python_DHT
As the library is written in C, it requires compilation, so you need the build-essential and python-dev packages.
sudo apt install build-essential python-dev -y
sudo python setup.py install
While the packages are installing, connect the DHT22 as shown in the picture below.

And test it:
cd ~
python -c "import Adafruit_DHT as d; print d.read_retry(d.DHT22, 4)"
If you see something like (39.20000076293945, 22.600000381469727) , you should know that this is the humidity in percents and temperature in Celsius.
Now, let’s assemble everything together!
Sending Sensor Readings to Cloud
I’ll use the minimal.py as a base and add the DHT22 interaction into it.
cd cloud4rpi-raspberrypi-python
cp minimal.py ~/cloud_dht22.py
cp rpi.py ~/rpi.py
cd
vi cloud_dht22.py
As DHT22 returns both temperature and humidity in a single call, I store them globally and update only once in a request, assuming the delay between them is more than 10 seconds. Consider the following code, which acquires the DHT22 data:
import Adafruit_DHT

temp, hum = None, None
last_update = time.time() - 20

def update_data():
    global last_update, hum, temp
    if time.time() - last_update > 10:
        hum, temp = Adafruit_DHT.read_retry(Adafruit_DHT.DHT22, 4)
        last_update = time.time()

def get_t():
    update_data()
    return round(temp, 2) if temp is not None else None

def get_h():
    update_data()
    return round(hum, 2) if hum is not None else None
Insert this code after the existing imports and edit the variables section so that it uses the new functions:
variables = {
    'DHT22 Temp': {
            'type': 'numeric',
            'bind': get_t
    },
    'DHT22 Humidity': {
            'type': 'numeric',
            'bind': get_h
    },
    'CPU Temp': {
            'type': 'numeric',
            'bind': cpu_temp
    }
}
Push the red button to start the data transfer:
python cloud_dht22.py
Then you can check the device page.

You can leave it as is, but I prefer having a service for everything. This ensures that the script is always running. Creating a service with the fully automated script:
wget -O https://github.com/cloud4rpi/cloud4rpi-raspberrypi-python/blob/master/service_install.sh | sudo bash -s cloud_dht22.py
Starting the service:
sudo service cloud4rpi start
And checking it:
pi@raspberrypi:~ $ sudo service cloud4rpi status -l
● cloud4rpi.service - Cloud4RPi daemon
   Loaded: loaded (/lib/systemd/system/cloud4rpi.service; enabled)
   Active: active (running) since Wed 2017-05-17 20:22:48 UTC; 1min ago
 Main PID: 560 (python)
   CGroup: /system.slice/cloud4rpi.service
           └─560 /usr/bin/python /home/pi/cloud_dht22.py
May 17 20:22:51 raspberrypi python[560]: Publishing iot-hub/messages: {'type': 'config', 'ts': '2017-05-17T20...y'}]}
May 17 20:22:53 raspberrypi python[560]: Publishing iot-hub/messages: {'type': 'data', 'ts': '2017-05-17T20:2...40'}}
May 17 20:22:53 raspberrypi python[560]: Publishing iot-hub/messages: {'type': 'system', 'ts': '2017-05-17T20....4'}}
If everything works as expected, we can go on and use the Cloud4RPi platform’s capabilities to manipulate with the data.
Charts and Alarms
First of all, let’s plot the variables to see how do they change. This can be done by adding a new Control Panel and putting the required charts in it.

Another thing that we can do here is setting an Alert. This feature enables you to configure the safe range for a variable. As soon as the range is overstepped, it sends an email notification. On the Control Panel editing page, you can switch to Alerts and set one up.

Right after that, the humidity in my room started to decrease rapidly without any noticeable reason, and the alarm soon followed.

You can use Cloud4RPi for free with any hardware that is able to execute Python.
As for me, now I always know when to turn the air humidifier on, and I can even connect it to a relay for emote control via Cloud4RPi. I’m prepared for the heat! Welcome, Summer!