After reading about how well things can grow indoors, I started thinking that maybe automation was my path to healthy plants. So I decided to build the bare minimum - get a plant, a pump, and a water sensor. When the water sensor says "no water here", use the pump to put water there.
I also decided to run it all through a Raspberry Pi to as an excuse to interact with the RPi GPIO.
Here's how I did it:
Materials:
- Raspberry Pi 3
- Soil Moisture Sensor
- Flexible Water Line
- 5V Relay
- 3-6V Mini Micro Submersible Pump
- TOLI 120pcs Multicolored Dupont Wire
- 5v Power Supply (Any USB Cable+ USB Wall Charger
Wiring:
The first thing I did was make my 5V power supply from a usb cable. Using an old iphone cable, I cut the iphone side off and fished out a red and black wire. I soldered some sturdier wires to this, and plugged it into a wall adapter. Checking with a voltmeter, this gave me 5V output.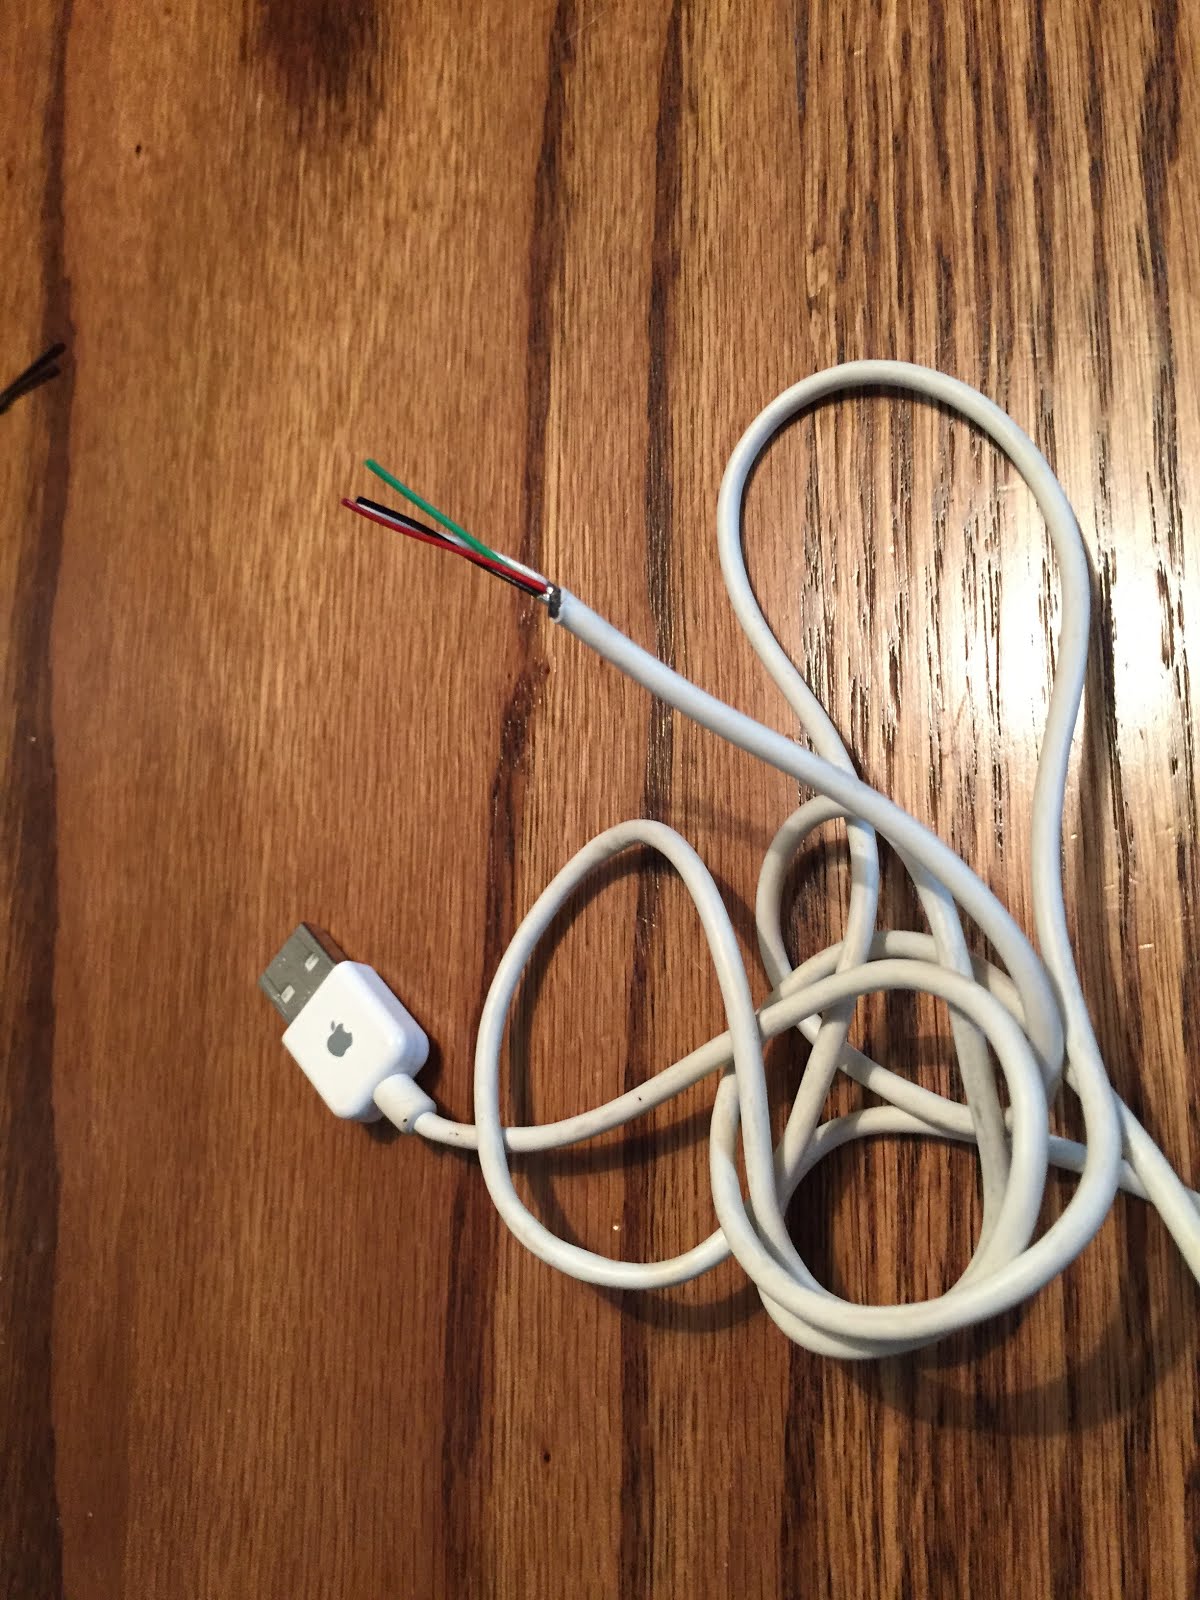
Now time for the GPIO.
RPi Wiring:

Following this GPIO layout:
Water Sensor - plug the positive lead from the water sensor to pin 2, and the negative lead to pin 6. Plug the signal wire (yellow) to pin 8.
Relay - Plug the positive lead from pin 7 to IN1 on the Relay Board. Also connect Pin 2 to VCC, and Pin 5 to GND on the Relay board.
Pump - Connect your pump to a power source, run the black ground wire between slots B and C of relay module 1 (when the RPi sends a LOW signal of 0v to pin 1, this will close the circuit turning on the pump).
This diagram should capture the correct GPIO so long as you are using Raspberry Pi 3. Not shown is another power source to the RPi.
Hardware Setup:
Once the wiring has been completed, attach the flexible hose to the pump (I used electrical tape), and drop it into a jar of water. Attach the other end of the hose to your plant.
Now plug in all power sources (and make sure your Raspberry Pi is running some version of an operating system, like this one here).


Software
Note: If you get the wiring exactly as described above, my code in the next section will work with no modifications.
There are two parts to this setup. One file controls all the GPIO and circuit logic, and the other runs a local web server.
All files:
water.py
web_plants.py
main.html
GPIO Script
Let's start with the code for controlling the GPIO. This requires the RPi.GPIO python library which can be installed on your Raspberry Pi as follows:
$> python3.4 -m pip install RPi.GPIO
With that installed, you should be able to use the water.py script found here.
You can test this is working correctly by running an interactive python session as follows:
$> python3.4
>>> import water
>>> water.get_status()
>>> water.pump_on()
This should print a statement about whether your sensor is wet or dry (get_status()), and also turn on the pump for 1s. If these work as expected, you're in good shape.
At this point you can also calibrate your water sensor. If your plant status is incorrect, try turning the small screw (potentiometer) on the sensor while it is in moist soil until the 2nd light comes on.
Flask Webserver
The next aspect of this project is to setup the web server. This code can be found here in a file called web_plants.py. This python script runs a web server enabling various actions from the script described above.
You will need to keep web_plants.py in the same directory as water.py described above. You will also need a subdirectory called "templates" containing the html file here called main.html.
You will need to install flask, and psutil as follows:
$> python3.4 -m pip install flask
$> python3.4 -m pip install psutil
Make sure to place the web_plants.py file in the same directory as the water.py script above. You will also need to create a sub-directory called templates, and place main.html in the templates directory.
Now run the following command command to start your web server:
$> sudo python3.4 web_plants.py
Now if you navigate to the ip address of your RPi, you should see a web dashboard something like this: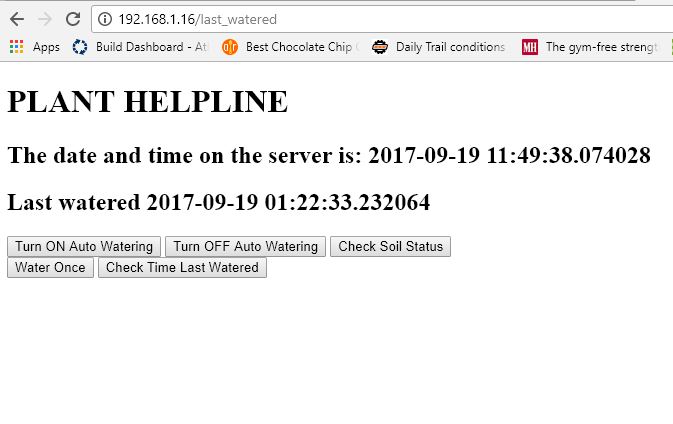
Try clicking the buttons to make sure everything works as expected! If so, you're off to the races.
here's another great tutorial I followed on flask + GPIO
Run Website Automatically
Finally, you probably want the website to auto start when the RPi gets turned on. This can be done using a tool called cronjob, which registers your website as a startup command.
To do so, type:
$> sudo crontab -e
This will bring up a text editor. Add a single line that reads (and make sure to leave one empty line below):
@reboot cd <your path to web_plants>; sudo python3.4 web_plants.py
@reboot cd <your path to web_plants>; sudo python3.4 web_plants.py
Now when you reboot your pi, it should auto start the server.