These are the highlights
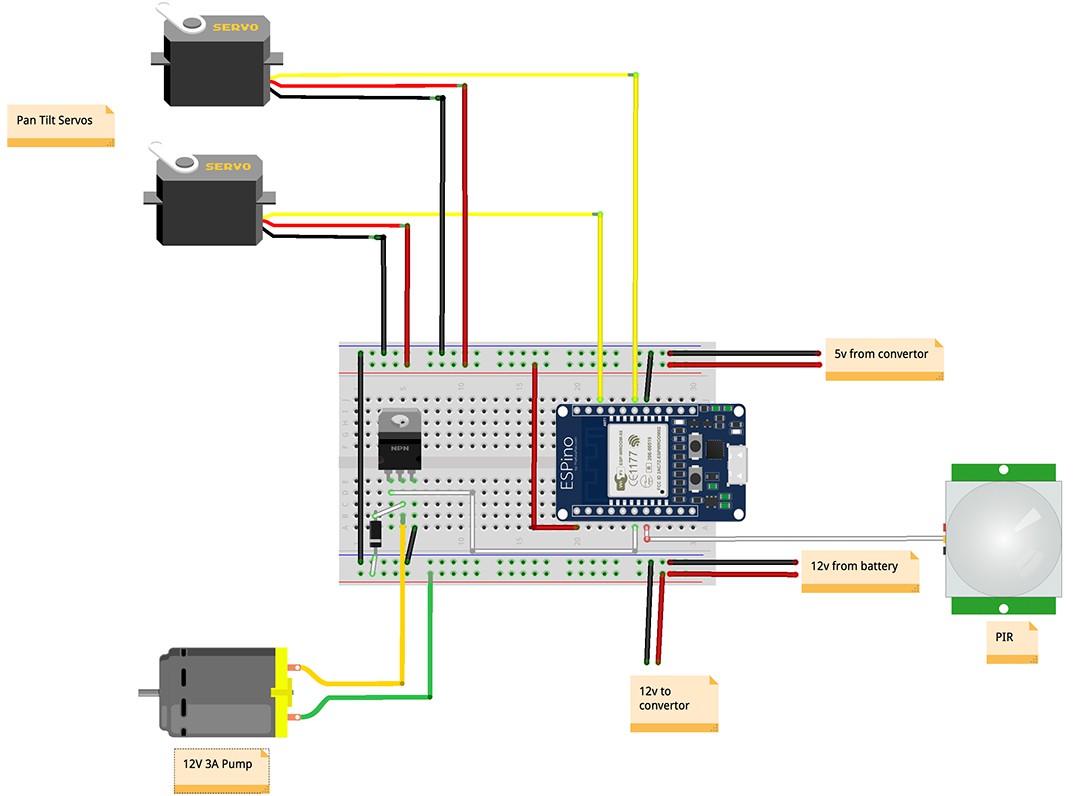
- An ESPino is used to control the pan tilt arm, detect motion via a PIR Motion Sensor, turn the pump on using a transistor as a switch and trigger the camera on the Arducam UNO.
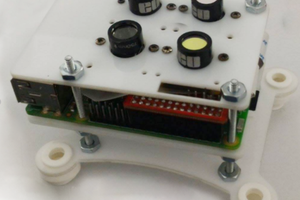
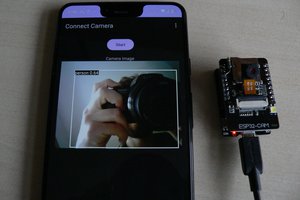
- An ESP8266 ESP-12F UNO Board for ArduCAM Mini Camera and the Arducam Mini module Camera Shield w/ 2 MP OV2640 is used for the video feed to the iPhone App and as a fast burst camera to save images to the SD Card.
- A HC-SR501 PIR Motion Detector is used to trigger the pump, pan tilt action and the camera burst to SD Card.Communication between the ESPino and Arducam UNO and the iPhone App is done using HTTP.
- An SD Card in the Arducam UNO is used to save images and to serve a htm file so that the saved images can be accessed via browser.
- A home made Vacuum Relief Valve is used to prevent water siphoning from the reservoir through the pump when not on.
- A 12v 3A Windscreen Washer Pump is used.Two 6v 7Ah Sealed Lead Acid Batteries are connected in series to provide 12v for the pump.
- Router configuration including LAN Static IP's and NAT Port Forwarding along with a DDNS or a Static IP is required.
- A TIP120 NPN Transistor is used to switch the pump on and off and the calculation is covered briefly, a 1N4001 Diode is used for flyback protection .
 Theo
Theo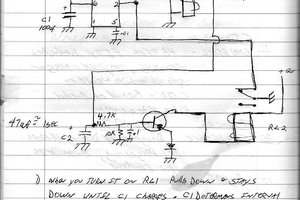
 Ross Bochnek