First you have to download and write the Rasbian image to an SD card, i recommend to download the Raspbian Lite but if you want to connect to a WiFi with captive portal (like a hotel WiFi) you can download the Desktop version. THIS PROJECT IS DONE ON RASPBIAN JESSIE LITE
You can download the image you prefer from official Raspberry Pi site:
https://www.raspberrypi.org/downloads/raspbian/
Ones you download the image you can follow the instructions to write the img to your SD card:
https://www.raspberrypi.org/documentation/installation/installing-images/README.md
Tip for those who want a full headless build so you dont want to have a keyboard or monitor:
After you write the image you should see a boot partition on My Computer

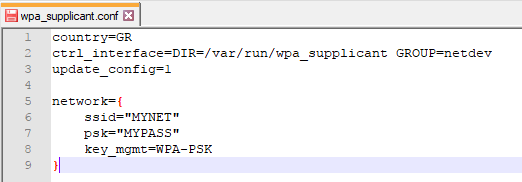
so to automatically your Pi connect to your WiFi network you have to make a new file named "wpa_supplicant.conf" with (Notepad++ or similar program) and put the following code inside and change it to your needs :
country="Your country 2 letter code here" (eg. GR,US)
ctrl_interface=DIR=/var/run/wpa_supplicant GROUP=netdev
update_config=1
network={
    ssid="YOURSSID"
    psk="YOURPASS"
    key_mgmt=WPA-PSK
}
Like this:
More info here : https://www.raspberrypi.org/documentation/configuration/wireless/wireless-cli.md
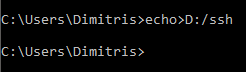
Also to enable ssh headless you need to create a blank file called "ssh" also in the boot partition (name it just ssh, maybe ssh.txt works i dont know leave a comment if it does) if you dont have show hidden files enabled you can create it with cmd :
Run cmd and type this command "echo>D:/ssh" (replace the D:/ with your SD path for me is D:/)
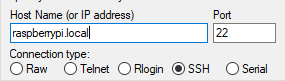
Now you are ready to power on your Pi. Just insert the SD card you just prepared and give it power. Give Pi 30-40 seconds to boot up you can connect through your favorite SSH program i use Putty, and type at Hostname filed "raspberrypi.local" and click Open.
If you get this error:
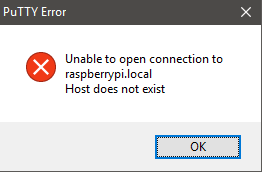
you dont have Apple Bonjour installed so you can either download it or you have to find the Pi IP manually. So you can login to your router and go to Connected Devices or ARP table and find the IP or you can use a Network Scan tool (like Angry IP Scanner).
Now that you have the IP of the Raspberry you can connect and start the installation of the required packages.
STEP 1: update your Raspbian and install the packages that we need by typing:
sudo apt-get update
sudo apt-get upgrade -y
sudo apt-get install dnsmasq iptables-persistent -y
STEP 2: Find the name of your Ethernet interface with ifconfig command (in my case eth0)

STEP 3: Disable the dhcpcd for the eth0 interface by editing the /etc/dhcpcd.conf with your favorite editor (i use nano)
sudo nano /etc/dhcpcd.conf
and adding the following line at the very bottom
denyinterfaces eth0
save and exit ( Press ctrl + o to save and ctrl +x to exit )
STEP 4:
Edit the /etc/network/interfaces file by typing :
sudo nano /etc/network/interfaces
if it has any line that contains eth0 (or you interface name) comment it out by adding a # to the start of the line
add the following to the bottom:
auto eth0
allow-hotplug eth0
iface eth0 inet static
    address 192.168.2.1
    netmask 255.255.255.0
    network 192.168.2.0
    broadcast 192.168.2.255
You can change the network settings as you want but you have to remember your changes for the dhcp server config later or you can leave it as it is
Optional:
if you want to use an external Wireless adapter you have to comment out the wpa_conf line
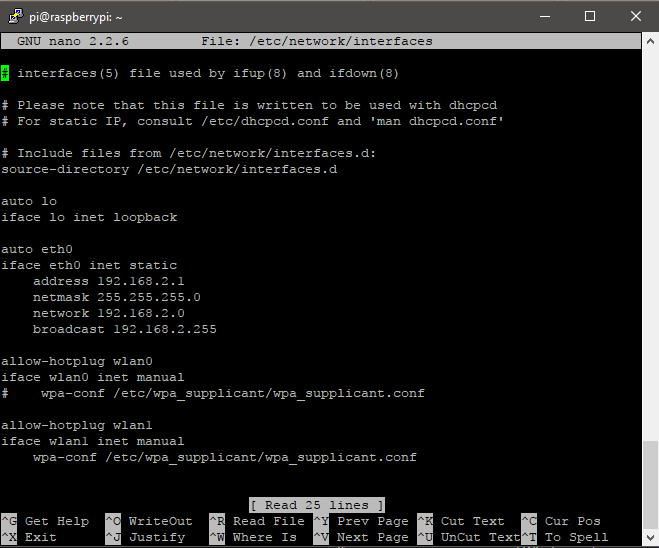
For external Wireless adapter add also the following at the bottom:
allow-hotplug wlan1
iface wlan1 inet manual
    wpa-conf /etc/wpa_supplicant/wpa_supplicant.conf
As the wlan1 being your wifi card name you see from ifconfig command early
again save and exit the file
STEP 5: Configure the DHCP...
Read more »
 Chris
Chris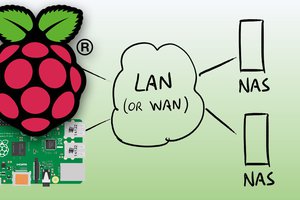
 Dmitry
 tlankford01
 Hpsaturn
Does this also works as a "Ethernet to Wifi Adapter" to bring some devices which only supports LAN into wifi?