 Jim
JimYou attach Acusis to your computer/Raspberry Pi/custom system via USB. It will connect to your device as a USB microphone and a USB speaker. The reason it appears as a speaker is because to remove echos from the microphone input, it needs to receive the audio you are producing.
You can get audio to it two ways. One is to send audio to it as your primary audio output and connect your external speaker to Acusis’ line-level audio output. In this mode all of the sound is passed through to your speaker.
If you can’t put Acusis between your device and your speaker, you can usually configure your device to output audio to two devices at the same time, one output being Acusis, the other being the speakers you want to use.
On a Mac, you do this with “Audio MIDI Setup”, and it’s pretty straight-forward. Other platforms have either built-in or third-party solutions (we’ll post solutions on our site).
We built Acusis to be attached to the front of a webcam; that’s why it has a circular opening in the center. Just use some double-sided tape and you’re good to go. At some point in time, we may introduce velcro attachments, stay tuned!
Acusis is built on a really cool component, the XMOS XVF3000. The XMOS is a single chip that lets us hook up four PDM microphones, USB, and audio output. Internally, it has an array of DSPs for running algorithms for beamforming and echo cancellation.
You can use Acusis out-of-the-box as a really good microphone. You can also hack on it yourself by downloading the SDK from XMOS and writing your own code. If you’re interested in this, add the XTAG programmer accessory to your pledge.


 Sean
Sean
 Onion.io
 bobh
bobh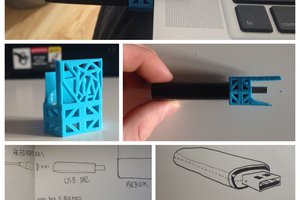
Neat project. I think I saw one of these at the Supercon.