 Plasmode
To move from simulated environment to real hardware, the file I/O and serial I/O services used by the simulator need to be replaced with real codes in hardware. Since the CP/M disk image is already loaded in simulation memory and CP/M file I/O services are already created in BIOS, the only real service codes that need to be created are the console input, console output and console status services. In EASy68K simulator they are trap #15 task 5 (console input), task 6 (console output), and task 7 (console status). In real hardware these trap calls invoke small assembly routines that interact with the 68692 Dual UART. These trap routines become a part of the bootstrap monitor that CP/M BIOS can call. A subtle but important point is not allowing trap #15 to be initialized when CP/M boot. Another word, the "Set Exception Handler Address" function (function 22) need to watch out for trap #15 address and skip over it.
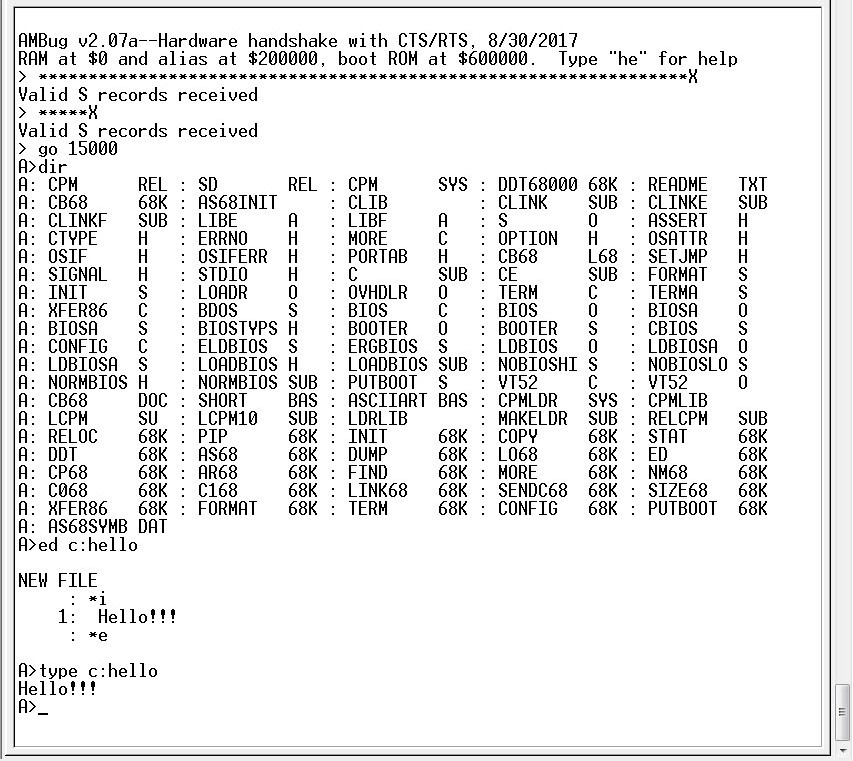
At this point it is possible to test CP/M on the hardware: load CPM15000 and BIOS at location $15000 and execute. CP/M will boot and display the prompt "A>". A "DIR" command will either get a "no file" response or gibberish directories. It is a good start, but not much to do because there is no disk image.
Putting simulated disk image in flash is a little bit more complicated due to the limitation of my simple bootstrap monitor. The disk image is located in the same address as the on-board 2 megabyte flash, but I can't write to flash directly. I need to buffer the incoming data, erase the flash, write the data to flash one sector at a time, and verify. That's a bit complicated for the simple bootstrap monitor. What I've done is to cut the disk image into three parts, each part is small enough to fit in the 1 meg system RAM and have a flash programmer that copy the partial image into flash. Once the entire disk image is reassembled in flash, load the CPM15000 and BIOS like before and execute. Voila!
Serially load CP/M and BIOS every time is a pain. To speed it up, I store the CP/M and BIOS images in the flash and added a command "bo" to the bootstrap monitor. So now I just type "bo" after power on and I'm in CP/M immediately.
Discussions
Become a Hackaday.io Member
Create an account to leave a comment. Already have an account? Log In.