 Andrew Mayhall
In my last project log entry I wrote about the various categories of particle fluids and the need for mechanical agitation during fluidizing for specific types of powdered materials. Additionally I walked through the designs of the magnetic stirrer that I would be implementing as well as how it would function over all. This entry will show the completed stirrer mechanism and the assembly process to make it functional.
The major components that make up the stirrer are pictured below. Everything besides the 3D printed mounting bracket and the magnetic spinner ring are stock parts that can be sourced through McMaster Carr and Amazon. A detailed list of components is available for this project.
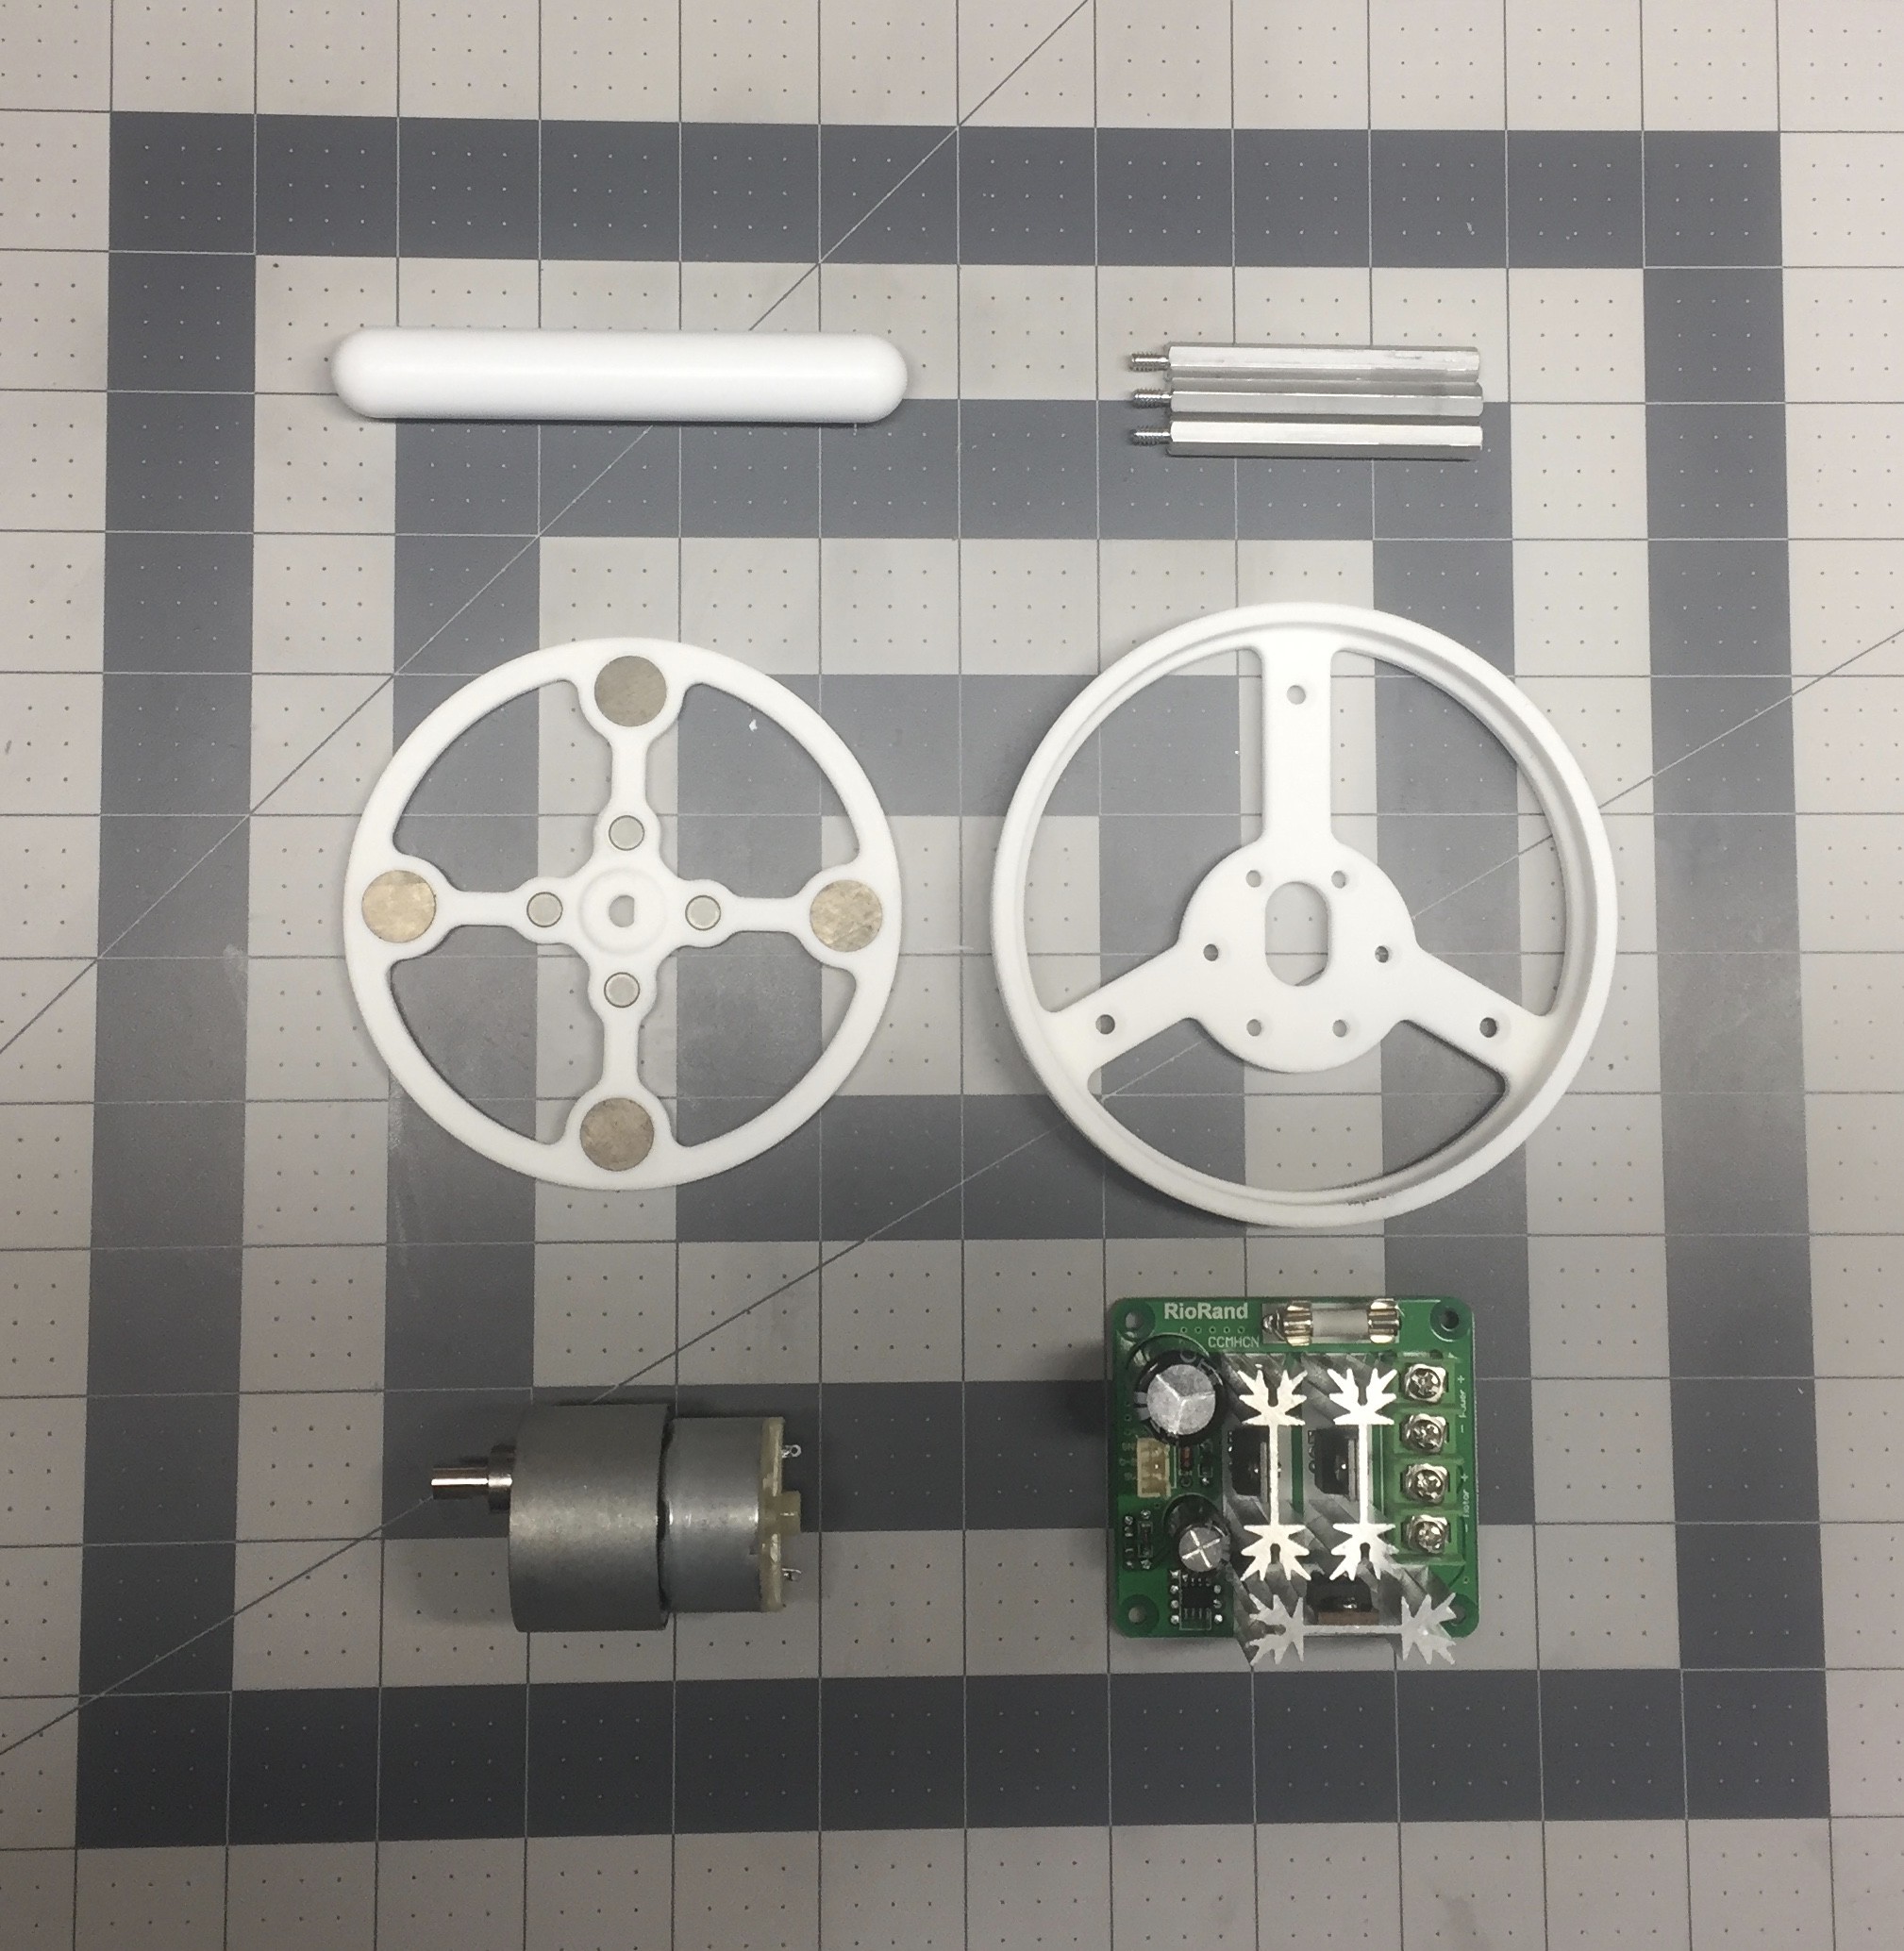
I had the two 3D printed parts made form SLS nylon through i.materialize. These can certainly be printed on any FDM machine if you have access to one. i.materialize offers a very quick turnaround time at competitive rates so it was just easier for me to order it and forget. If others are interested in building their own I have uploaded the STL files. I think these parts cost me around $60 including shipping.
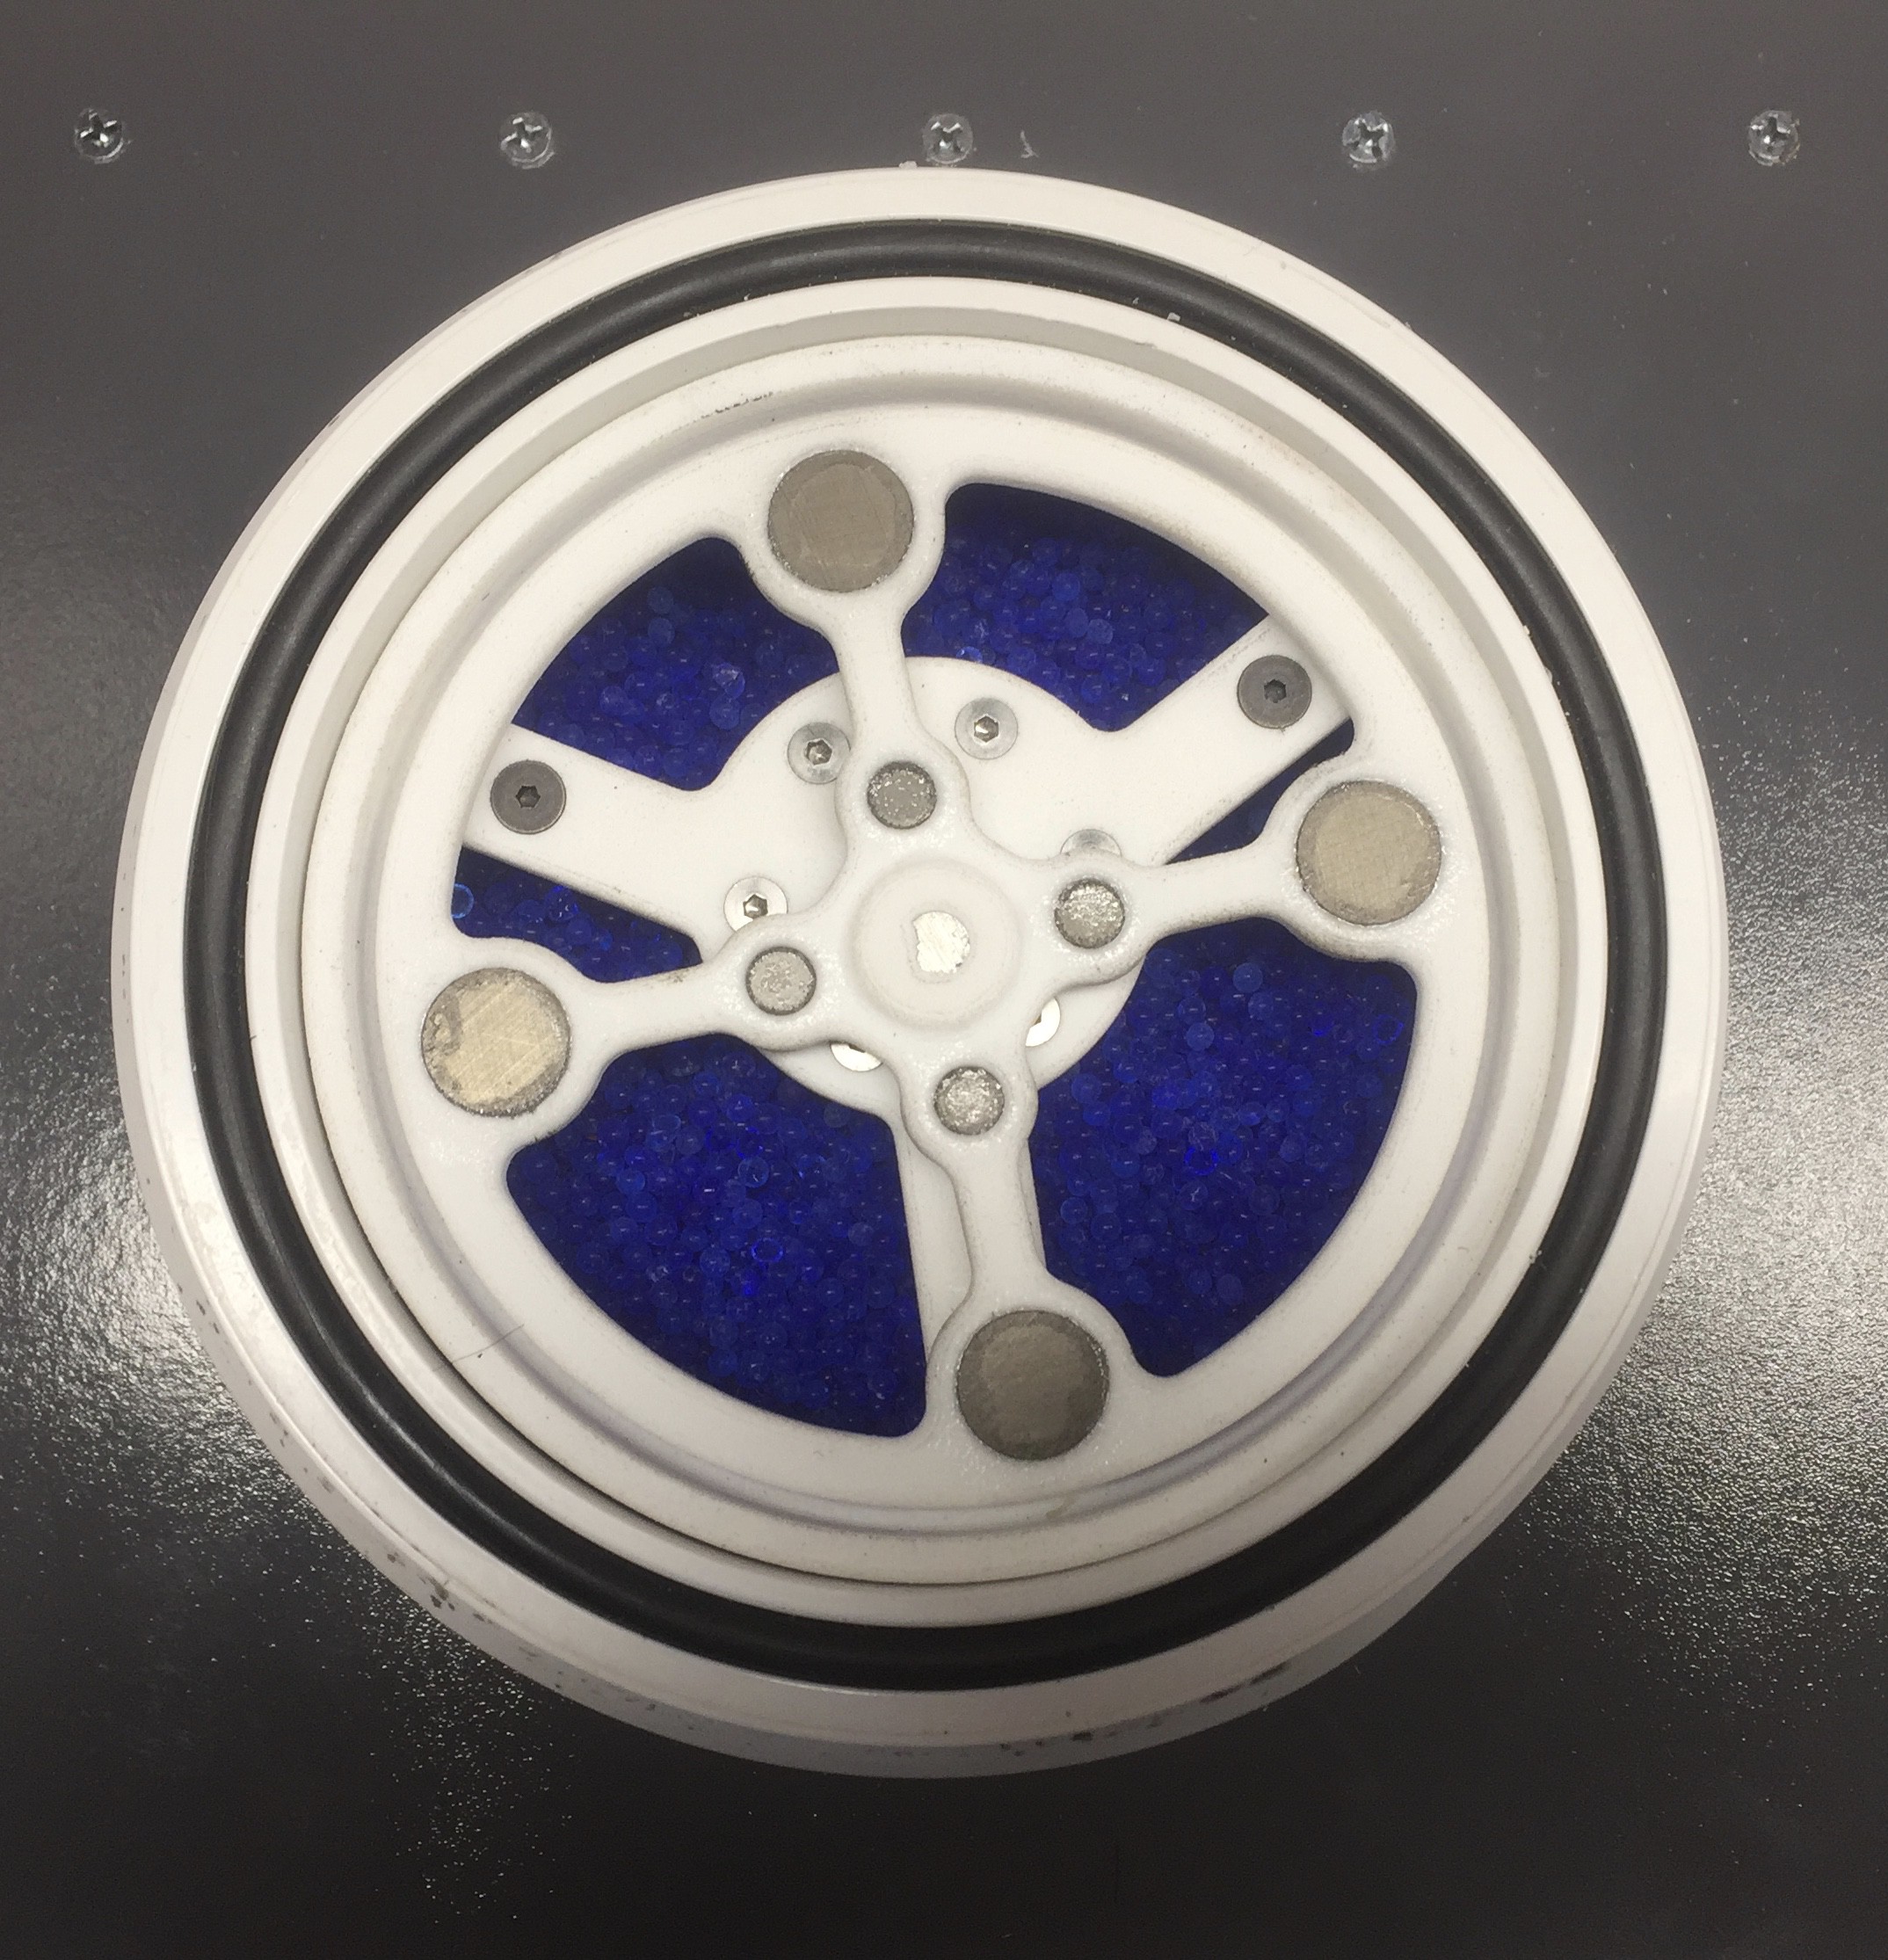
I started the assembly by pressing the magnets into the recesses in the magnetic spinner making sure to match the same polls on each strut and to flip the polls on the opposing strut. Some super glue made sure the magnets were permanently attached.
Next I shifted focus to installing the aluminum standoffs into the base of the fluidizer. I used the mounting bracket as a template to drill the tapped holes for the standoffs. At this time I also added a power connector by using a Dremel to shape a hole in the end of the PVC cap used to close off the bottom of the fluidizer.
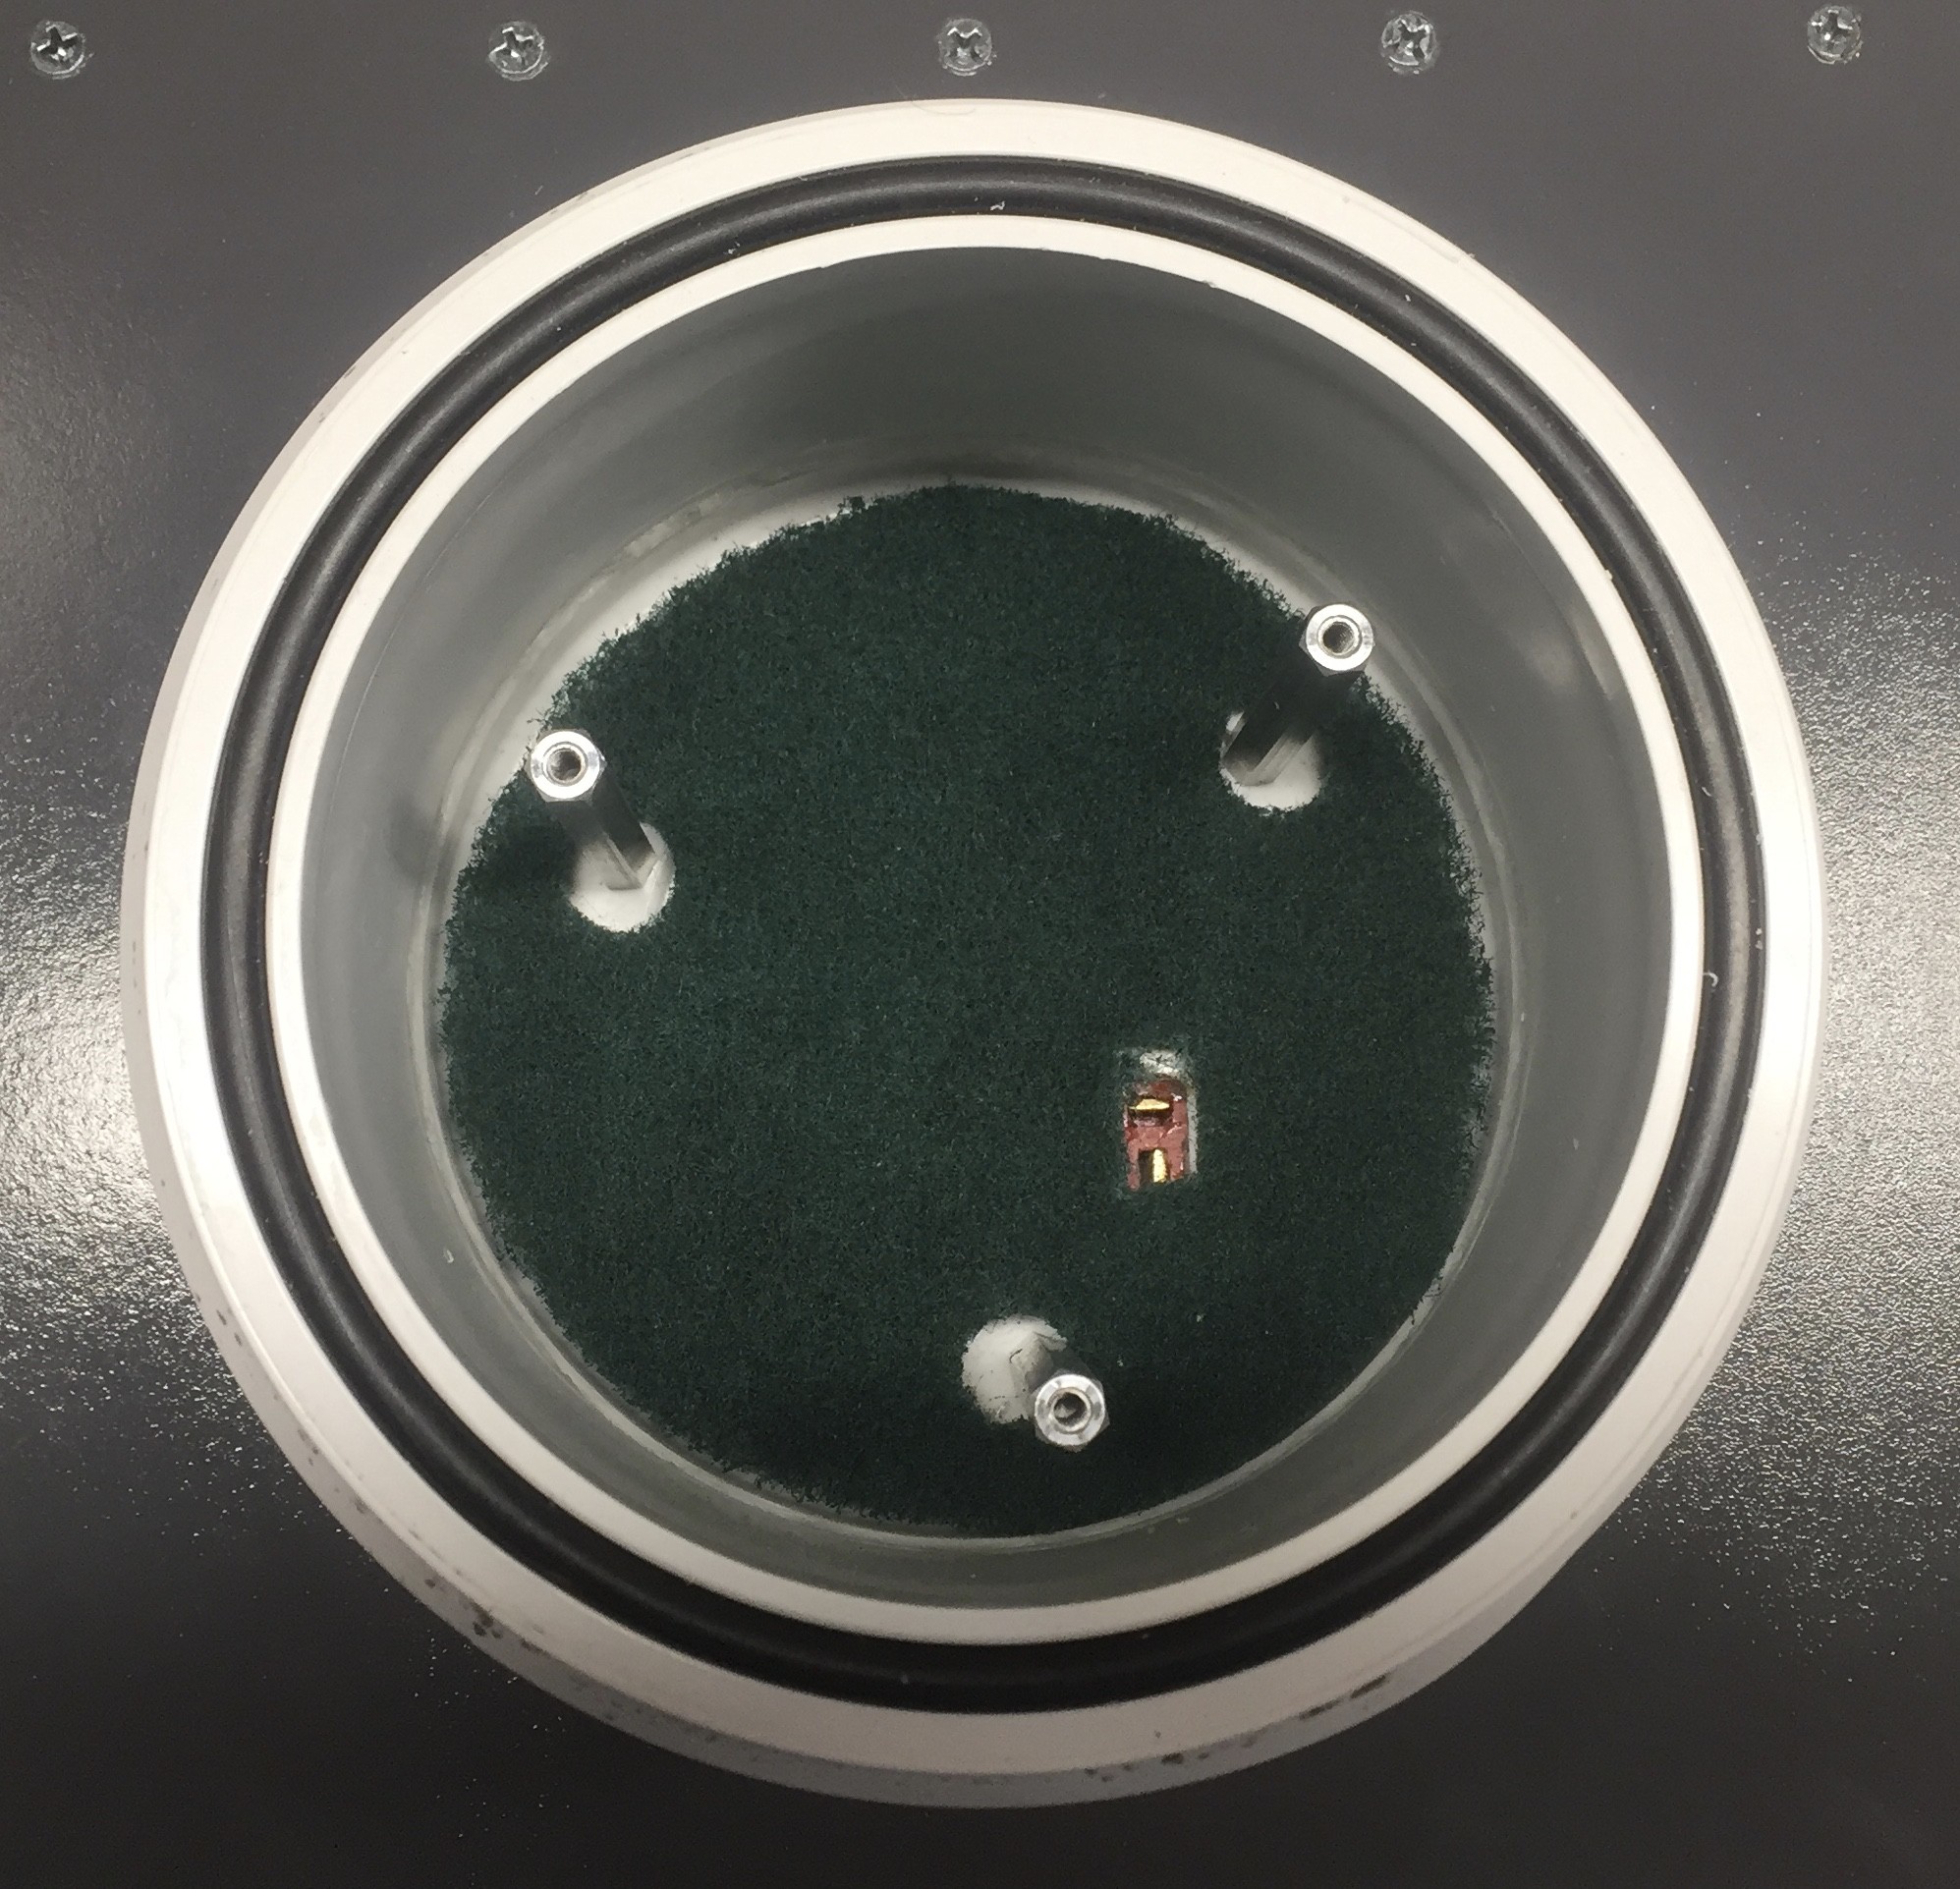
The green material seen at the bottom of the fludizer base is a cut section of Scotch-Brite scouring pad. This will prevent silica beads from falling down into the 1/4" brass fitting used as the air inlet. I will talk more on this later.
Overall assembly is pretty straight forward. Using the M3 fasteners I fixed the motor to the 3D printed mounting bracket. I connected the power to the motor and installed the mounting bracket on the standoffs using the 6-32 fasteners. Then it is as simple as pressing on the magnetic spinner ring.

Since this fluidizer uses air as its working gas humidity will play a big roll in how a particular powder will behave when fluidized. Especially for longer or continuous operations.
Powder coating material will form agglomerates when exposed to humidity. The best option would be to used a nitrogen supply form a welding tank to ensure the particle fluid will not change its properties over time. Since this fluidizer is relatively small and will only be run in short batches air should be okay. That being said it is important to try and stack the deck in your favor at all times!
For this build I will be using indicating silica beads located in the base of the fluidizer to help absorb any moisture in the air supply. They likely won't help a ton but every little bit counts.
In order to keep the beads from clogging my air supply line I installed a cut section of Scotch-Brite scouring pad.

There are actually two pieces being used. One for the bottom which was show in place earlier. The other section actually sits on top of the magnetic spinner rig to provide support for the membrane when a stirrer bar is in place.
From here the upgrades are pretty much complete. I will show the rest of the assembly of the fluidizer below.
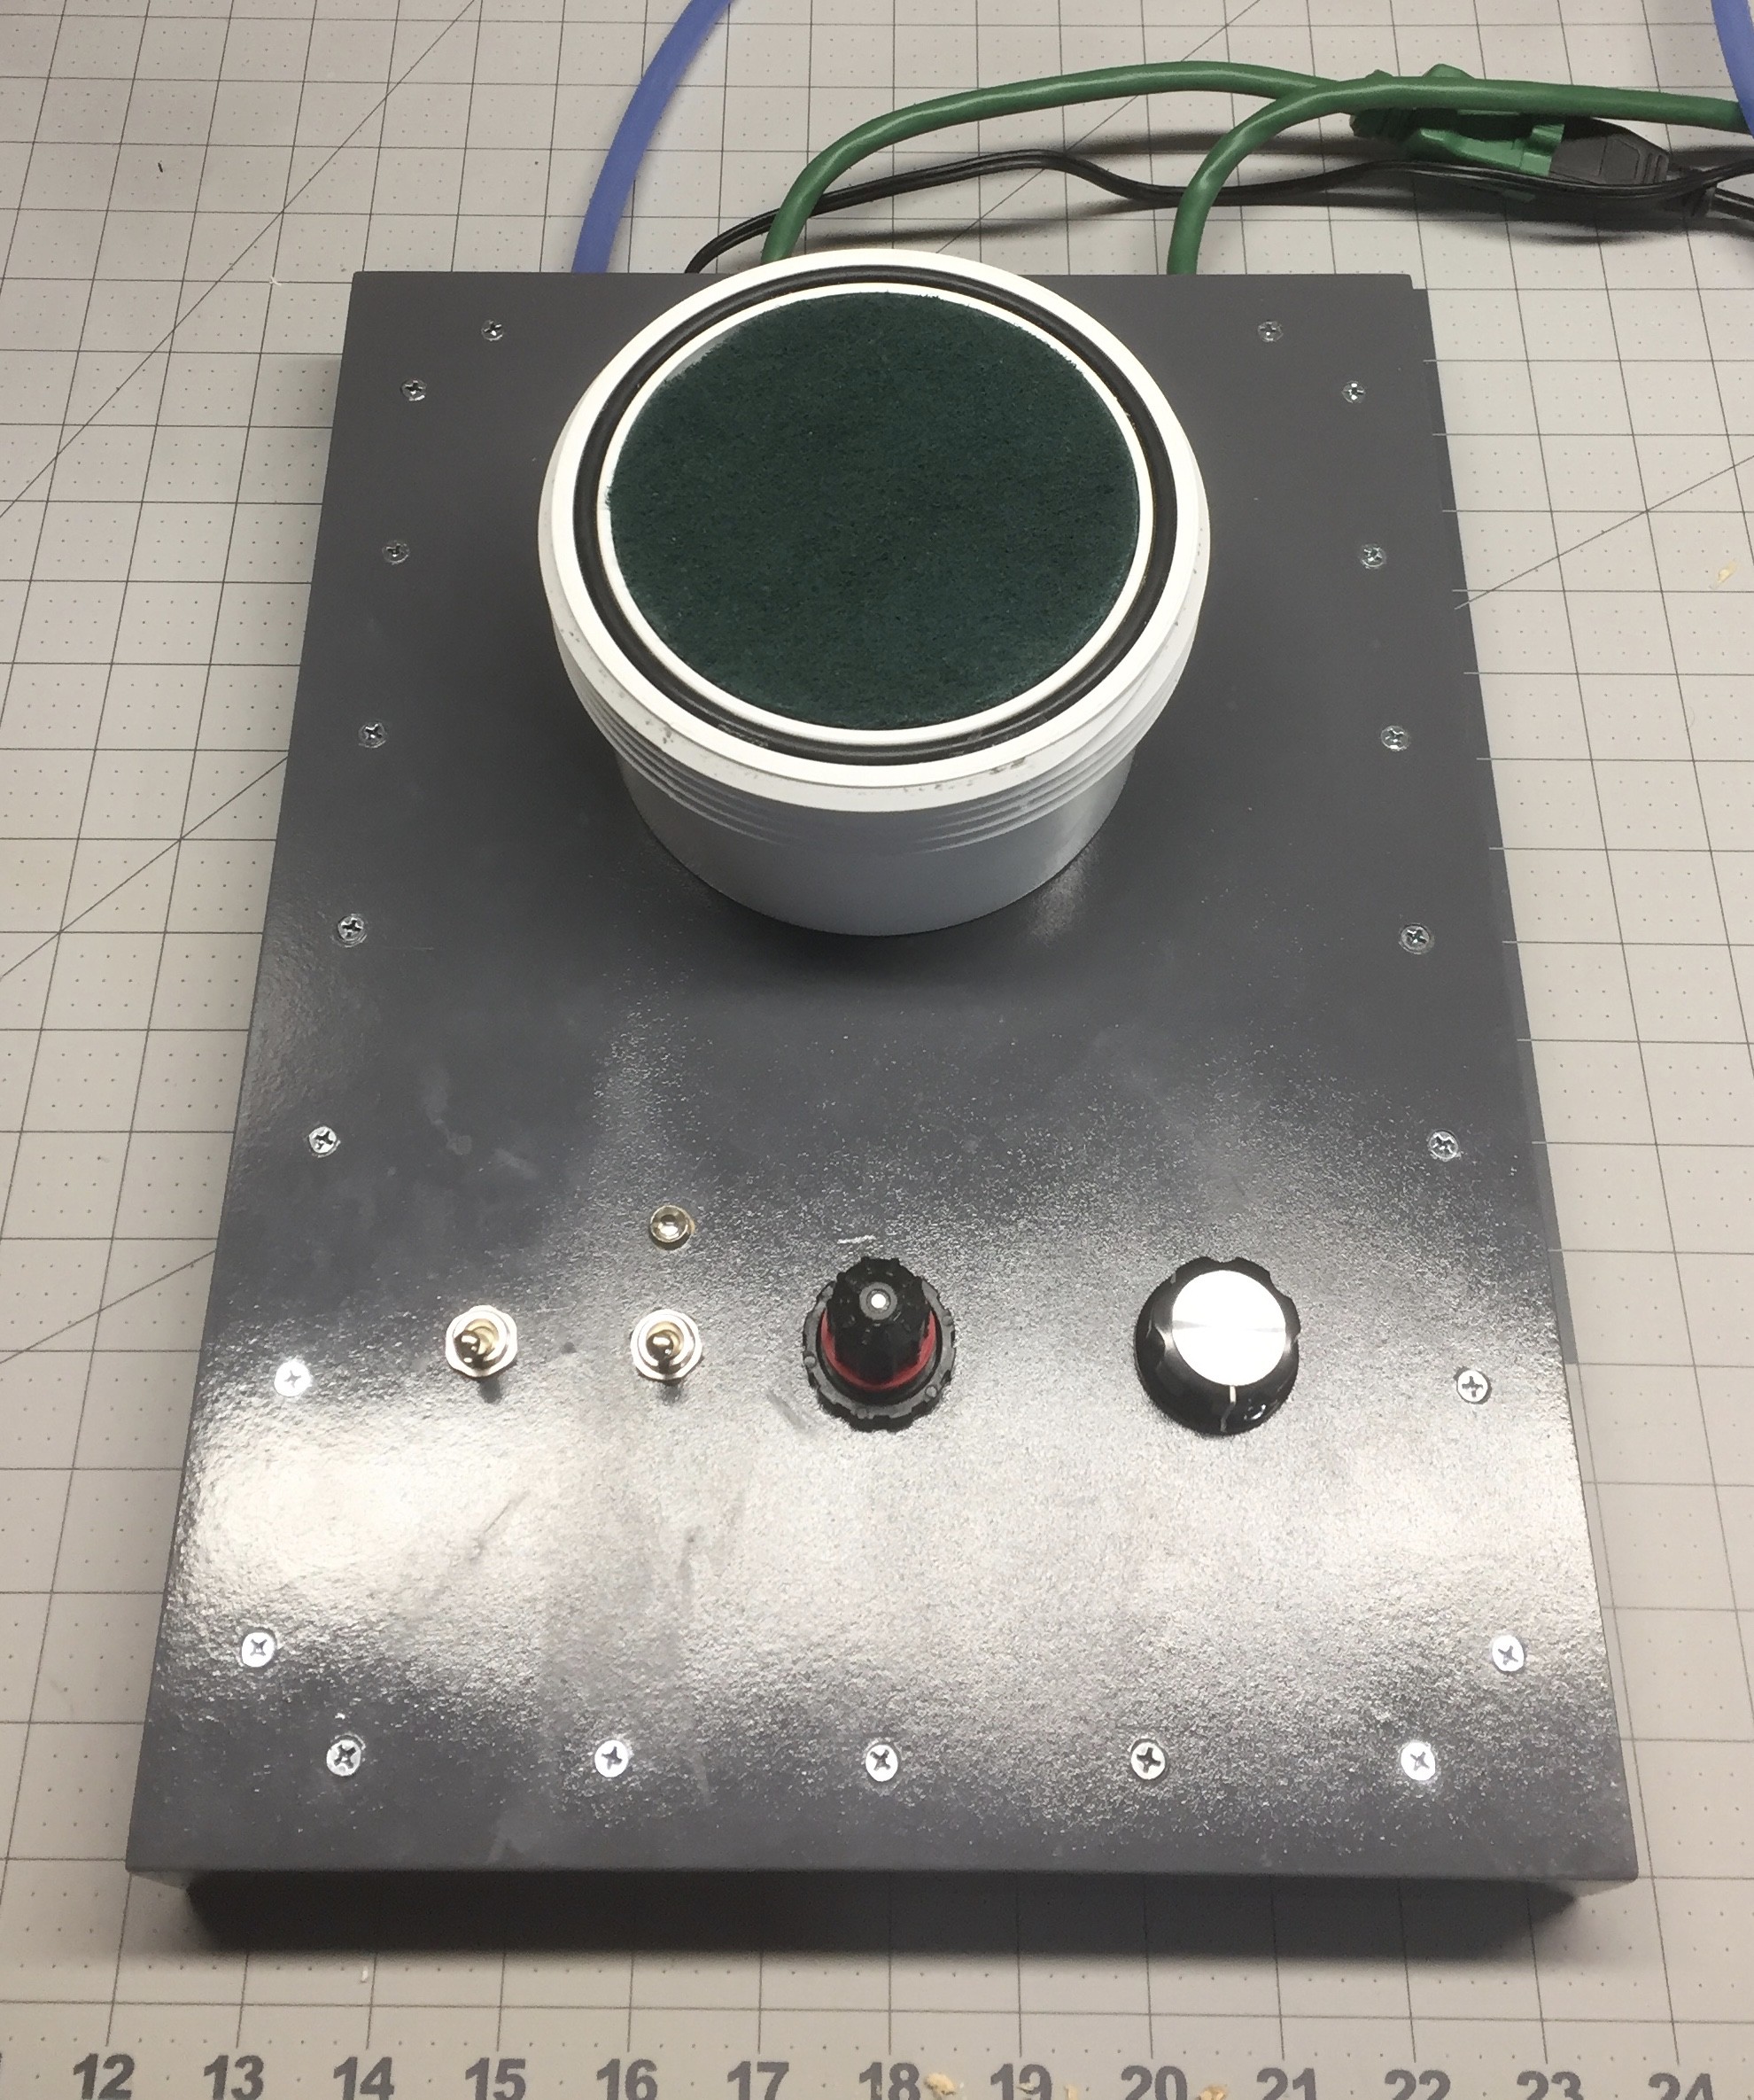
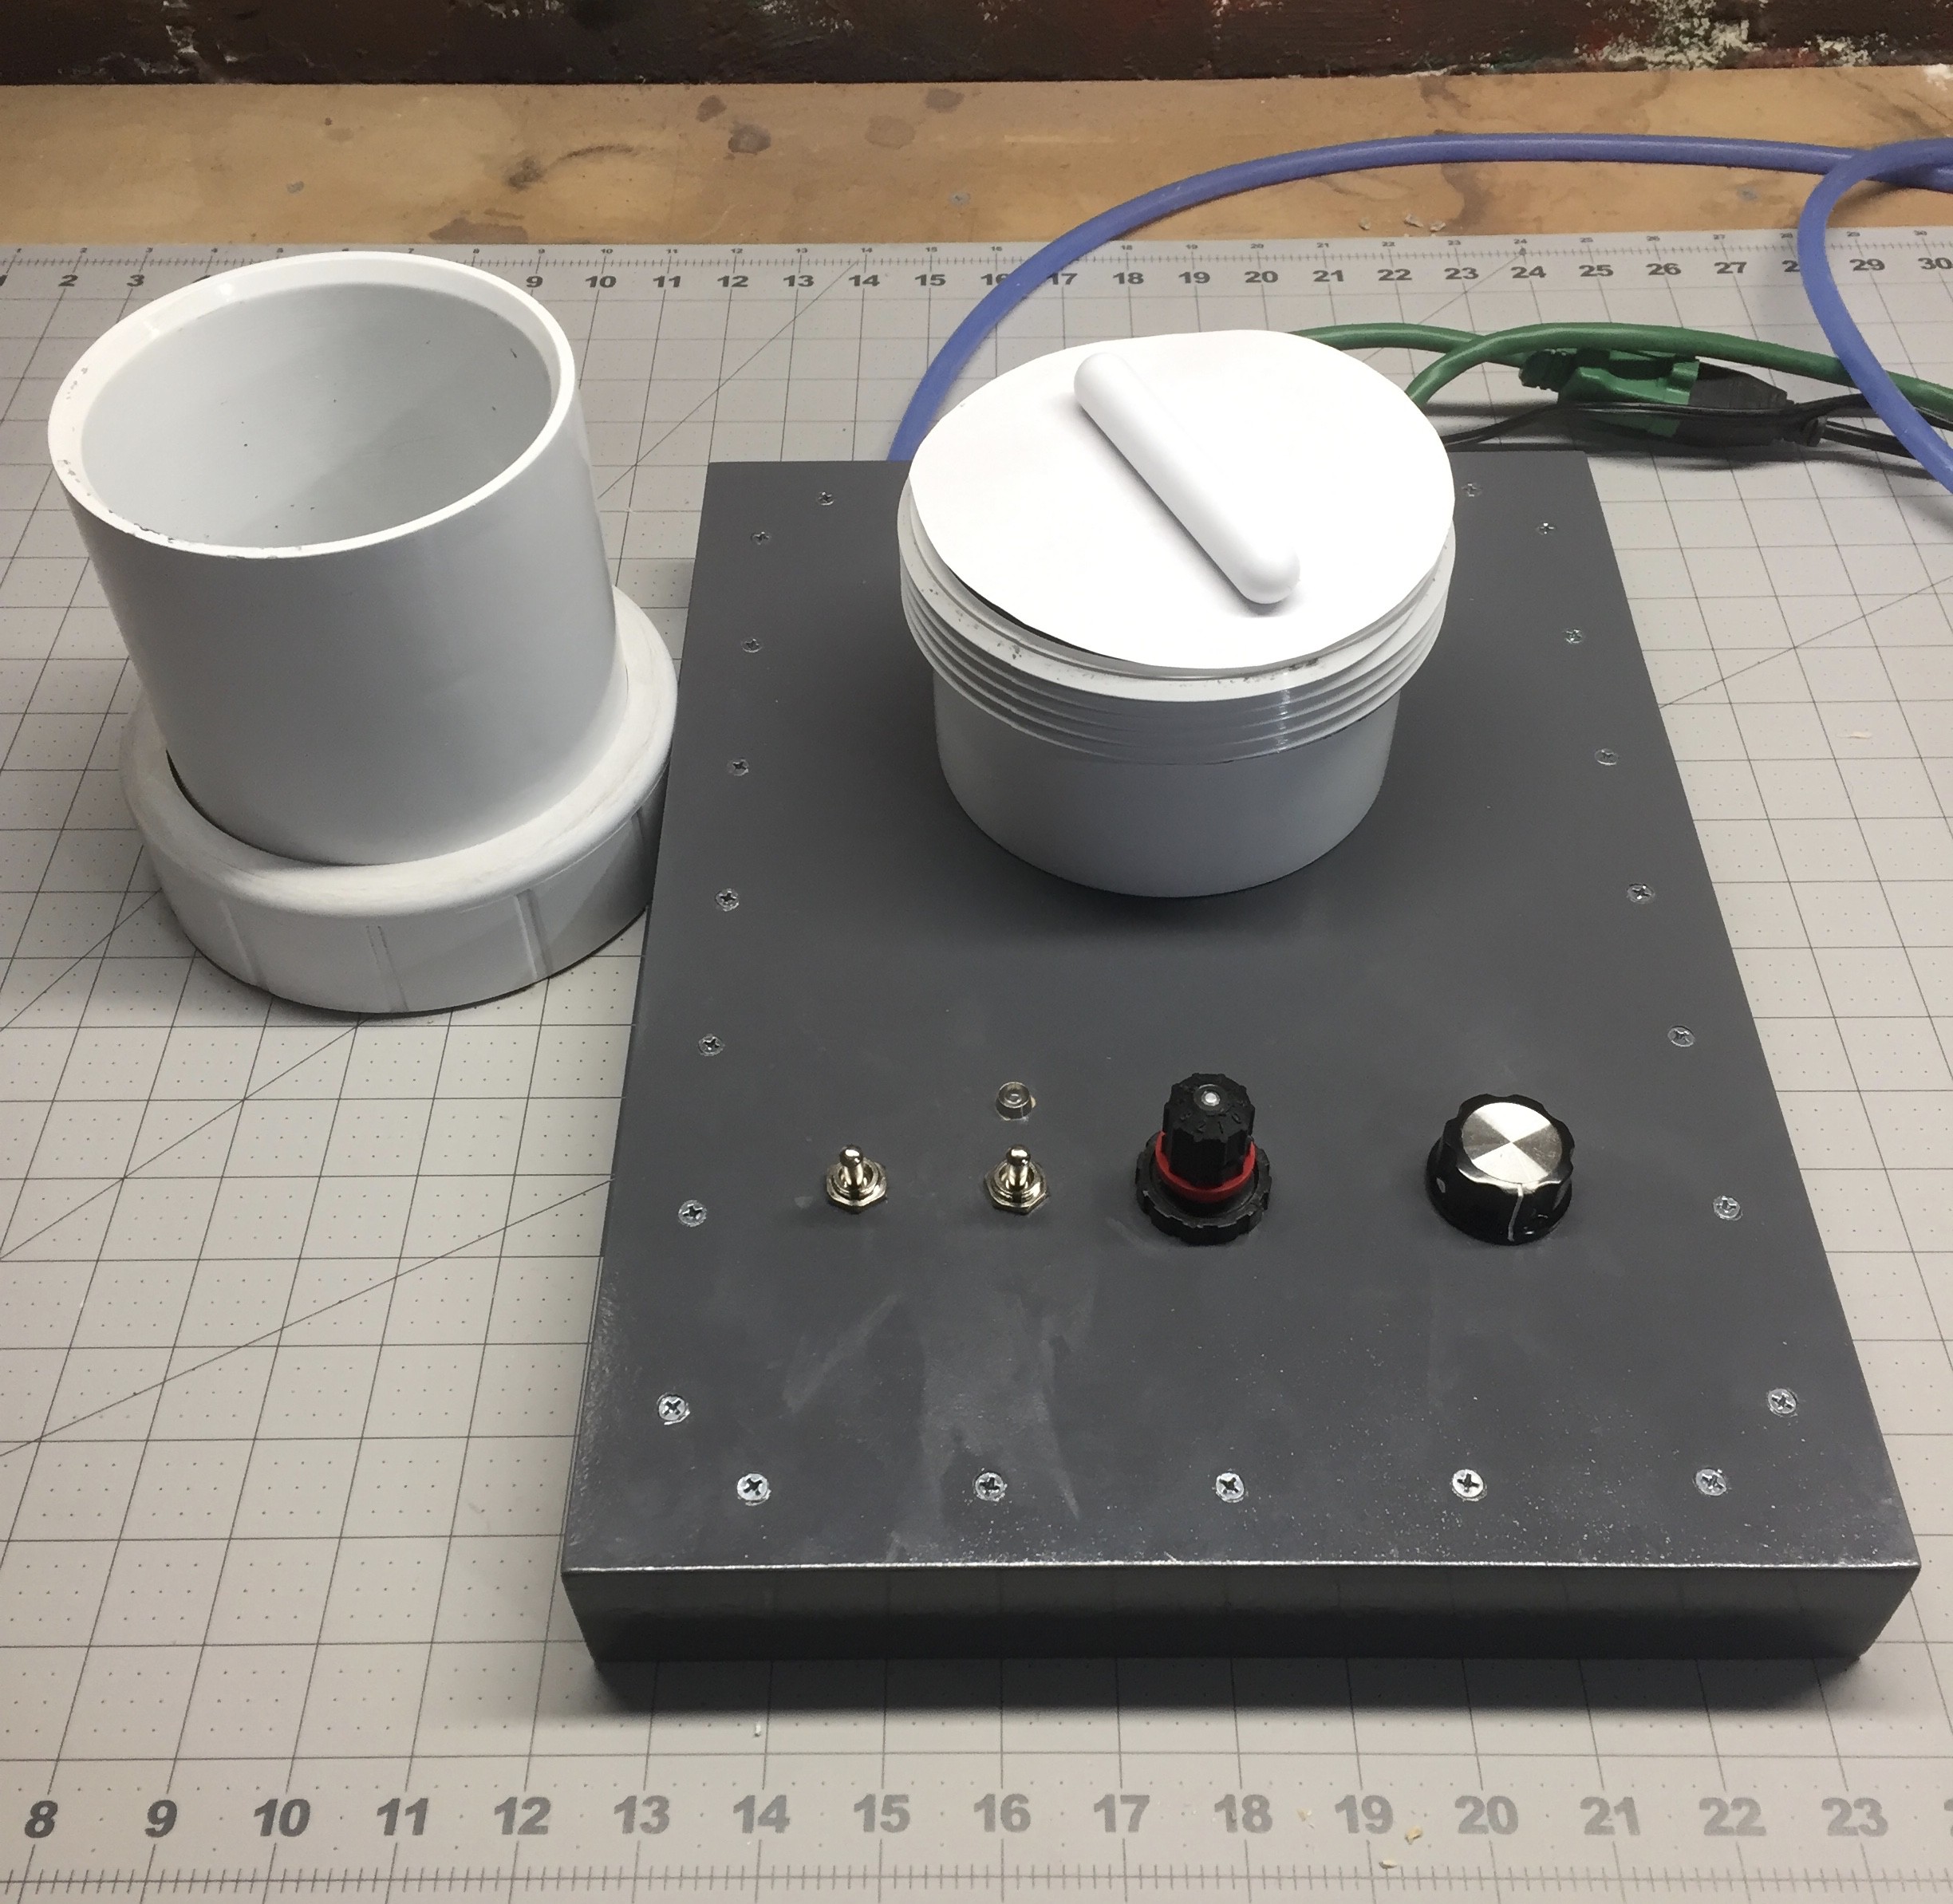
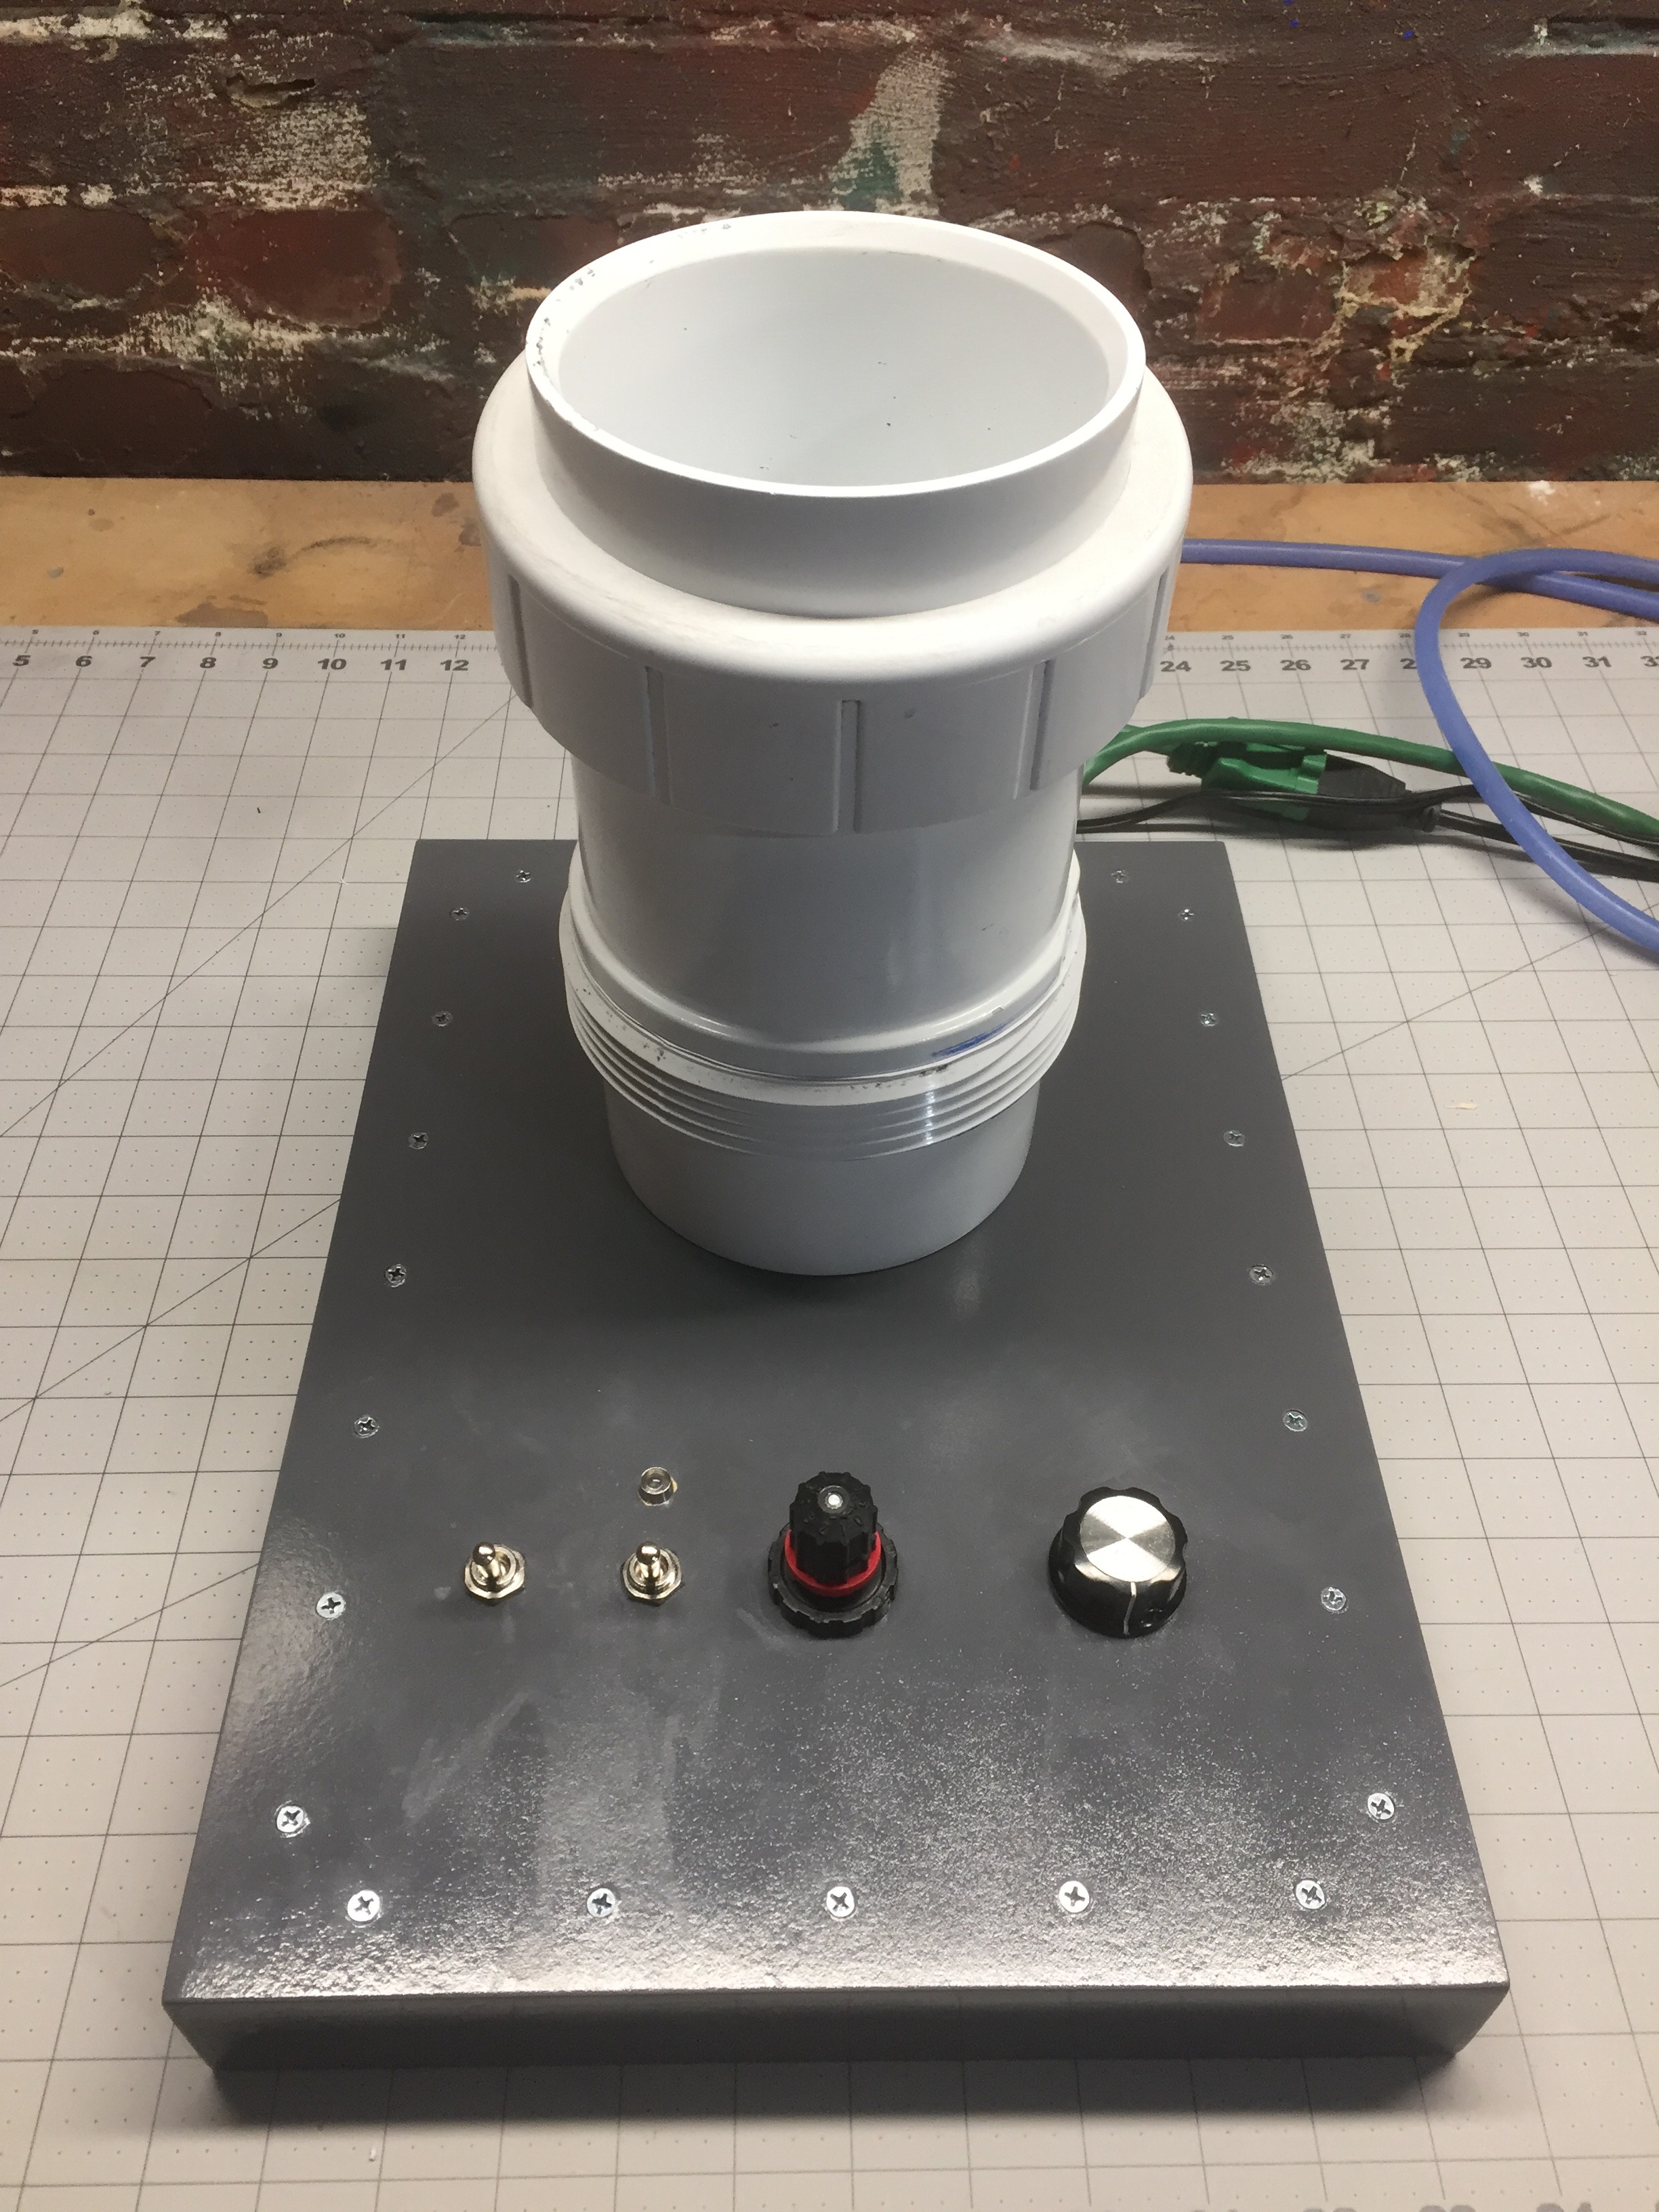
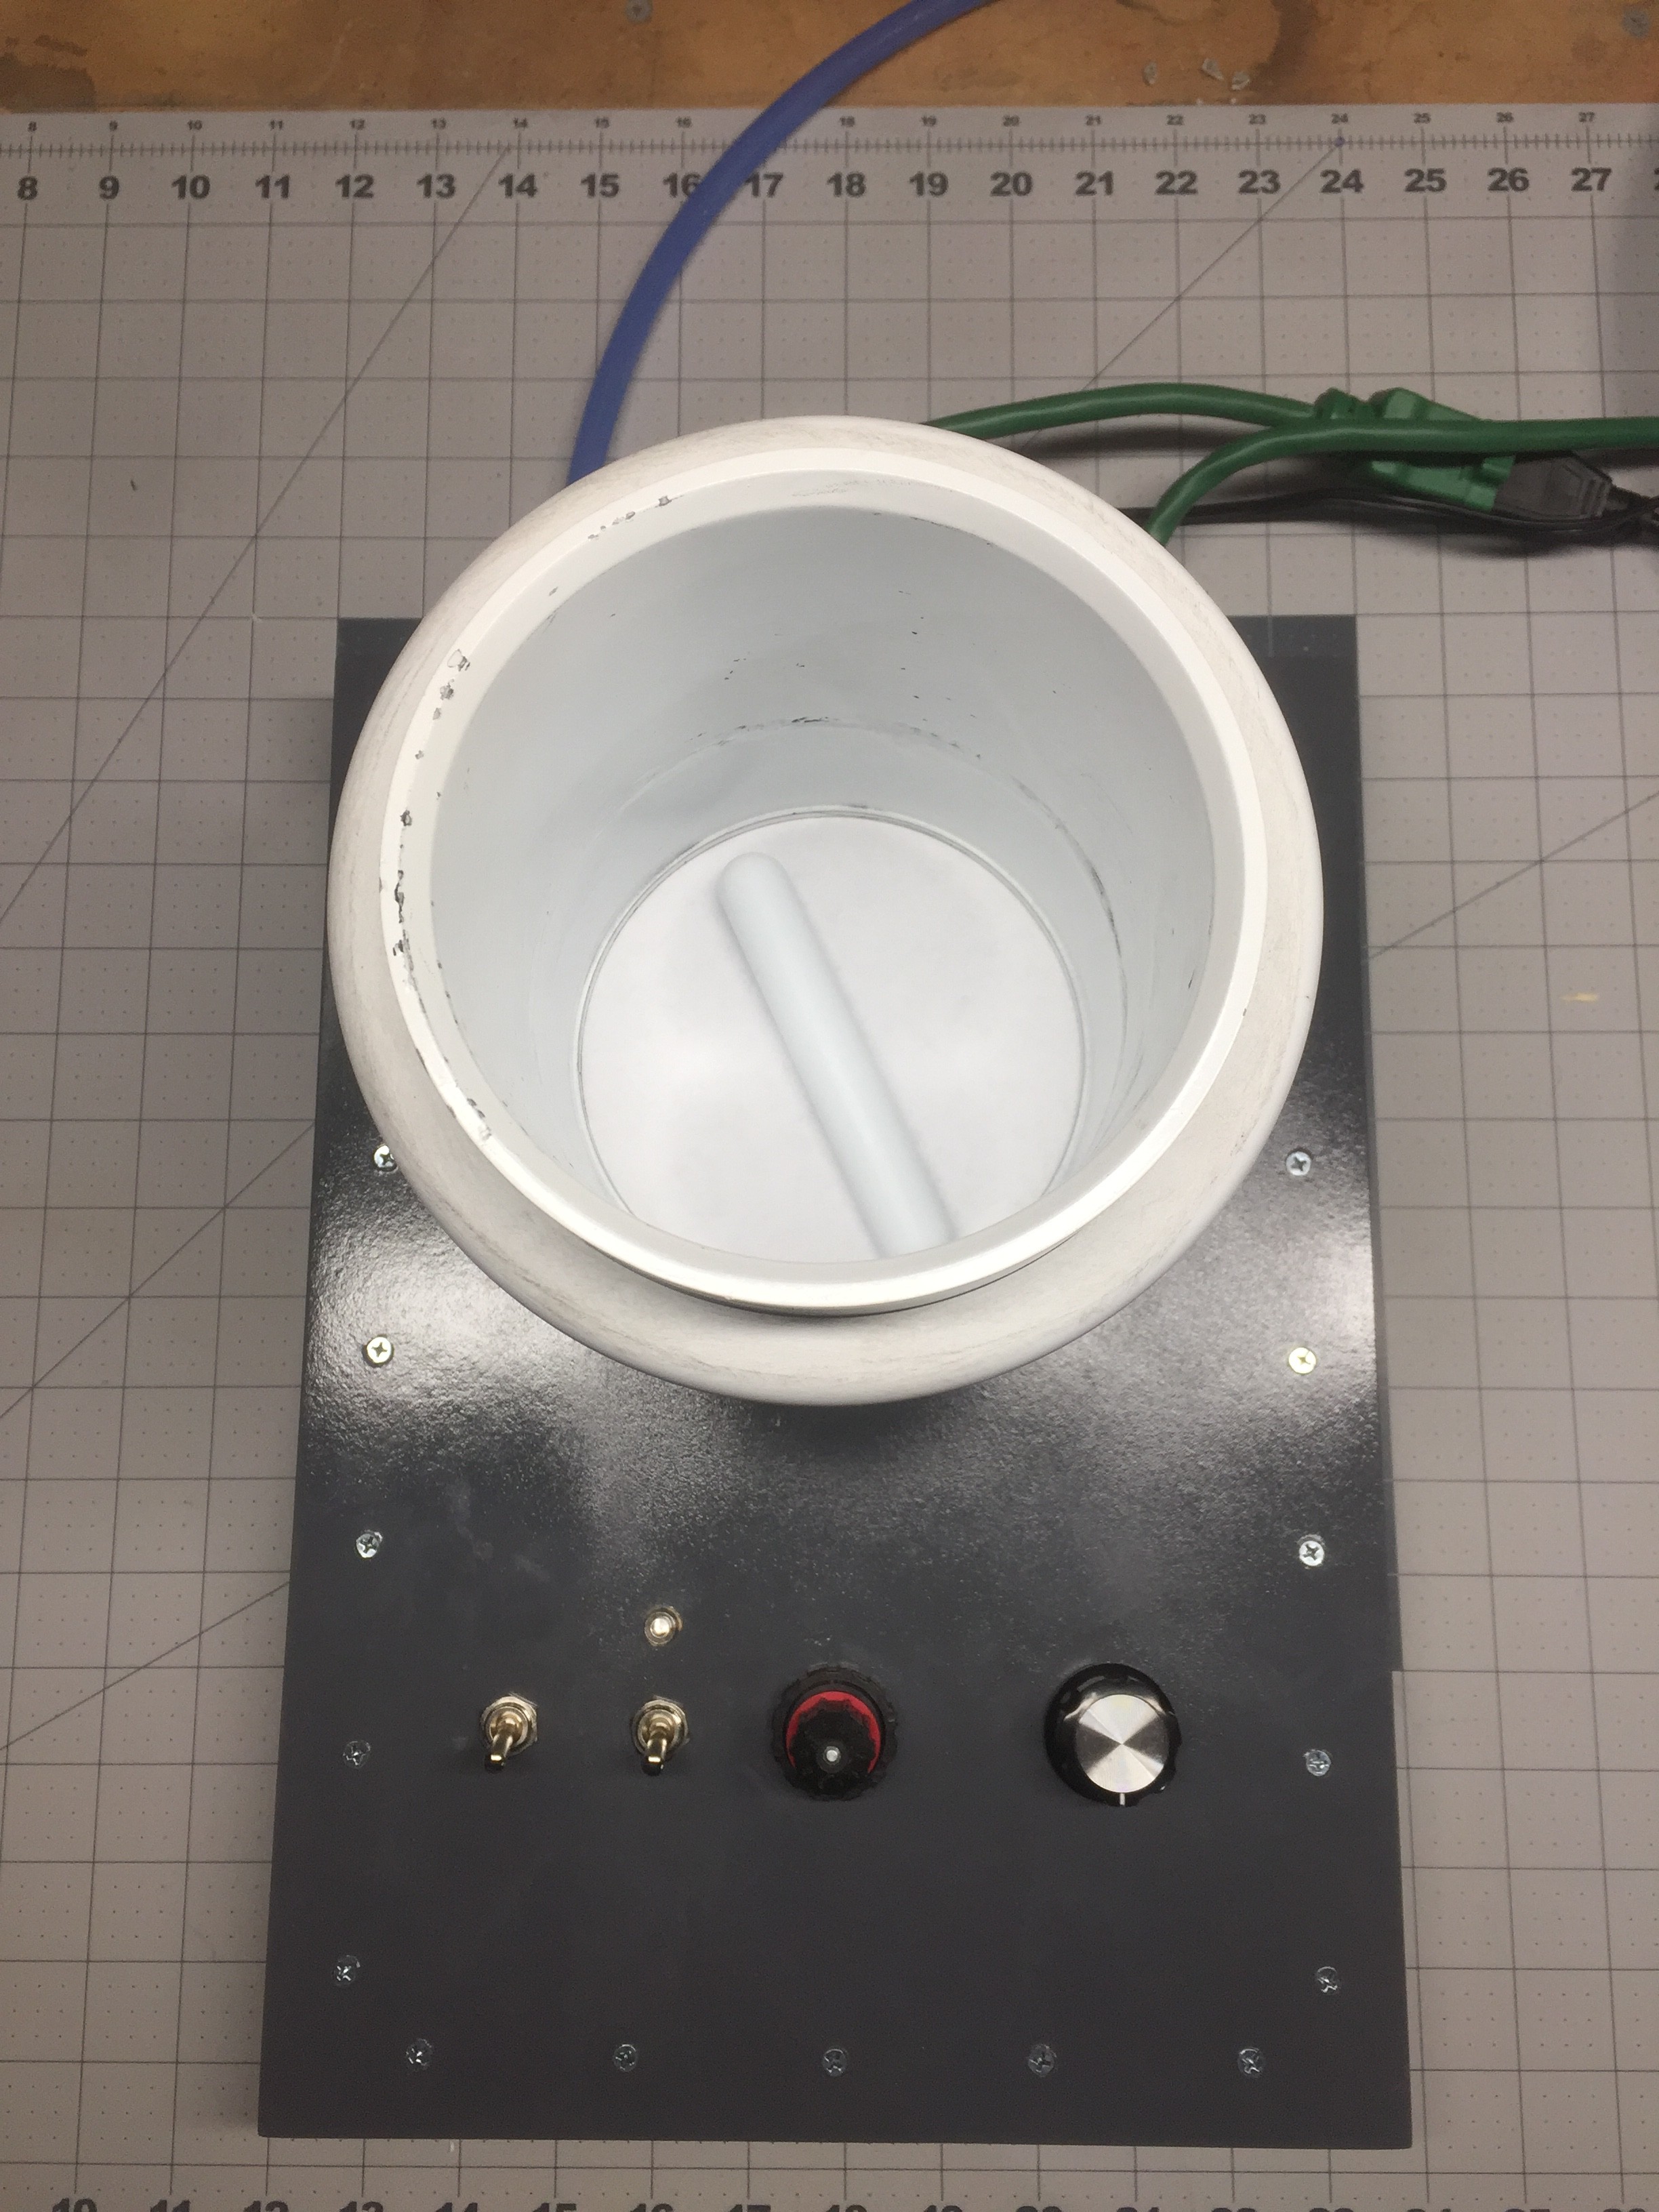
The control of the fluidizer is very simple. The left most switch turns on the air supply, the second switch turns on the magnetic stirrer. The center dial is a precision set flow valve for adjusting the air supply and the right dial is the speed control for the magnetic stirrer.
Overall the upgrade was a total success. I will be posting a few videos soon on the operation and various characteristics of fluidizied powders so please watch for another log entry soon!
I hope you enjoyed following along!
Discussions
Become a Hackaday.io Member
Create an account to leave a comment. Already have an account? Log In.