Dmitry
Retropie is the most popular emulator for Raspberry Pi. In fact, it comes from the Raspberry Pi version of the EmulationStation application (former front-end for RetroArch emulators). And now it has grown up to a big and popular open source project, offering extended features application for ARM-based devices. Besides RPi Zero/1 and Raspberry Pi 2/3, there are also distributions for Odroid-C1/C2 and Odroid-XU3/XU4 (both on Ubuntu), as well as additional versions for PC devices running Debian/Ubuntu operating systems.
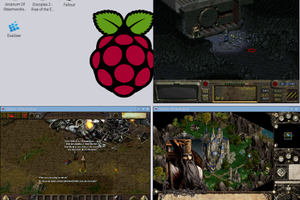
The main feature of Retropie is that it includes almost all the previous experience of console gaming emulation. It consists of the EmulationStation’s interface with themes for emulators, Kodi media-player, RetroArch (frontend for the Libretro API which helps many of emulators work) and more than 50 systems pre-installed by default.
Build Your Own Retropie Gaming Super Machine
By following this tutorial you’ll be able to make your own Raspberry Pi retro gaming console with Retropie. A powerful all-in-one gaming machine to play almost all known console games as well as the large part of popular old and medium age x86 PC games. For that outstanding retrogaming project you will need:
Model | Raspberry Pi 2 Model B | Raspberry Pi 3 Model B |
Frequency | 1000 MHz | 1200 MHz |
Memory | 1 GB RAM | 1 GB RAM |
Operating System | Raspbian Stretch from November 2017 | Raspbian Stretch from November 2017 |
Software | Retropie for Raspberry Pi 2/3 ExaGear Desktop for Raspberry Pi 2 | Retropie for Raspberry Pi 2/3 ExaGear Desktop for Raspberry Pi 3 |
Additional hardware for any RPi model:
Micro SD card (8Gb minimum) |
|
USB Controllers of your choice (almost any USB-controllers are compatible, even XBox360 and Wii) |
|
A mouse and a keyboard (for the first-time setup) |
|
A TV or a monitor (with HDMI and/or AV cables) |
|
Additional PC (Windows, Linux or Mac) for initial SD card installation and ROMs transferring |
|


Well, as soon as you gather all the necessary parts together, the real work just starts at this point. Generally, you need to do the following big steps:
- Download and install Retropie
- Configure controllers
- Configure WiFi
- Transfer the ROMs (game files)
- Manage emulators (optional)
- Add ExaGear emulator for x86 PC games (2018 must-have!)
Retropie is compatible with any model of Rasberry Pi but it’s recommended to use the Raspberry Pi 3 Model B for the best performance.
How to Install Retropie
In this post, we are going to introduce only the Raspberry Pi tutorial, as one of the most popular devices to build a gaming machine on. If you’d like to learn more tutorials, visit the special page on Retropie official website.
Basically, there are two options for installation of Retropie on RPi devices: set up Retropie as an SD image (with no OS on a hardware) and installation on top of an existing operating system.
Install Retropie on RPi with an SD Card Image
To make a Retropie image on some SD, follow this simple algorithm.
1. Download the proper image of Retropie (you’ll need to choose between Raspberry Pi 0/1 and Raspberry Pi 2/3).
2. Unpack the downloaded archive using the app of your choice (note, that the file is going to have the .img format).
3. Write an image using an SD card and a special application. The further depends on what additional device you are using: Windows PC, Mac or Linux device. For PC use Win32DiskImager app, for Mac – Apple Pi Baker, and for Linux – Etcher (or use the command line). Depending on your device, follow the steps respectively (see below):

4. As soon as the image is ready, simply insert the SD card into your Raspberry Pi and switch it on. The Retropie will start booting automatically. On the first boot, you’ll need to configure the controllers. For that, simply hold the proper button you want to assign.
Also, it’s worth mentioning, that on the first boot, you won’t find any emulators. To display them, you need to add the respective ROMs for that gaming system in the system folder. We’ll show you...
Read more »