frankstripod
-
Thank you Hackaday!
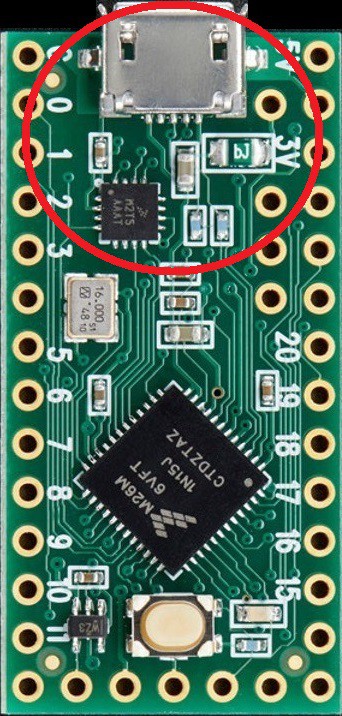
06/01/2015 at 02:08 • 0 commentsThe two Teensy-LC boards I won from the 125 Teensy-LC giveaway came in!
I can't believe I won and I am so excited to use both of them on my projects!!!
(And stickers too!)
-
How I would use a Teensy-LC?
05/09/2015 at 12:59 • 0 commentsI would force it to act like a mouse as part of an expandable system for my project.
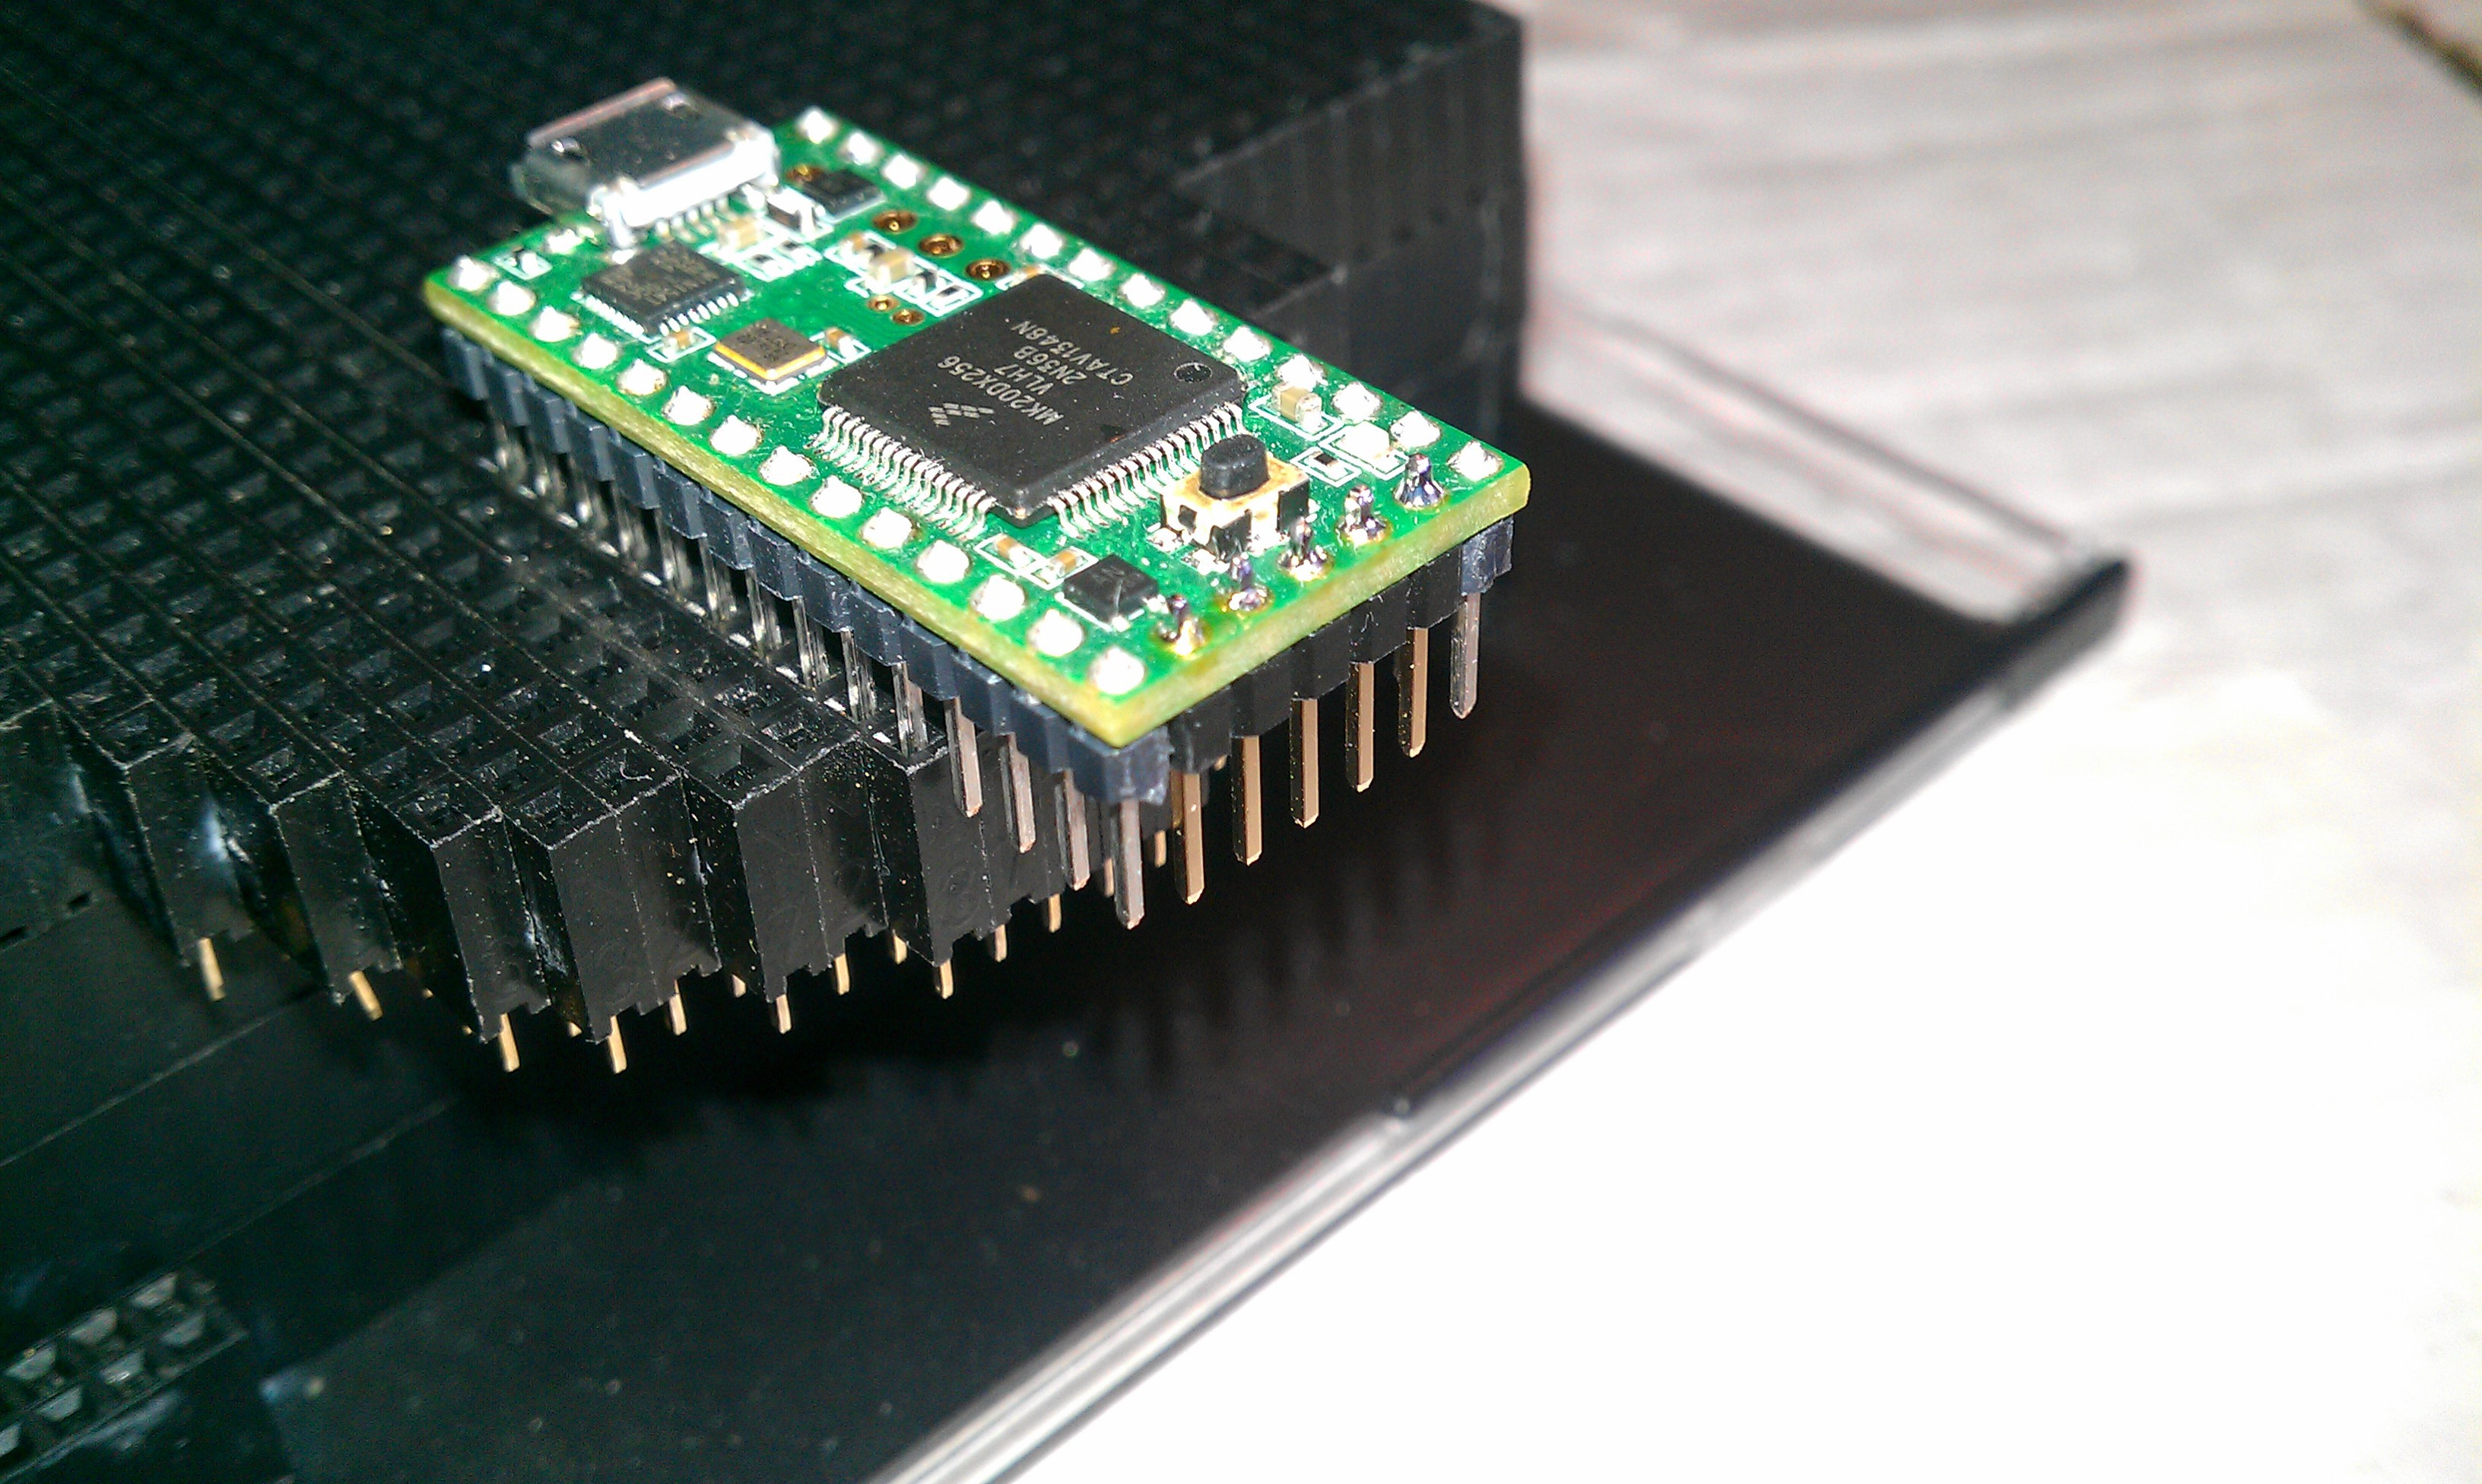
Each Teensy-LC pictured below would use its built in USB HID mouse function, receiving mouse moves and commands from a Teensy 3.1 and USB Host.
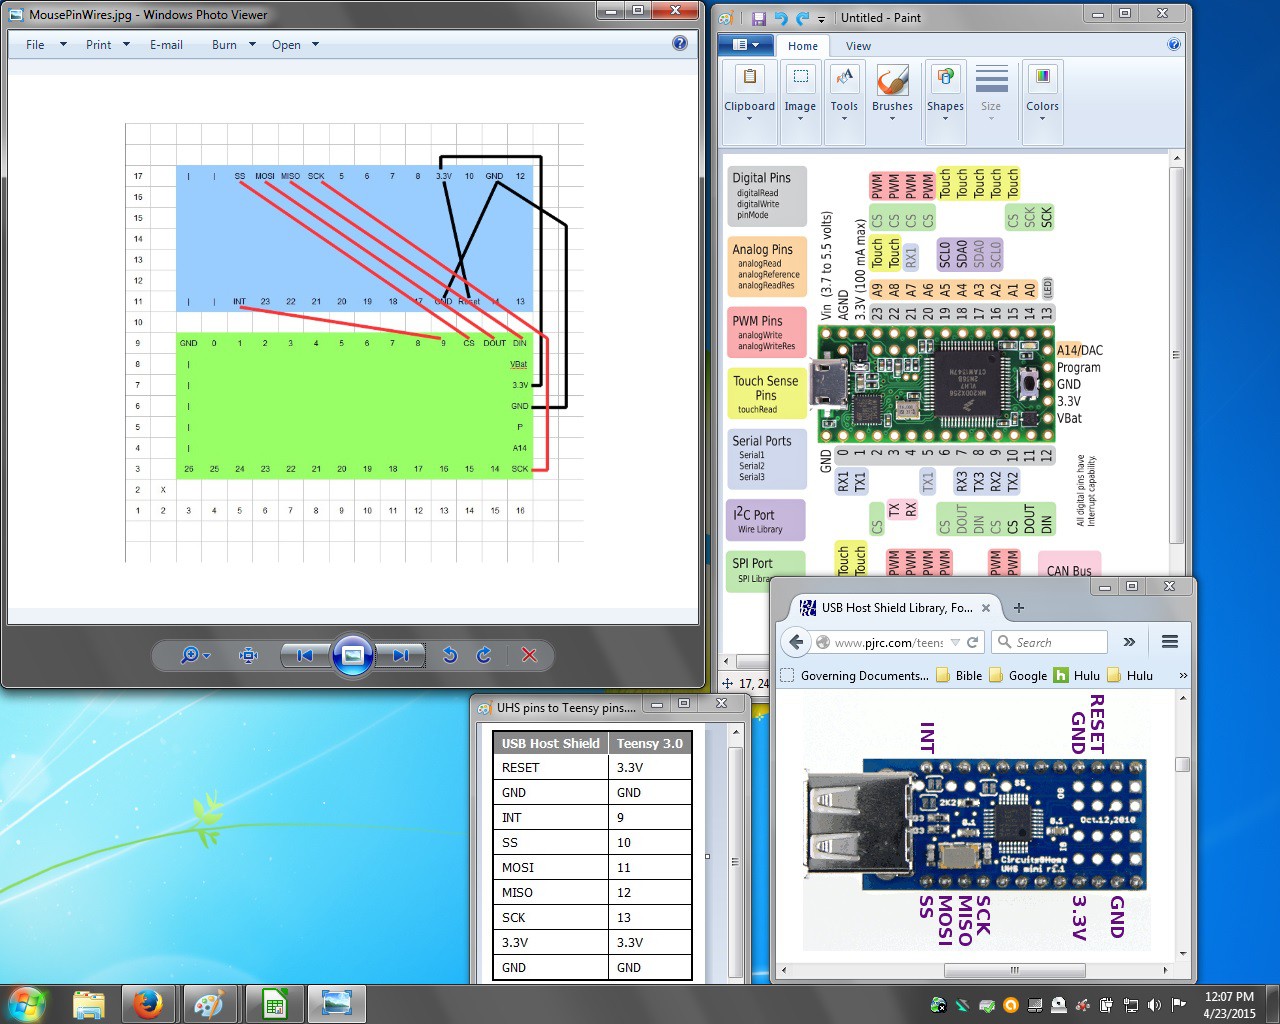
I can't believe how perfect the timing is for this. I recently received a Circuits@Home USB Host Shield Mini as a gift, and already had it rigged together with my Teensy 3.1. The combination translates the USB data to serial and routs it to the right port.
![]()
I could make a 3D printable case file that would include several sizes depending on how many ports you wanted to build, or maybe a snap together system that adds ports to the bus as needed.
Here is the part I really like:
I really do not want to trick the host computers with a hack, as I mentioned in my previous log. This is the part I really want:
![]()
Using a separate Teensy-LC for each computer will maintain a continuous connection, allowing for fast switching from the device and eliminating the need for python scripts.
Data Flow:
USB Mouse to
USB Host Shield to
Teensy 3.1 using SPI4Teens3 in the USB Host Shield Library, to
I2C (may change this, but there is a new i2c_t3 library made for Teensy3!)
To each Teensy-LC then output as USB HID mouse moves
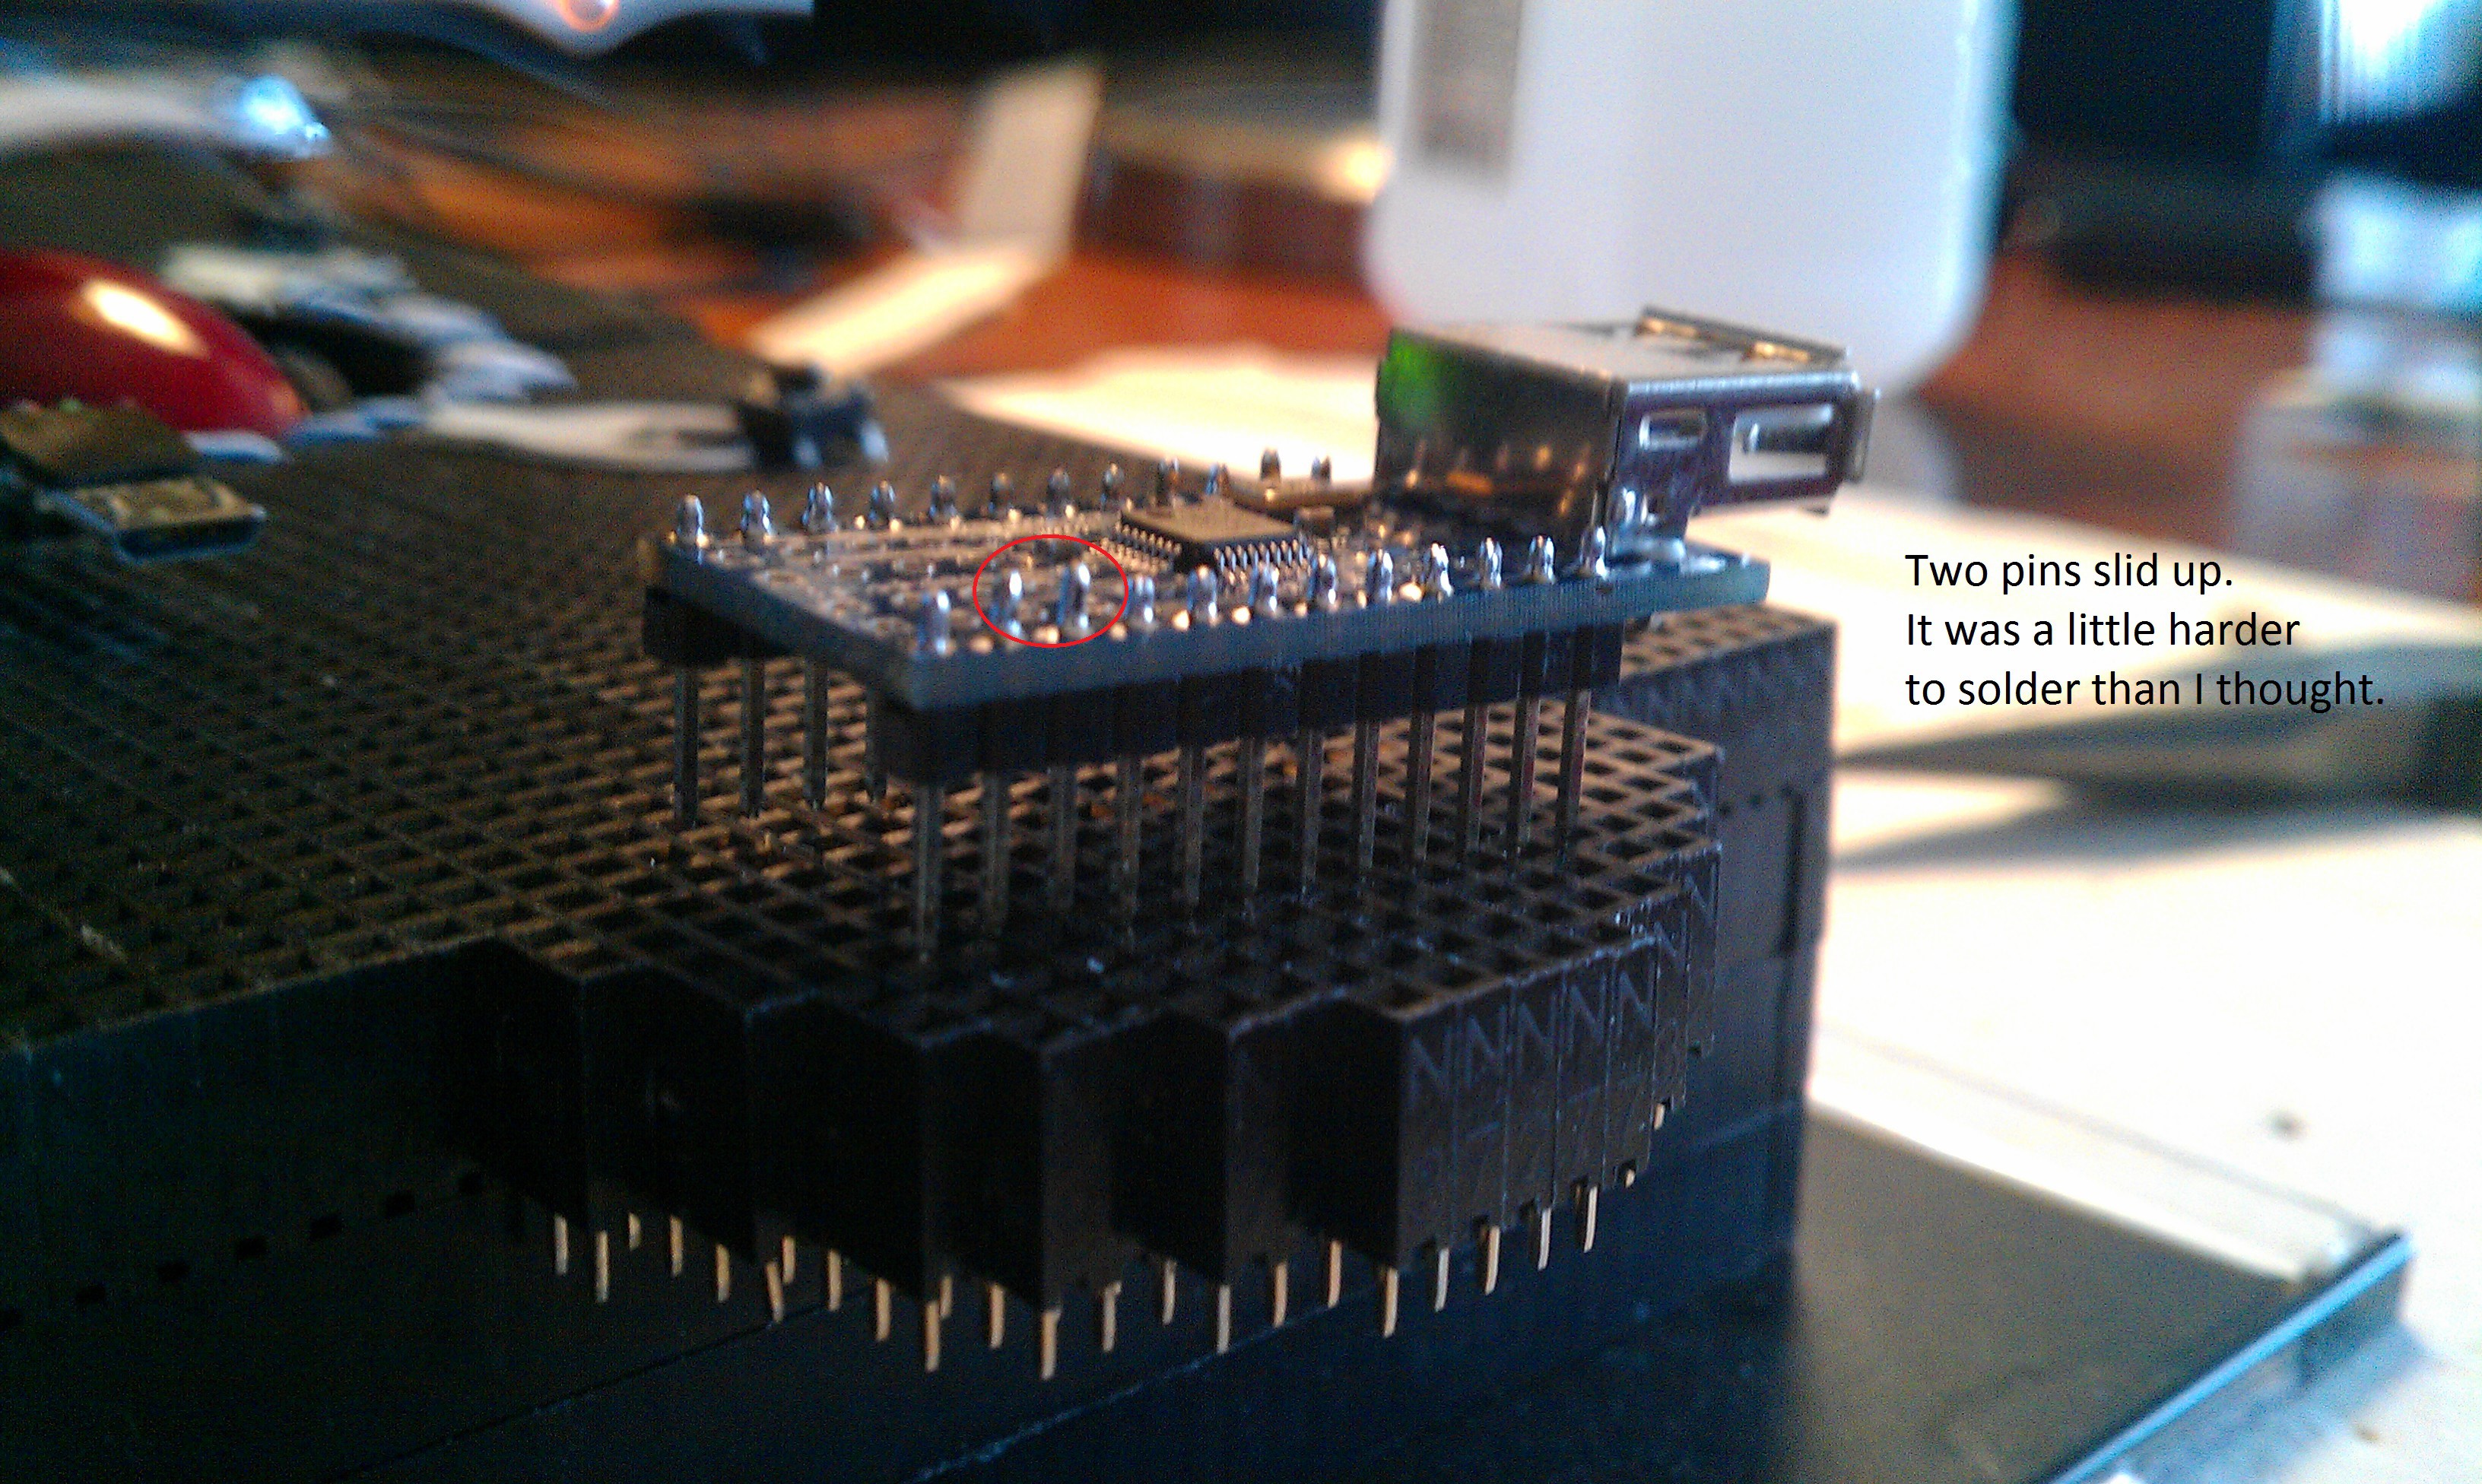
Relayed to the right computer.I Soldered back pins on Teensy 3.1 and pins on the host shield.
![]()
![]()
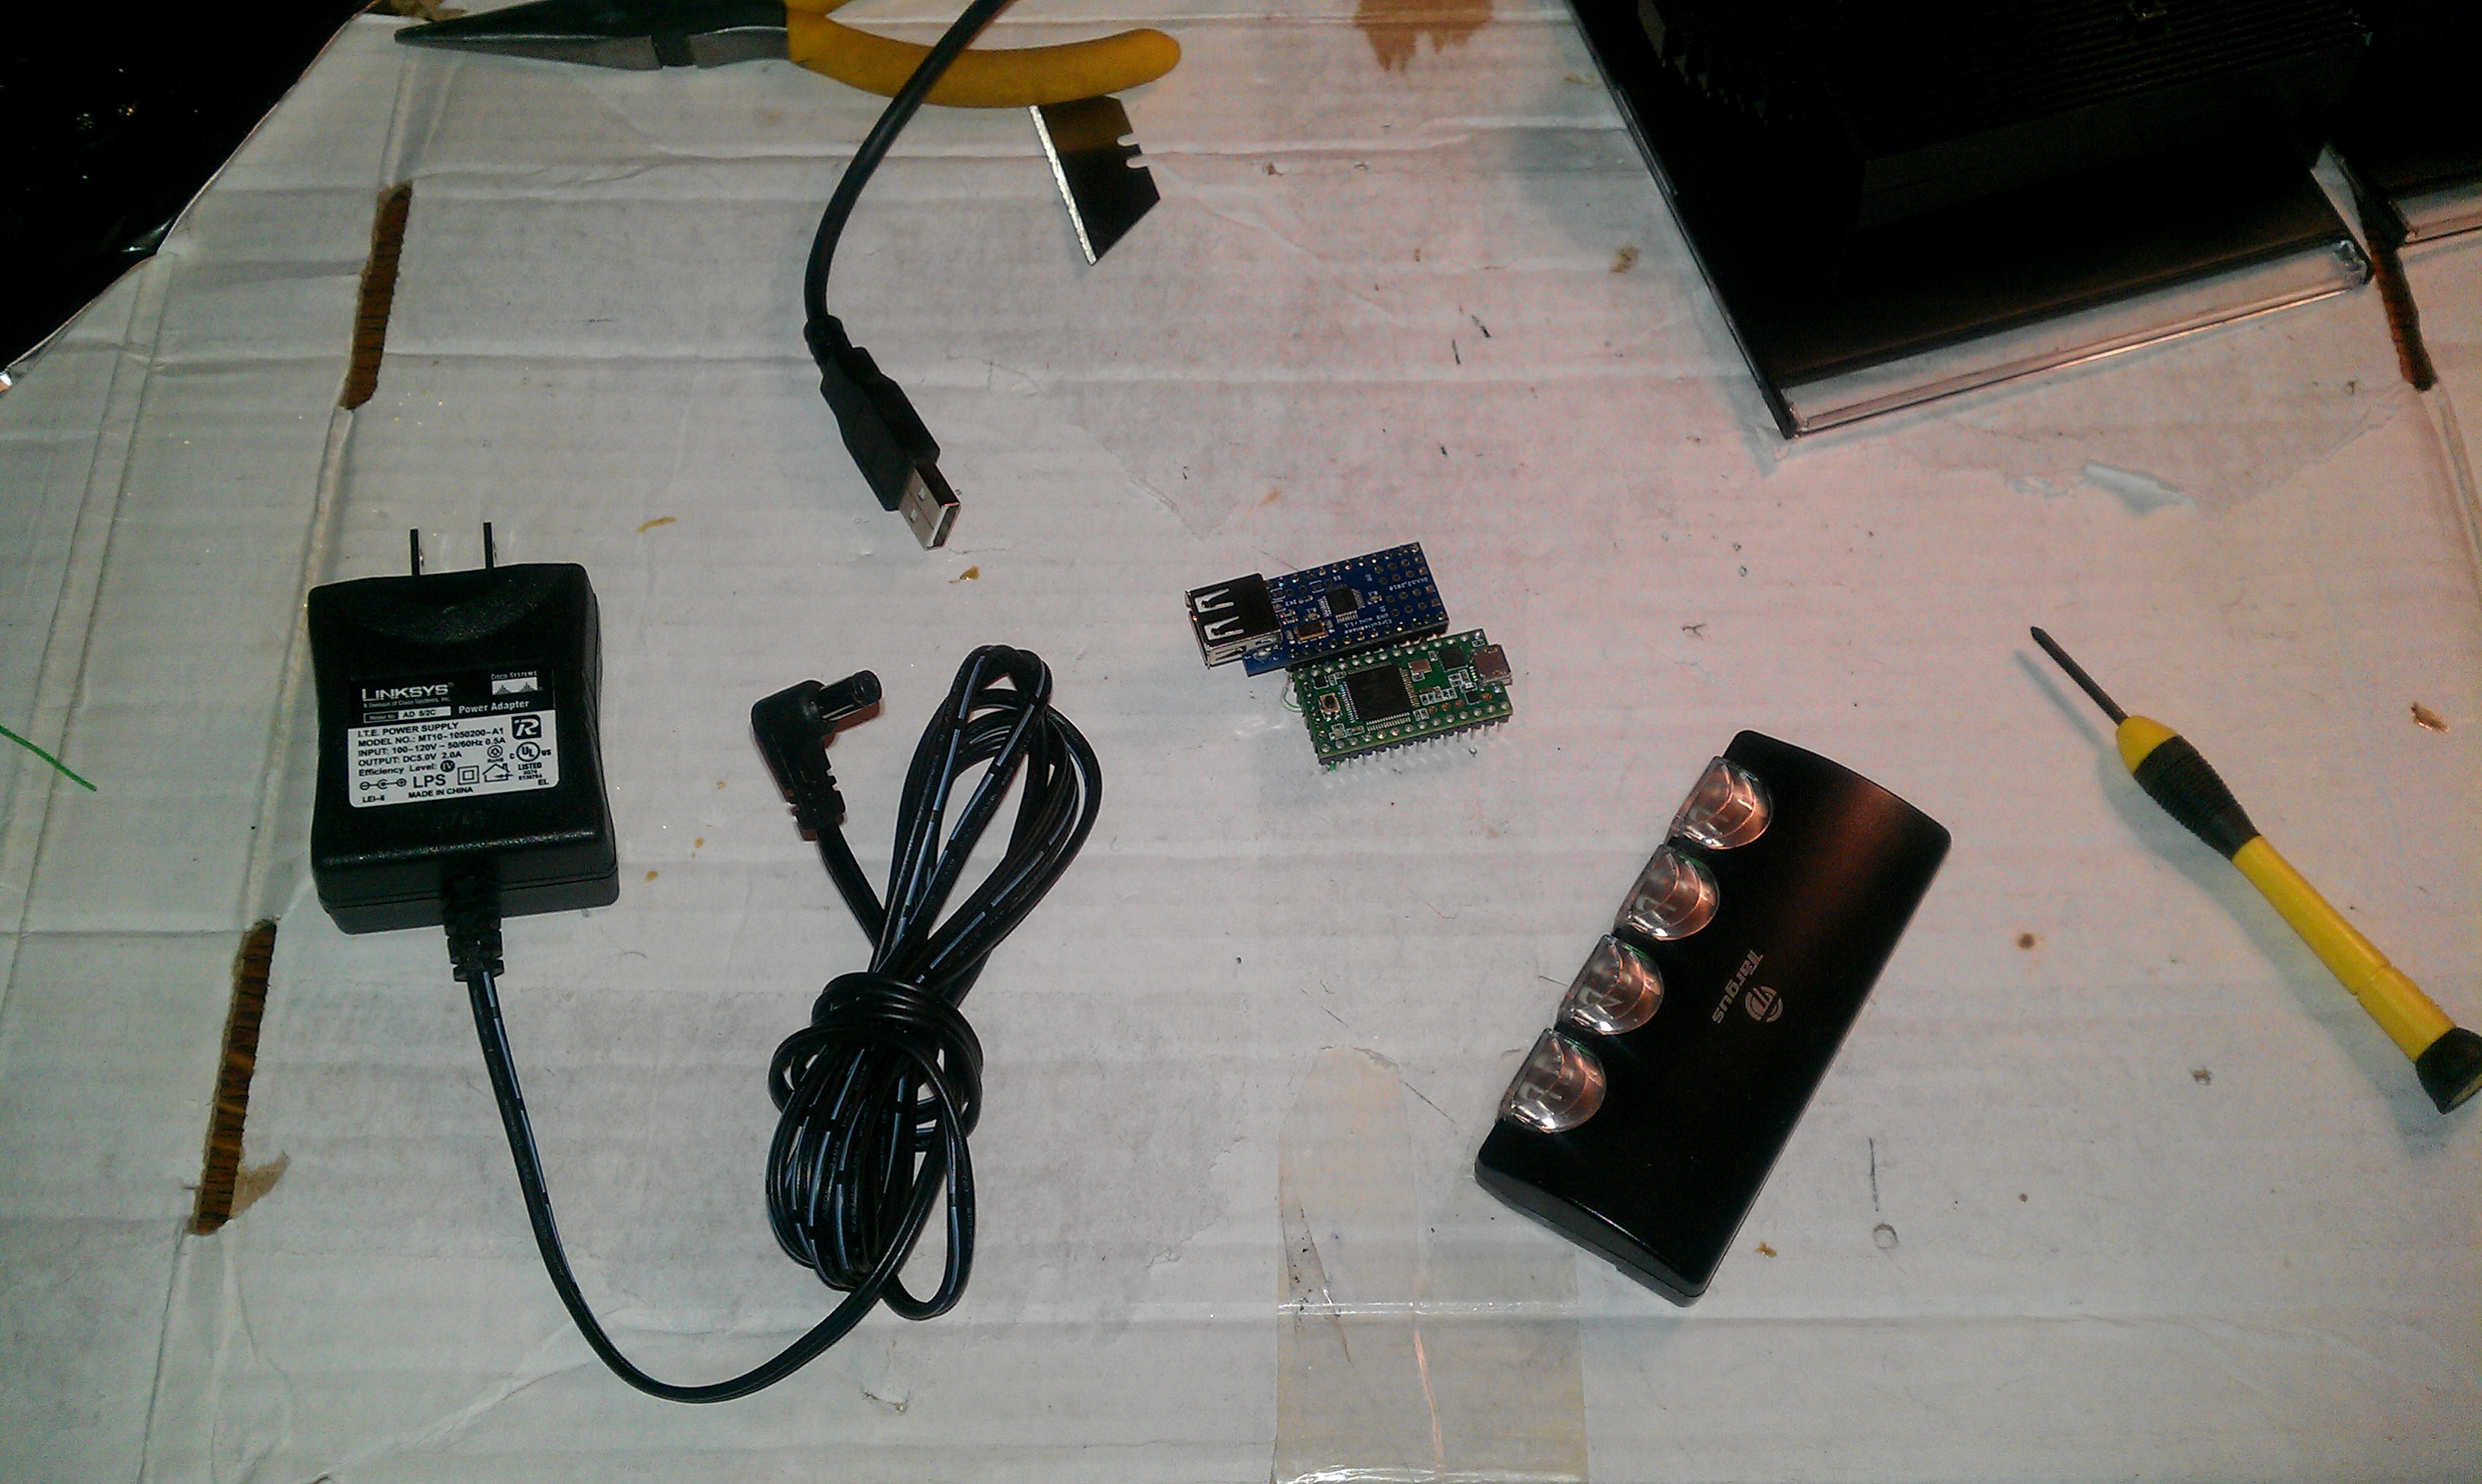
Temporally hacked together for testing. Sorry there are not more pictures :( I was going to start a different project for this, but the timing is so perfect to switch to this now.![]()
Some pics that helped me with setup. I used a 100uF cap, cut the VBUS power trace on the USB Host Shield, and added a USB Hub with a 5V power supply.![]()
I promise to get this more organized, with details, pictures and links, that will explain exactly how to get the USB Host Shield working.![]()
-
Custom PCB Work from OSH Park Would be Awesome!
04/27/2015 at 09:27 • 7 commentsRe: http://hackaday.com/2015/04/24/50k-in-play-thirty-projects-will-win-custom-pcbs-this-week/Only you can stop this from happening again:
![]()
A real PCB would make this a real device I would seriously follow up on. I am far from a PCB design. As of now, I would like it to have at least a non-floating Teensy socket, a dedicated USB switching circuit.
Good luck to all those with much more noble projects! :)
-
Version 1.0 Working! (almost)
04/27/2015 at 01:15 • 7 commentsI have been gone for a while, sorry. I finally got a spot to set up my desk and computers, and I realized I had all the parts I needed to piece something together.
I seriously want to make a real circuit board and make this project legitimate... Oh crud, I dead bugged it again... I thought this was a work around for cost, but forces me to realize my fear of asking for help.
![]()
The Major Problems
My original brainstorm, to count pixels and determine mouse location before and without communication with a computer, turns out to be more storm than brain. I have come up with two solutions to this, the first being the working version 1.0 prototype that cheats.
The second solution will be a long term experiment (with the pixel counting, or something), and a more powerful processor, possibly Intel based with Linux. This would keep my my other concept going, that it is possible to replace computer software drivers with an external hardware module system. The problem with the second solution is keeping the cost down. It will eventually get its own project log.
Getting this to work as intended is in need of a crude USB hack, that tricks the host computers into thinking the devices on this hub never get disconnected, even though they are switched around. My limited bubbled search leads me to believe it is an impedance hack, but there might be more to it then soldering four resistors on the USB output connectors.
Version 1.0 Prototype Cheats:
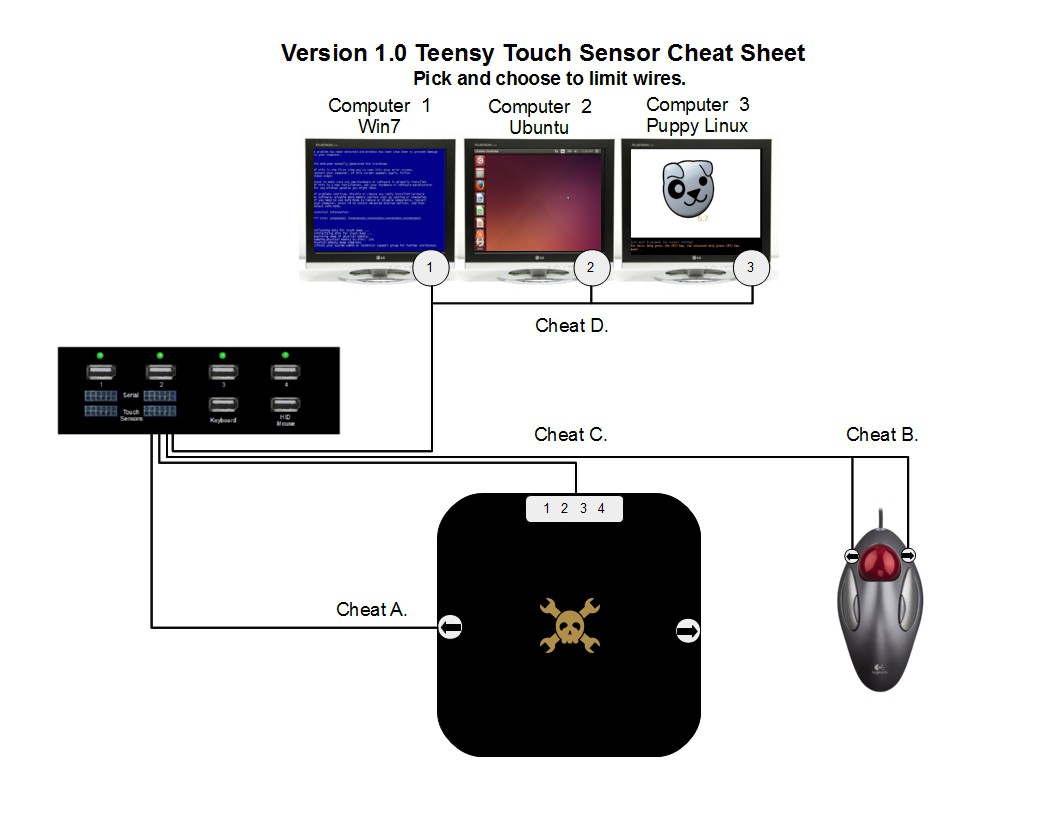
Cheat 1. Use the Teensy touch sensors with thin wire and sticker like buttons, in any or all of the four combinations:
- A. At the sides of a dedicated mouse pad for left right screen switching.
- B. Stuck on to a mouse as extra buttons for left right screen switching.
- C. At the top of a dedicated mouse pad for 1 through 4 instant switching.
- D. Stuck on four monitors for 1 through 4 instant switching.
![]()
:
Cheat 2. A Python Script (not working yet) on each computer that detects cursor edge position, then signals for the Teensy to do the switching through USB Serial. I know this really breaks my rule of No Drivers, and probably many other rules of common sense in programming, but it will look cool :)
All I have so far is for Windows only in the Python Shell, and where "yay left" and "yay right" = missing Teensy USB Serial code.
Python 3.4.3 32bit Win7 with pywin32 from: http://sourceforge.net/projects/pywin32/?source=navbar
import win32api

screenx, screeny = 1279, 1023
x, y = 1, 1

def detect(x, y):
    while x > 0 and x < screenx:
        x, y = win32api.GetCursorPos()
    return x, y

x, y = detect(x, y)
if x == 0:
    print ("yay left")
if x == screenx:
    print ("yay right")
I would definitely need a Linux and Mac solution also (help!)
Q? Would putting in a delay (from time import sleep, sleep(0.1)) make it less taxing on the CPU?:
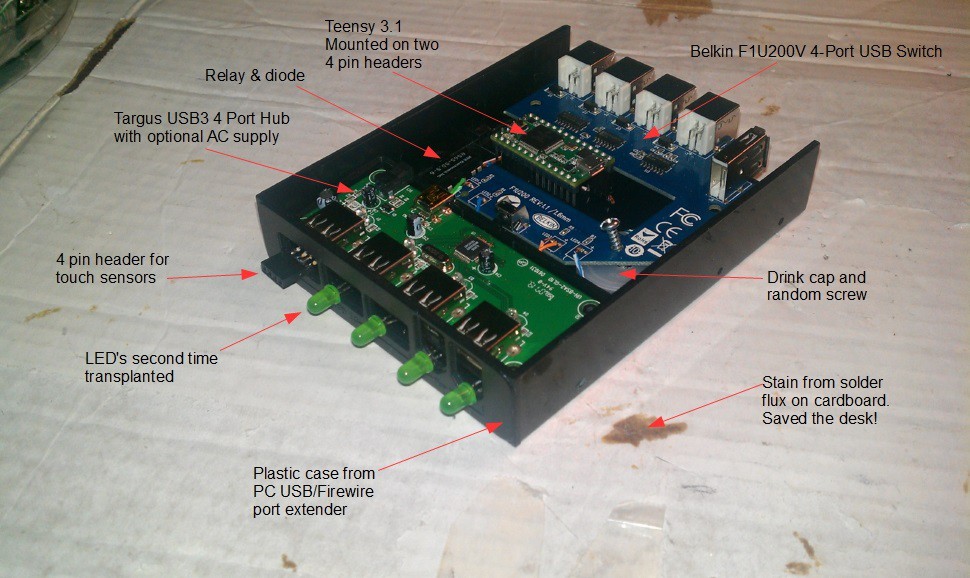
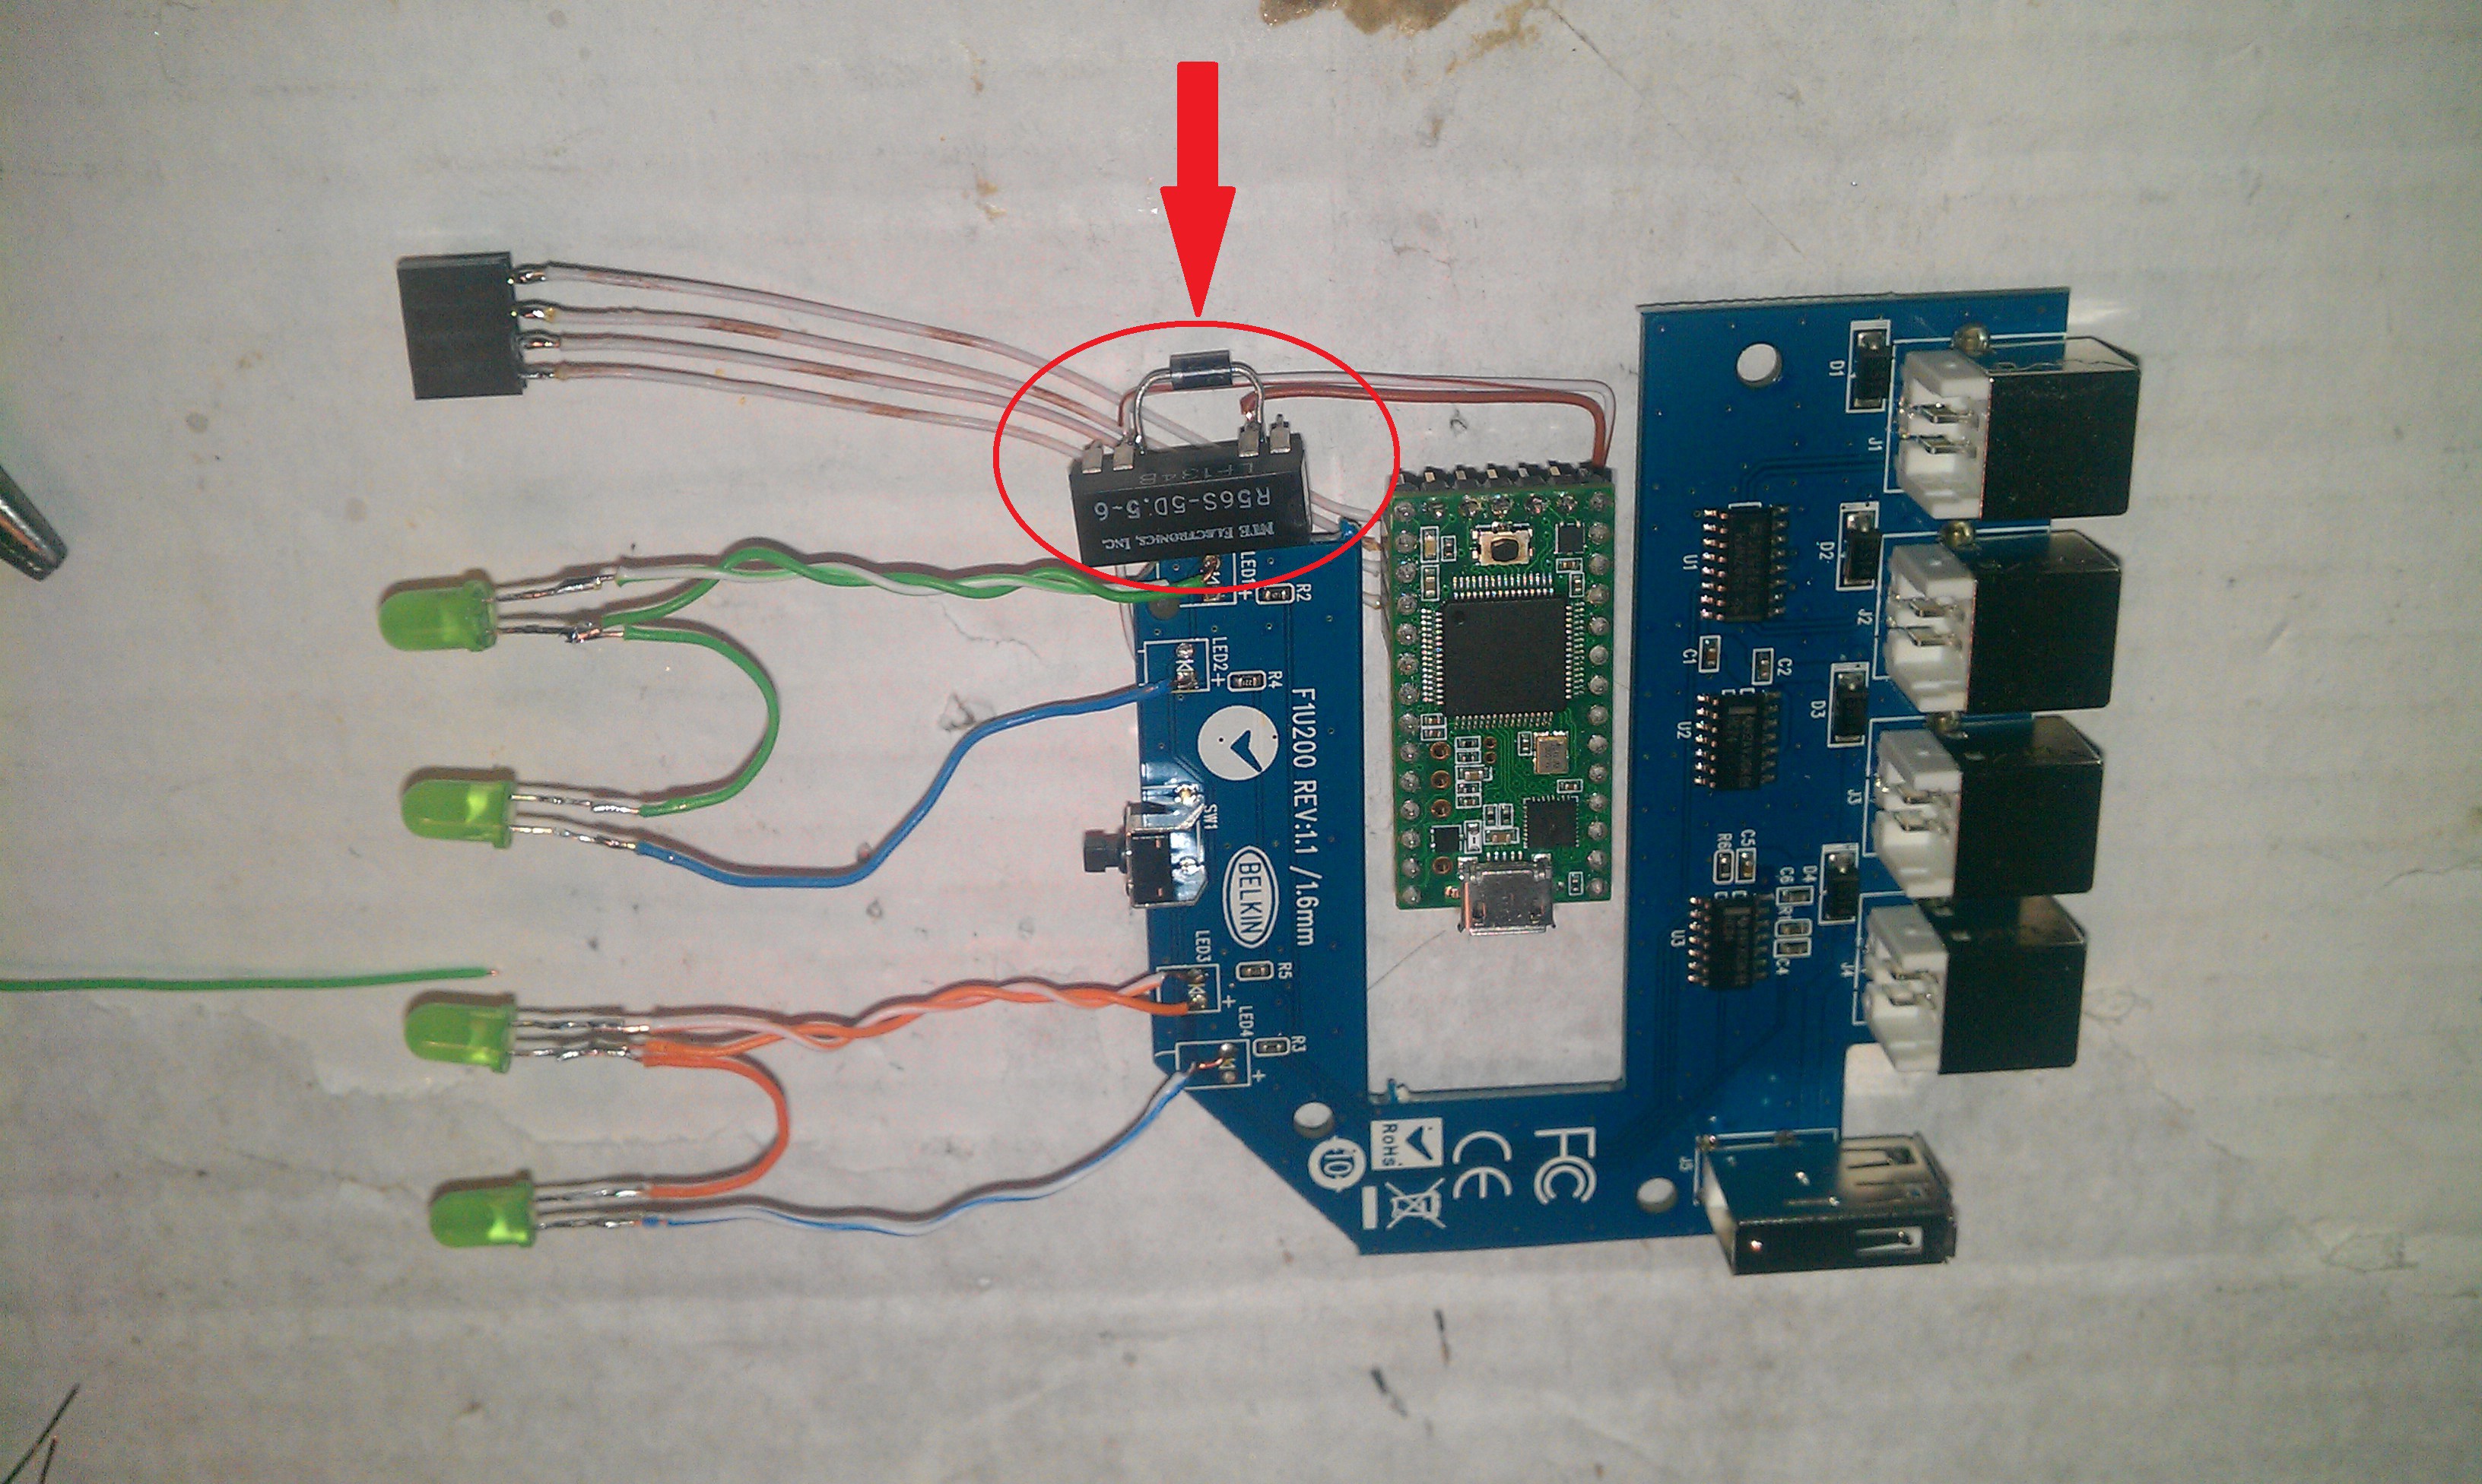
Cheat 3. I hacked it from other working devices that I had laying around...
"Oh crud, I dead bugged it again"
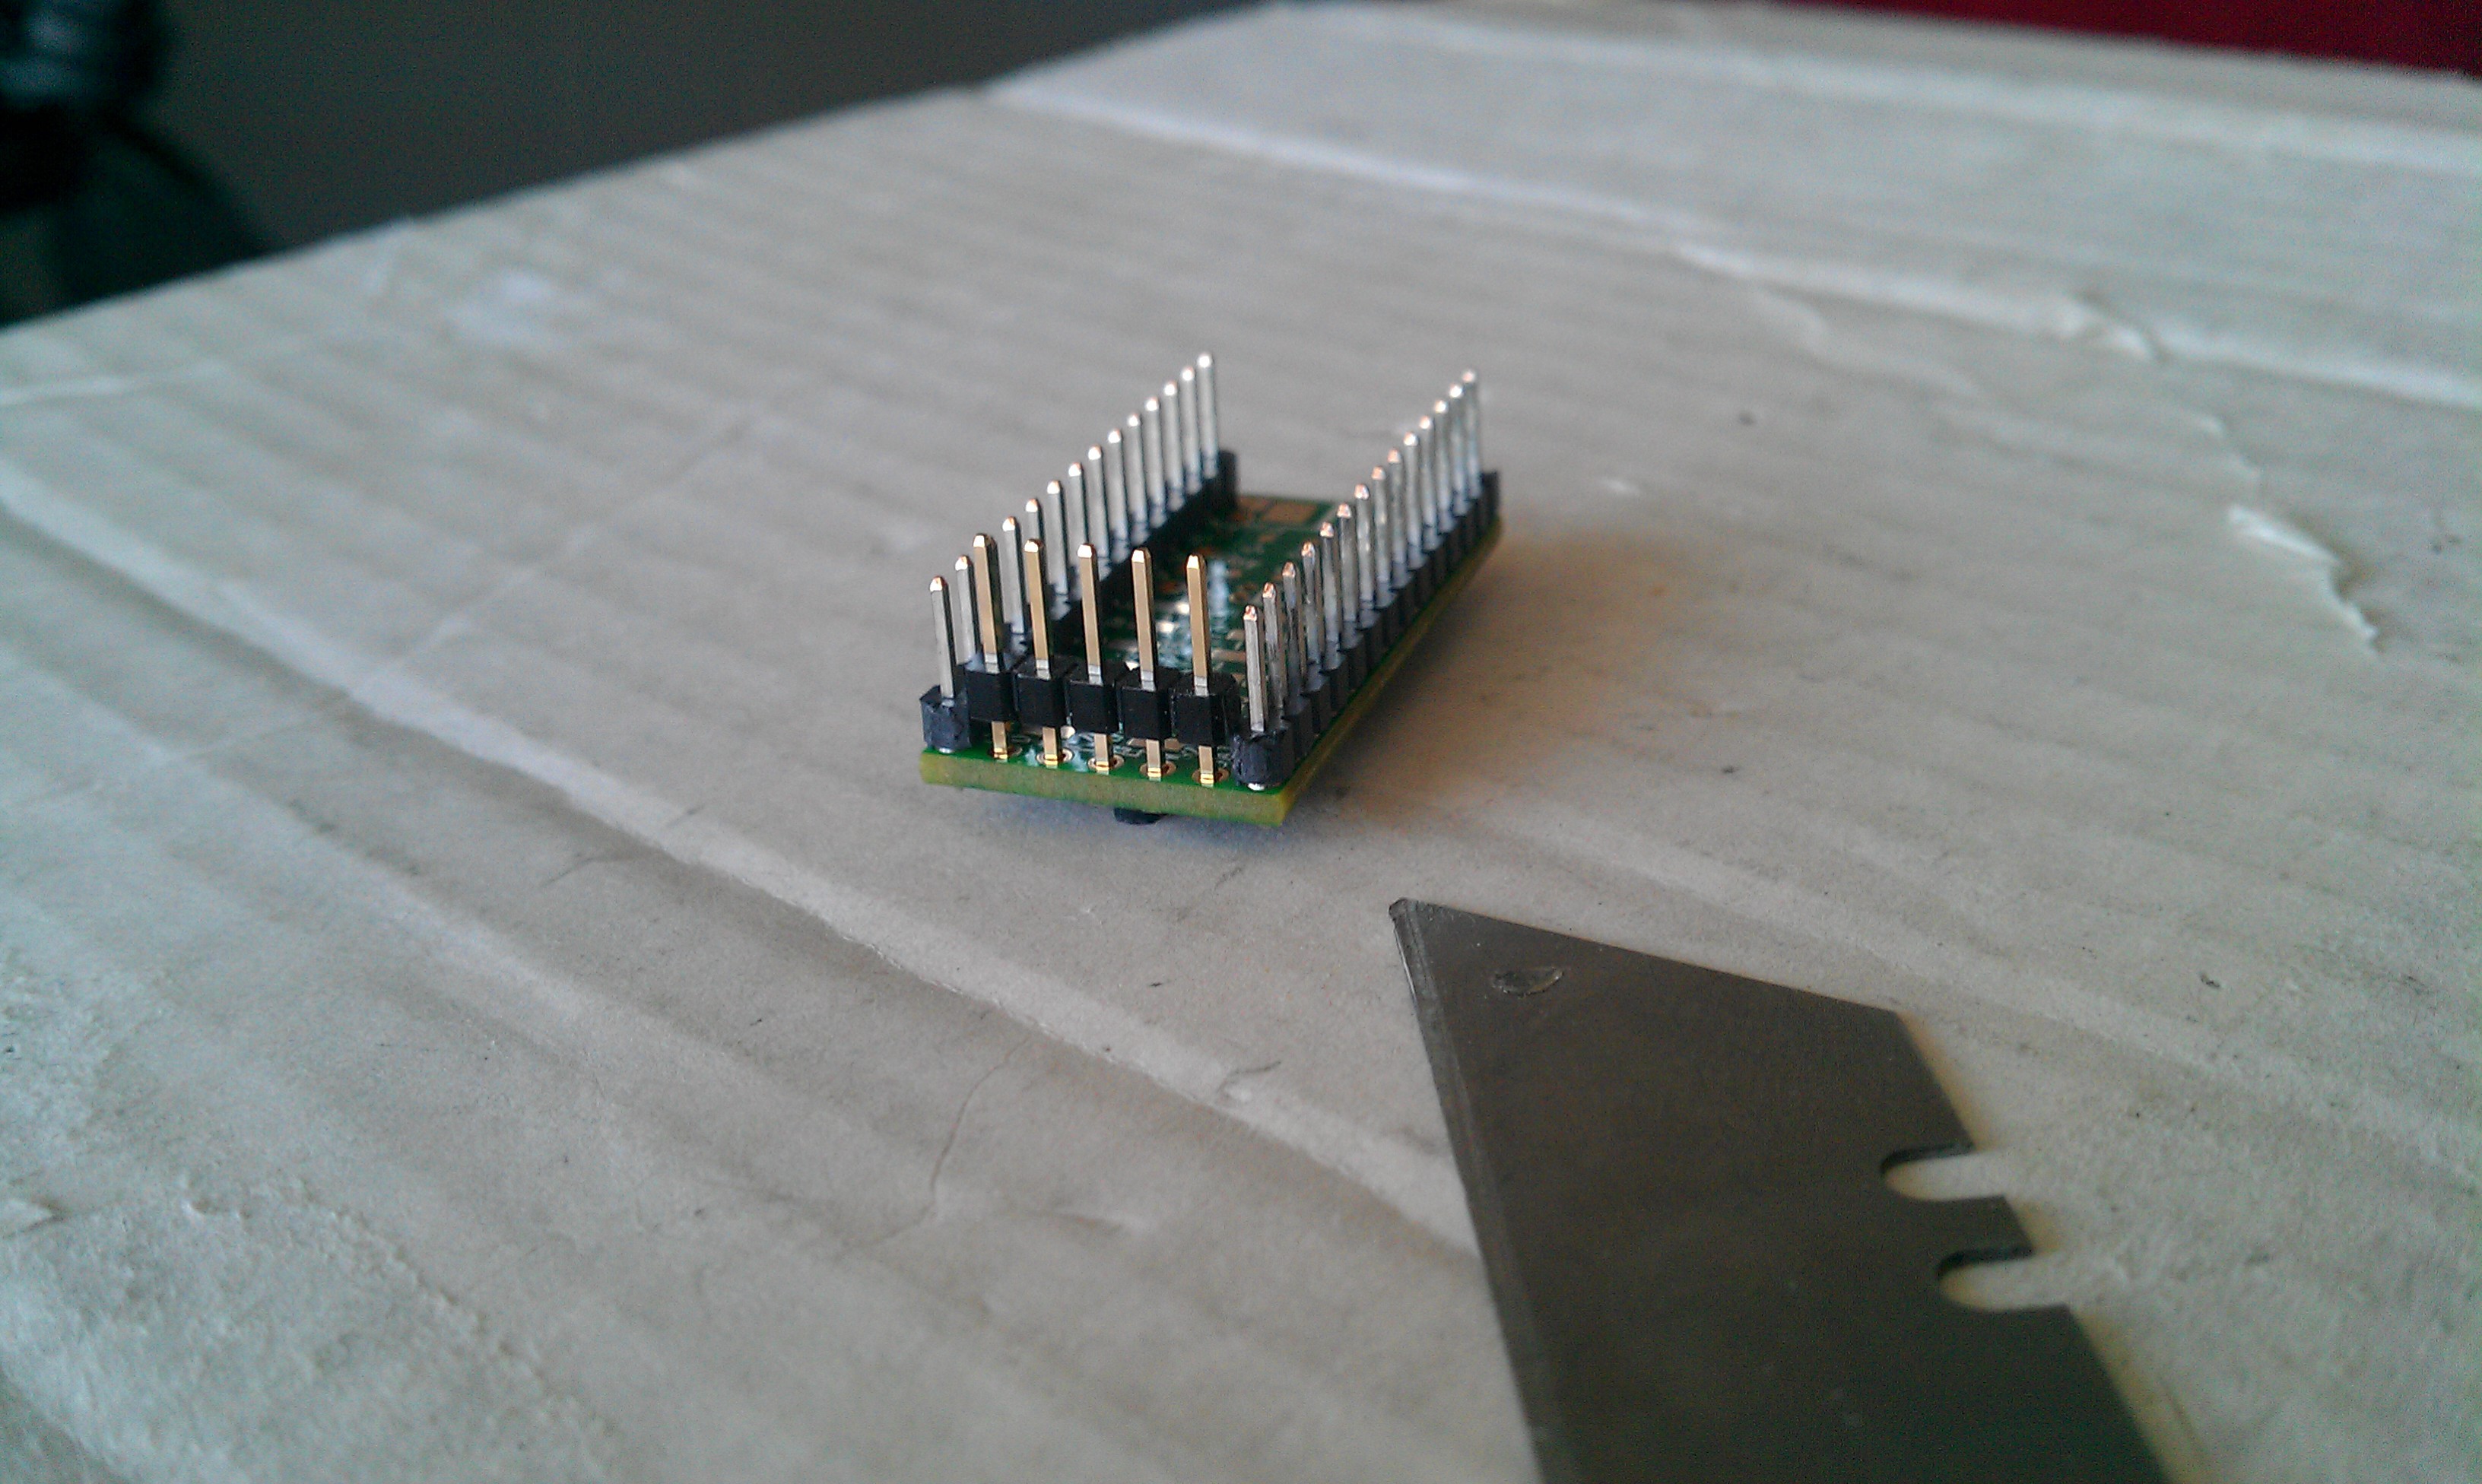
I used two 4pin headers as a floating socket so the Teensy is removable.
![]()
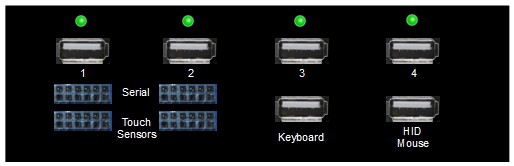
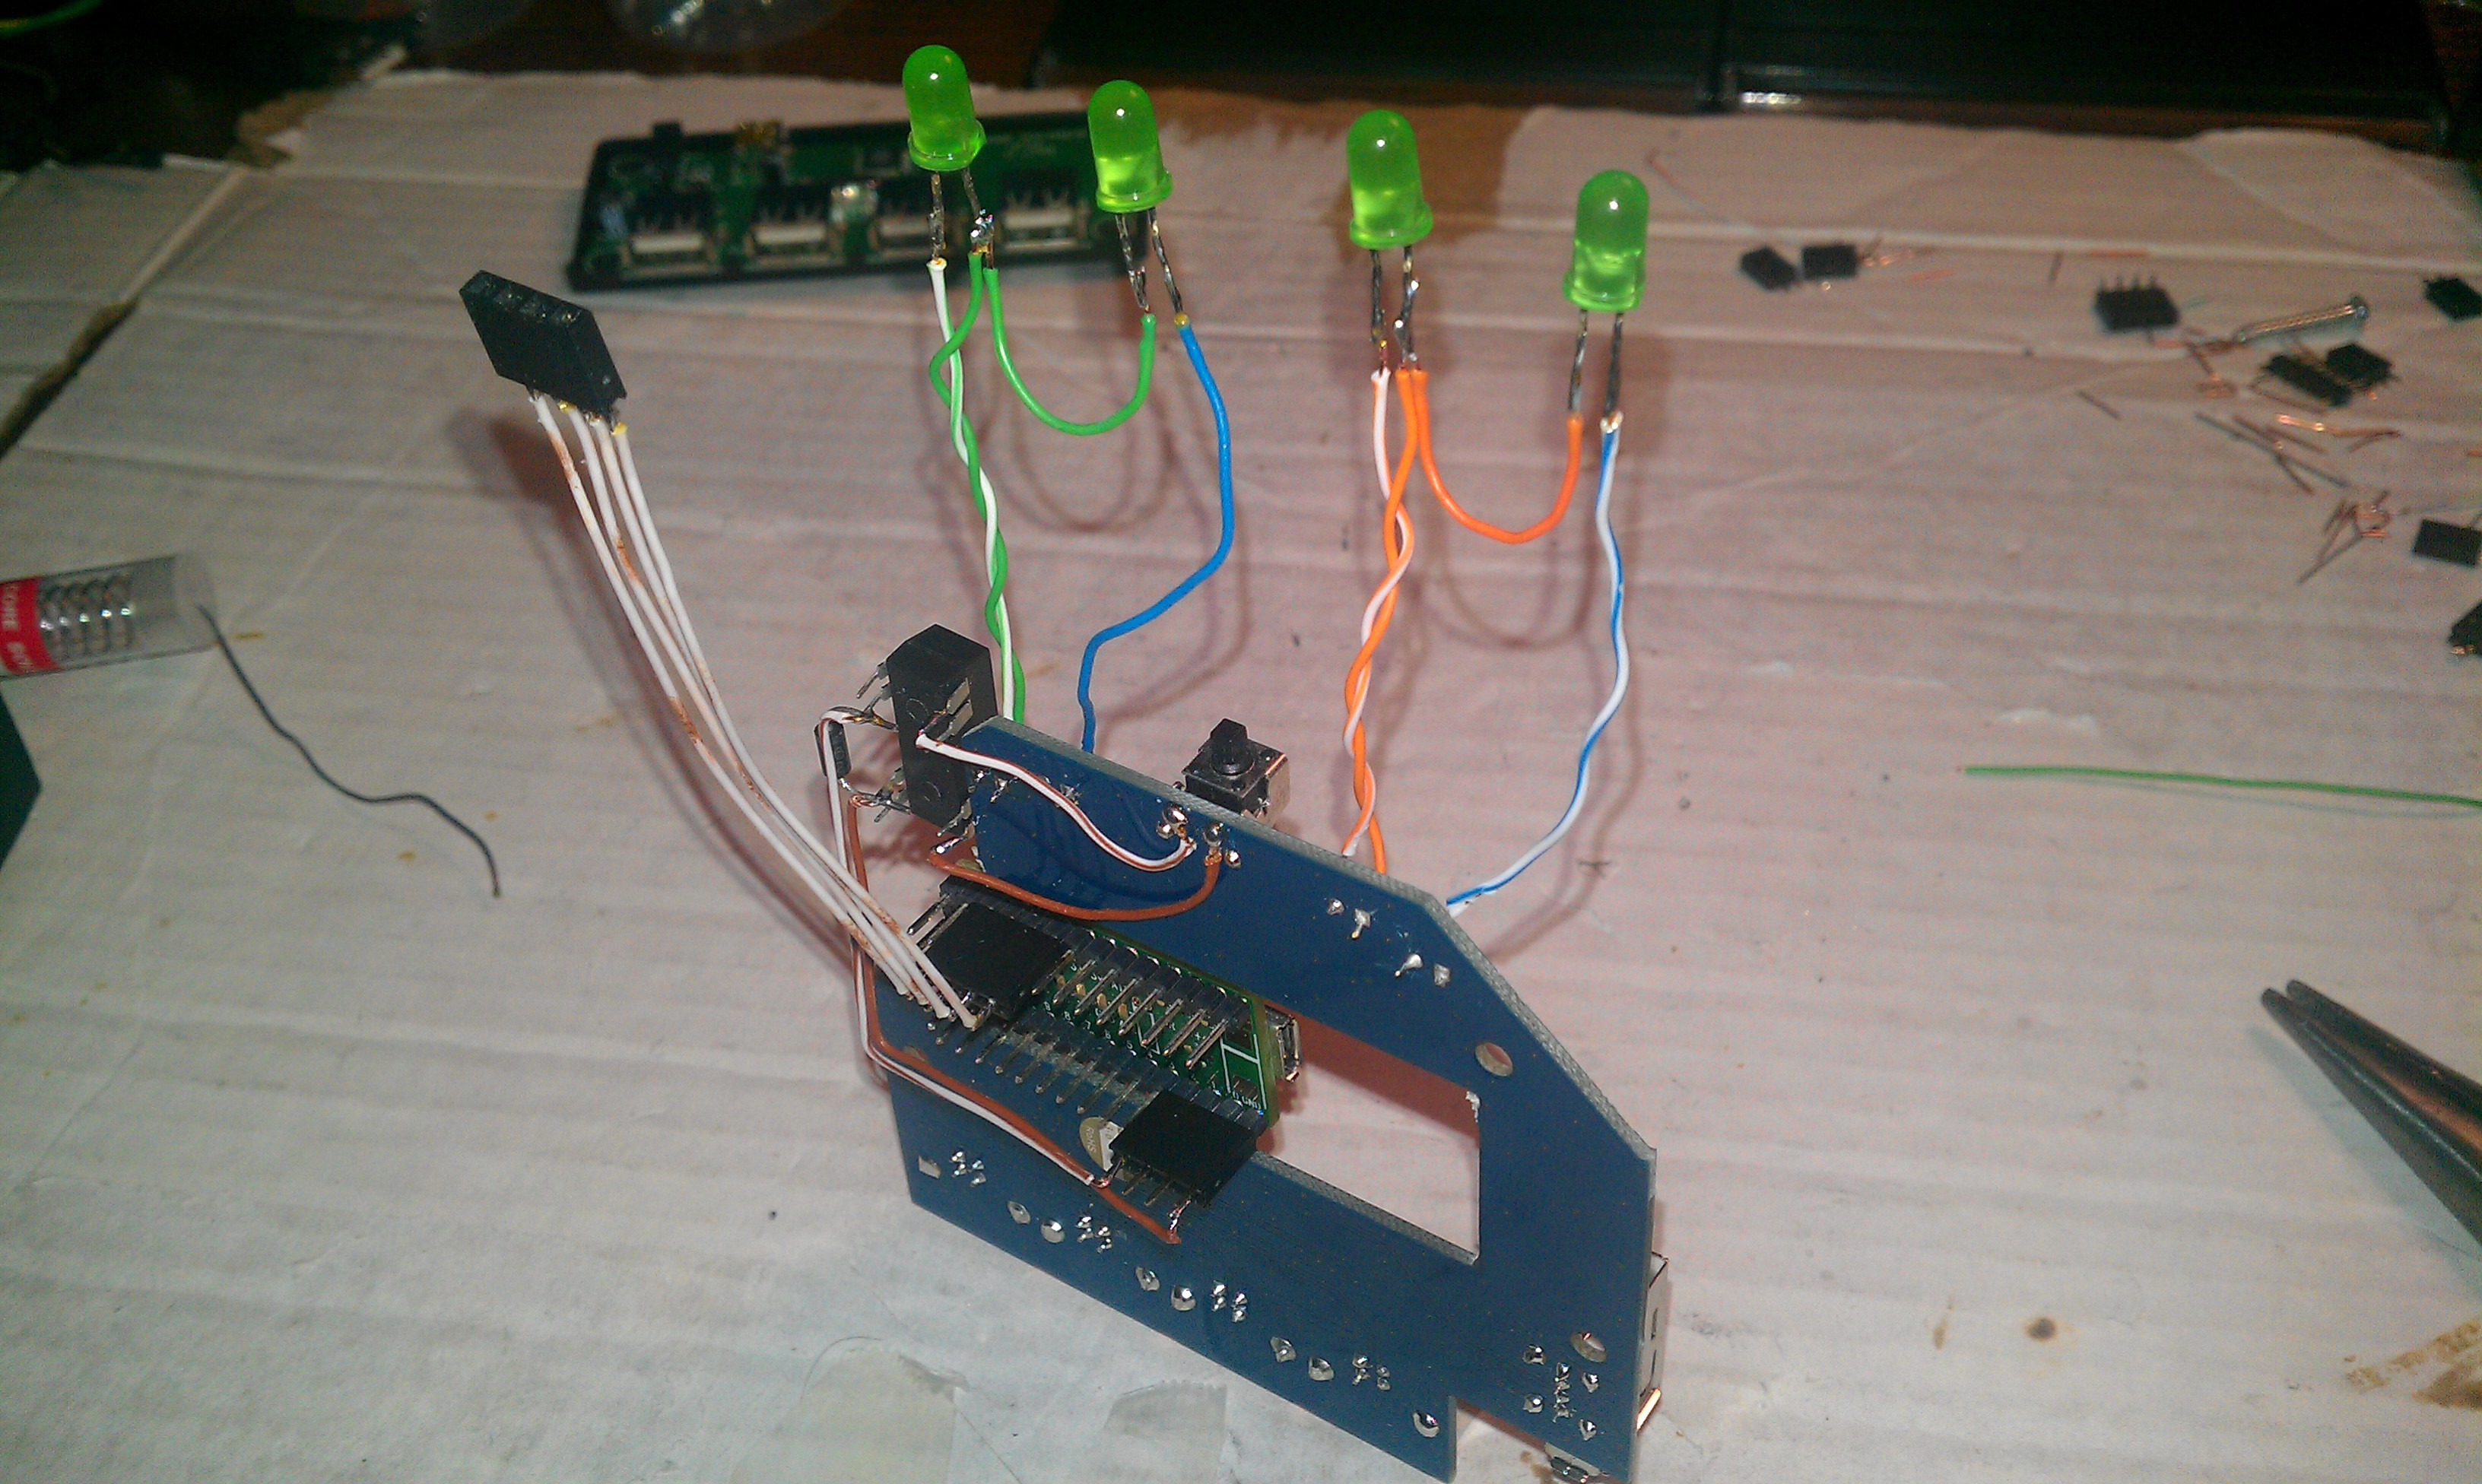
LED's poke out the front show which port is selected. Another 4pin header also pokes out revealing four touch pins from the Teensy.
![]()
I used the relay and diode from my mouse project.
![]()
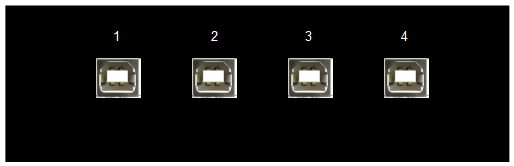
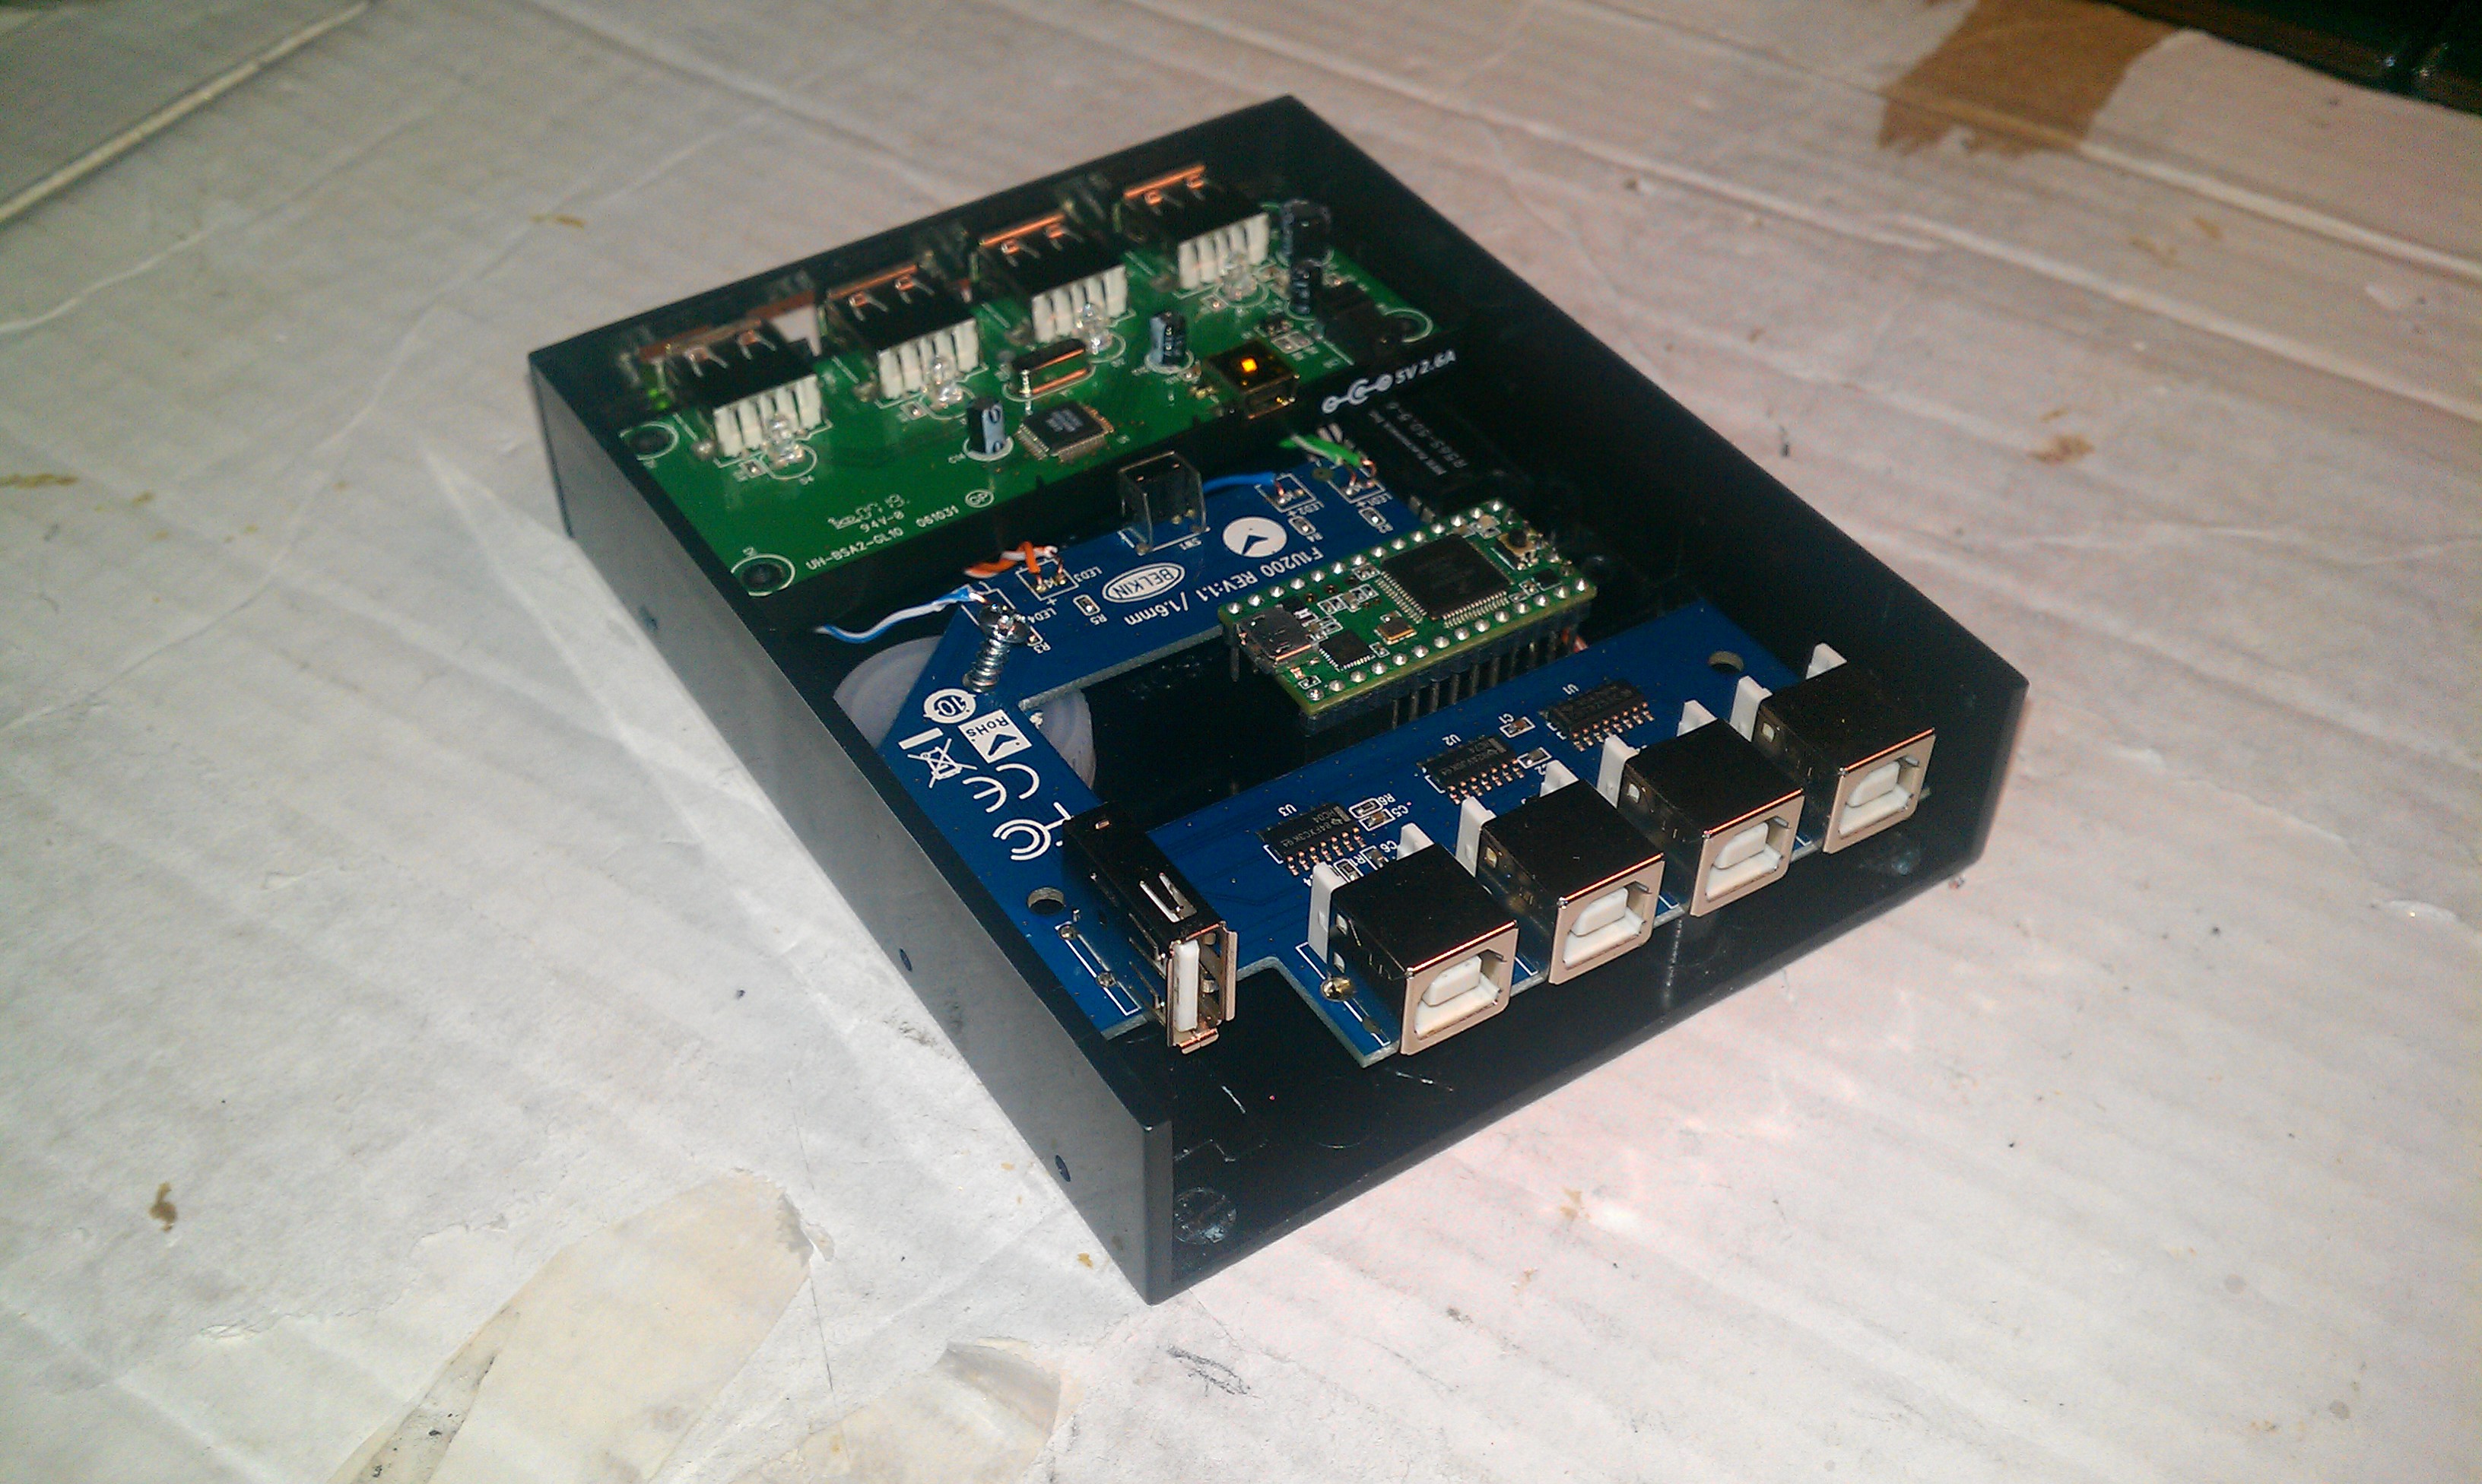
Back view:
![]()
More pictures, USB cables, and hopefully a video of it all working will be posted soon.
-
System Design Considerations
08/26/2014 at 21:47 • 0 comments*Synergy: Please visit and donate to synergy-project.org. http://www.synergy-project.org/
First I would like to explain my love and addiction for a favorite program called Synergy. It shares a keyboard and mouse between multiple computers. One computer with a keyboard and mouse is set as a Synergy server, then other computers are added as clients and communicate over a local network. I love that its Open Source, multiplatform, and has a quick smooth transition from one screen to another.
Synergy dislikes:
- Its network dependent so any computer or router with connection problems fails.
- All client keystrokes like passwords and account numbers go through the local network, although there is an option for encryption.
- Setup can be complicated with mixed platforms.
- It can not be used on screens where the client is not working yet, or disabled. For example; BIOS setup, Windows user account control, live CD's, some network passwords and user logins.
I still like, use and highly recomend Synergy. This projects device is an all hardware solution that eliminates Synergy and the network.
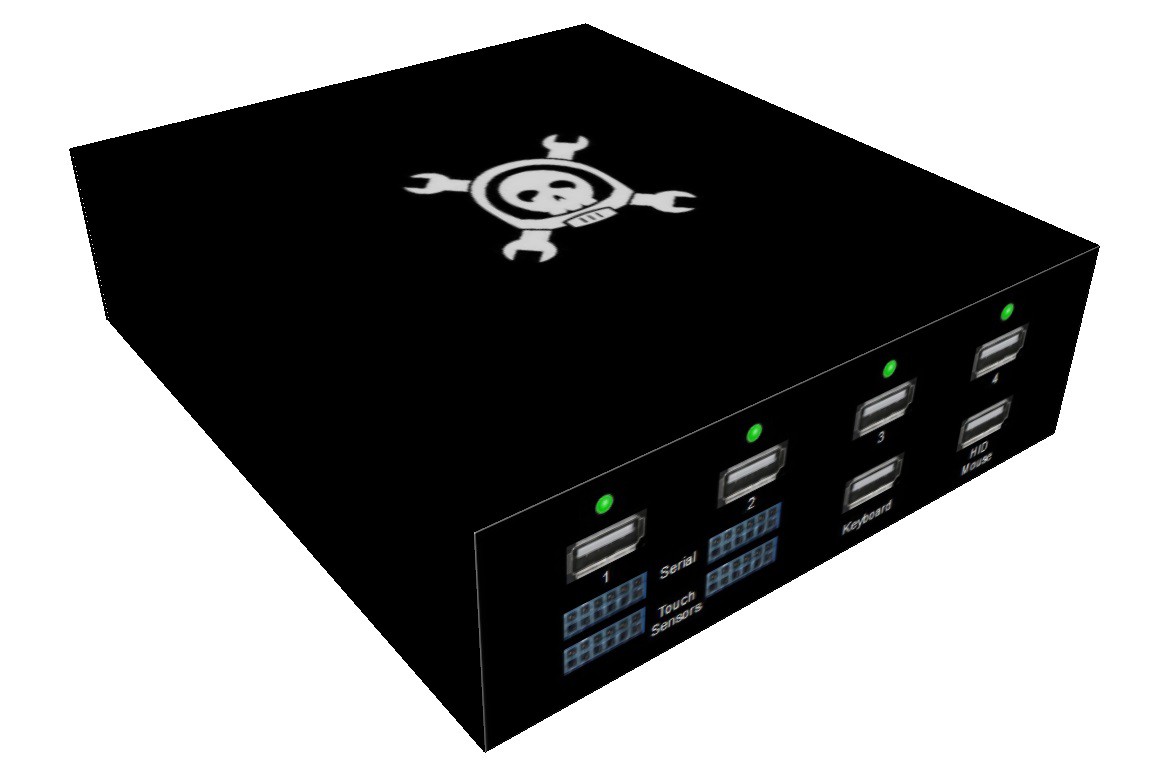
HID Mouse:
This device is also focused on adding mouse features on the device hardware itself (touch sensors, sliders, key switches, optical encoders,) in place of features provided by drivers.The USB input marked HID Mouse makes any mouse a driverless HID device (USB Host to serial), giving control to the microcontroller as a HID.
Drag along Keyboard:
When the screens switch, the microcontroller switches a USB switch, which connects the keyboard to the right computer. The delay for connecting to the host computer should be short considering it is just the keyboard.Desktop Integration:
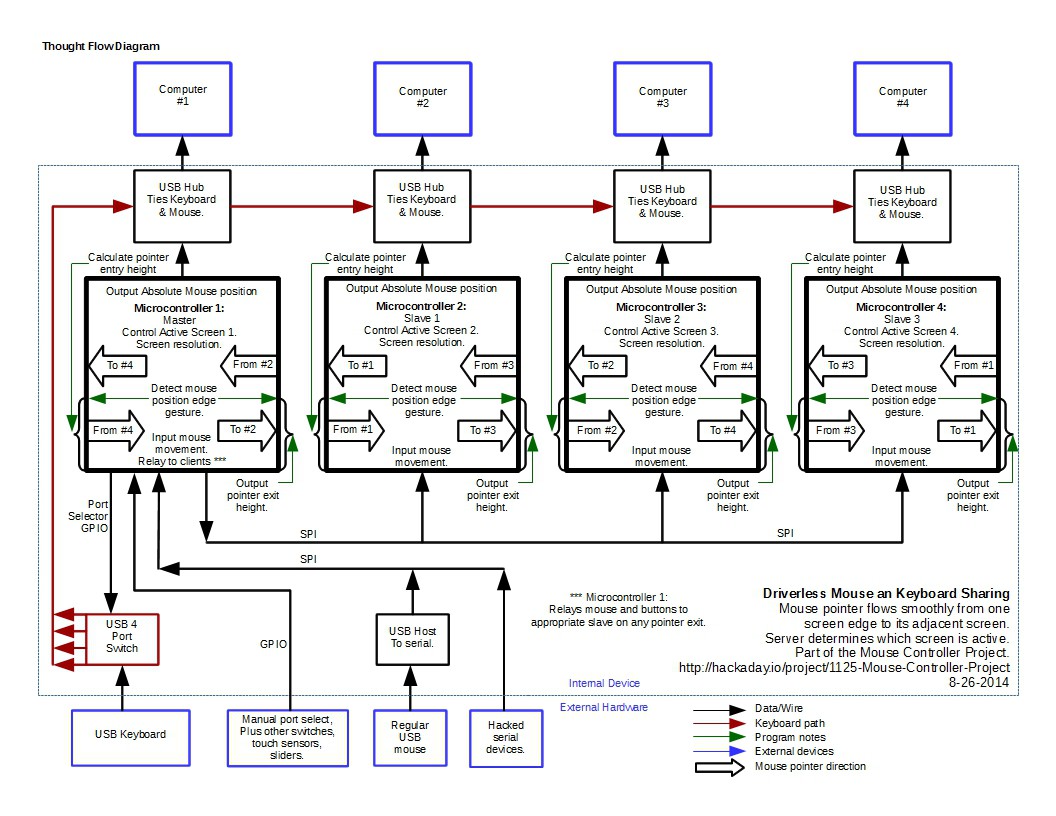
![]()
This is a mixed mind map flow diagram showing how screen switching is done by detecting the mouse pointer hovering at a screens edge.
![]() These are the chips I would like to use to make a board for production:
These are the chips I would like to use to make a board for production:(1) ATmega32U4 Microcontroller
(4) AT43301 Low-cost USB Hub Controllers
(4) MAX3421E USB peripheral/host controllersBut I am going to make an advanced prototype out of other circuits for now, because this one is for me.
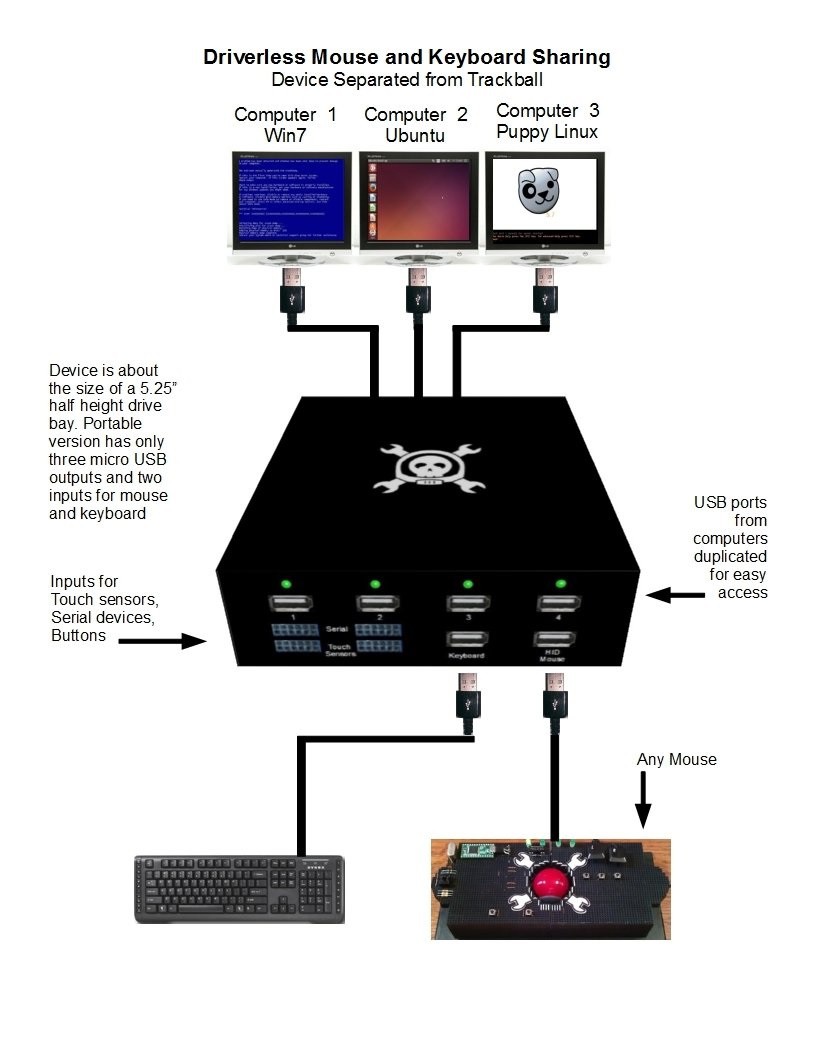
This is what I would like it to look like:
![]()
![]()
![]()
Driverless Mouse and Keyboard Sharing
Instantly share mouse and keyboard across computers on any platform.


 These are the chips I would like to use to make a board for production: