 Audrey Robinel
i'm building my aquarium rack layer by layer. So now i'm building the first stage of it. This level will support multiple small (50 liters, aproximately 15 gallons) aquariums (up to 8), so the load won't be extreme, however i want to be able to change my mind later.
Furthermore, the levels above will rest on this one.
in order to minimize risks, i chose a design that will transmit the weight to the ground mostly by the legs. Indeed, the beams that support the weight stand directly on the legs. Further levels will also stand directly on those legs, so we should thus reduce the possible flex.
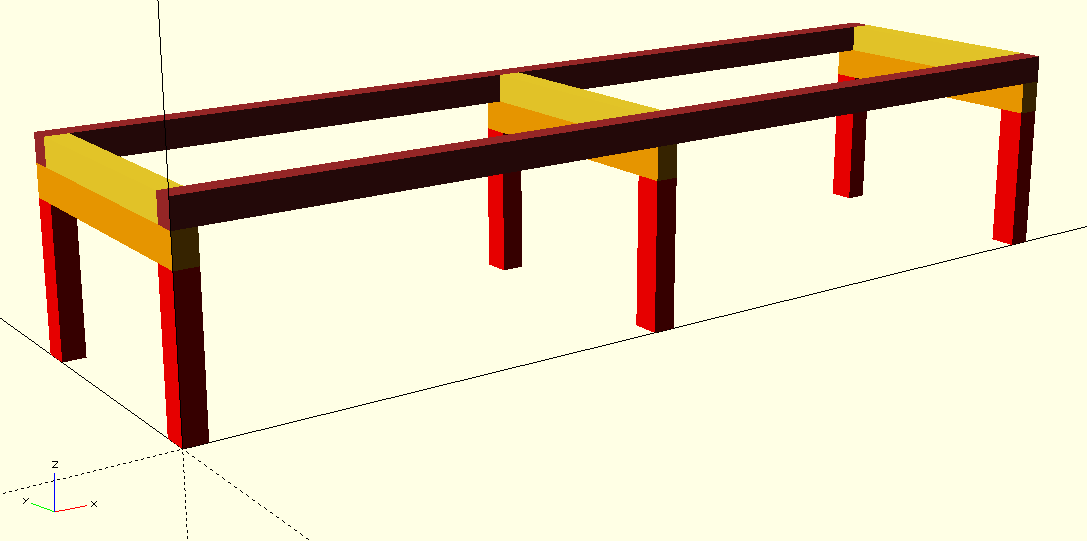
Here is a model in openscad. The beams are 60*50mm section (aproximately, i cut those from raw lumber).
The legs (in red) are joined together by the orange beam, with 8 screws (4 on each leg), going alond the Z axis. I used 5mm*80mm wood screws, and countersunk the head 20mm deep. I also used some wood glue on those joints.
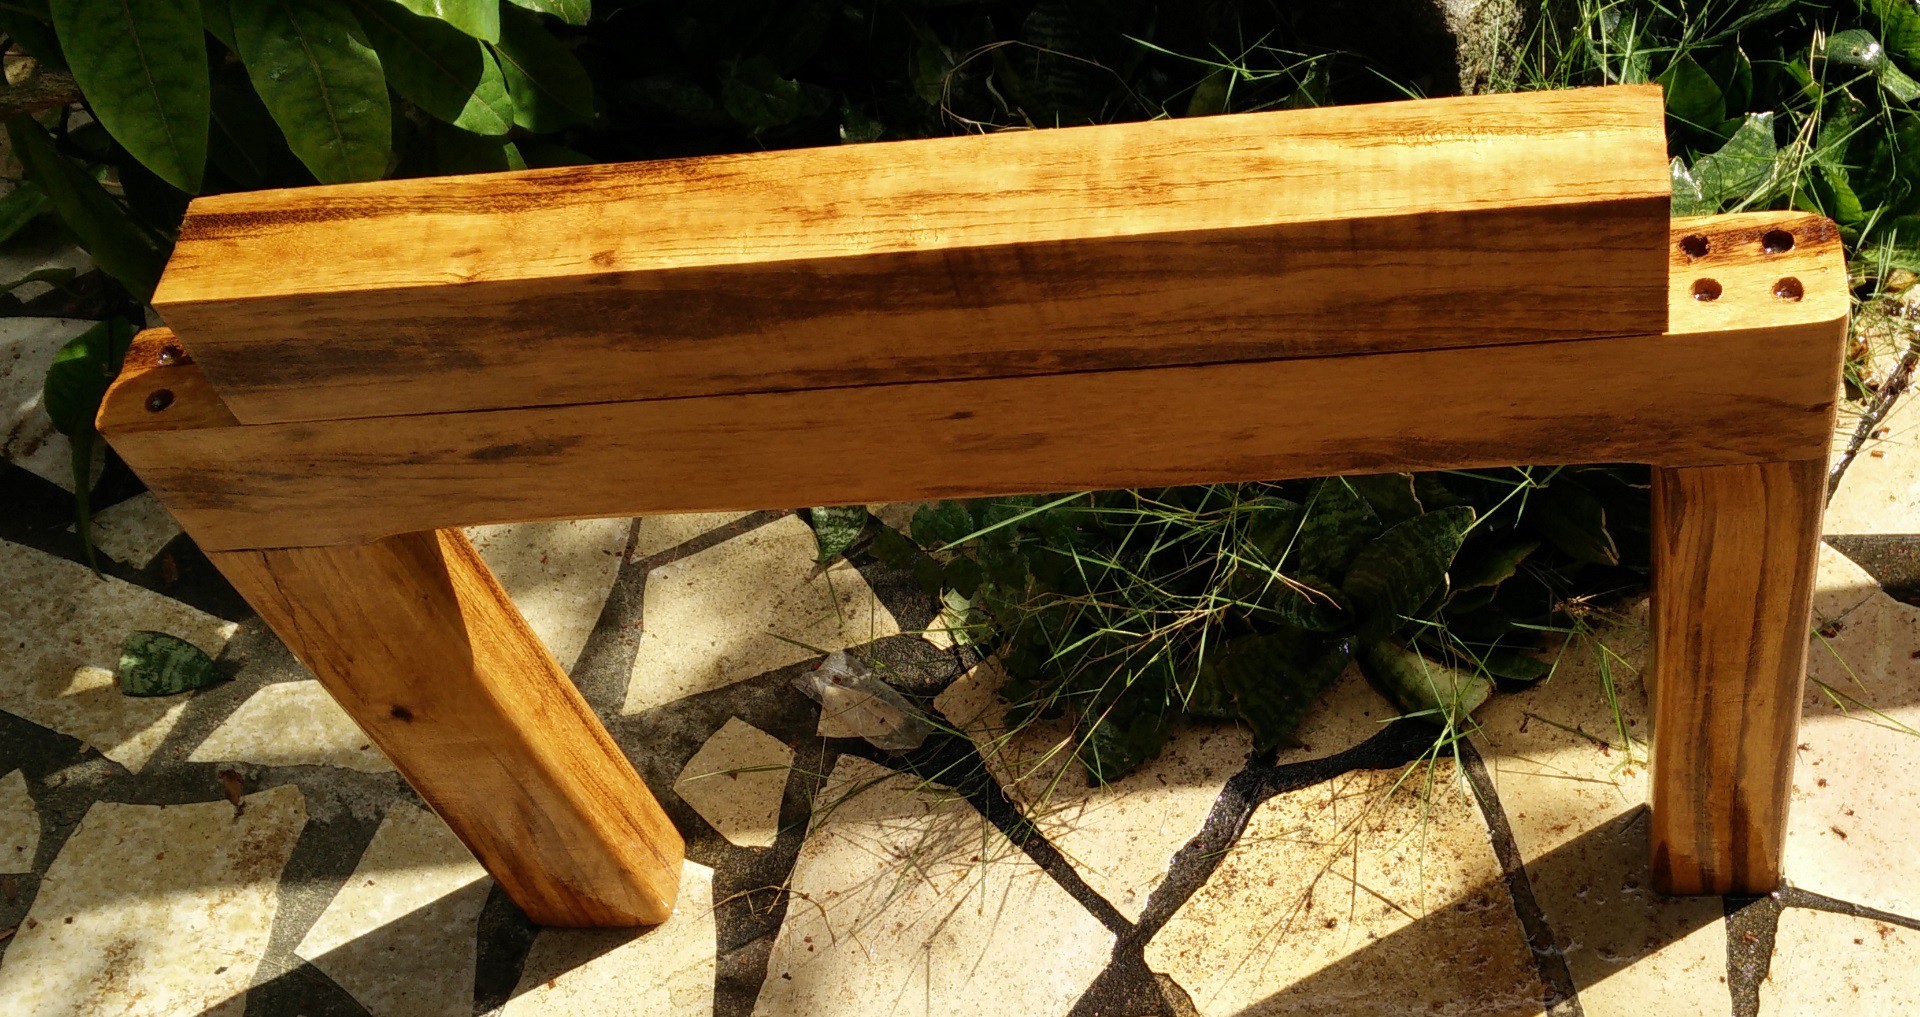
On the picture above, you can see the leg assembly.
I thus have 3 parts like that, giving me the 6 legs of the stand.
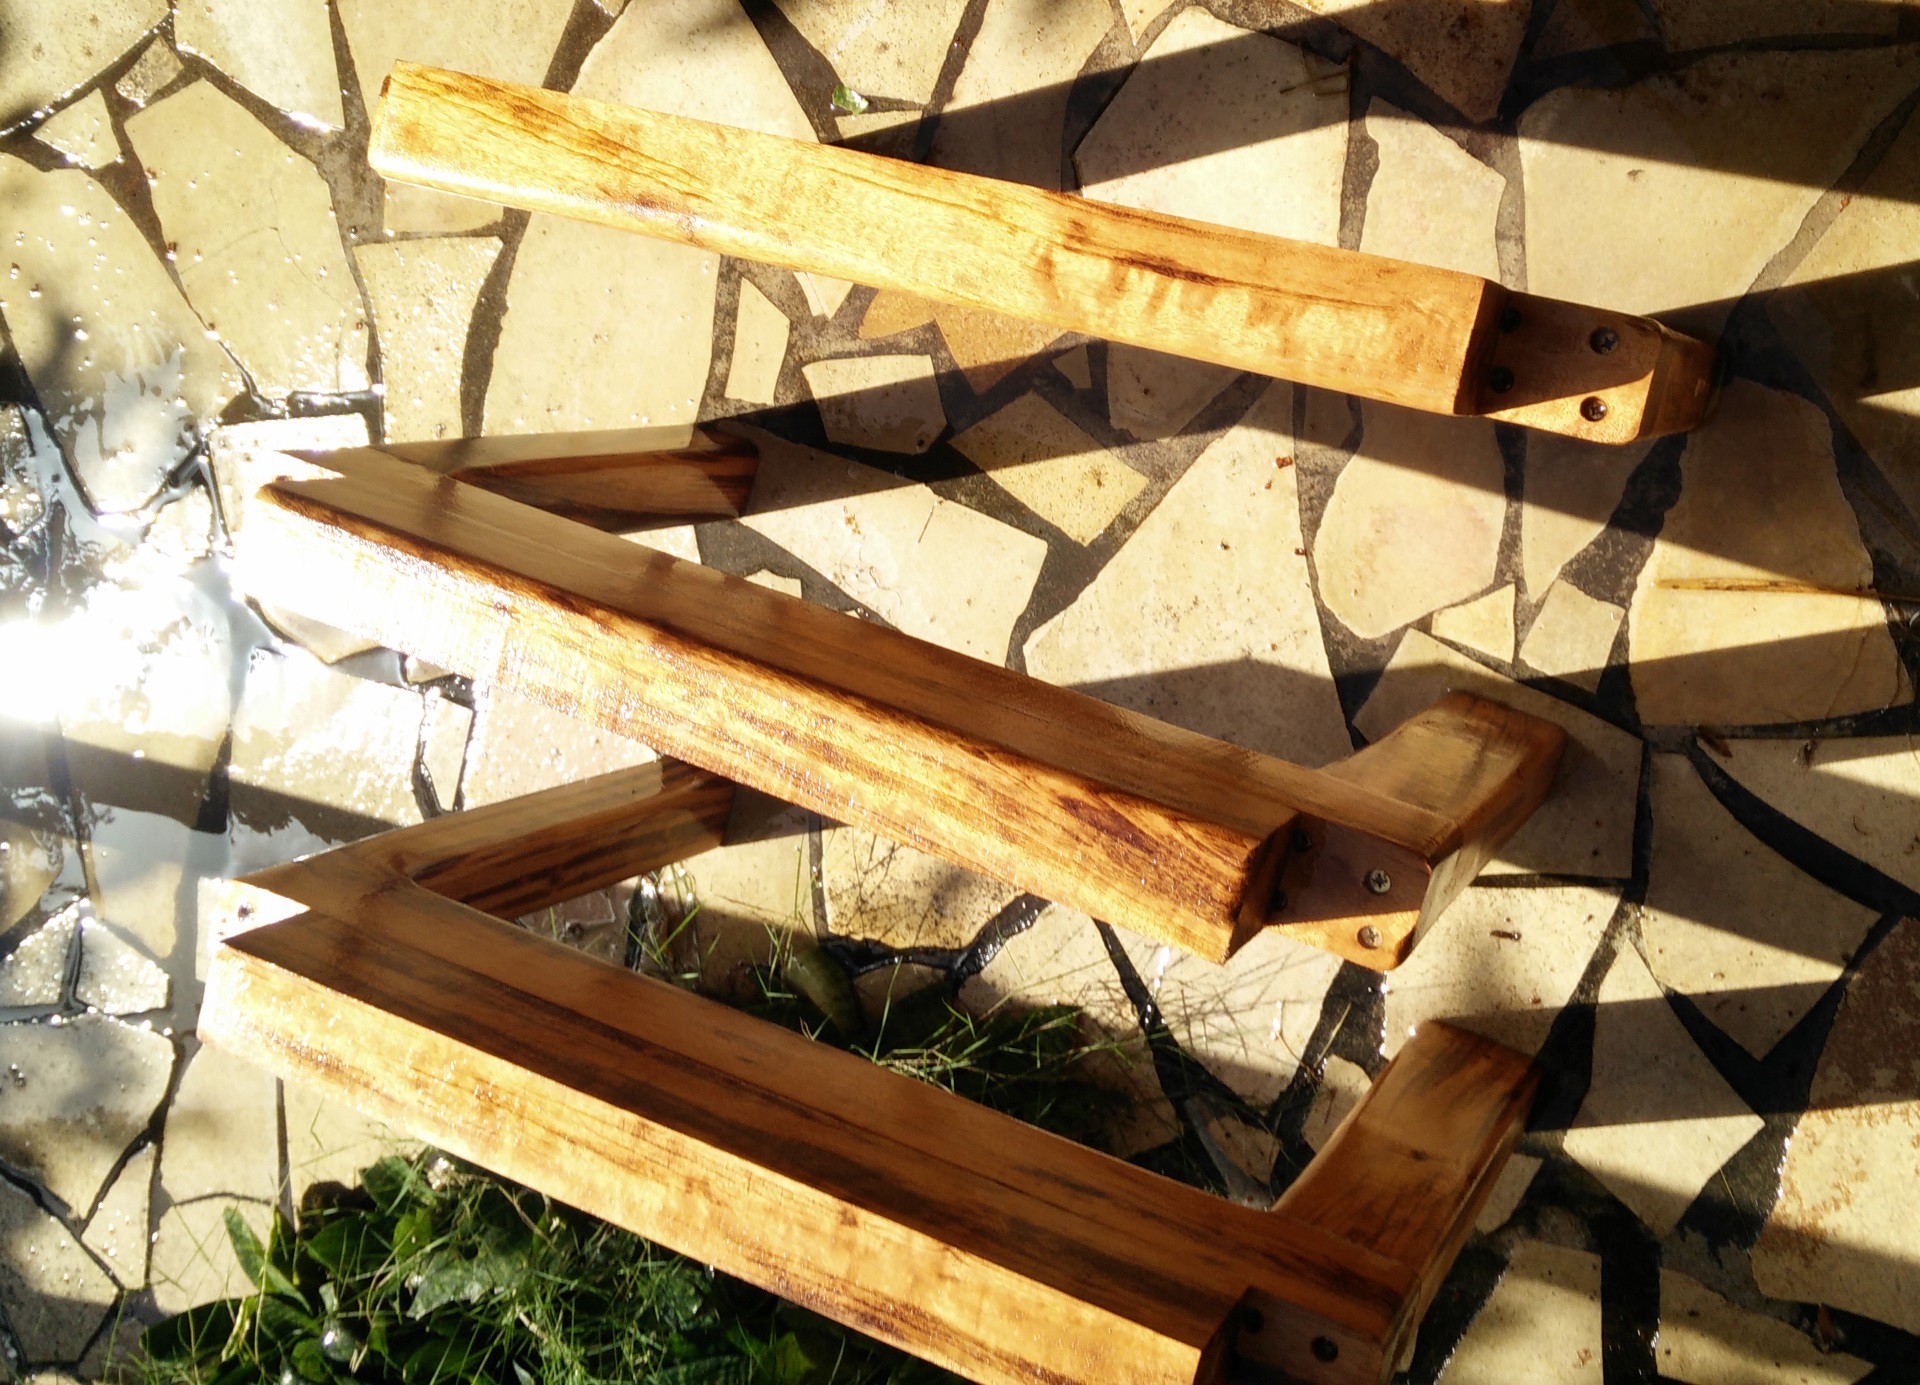
The next step is to add the yellow beams. I simply screwed those on the legs assembly from below (z axis, + direction), and countersunk the screws heads as well. I carefully placed each of those beams so that the long, brown beams are flush with the front.
I tried to join the yellow and brown beams with pocket screw holes, but i didn't manage to properly do that. So instead, the brown beams simply sit on the legs, and are secured with one 5x80mm wood screw, with a countersunk head.
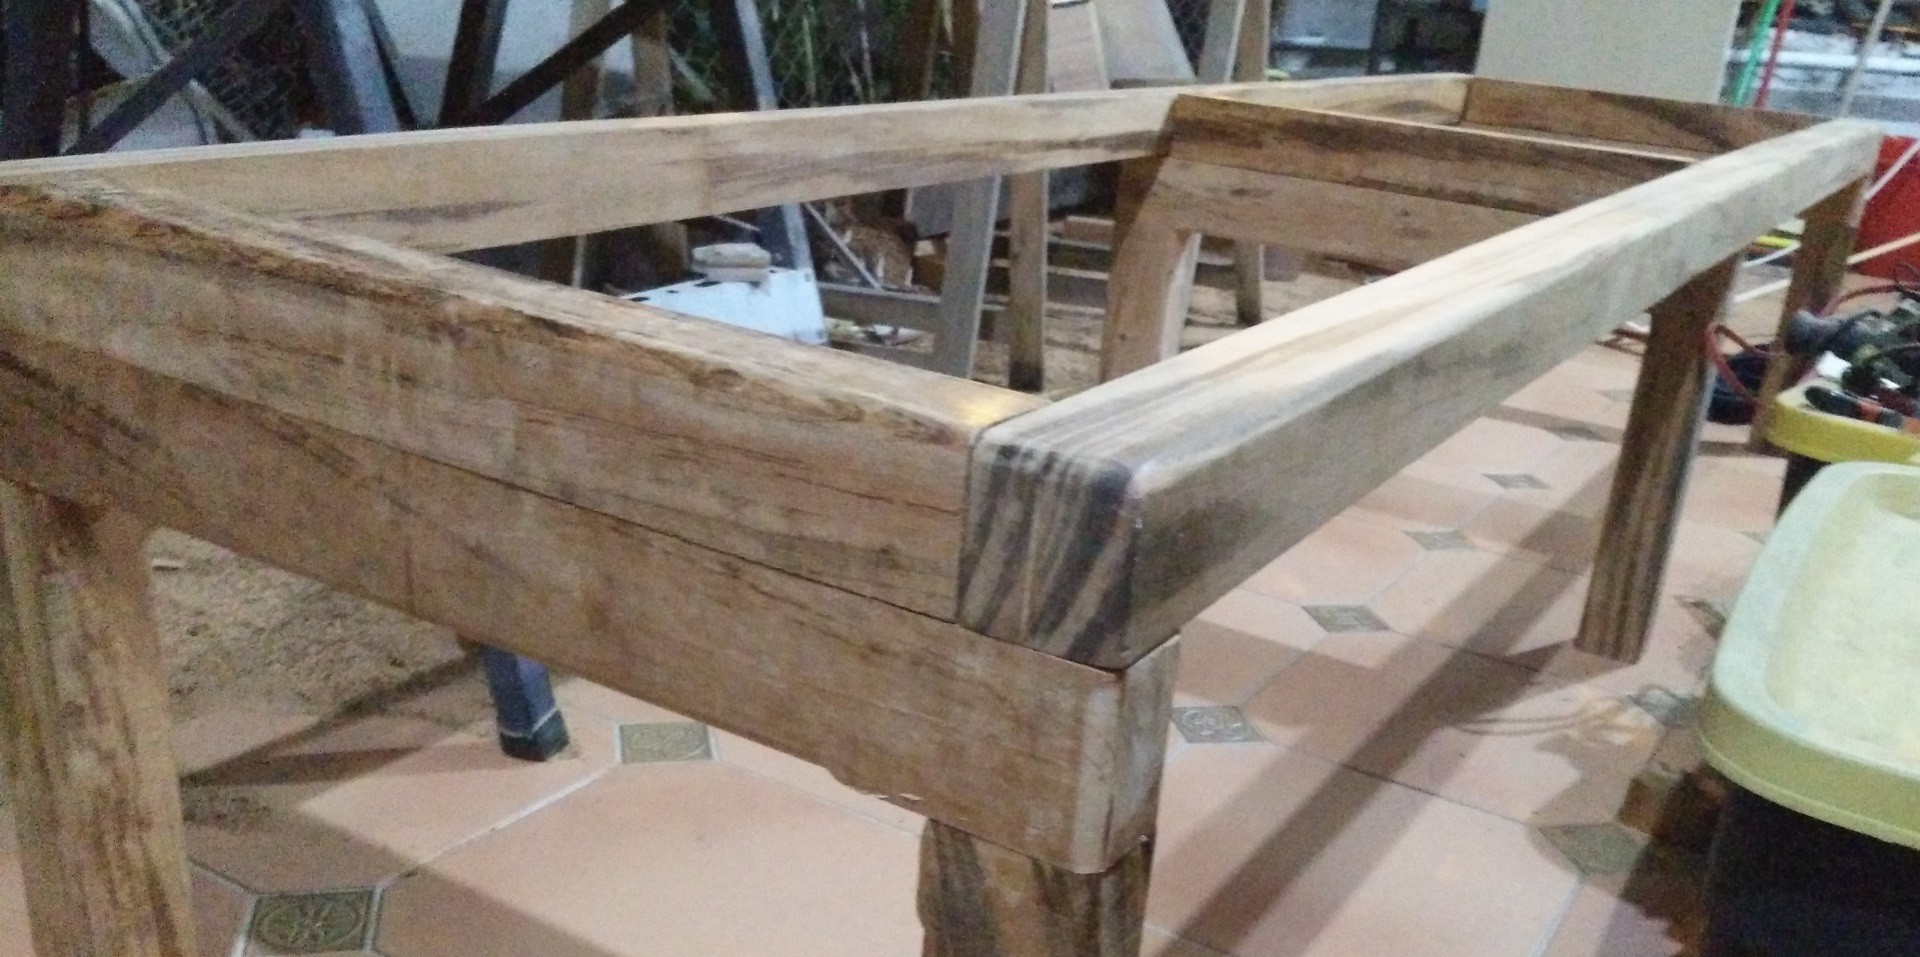
This construction makes the rack extremely sturdy along the Z axis, but it is a bit weak along X. The forces will mainly be exerted along Z, but an earthquake can generate quite some lateral forces, so i'll tackle this issue in an upcoming log.
Discussions
Become a Hackaday.io Member
Create an account to leave a comment. Already have an account? Log In.