Smart Technology
In this project, we are going to learn how to use Blynk app and Raspberry Pi 3 in order to control home appliance (Coffee maker,Lamp,Window curtain and more...).
Hardware components :
- Raspberry Pi 3
- Relay
- Lamp
- Breadboard
- Wires
Software apps :
- Blynk App
Step 1: Install Operating System in Pi

You can skip this step if you have installed the OS already in the Pi.If yes then go to step 2 or else look the complete OS installing instructions in this link that I uploaded.
https://www.instructables.com/id/Build-Your-Own-PC-With-Raspberry/
NOTE: You can also use your Smartphone or a PC to remote connect to you Raspberry Pi in this link that I uploaded :
https://www.instructables.com/id/Lets-Use-IOSWindows-As-a-Monitor-of-Raspberry-Pi/
Step 2: Blynk's Configuration


To setup Blynk App,you should follow the steps below :
- Download the Blynk app on your smartphone and create an account.
- Create a new project, select from the list your hardware (Raspberry Pi 3).
- Select connection type (Wifi,Bluetooth...).
- Add a widget to your control panel by clicking on the plus icon on the top right.
- Select the Button widget,and double tap on it to edit its settings.
- Install Node.js library on Linux( For that I advice you to watch the video or follow this link:
http://help.blynk.cc/how-to-connect-different-hardware-with-blynk/raspberry-pi/how-to-install-nodejs-library-on-linux ).
Note : Authentication key is send to your email.
Step 3: Watch the Video for More Details
All the Blynk App configuration is shown in video.
Hope you will like this toturial.
Thanks:)
Step 4: Schematic


Kindly follow the steps bellow :
- Connect the Raspberry's Vcc to the Relay's Vcc.
- Connect the Raspberry's GND to the Relay's GND.
- Connect the Raspberry's GPIOx to the Relay's IN.
 Shehzad Nazir
 Jon Hobbs
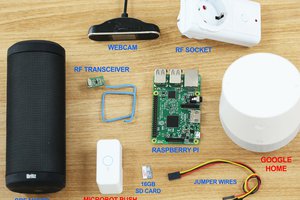
 NaranInc