 Eloy
EloyDomoio is a home automation system that connect your devices to the cloud with no pain. With this project and a bunch of components you'll have a cool cloud enabled thermostat that certainly will fit your needs.
The key features of this system are:
- Cloud enabled.
- Unlimited schedules.
- Unlimited configurations.
- Any combination of sensors and actuators.
- iOS and Android app.
Build the circuit
Follow this schematic to assemble the circuit.
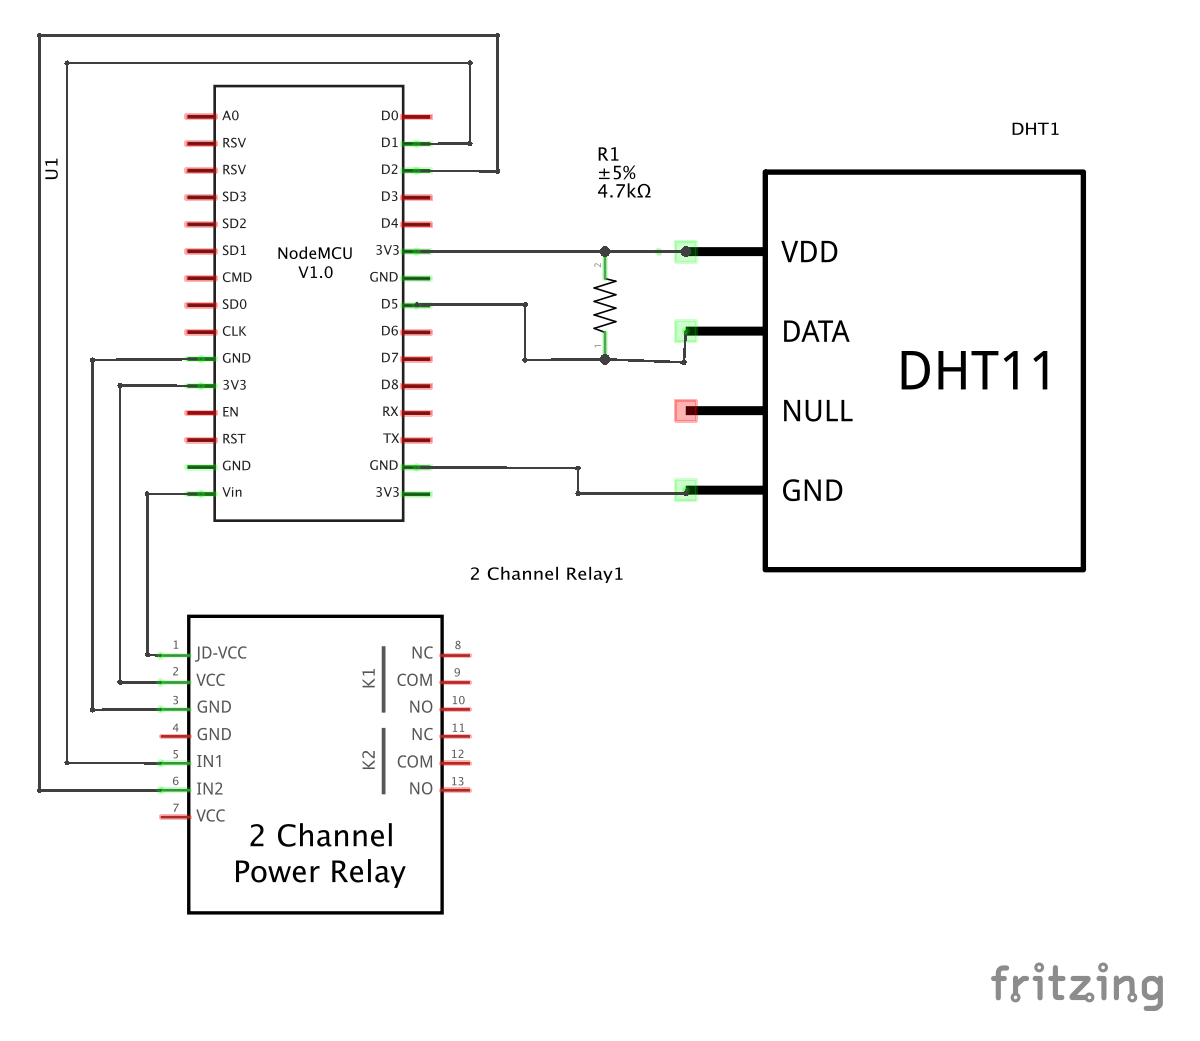
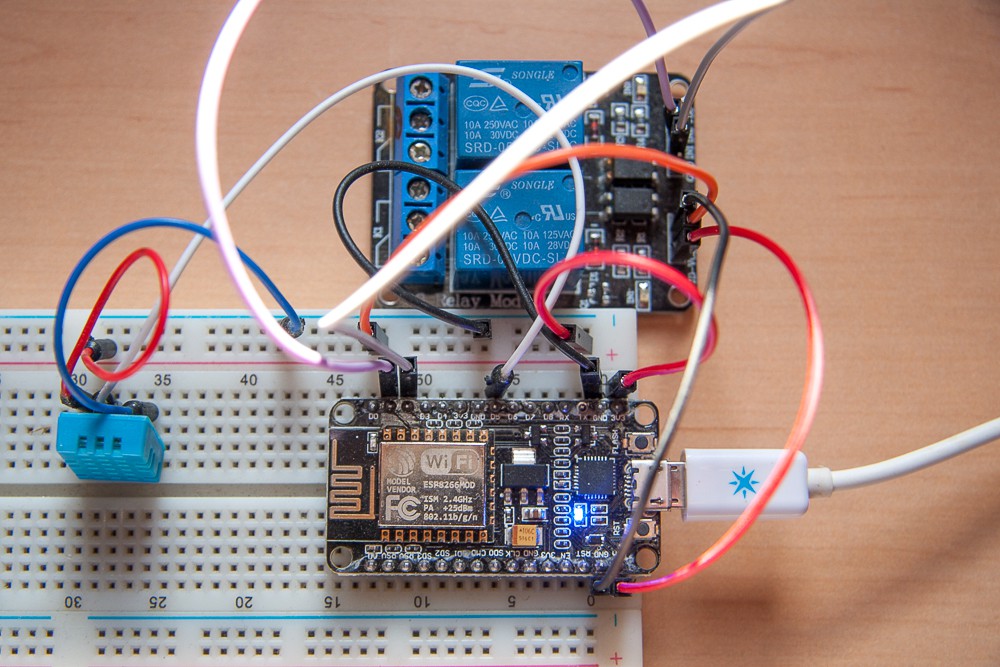
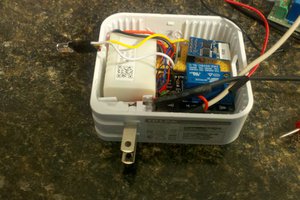
It should look like this:
Flash the firmware
You can get the source code from the repo on GitHub https://github.com/domoio-os/domoio_thermostat. The README contains detailed instructions, the steps are:
- Download the project and dependencies
- Create a Makefile using Makefile.sample as template
- Flash the certificates
- Flash the firmware
WiFi Settings
Follow this tutorial to connect the circuit to Domoio
Setup Specs
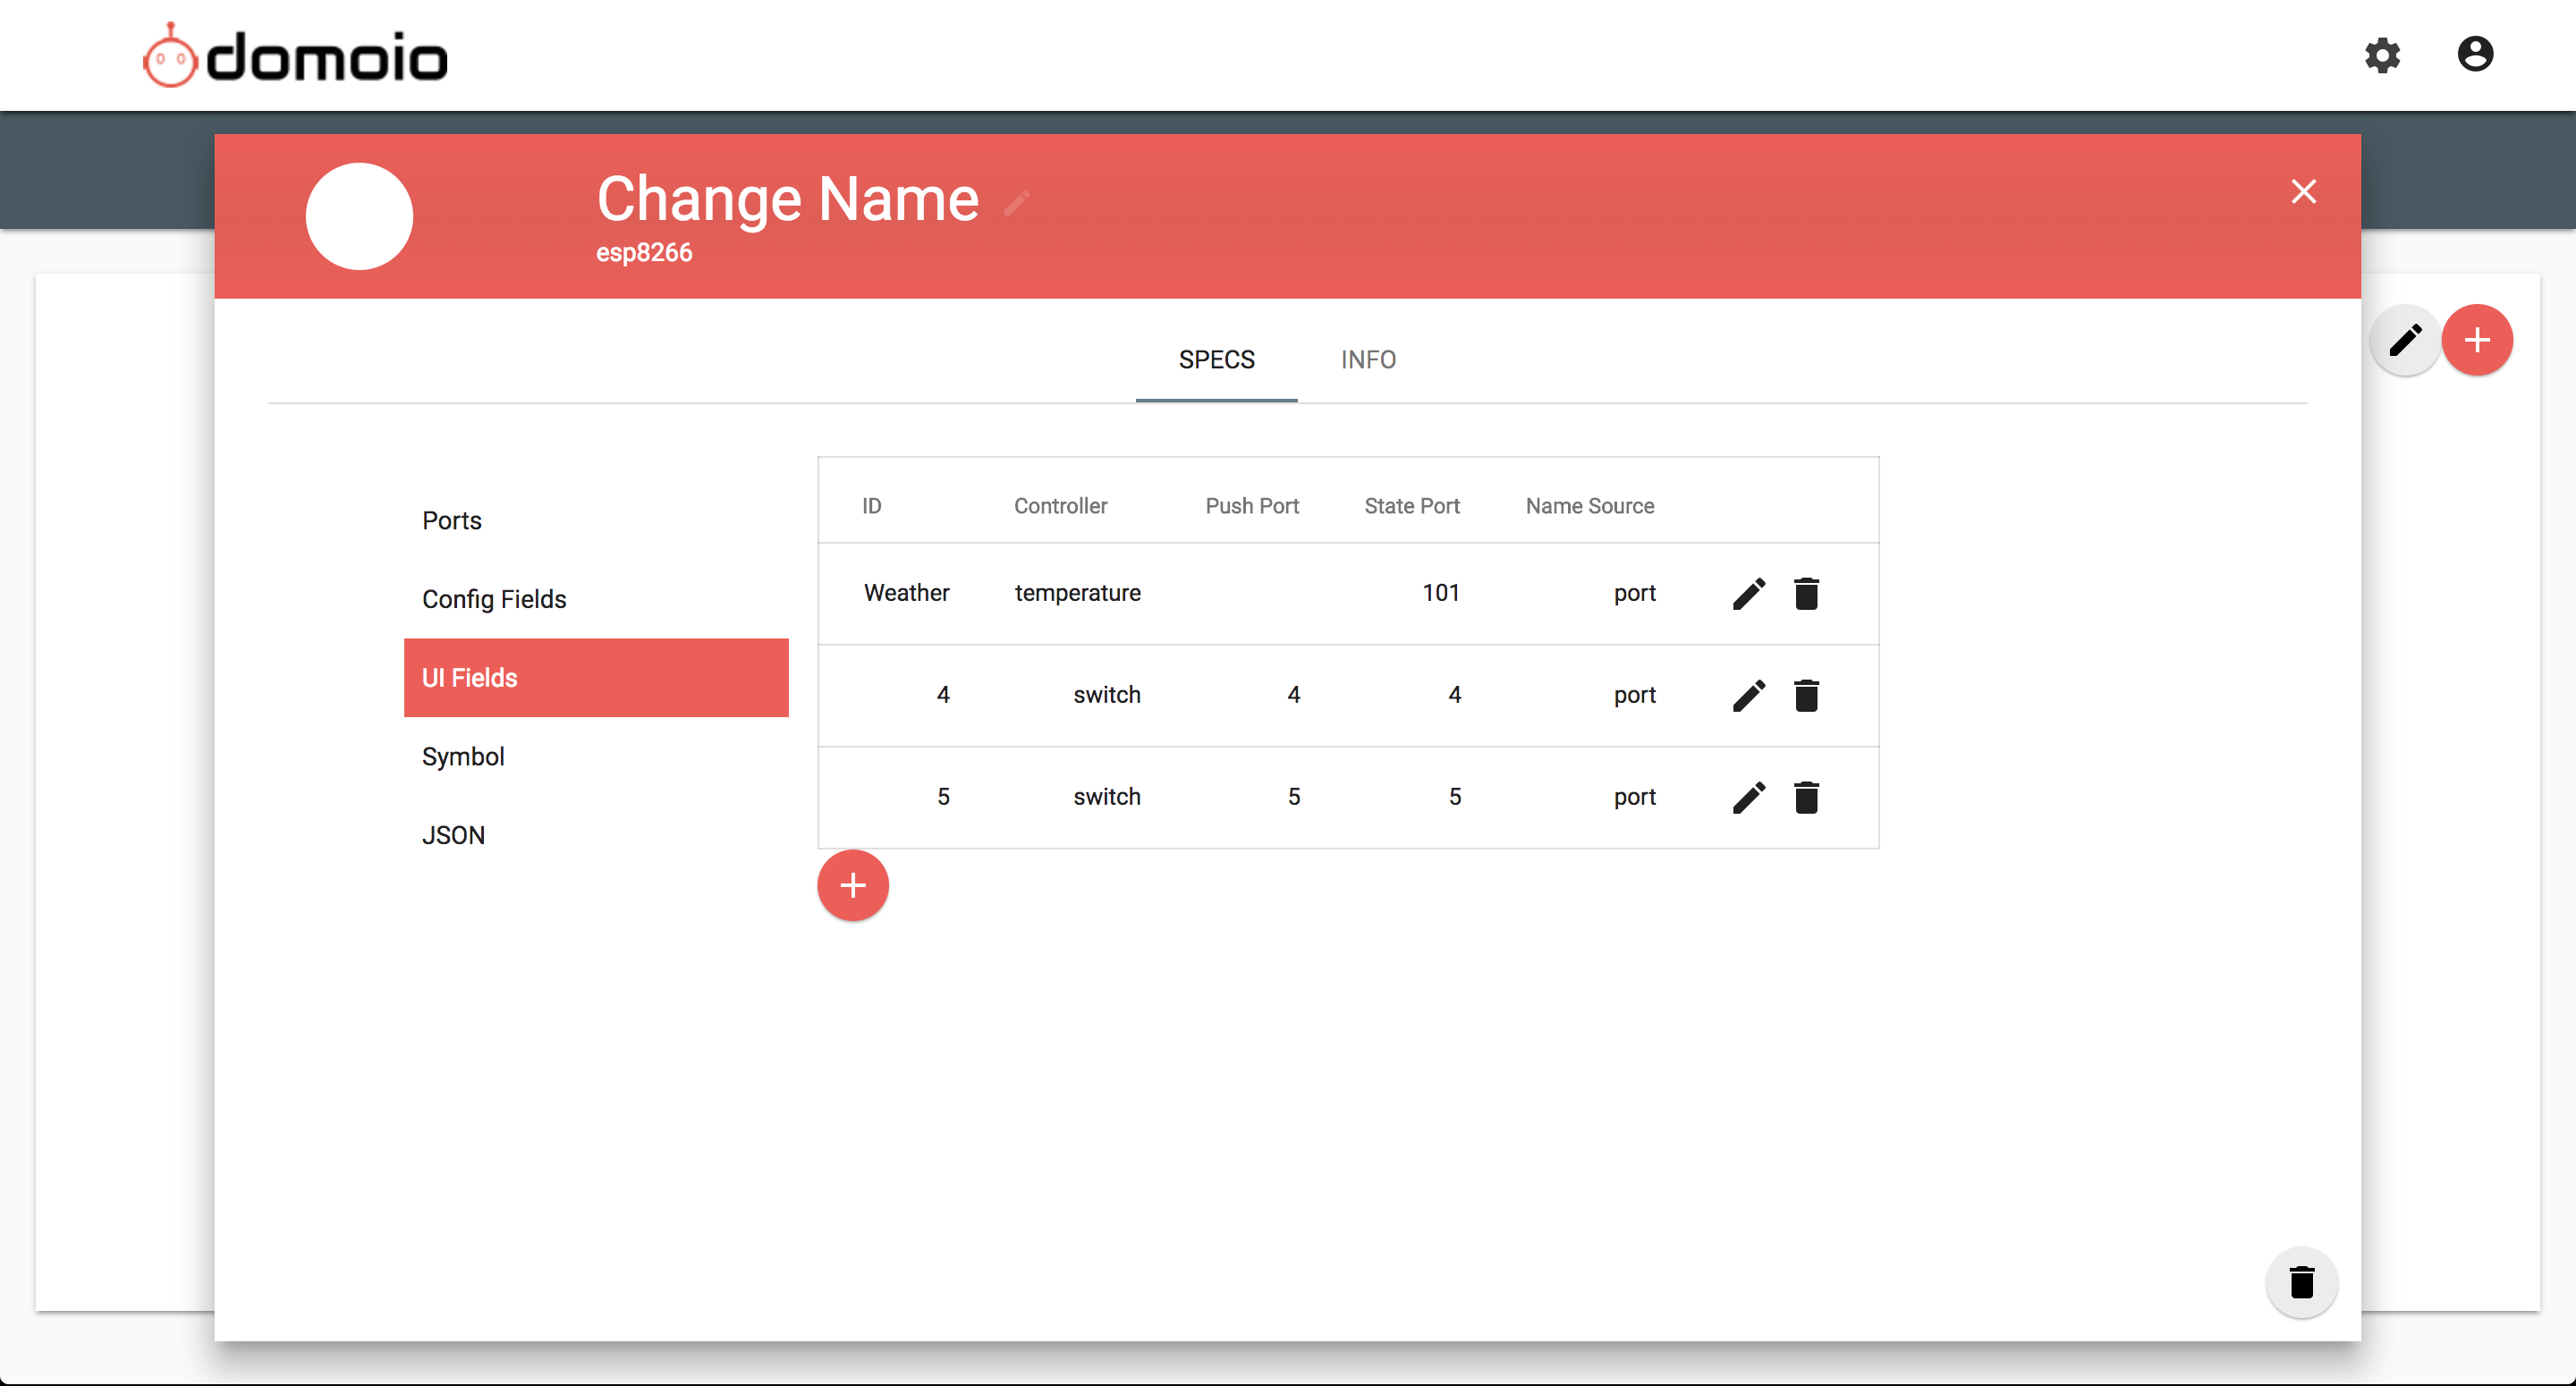
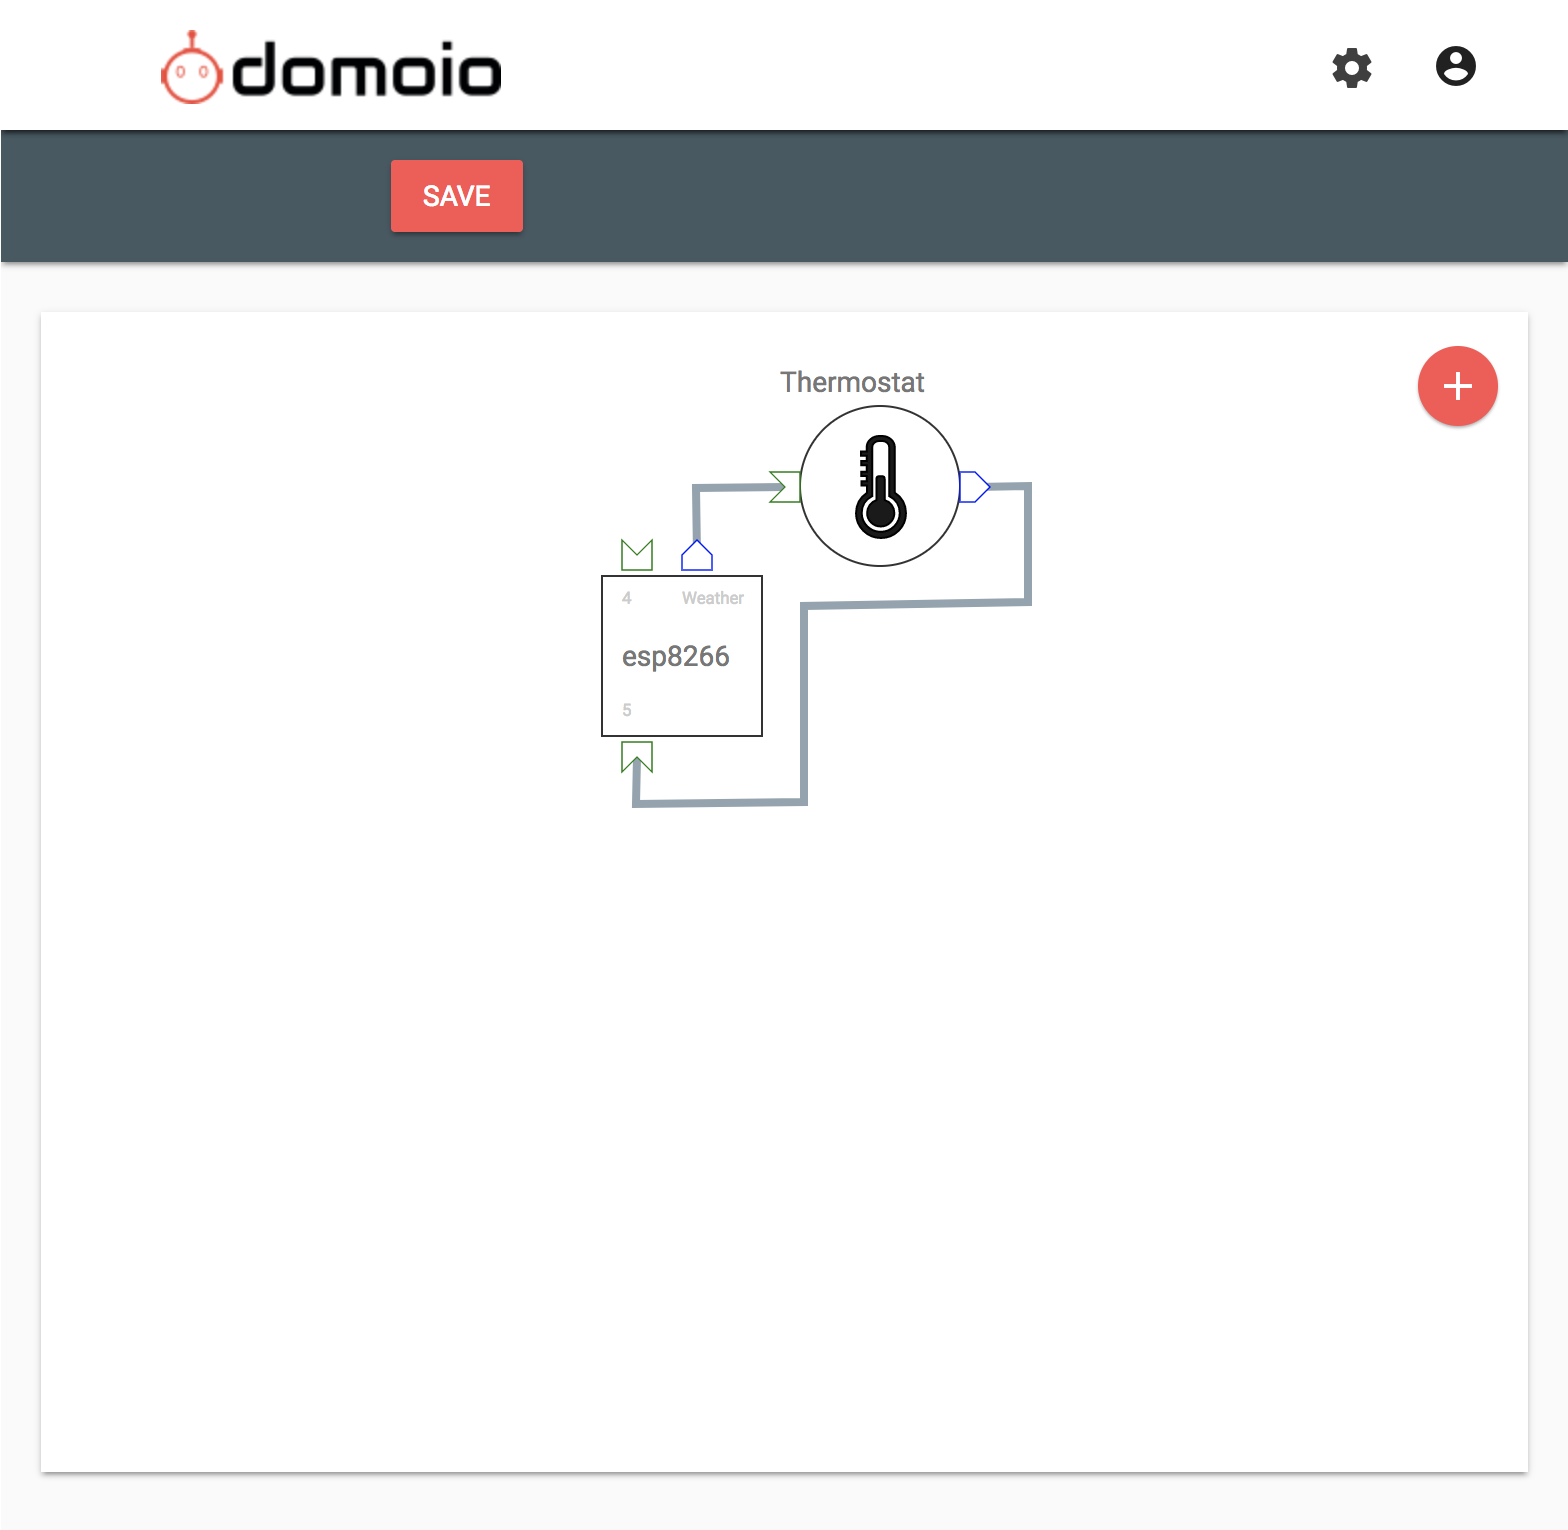
Once your device is connected and the pairing process has finished, you'll see a dummy device in the wires section of your project. It is time to setup the specs and let domoio know about the new device. To do so, add these ports and ui elements to your specs:
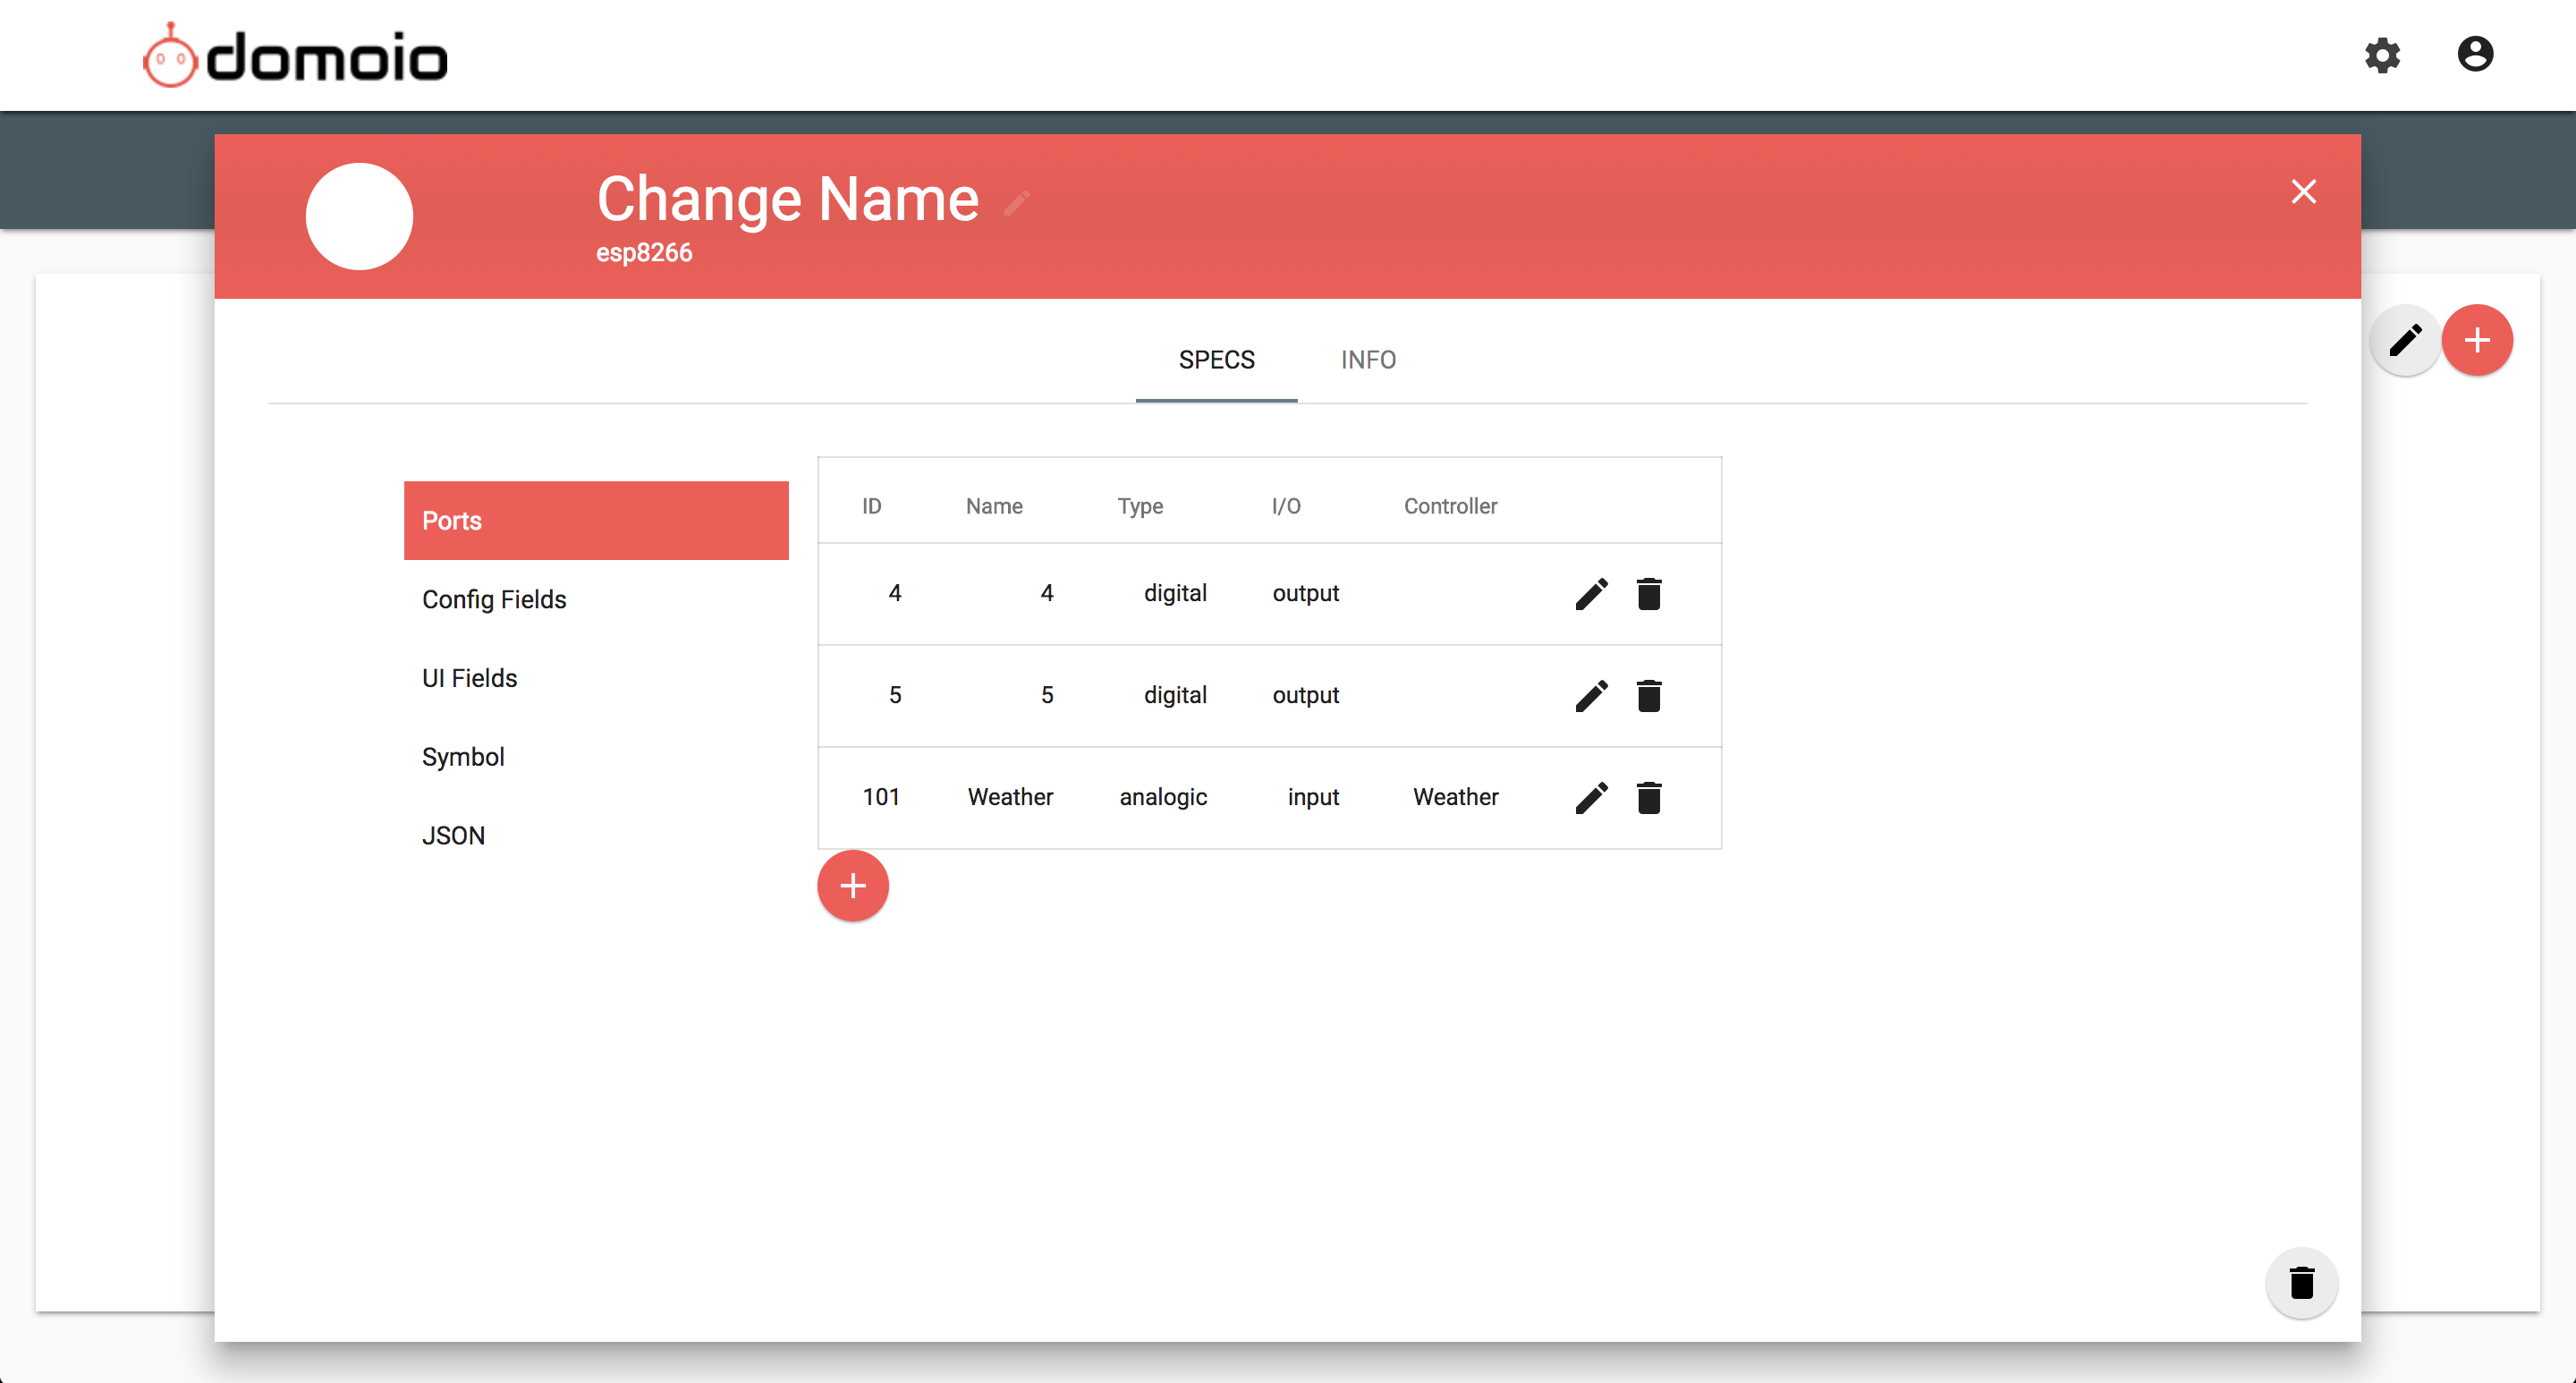
If you prefer, you can just import the JSON from this file: https://github.com/domoio-os/domoio_thermostat/blob/master/specs.json
Once the ports are created, you can add a thermostat and wire up everything.

 Gary
Gary
 Subhajit
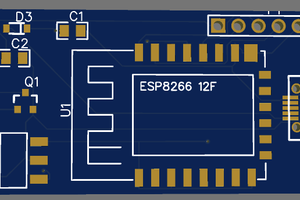
 Dimitar Ivanov