 Timo Birnschein
In order to weld metal to metal with a spot welder two things are important:
- a certain pressure onto the material with the electrodes to establish proper conductivity
- the time it takes to weld the material
The first bit can be achieved by hinging both arms individually and make both of them spring loaded. I didn't have any springs to I used a ring of ninjaflex for 3D printers instead. Works great! (thus far).
The time to weld the material is another story that I will cover in the software log.
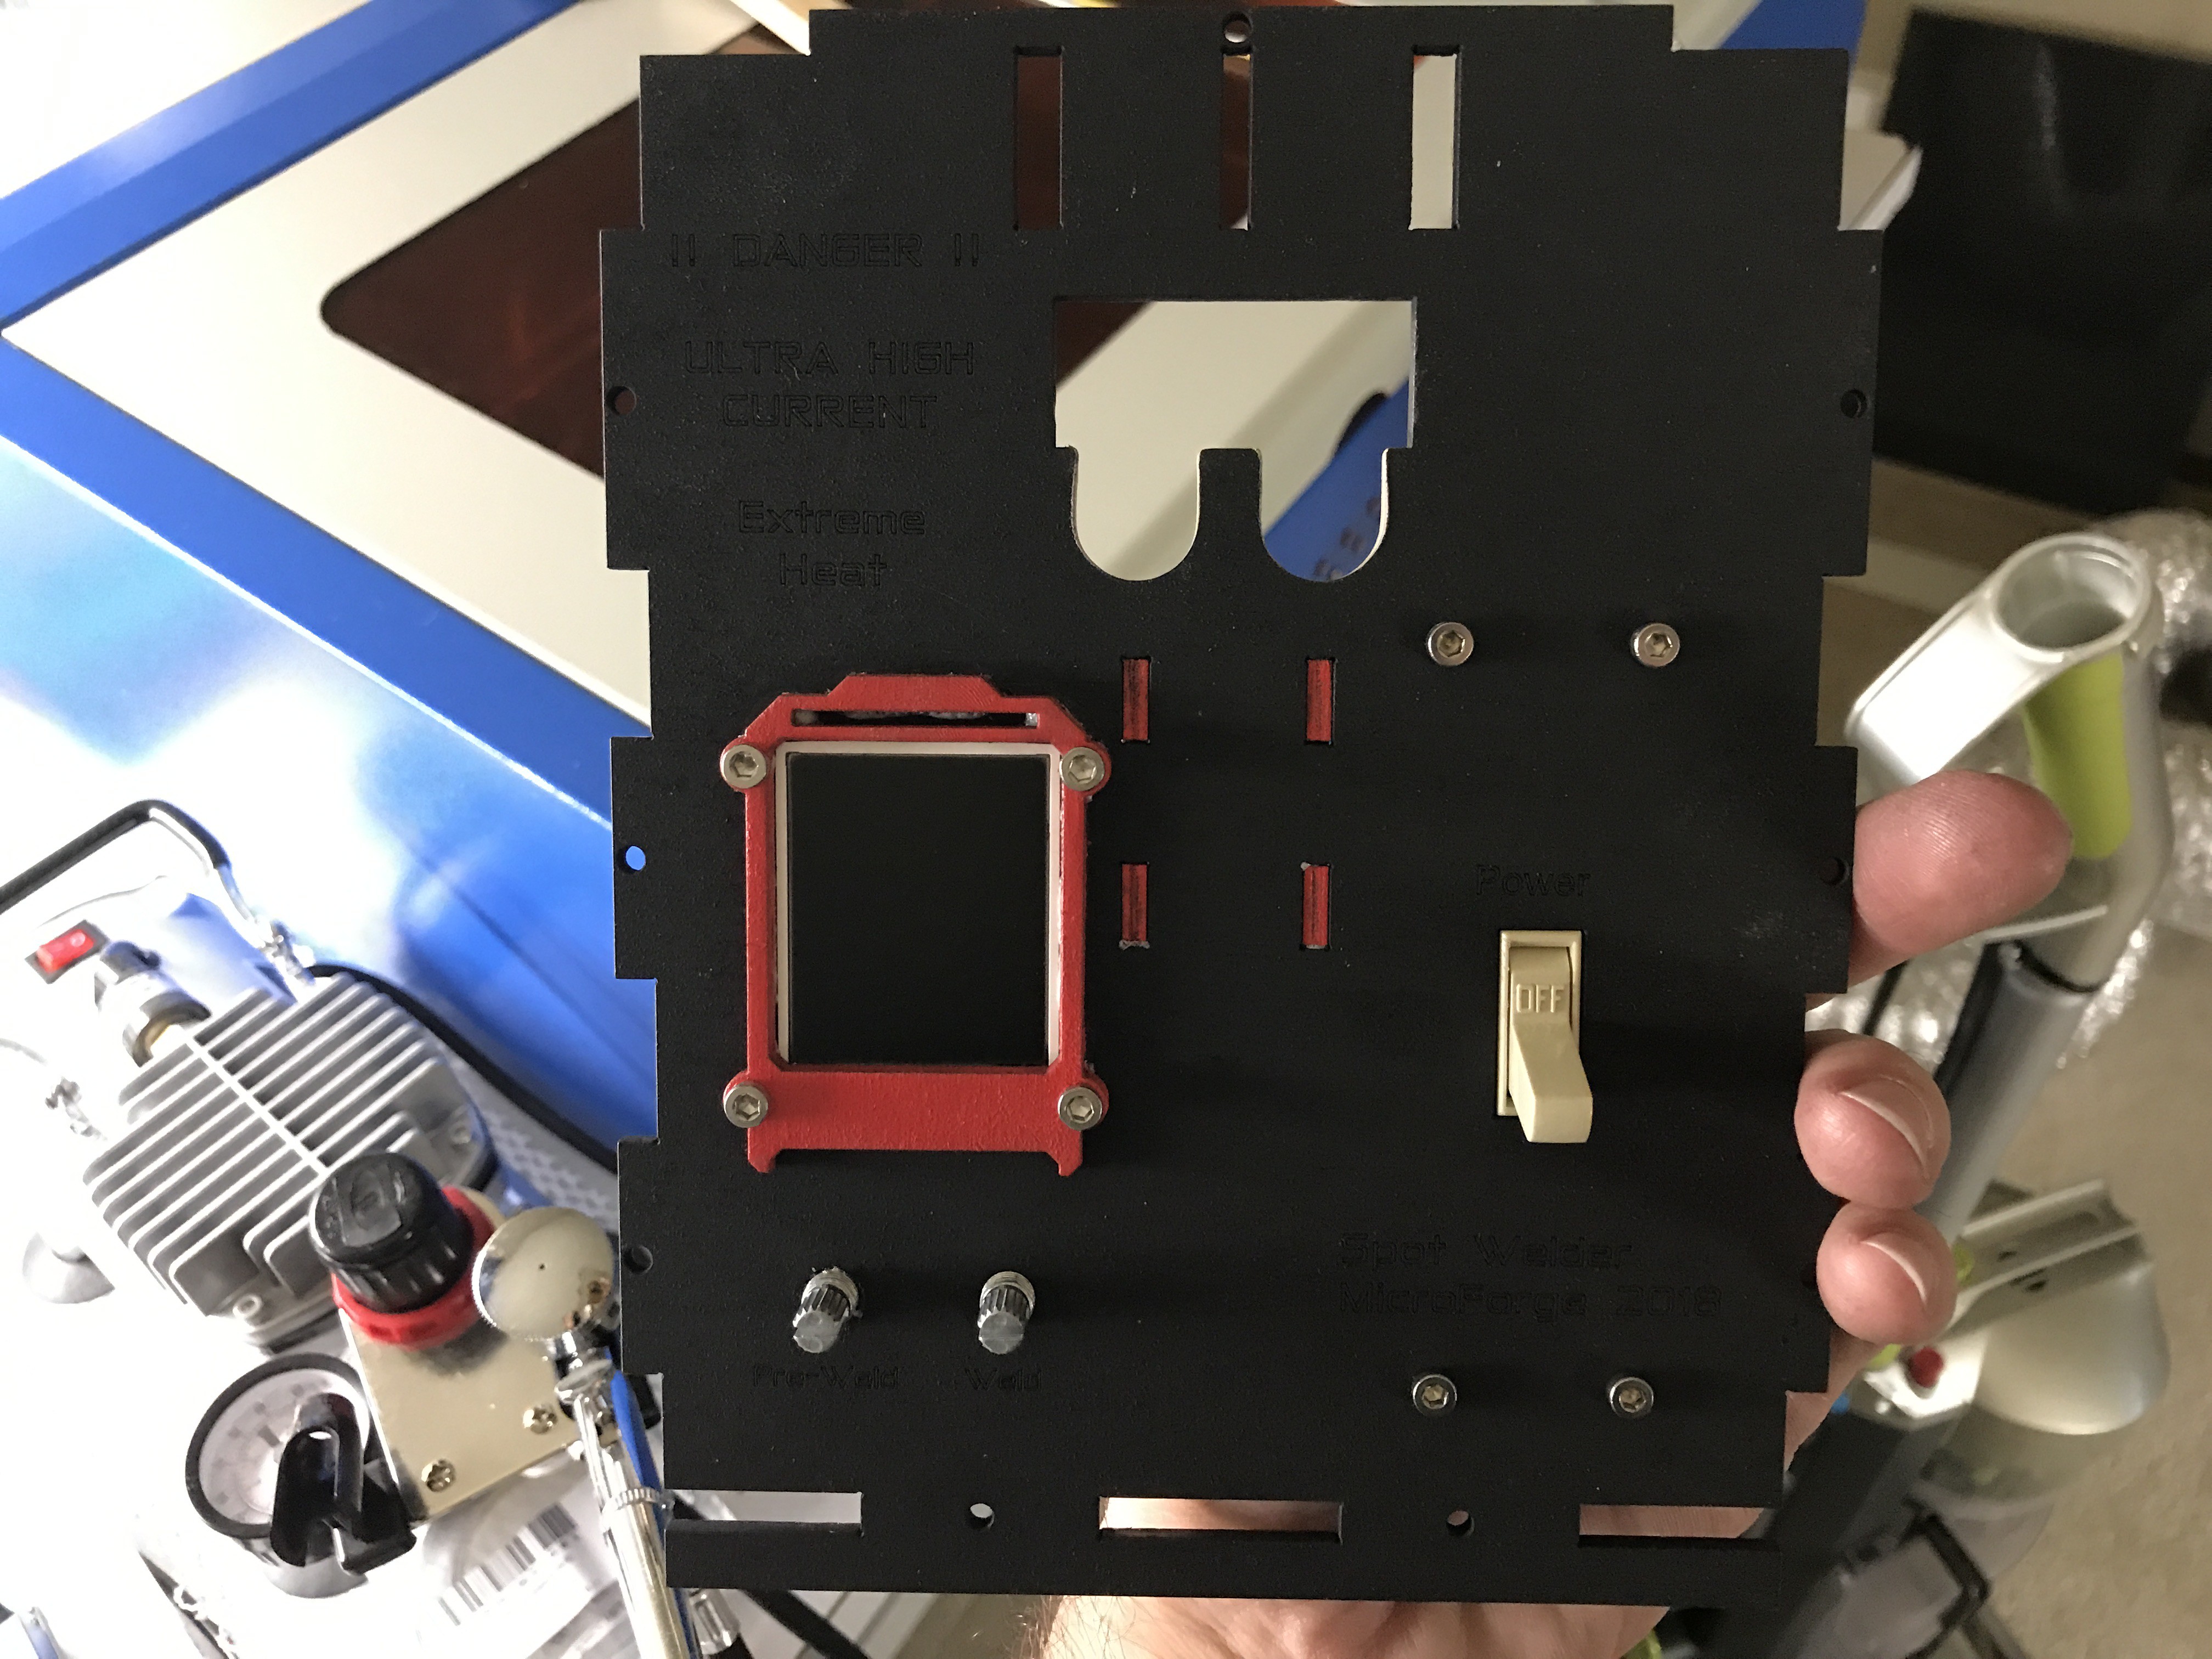
I wanted to create an enclosure that is easy to move around, has exposed arms, a display, a fuse behind a service bay, the potentiometers, as well as my favorite 86ct wall switch from Home Depot. It also needed to provide enough strength to house the heavy transformer as well as the double hinged arms that really shouldn't move at all - except vertically.
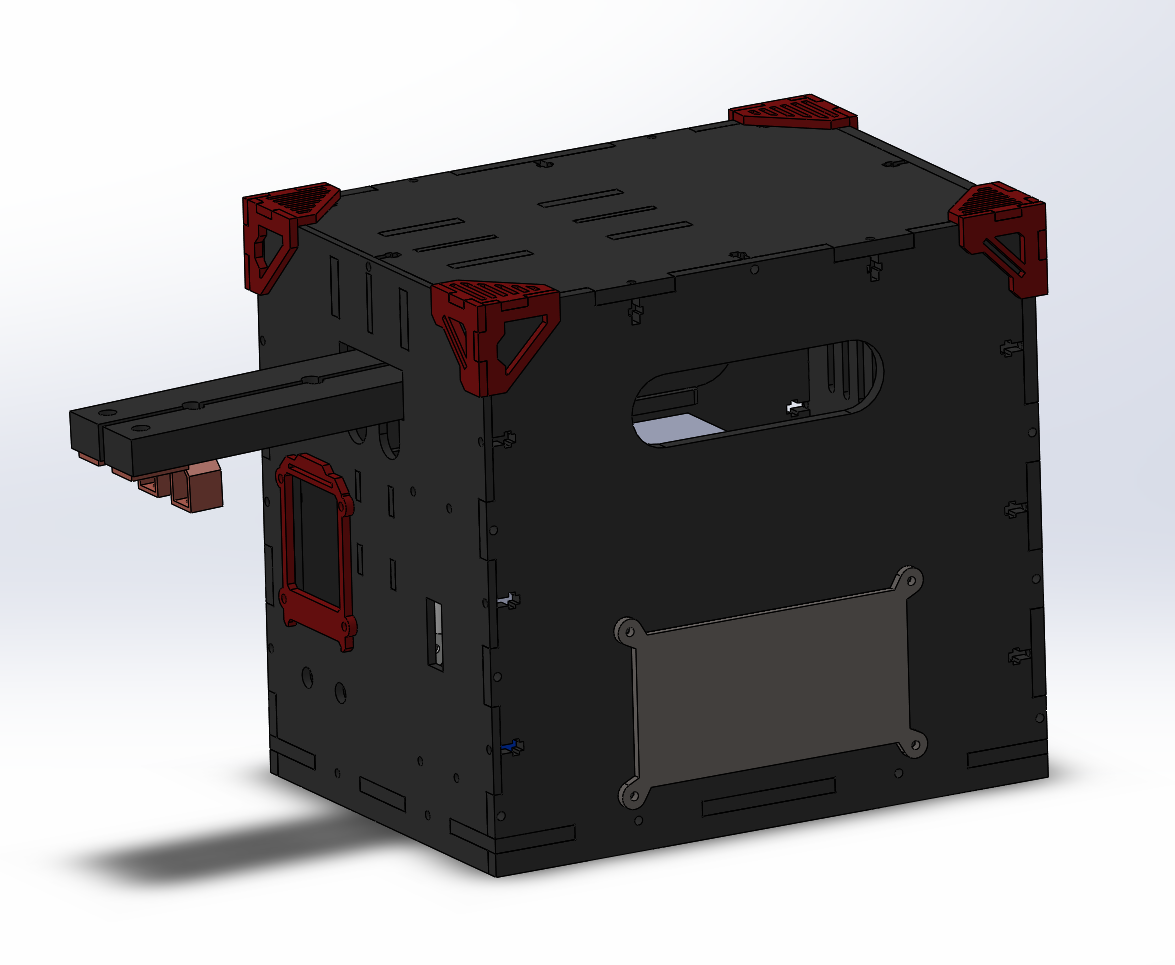
It's essentially a box. It has everything described above and it made from sturdy 5mm plywood from Home Depot. The front is only 3mm plywood because I needed to be able to mount the potentiometers as well as the display properly. The rest is decoration.
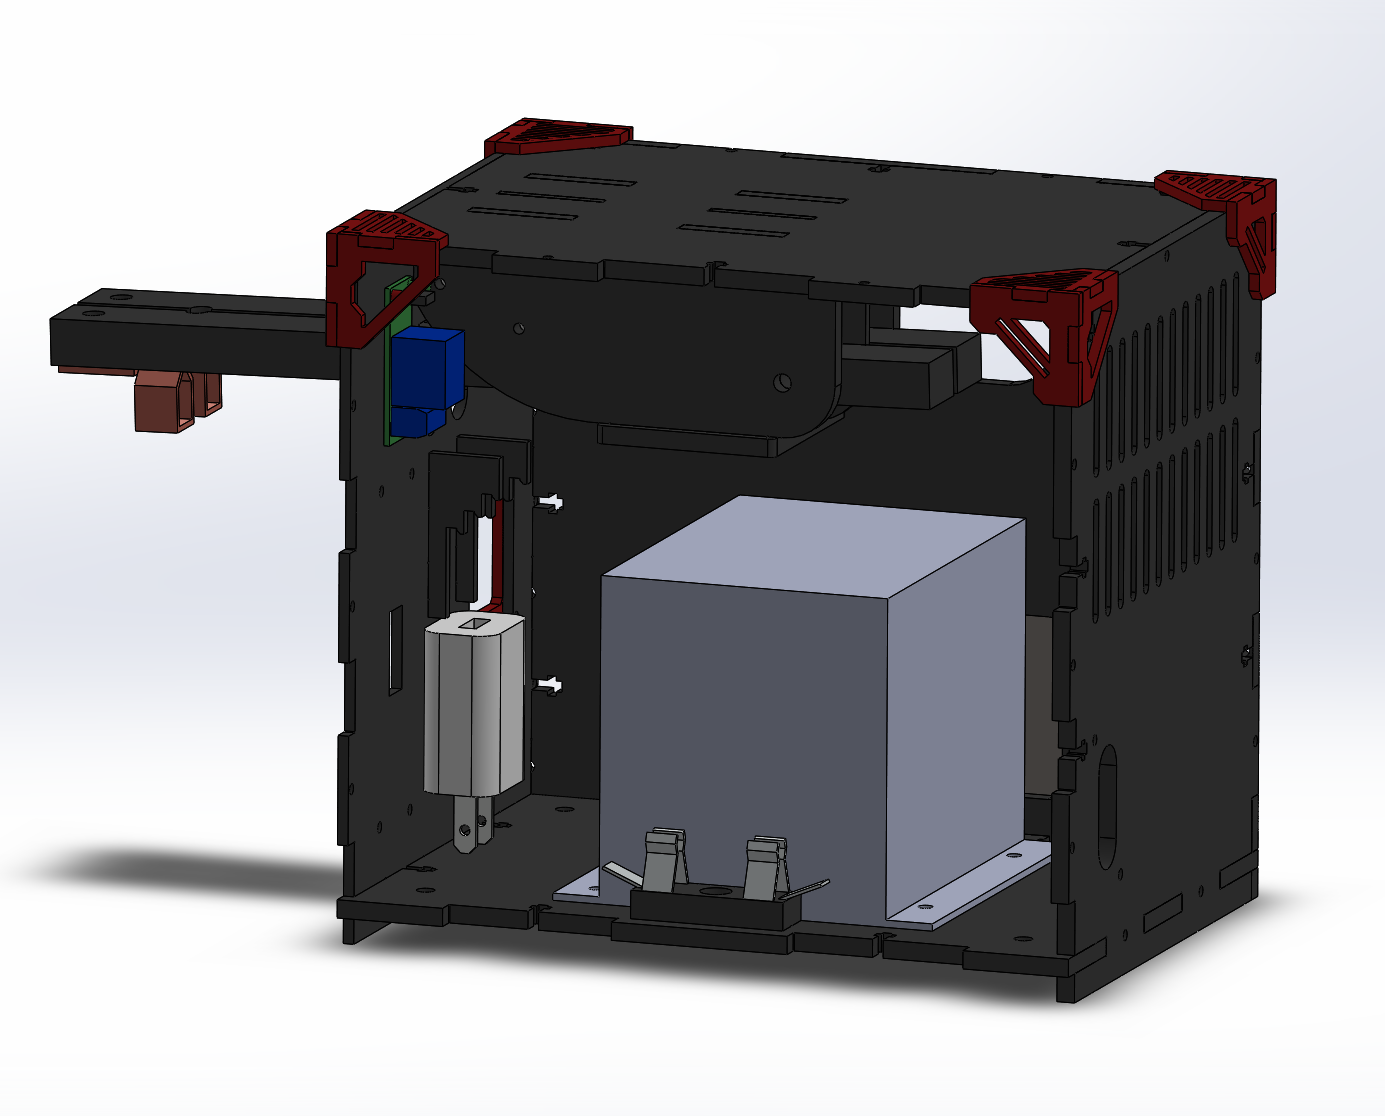
On the inside, there is the fuse block, the $1 wall charger from Dollar Tree (I really went all in here!) as well as the $2 Arduino relay. I mounted everything to the front plate that is either 5V or needs to be swapped out ones in a while.
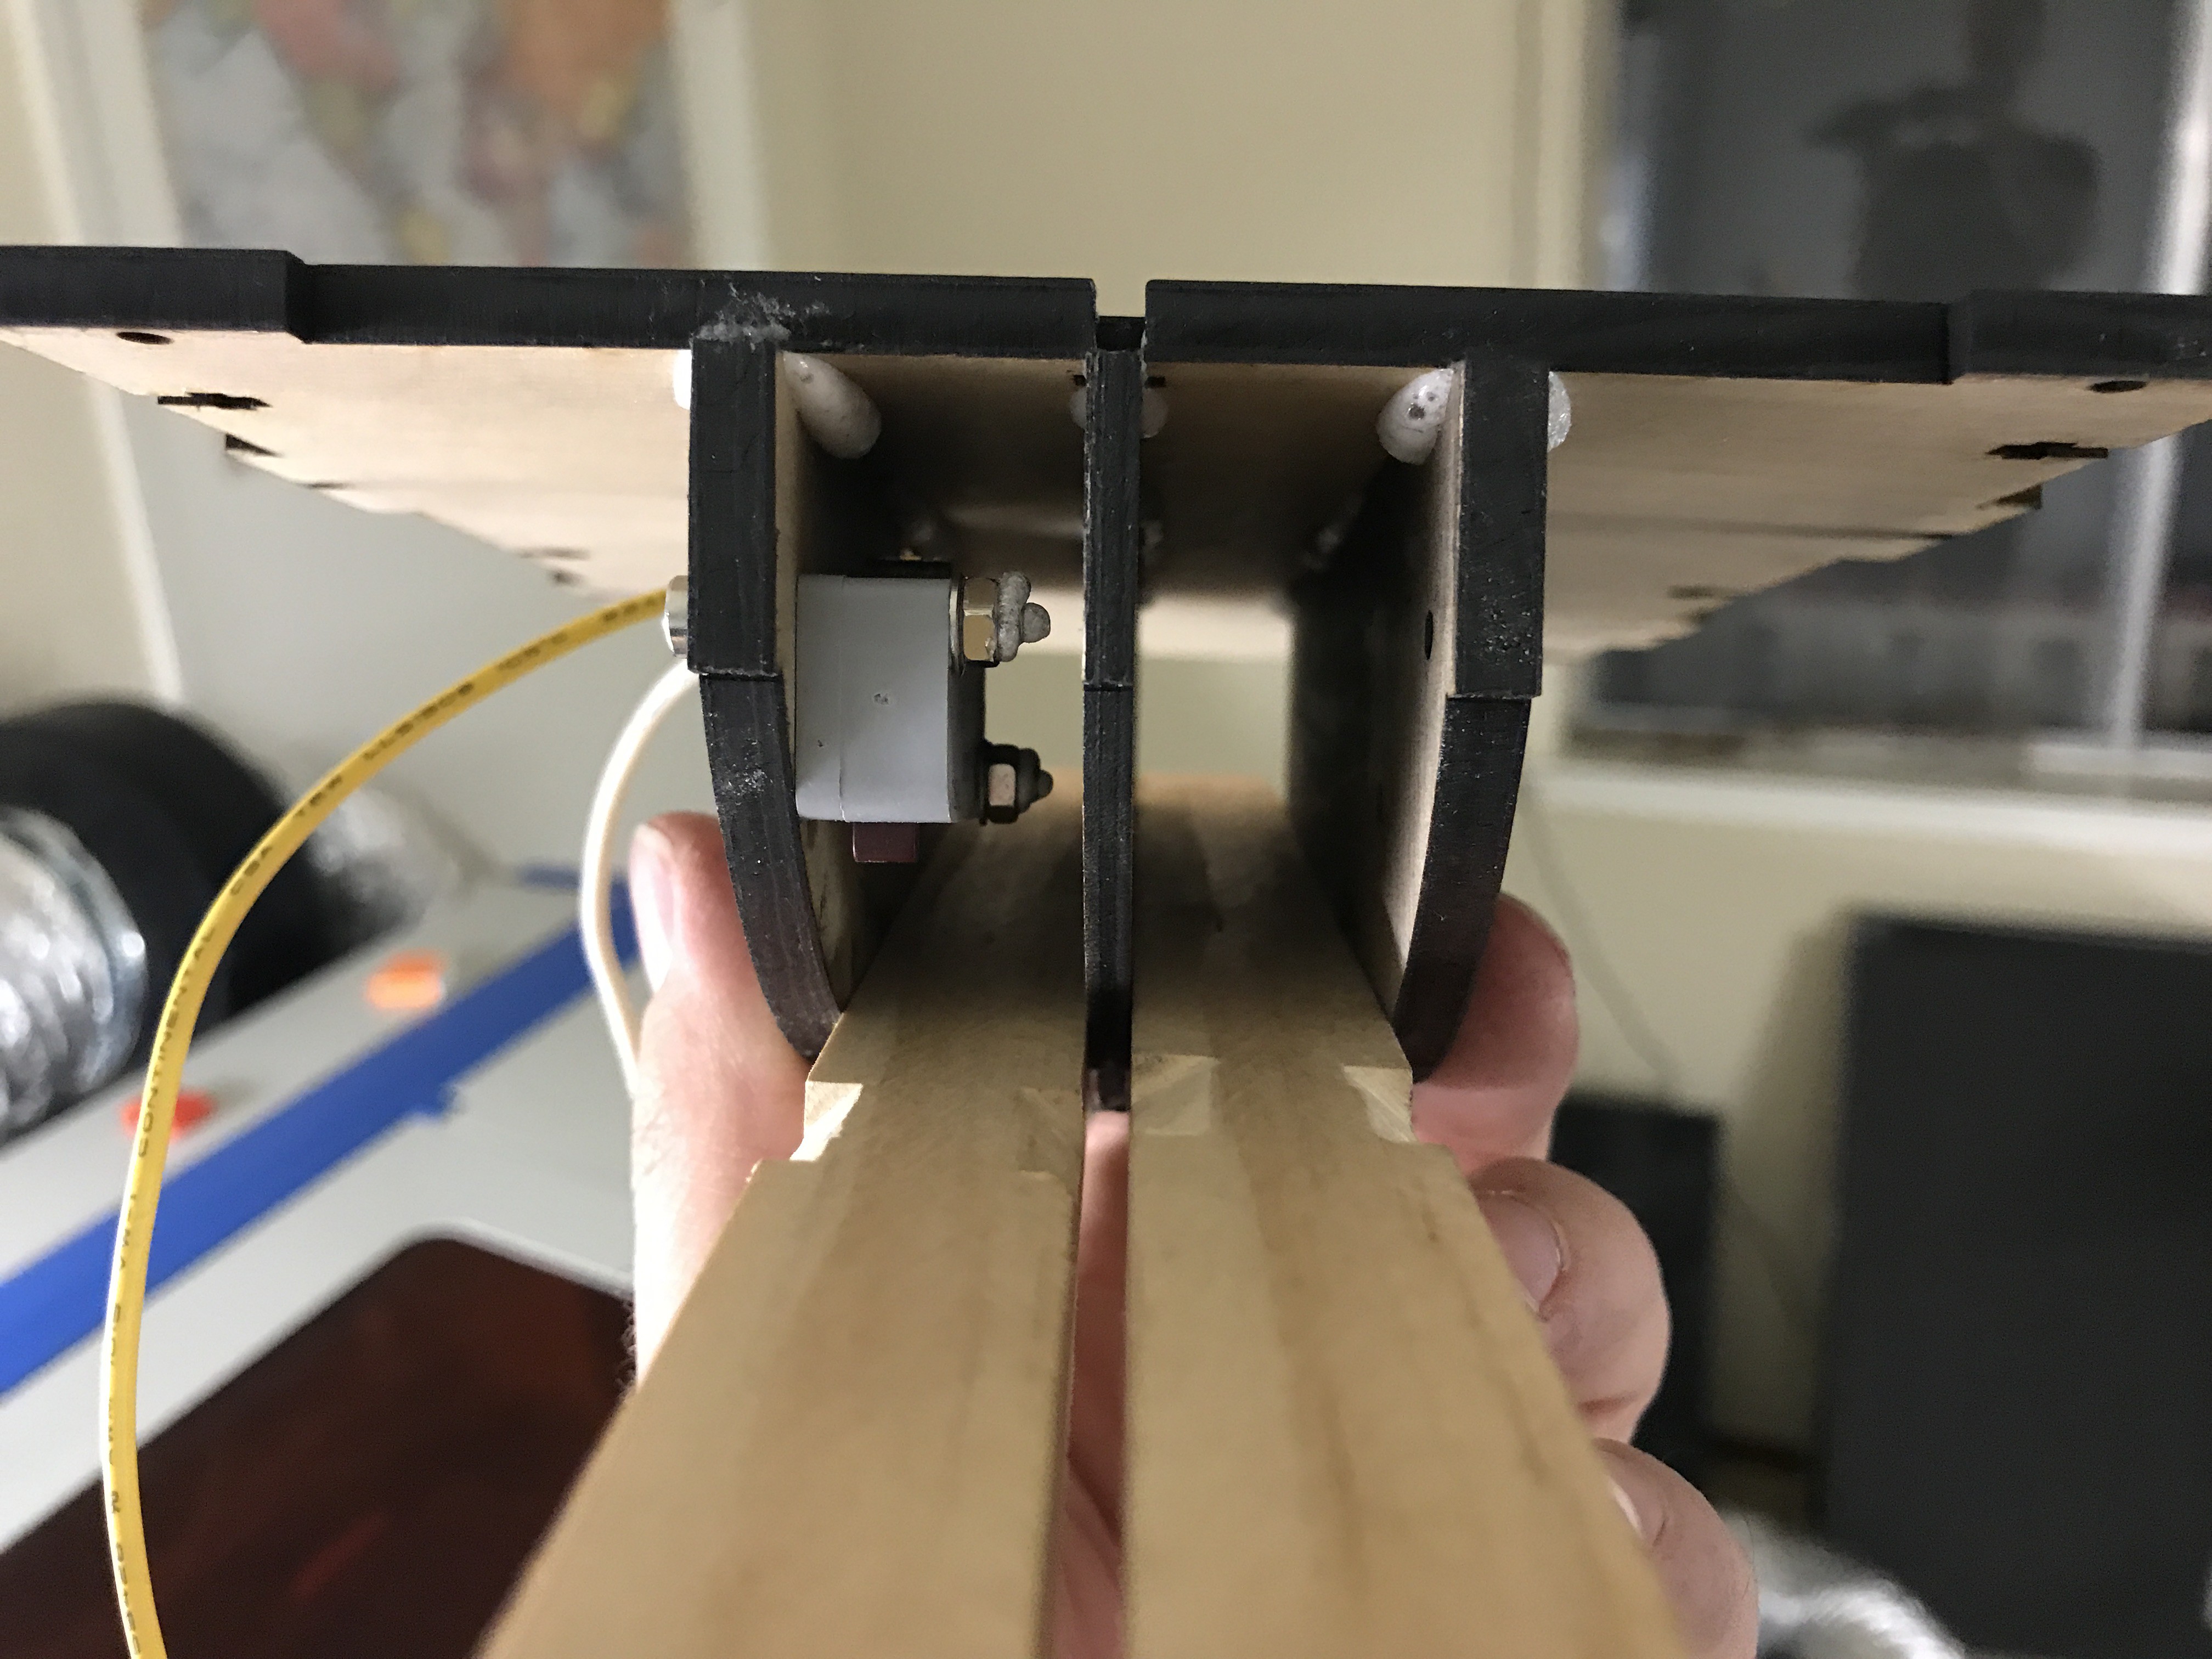
The hinge mechanism is equally simple. I just needed to constrain the two arms in all axis except one. This is possible with stiff side plates and a center plate to keep them apart which is why there are three plates glued to the top cover instead of just the outer two.

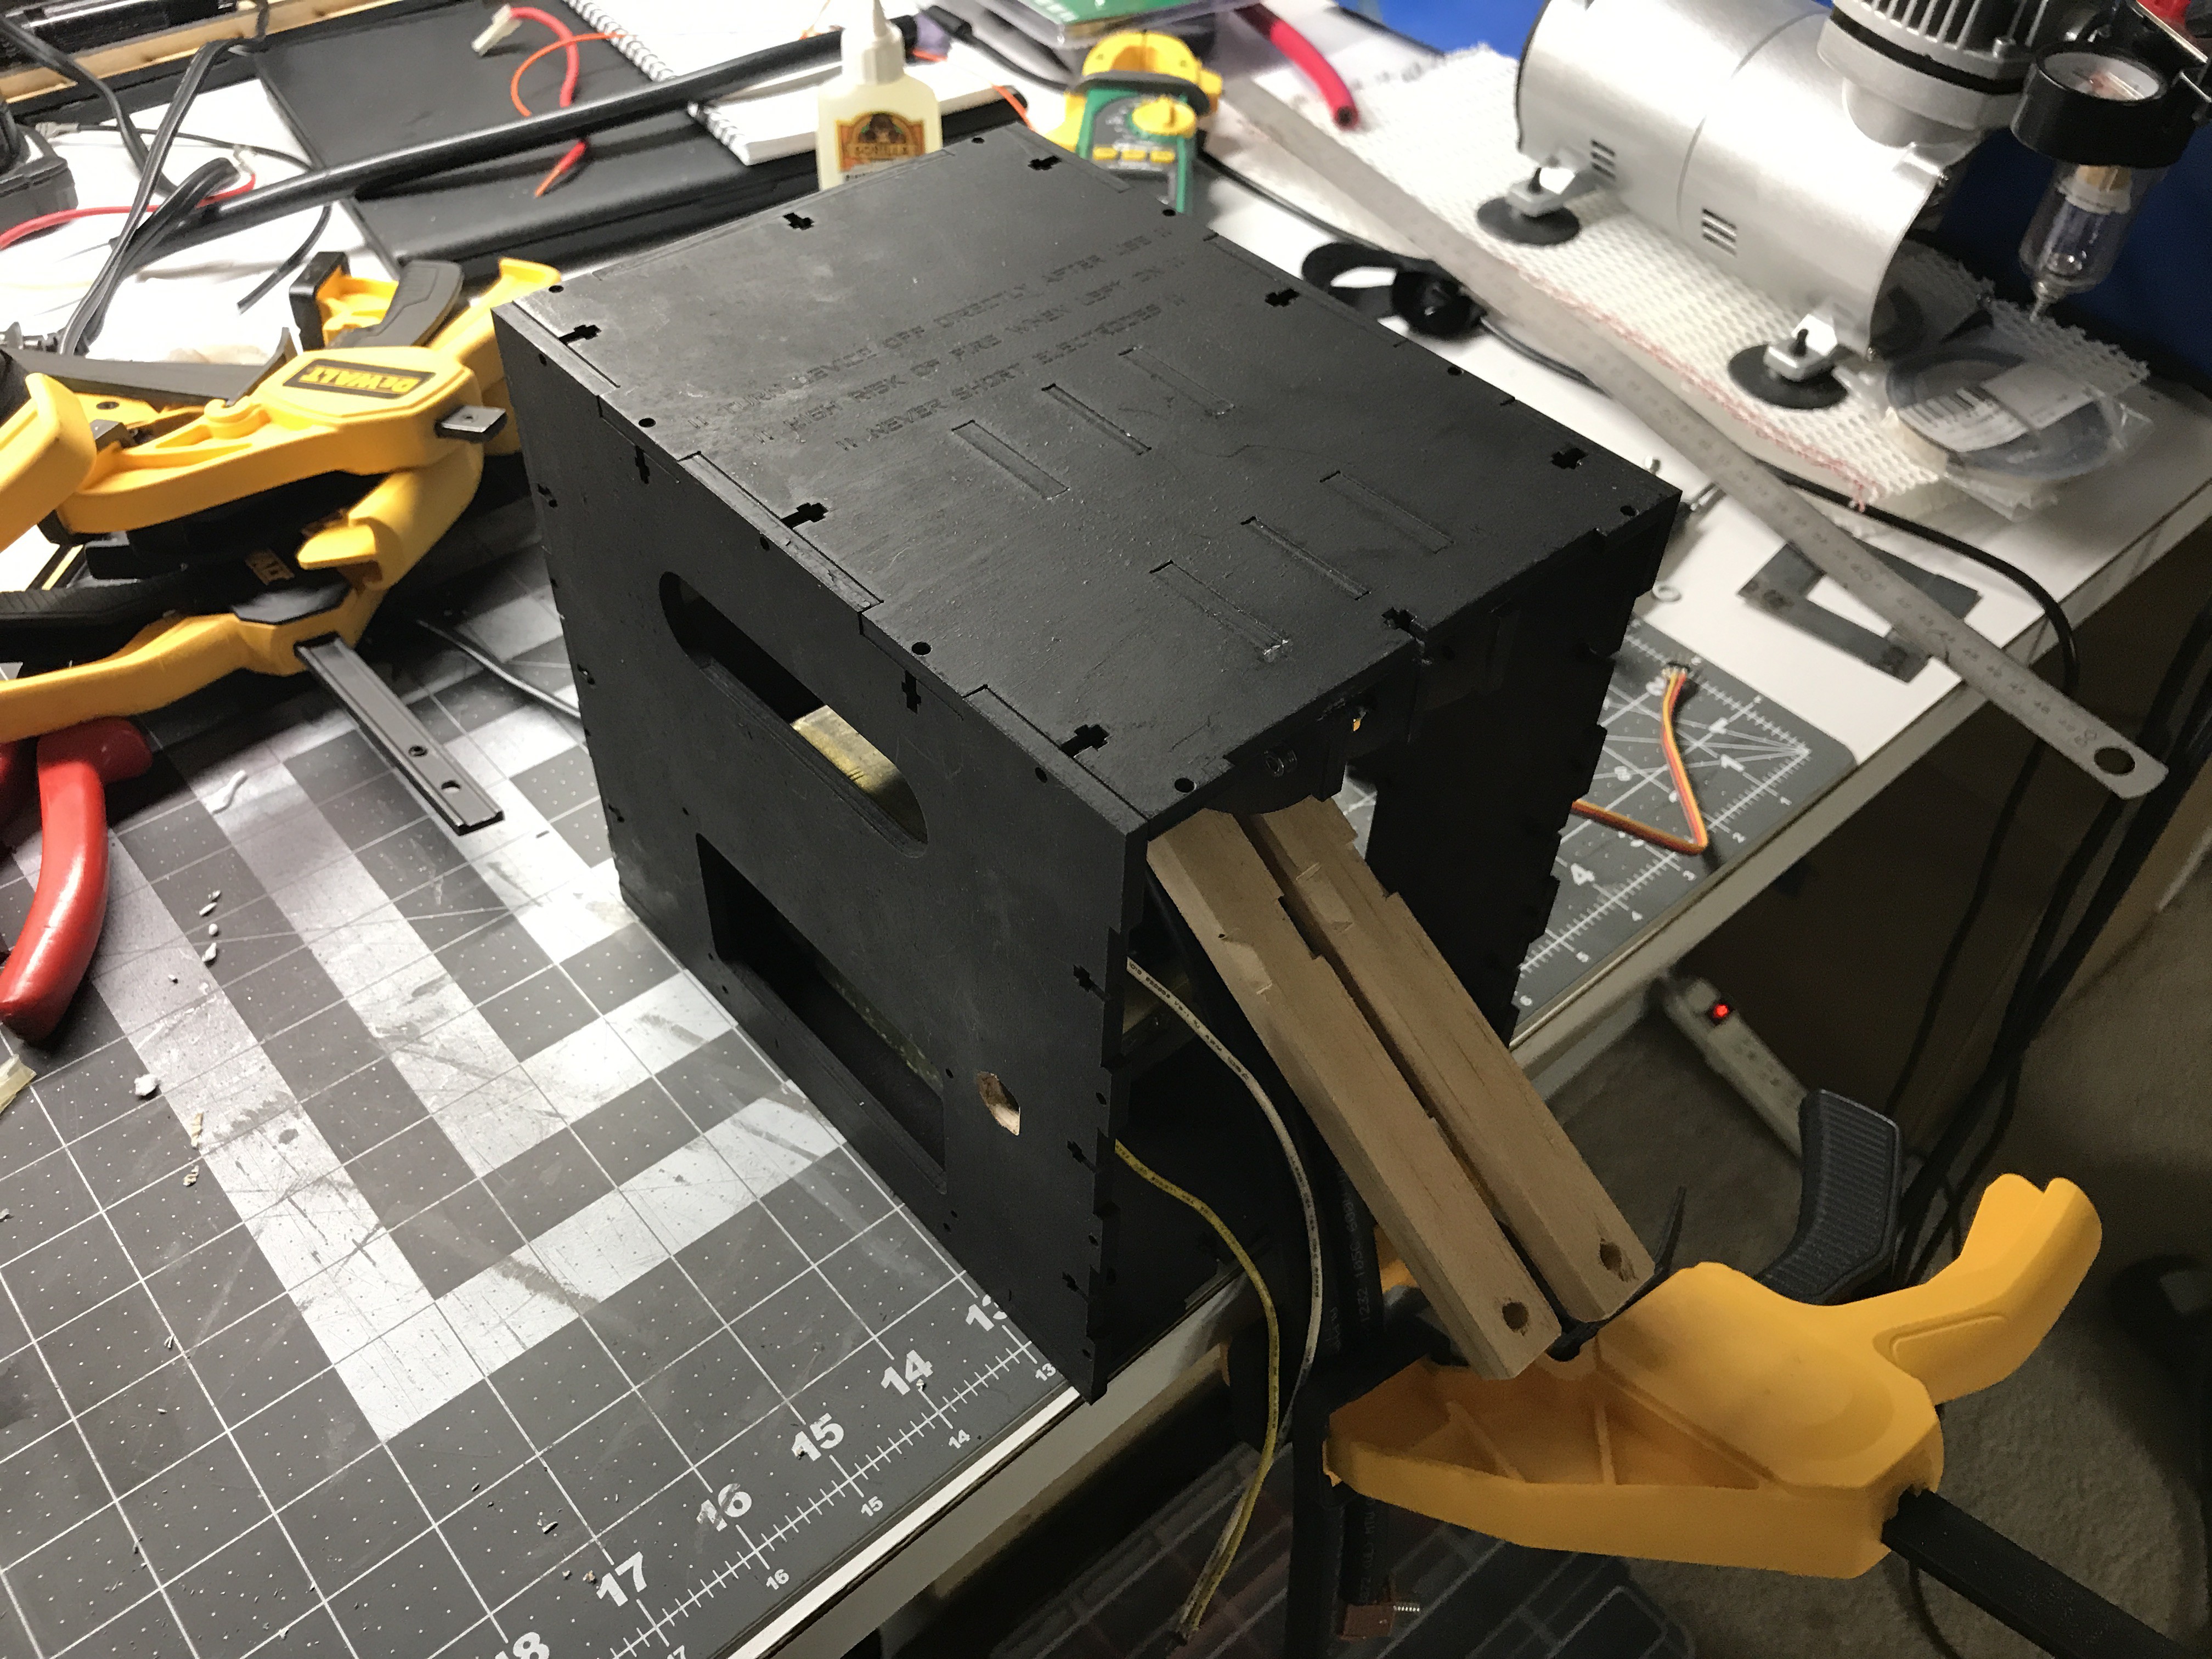
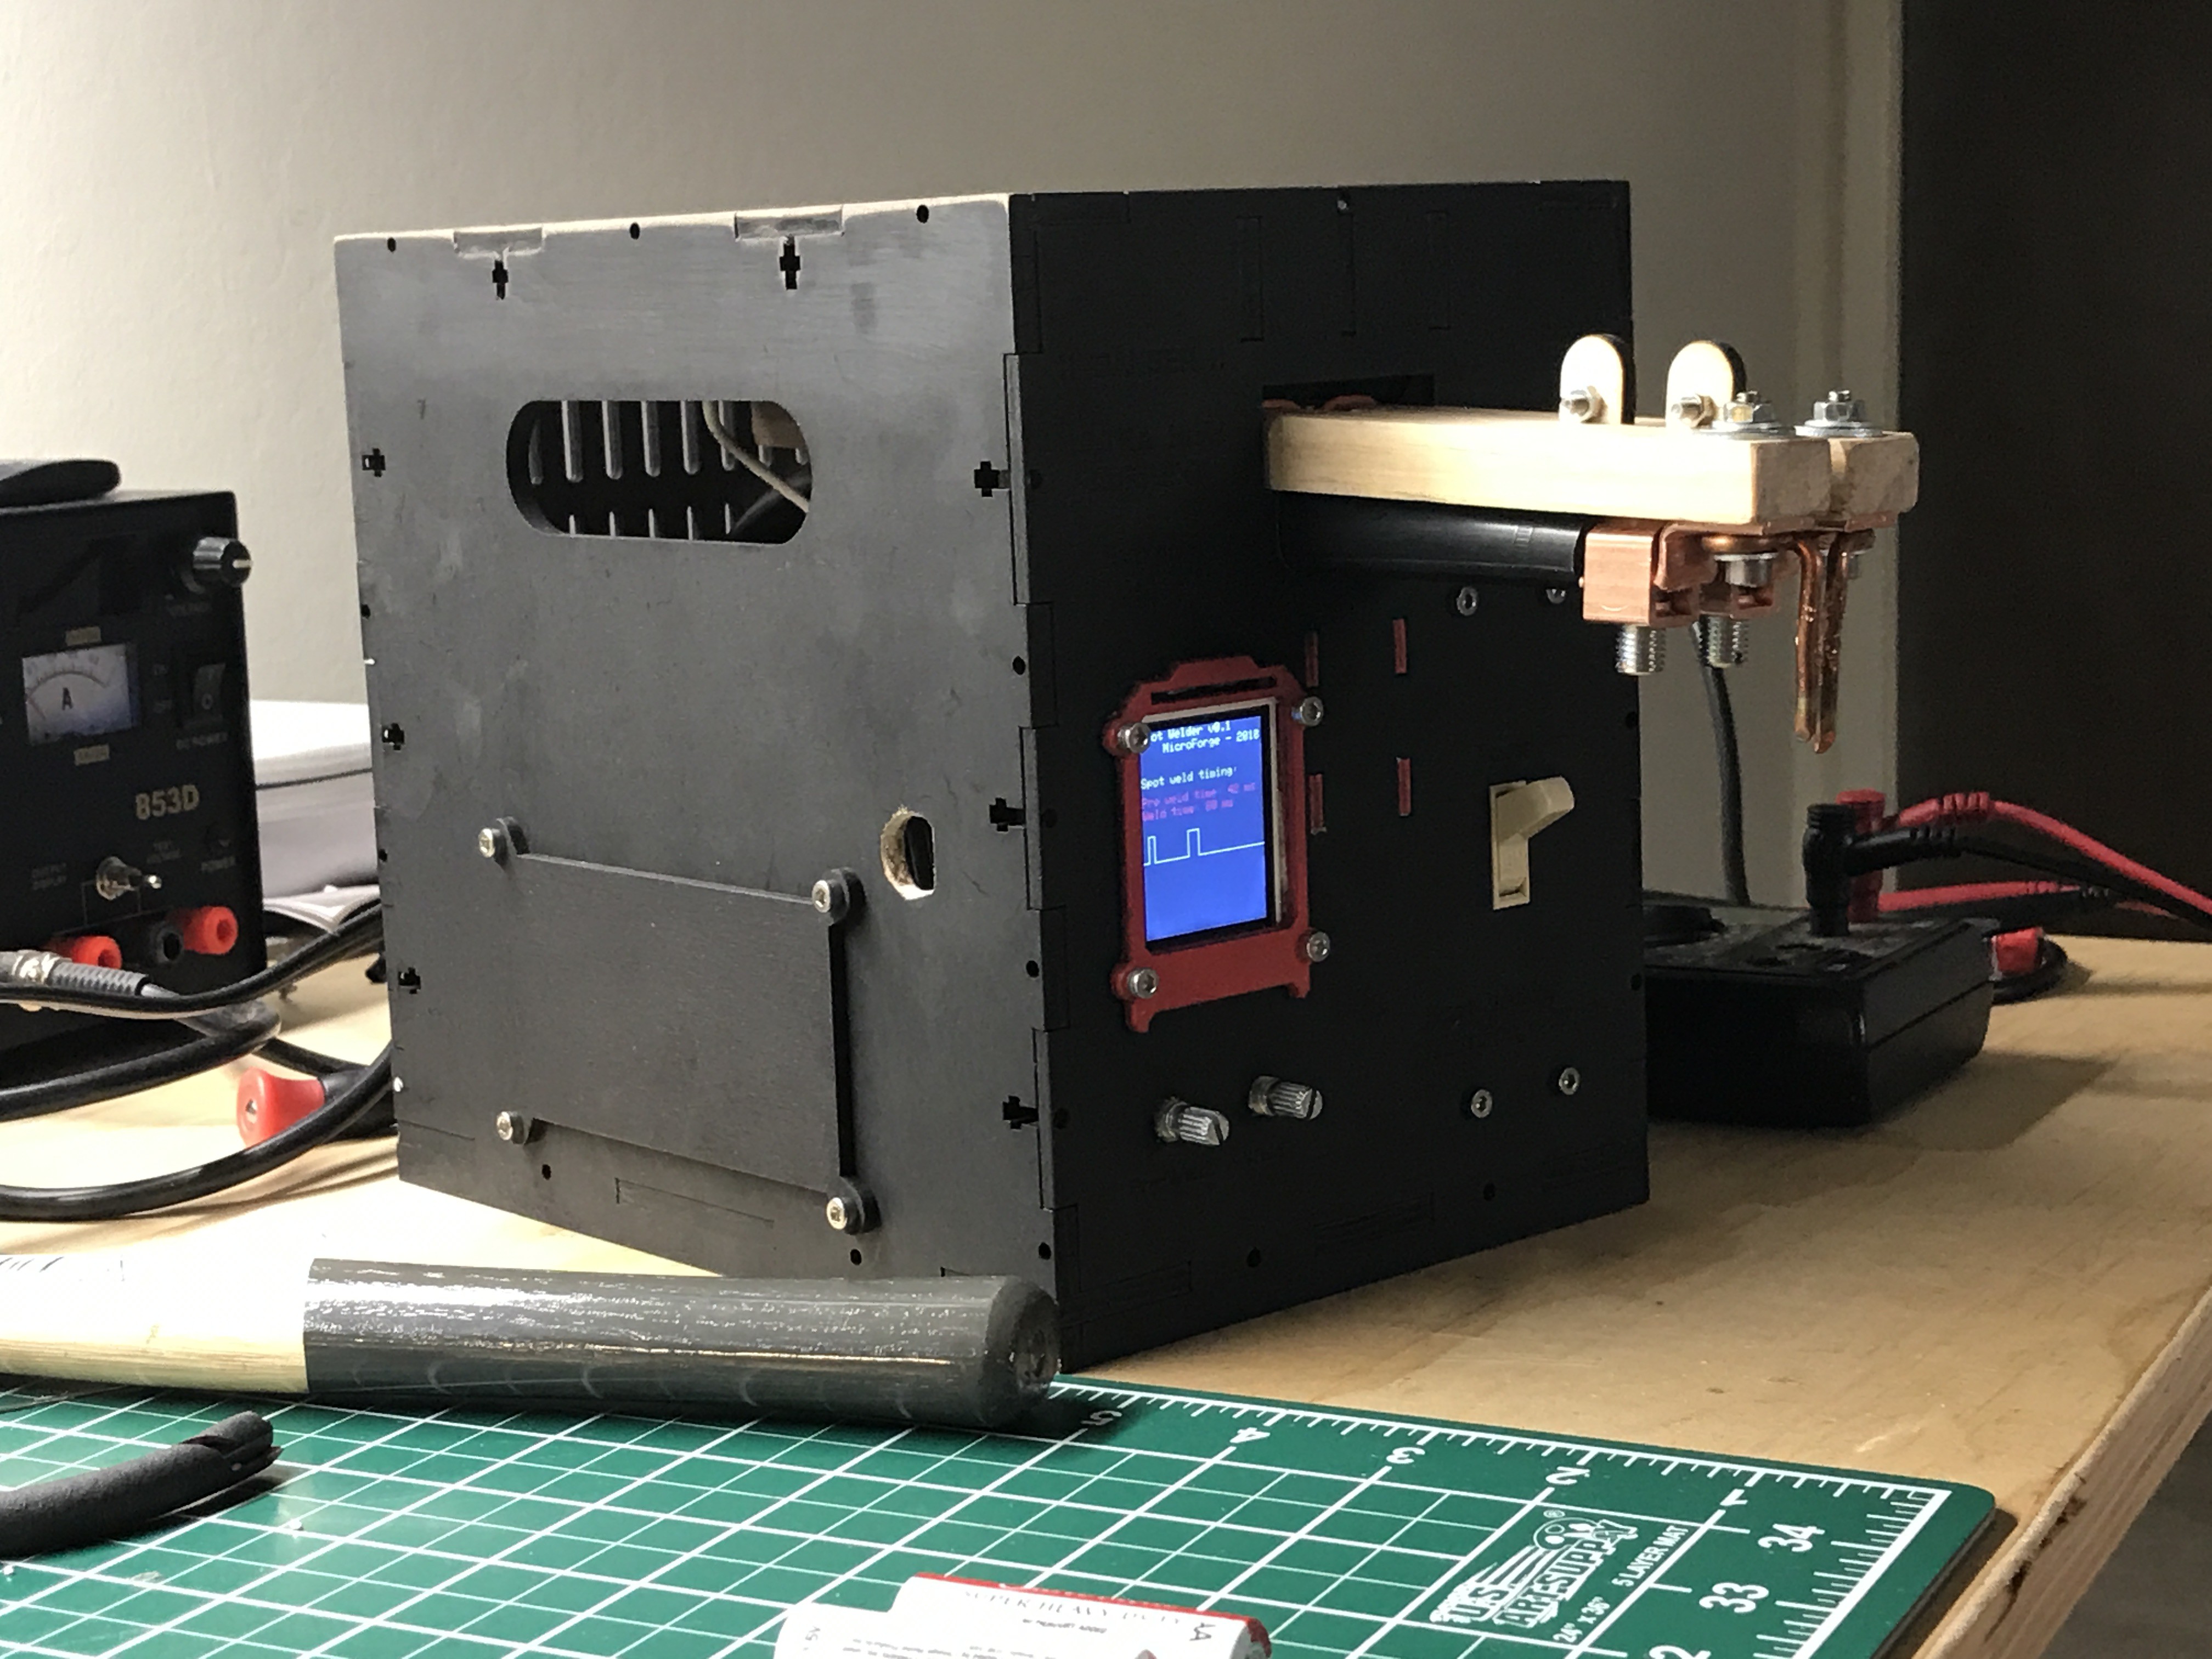
In the end it pretty much looked exactly the same in real life:
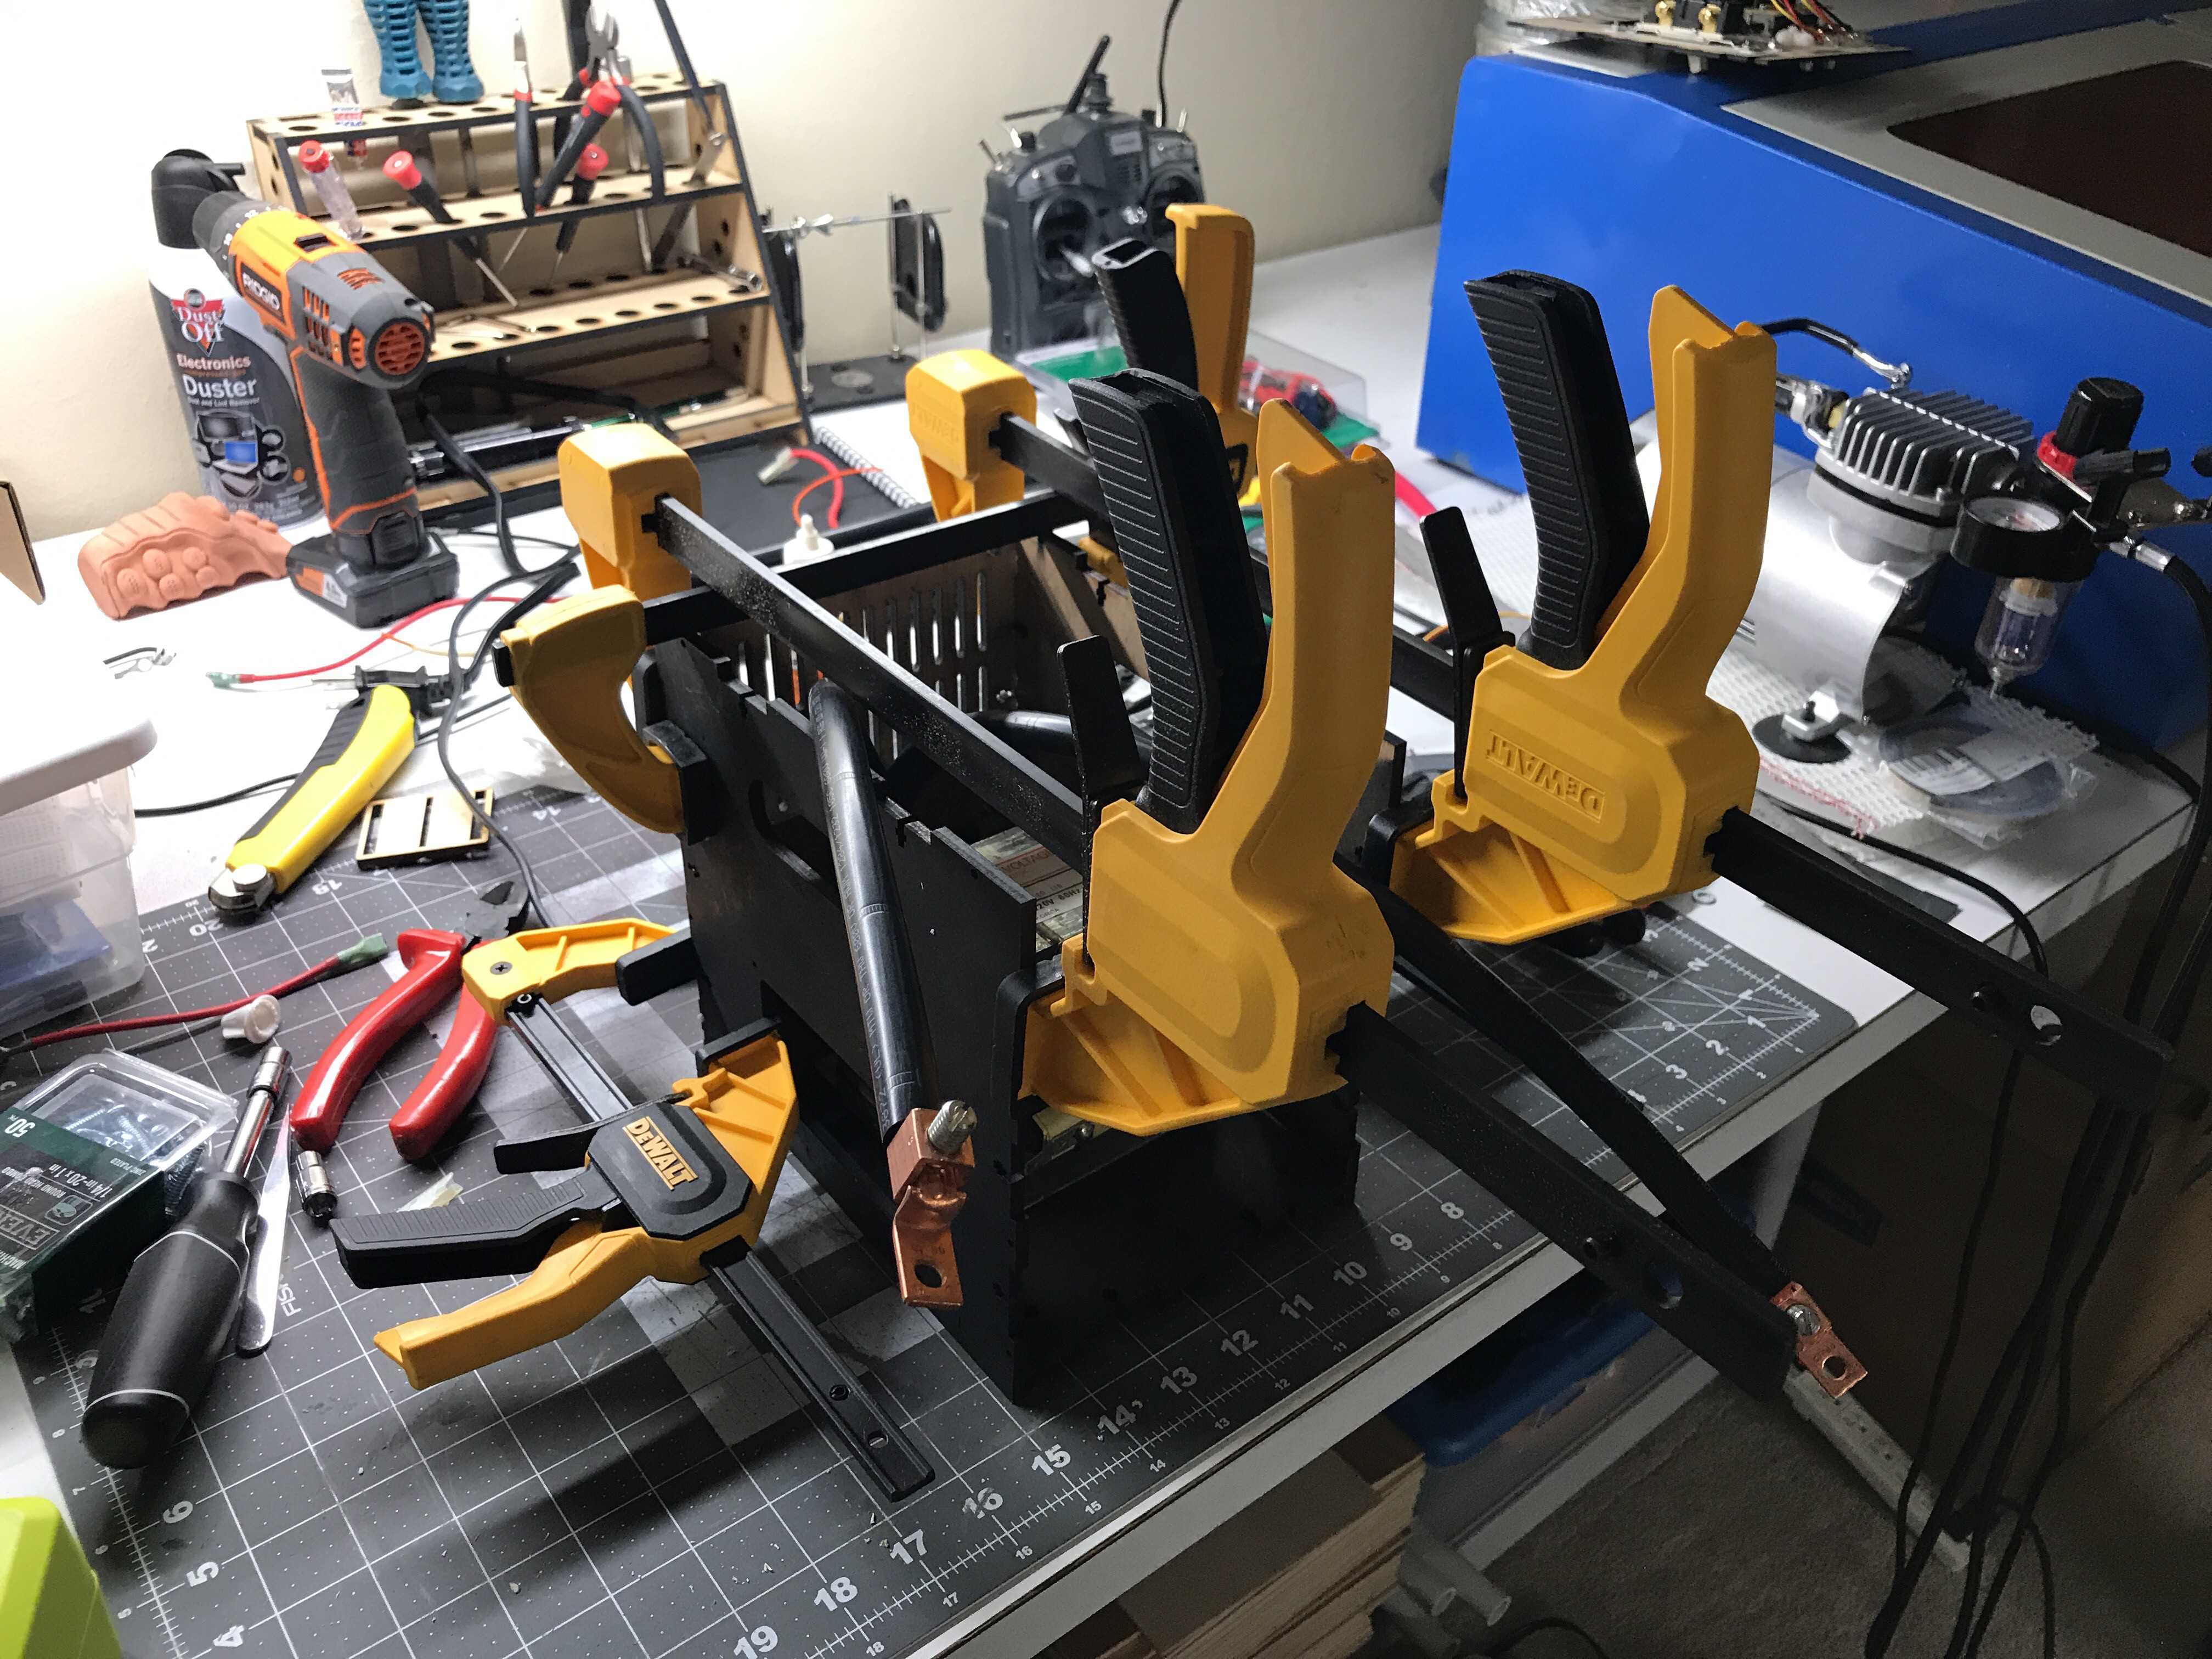
I lasered everything out on my modified K40 China laser that I couldn't live without and started putting the enclosure together. Unfortunately, I ran out of 12x3mm screws so I had to revert back to gluing instead of screwing. Not exactly what I wanted but it works as well. It made the process only marginally more complicated and it's still very serviceable and cheaper.
I put a switch inside the hinge mechanism to auto-fire the welder as soon as I pressed the electrodes against the material to weld with sufficient force.
The resulting enclosure looks cool on my desk and really works well. I can put the welder where ever I want. The wall switch really works well on the front as well.
The display is easily readable from the operators point of view. The contrast is actually very nice when viewed from the front.

Shortly after everything was put together I started to make some test welds. Of course! I couldn't wait to test my software and I was very eager to learn two things:
- How will the sudden power surge affect the Arduino with its $1 power source?
- Will the Arduino relay straight out of China even survive one operation?
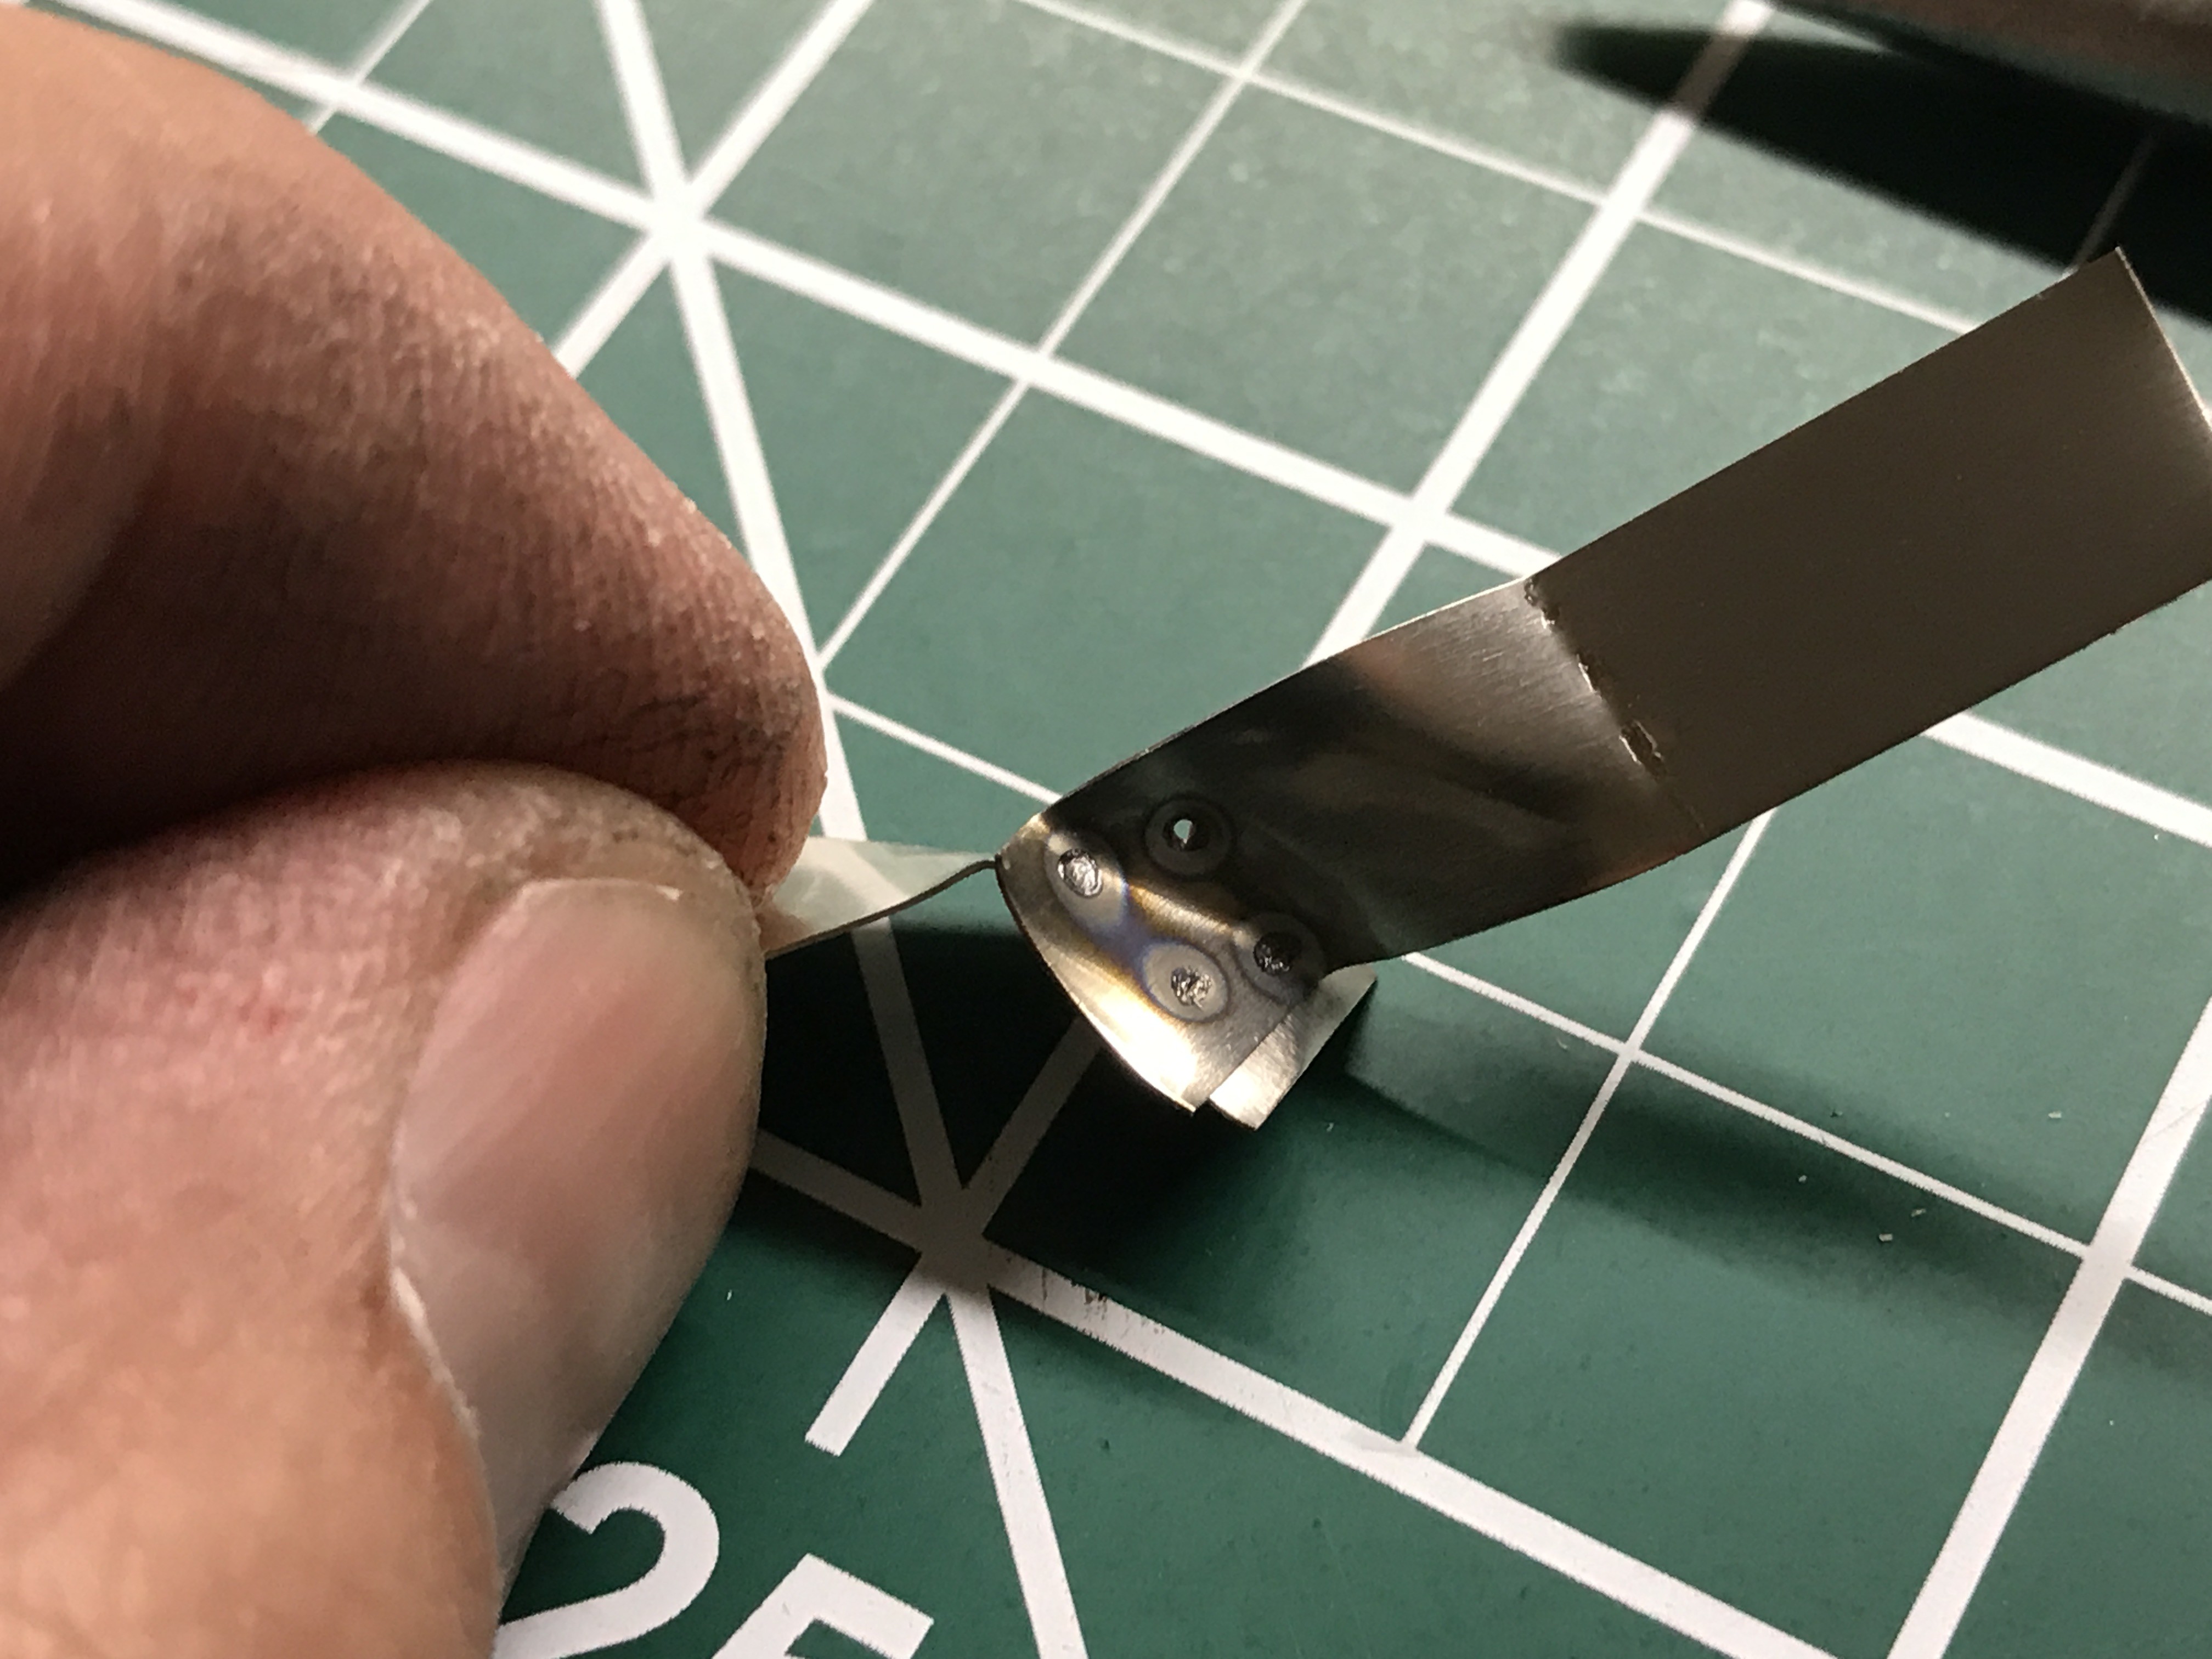
To my big surprise the answer to both these questions was very positive! Everything works! I even started dialing in the durations for both pre-weld and weld since my 0.2x8mm Nickel strips needed a lot less time to weld than my 0.75mm steel strips. Not exactly surprising.
What I really liked about this was the test to rip the welded strips apart.
I couldn't.
I used two pliers and all the force I was able to exhibit and only one welding spot popped off and left a hole! DANG!
In the end I tested my new tool with $1 batteries (8 for $1 - guess from where). I just wanted to weld something. The batteries are utter crap and I would never buy them again for anything serious but for a welding exercise they seemed perfect.
They weren't.
Apparently, the negative pole of the battery is just a cap and separates itself from the battery when the heat shrink melts. Its literally not connected to the battery except by touching the surface. However, this is the nice side of the pack and I'm extremely happy with the results! Maybe even a bit too long weld time but I don't care at this point.
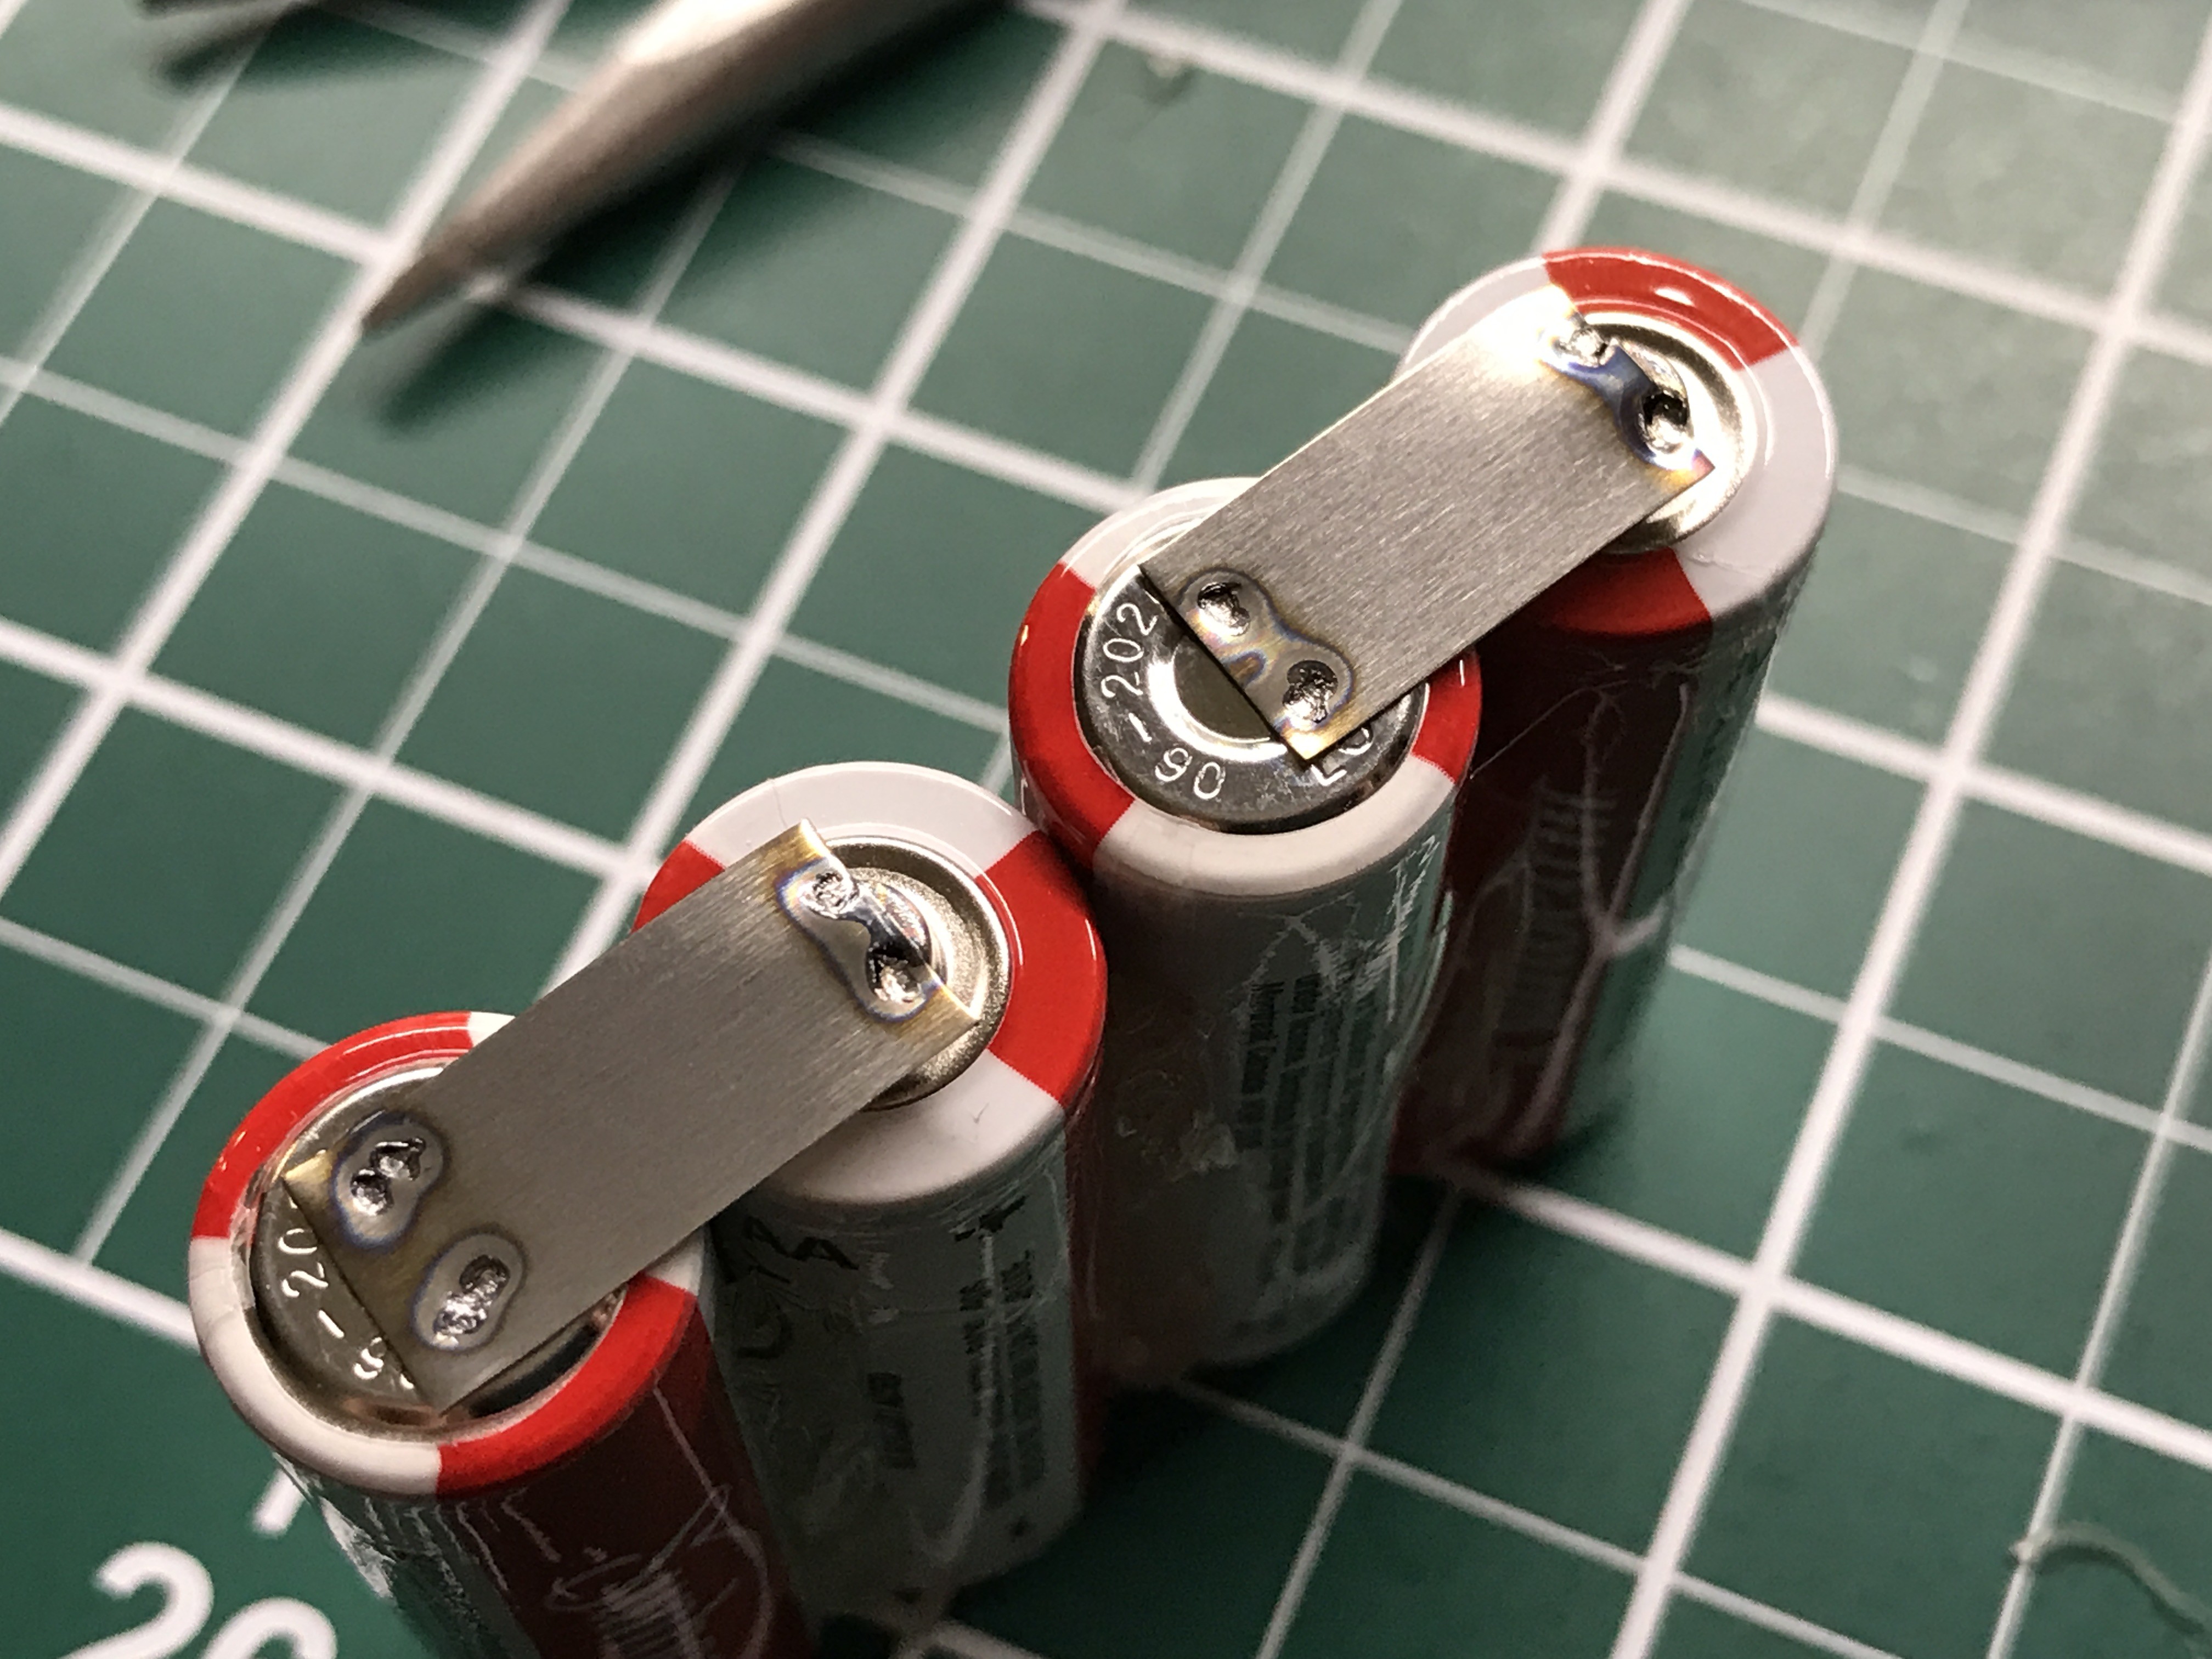
This will become more important when welding the actual 18650 battery packs.
Discussions
Become a Hackaday.io Member
Create an account to leave a comment. Already have an account? Log In.