 Jeff Thomas
Indoor Air Quality/Air Side Economizer Theory: If you can use fresh air of the appropriate temperature and humidity instead of conditioning (heating or cooling) return air you should be healthier and wealthier.
There are two schools of though on how to accomplish this. The simplest is the sample the outside air temperature and if it's within range let some in. A more complicated scheme samples the outside air temperature and the return (inside) air temperature and if the difference is within range let some air in.
We can complicate things even further by introducing humidity into the equation. Here along the Gulf Coast this is a big deal in the summer.
This is project basically a customized 'shield' that sits on top of an Arduio UNO. The biggest issue I have with the commercially available controllers is the lack of flexibility with the set points and logic. By using the UNO we can do whatever we want with regards to the logic.
The basic system has two operating modes, just like those mentioned early. In the 'absolute' mode we just sample the outside air temperature and go from there. In the 'differential' mode we sample outside and inside, take the difference and go from there.
The mode is controlled by the switch #1 on the 4 position dip switch.
The system controls the damper and the furnace blower independently. If the temperature, or differential, is within a larger range we open the damper and run the outside air (OA) fan. This provides fresh air into the system especially when the furnace runs. Within a narrower temperature range we also force the furnace blower to run for a prescribed amount of time. Switches 1-3 define the run time, between 0 and 30 minutes per hour.
***Disclaimer - This project involves messing with the control wiring on your furnace. i suspect this will void the warranty should anything go wrong. You have been warned ***
There are 3 main pieces of hardware -
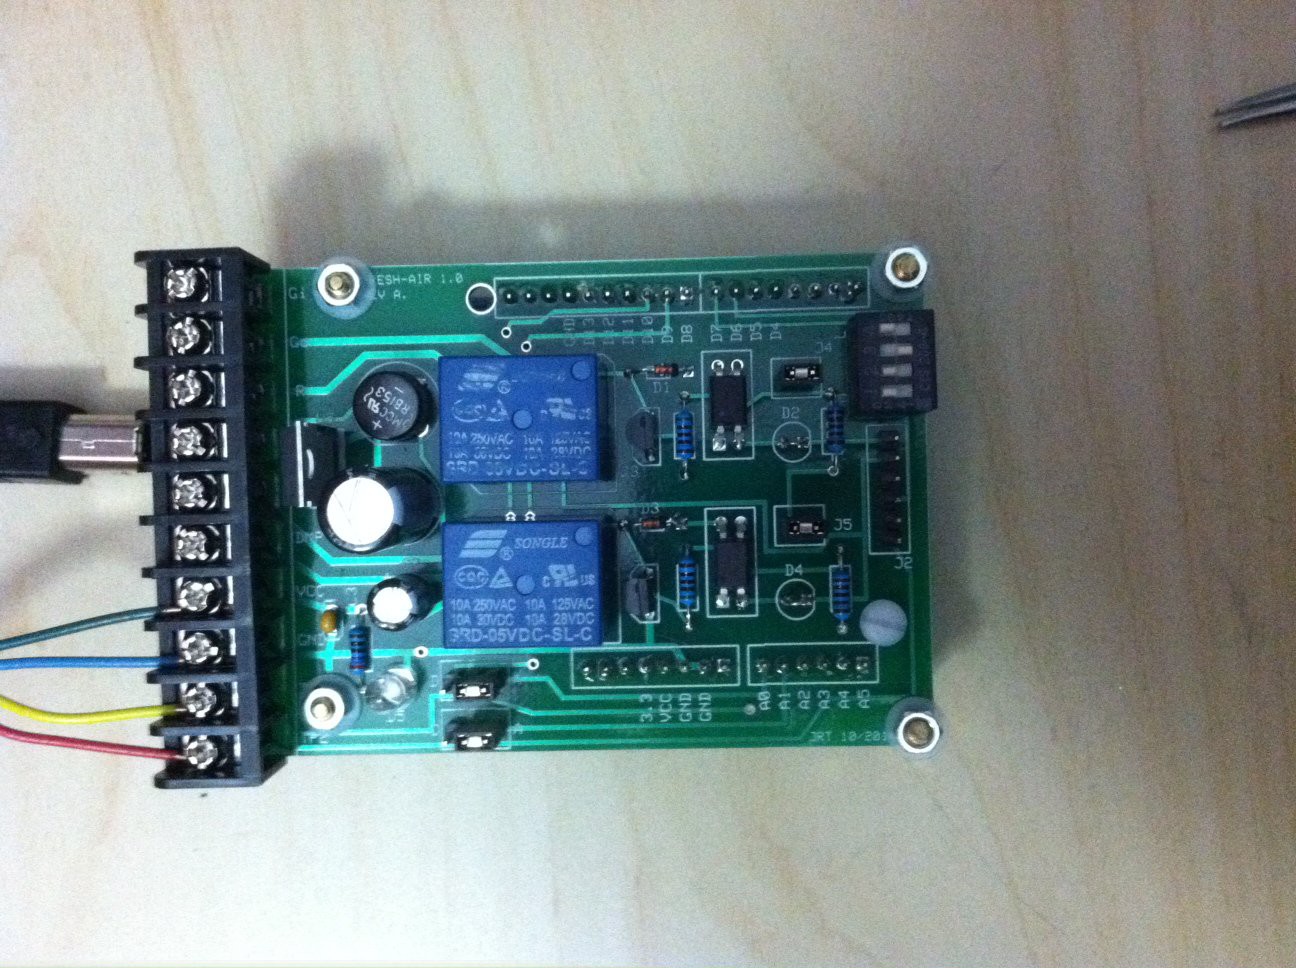
1) The controller board is basically a marriage of a 5-VDC power supply and a relay control board commonly used with micro-controllers. The terminal blocks make it easier to connect to the house thermostat and temperature boards. The on-board power supply lets us run everything from the existing 24-VAC control voltage.
2) The temperature boards are general purpose single or dual channel boards that support both digital, DHT11/22 type temperature/humidity sensors, or simple ADC TMP36 analog temperature sensors. We can use a DHT11 or TMP36 on either channel and both channels can be different by changing jumpers on the controller board. Since the DHT11 needs a pull-up resistor we can't have both DHT11 and TMP36 on the same channel.

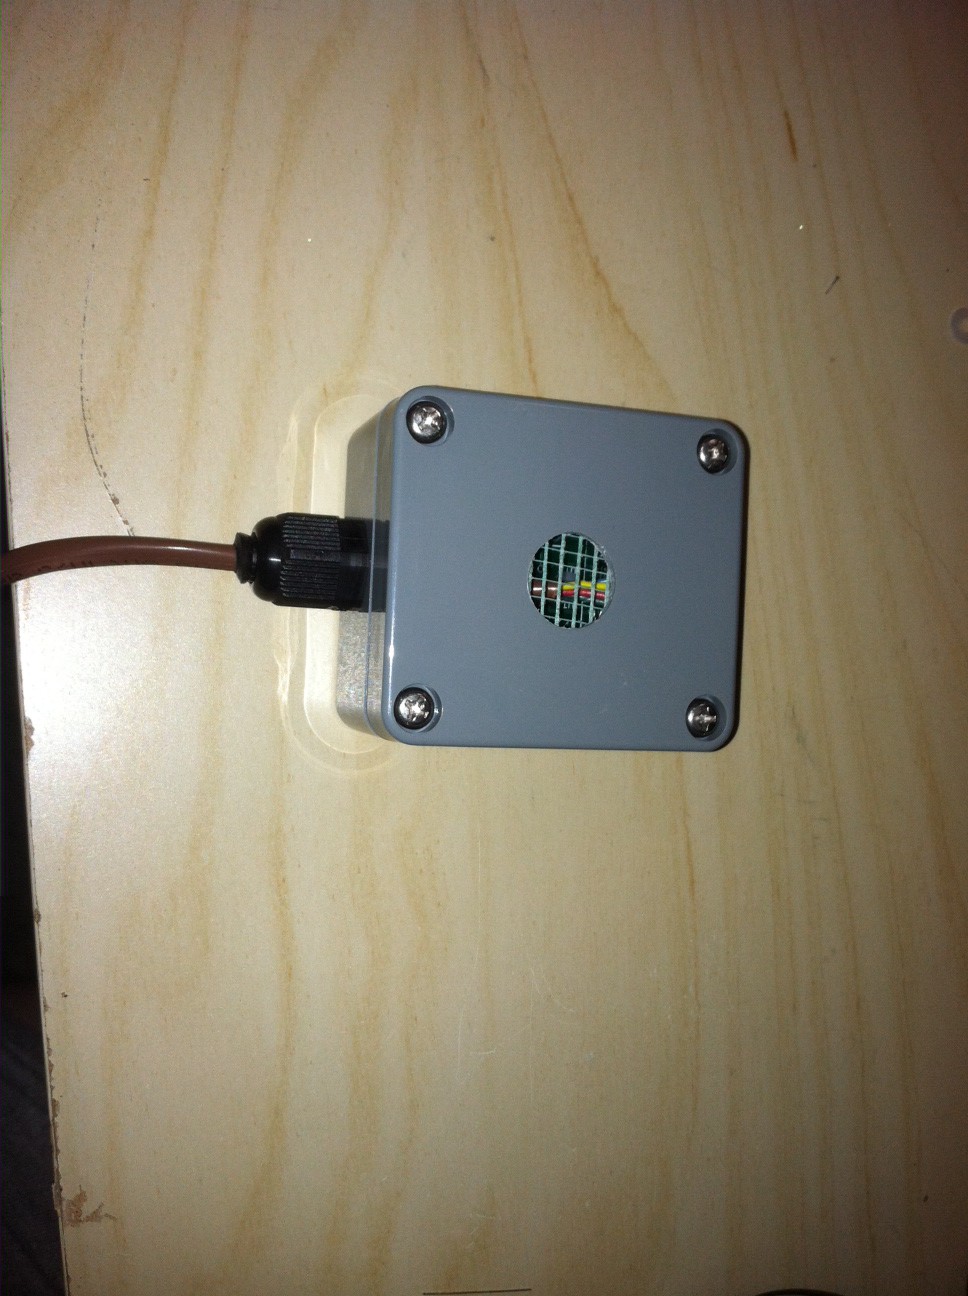
This board is configured for 2 DHT11/22 devices. The temperature sensor needs to be mounted out of direct sunlight in a dry-ish place. I put mine under the eaves on the north side of the house. I put a small, screened opening in the box so the temperature sensor is exposed directly to outside air. In a harsher climate you could seal the box and it would work just fine. It would take a bit longer for changes in temperature to register but that's all.
3) The fan control relay box. ****WARNING - HAZARDOUS VOLTAGES PRESENT**** This box simply houses a 24V relay controlling a standard 120V 15A outlet which runs the OA fan.

Ok, so actually there's a 4th piece of hardware that's not electronic but critical. That's the air intake system. My second major beef with commercially available systems is they use flexible duct and take no precautions with routing and distance. This in essence guarantees almost zero outside air will actually make it into your house. Since I live in the south, my installation is skewed in that direction. If you actually live where there's snow in the winter you'll need to adjust. Or move.
Step 1 - locate a source of outside air as close to your return plenum as possible; I put a vent in my roof on the north side of my house. You could consider just using attic air but keep in mind it will take longer for attic air to cool down into the desirable range at the end of a summer day. On the flip side, attic air is preheated a bit during the winter. We also need to be mindful of what other air is in our attic. Do our bathroom and kitchen fans exhaust into the attic? Just some things to think through.
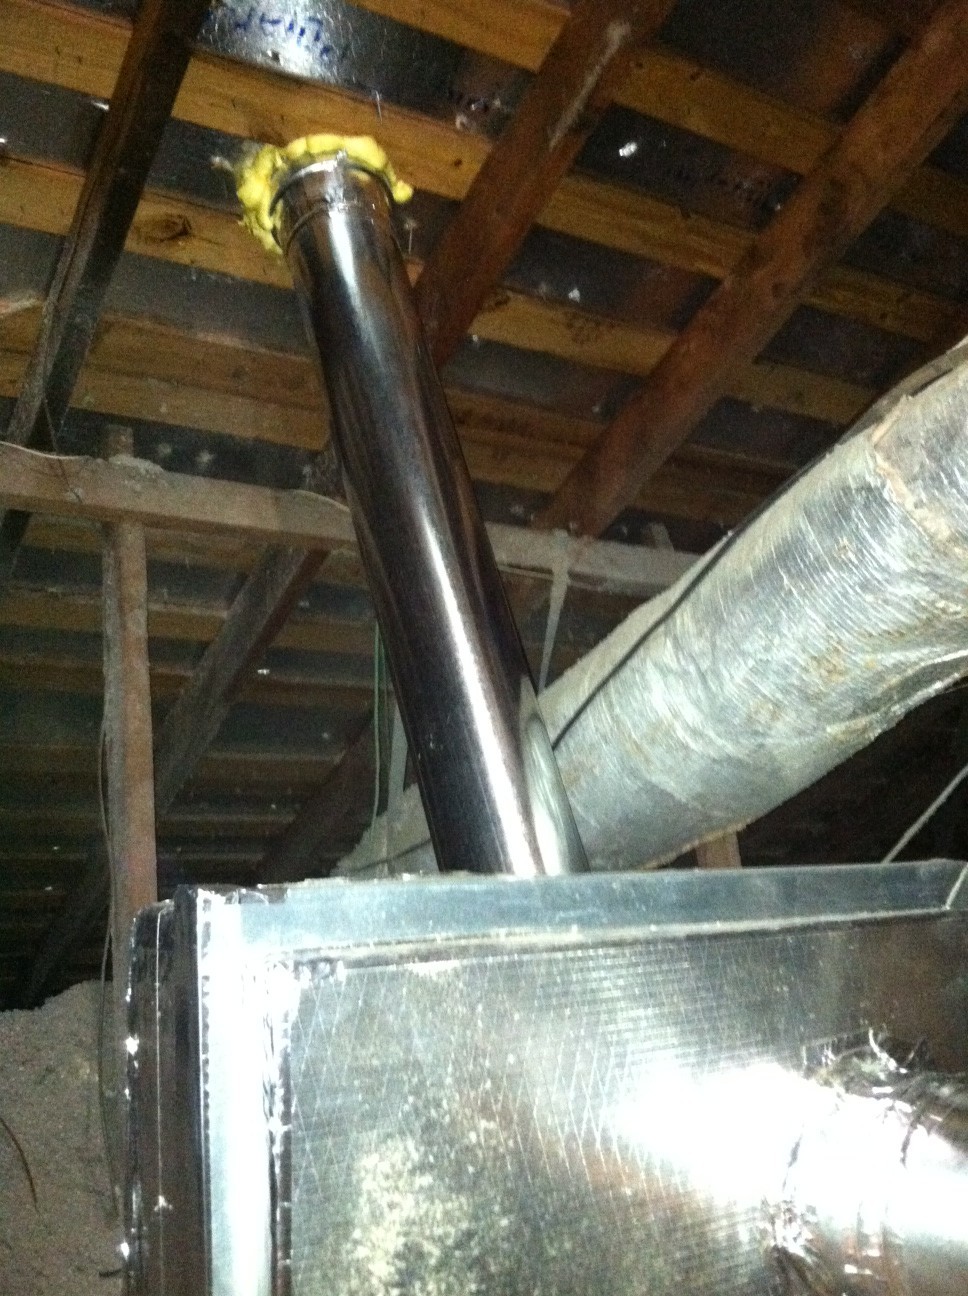
Step 2 - Use smooth, rigid duct to connect the outside air to the return plenum. I strongly recommend a filter (the box in the foreground is the filter).
Step 3 - Install the OA blower and damper and make sure all the joints are taped and sealed. To review the order is 1) Vent to outside, 2) Smooth duct to filter, 3) filter, 4) OA Fan, 5) Damper, 6) Return air plenum on furnace.

Well that's all the major pieces, now we just need some wiring and software.