Close
0%
0%

Squirco Smart Home System - Sensor Network

Hidden sensors in every light switch

Similar projects worth following
Smart Homes is an awesome concept. However, most of the products on the market today are not really "Smart". Having remote control capabilities is not intelligence; the users still have to figure out and set up every minuscule detail about how the system should operate. As a result, a tremendous amount of work is added to the user (which completely defeats the purpose of a smart home system), and sealing off regular, non-tech users from joining the fray.

There are two basic building blocks for building a smart home:
1. A sensor network
2. A control system
3. Actuators to manipulate physical objects

A system can be truly smart when a complete set of information available. The sensor network takes advantage of the positioning and ubiquity of light switches. Integrating one into another allows an extensive set of data to be collected and used in a very non-intrusive way.

In order for a home to be smart, a complete set of data must be provided to an A.I. unit, which will then learn from the data and set up rules automatically. The goal of this sensor network is to provide a basic set of data as a foundation to build off of. Currently, the sensor network can measure ambient light conditions, temperature, humidity, pressure (and by extension, the floor that the sensor is located at), and presence (using a variety of detection methods). Obviously, because the sensors takes the shape of a light switch, it is also a nice, reliable light switch with QoL improvement features built in.

While most, if not all of these sensors can be obtained by purchasing stand-alone sensors, there are a few fundamental problems with them:

1. Most, if not all of them are battery powered. No matter how power efficient the chips are, the batteries will run out one day. Some manufacturers even produce non-battery replaceable sensors, adding to our e-waste problem. Whether we will remember or bother to change the batteries is a whole different story.

2. Choosing where to place the sensors takes quite a bit of time and effort. Hiding them keeps them out of the way, but more easily forgotten when it's time to change the batteries.

Looking at these problems, integrating these sensors into light switches makes perfect sense. They are plugged into the mains, which means they never run out of power. They are present in every room, which means the data set will be complete. They are inconspicuous, because they're everywhere.
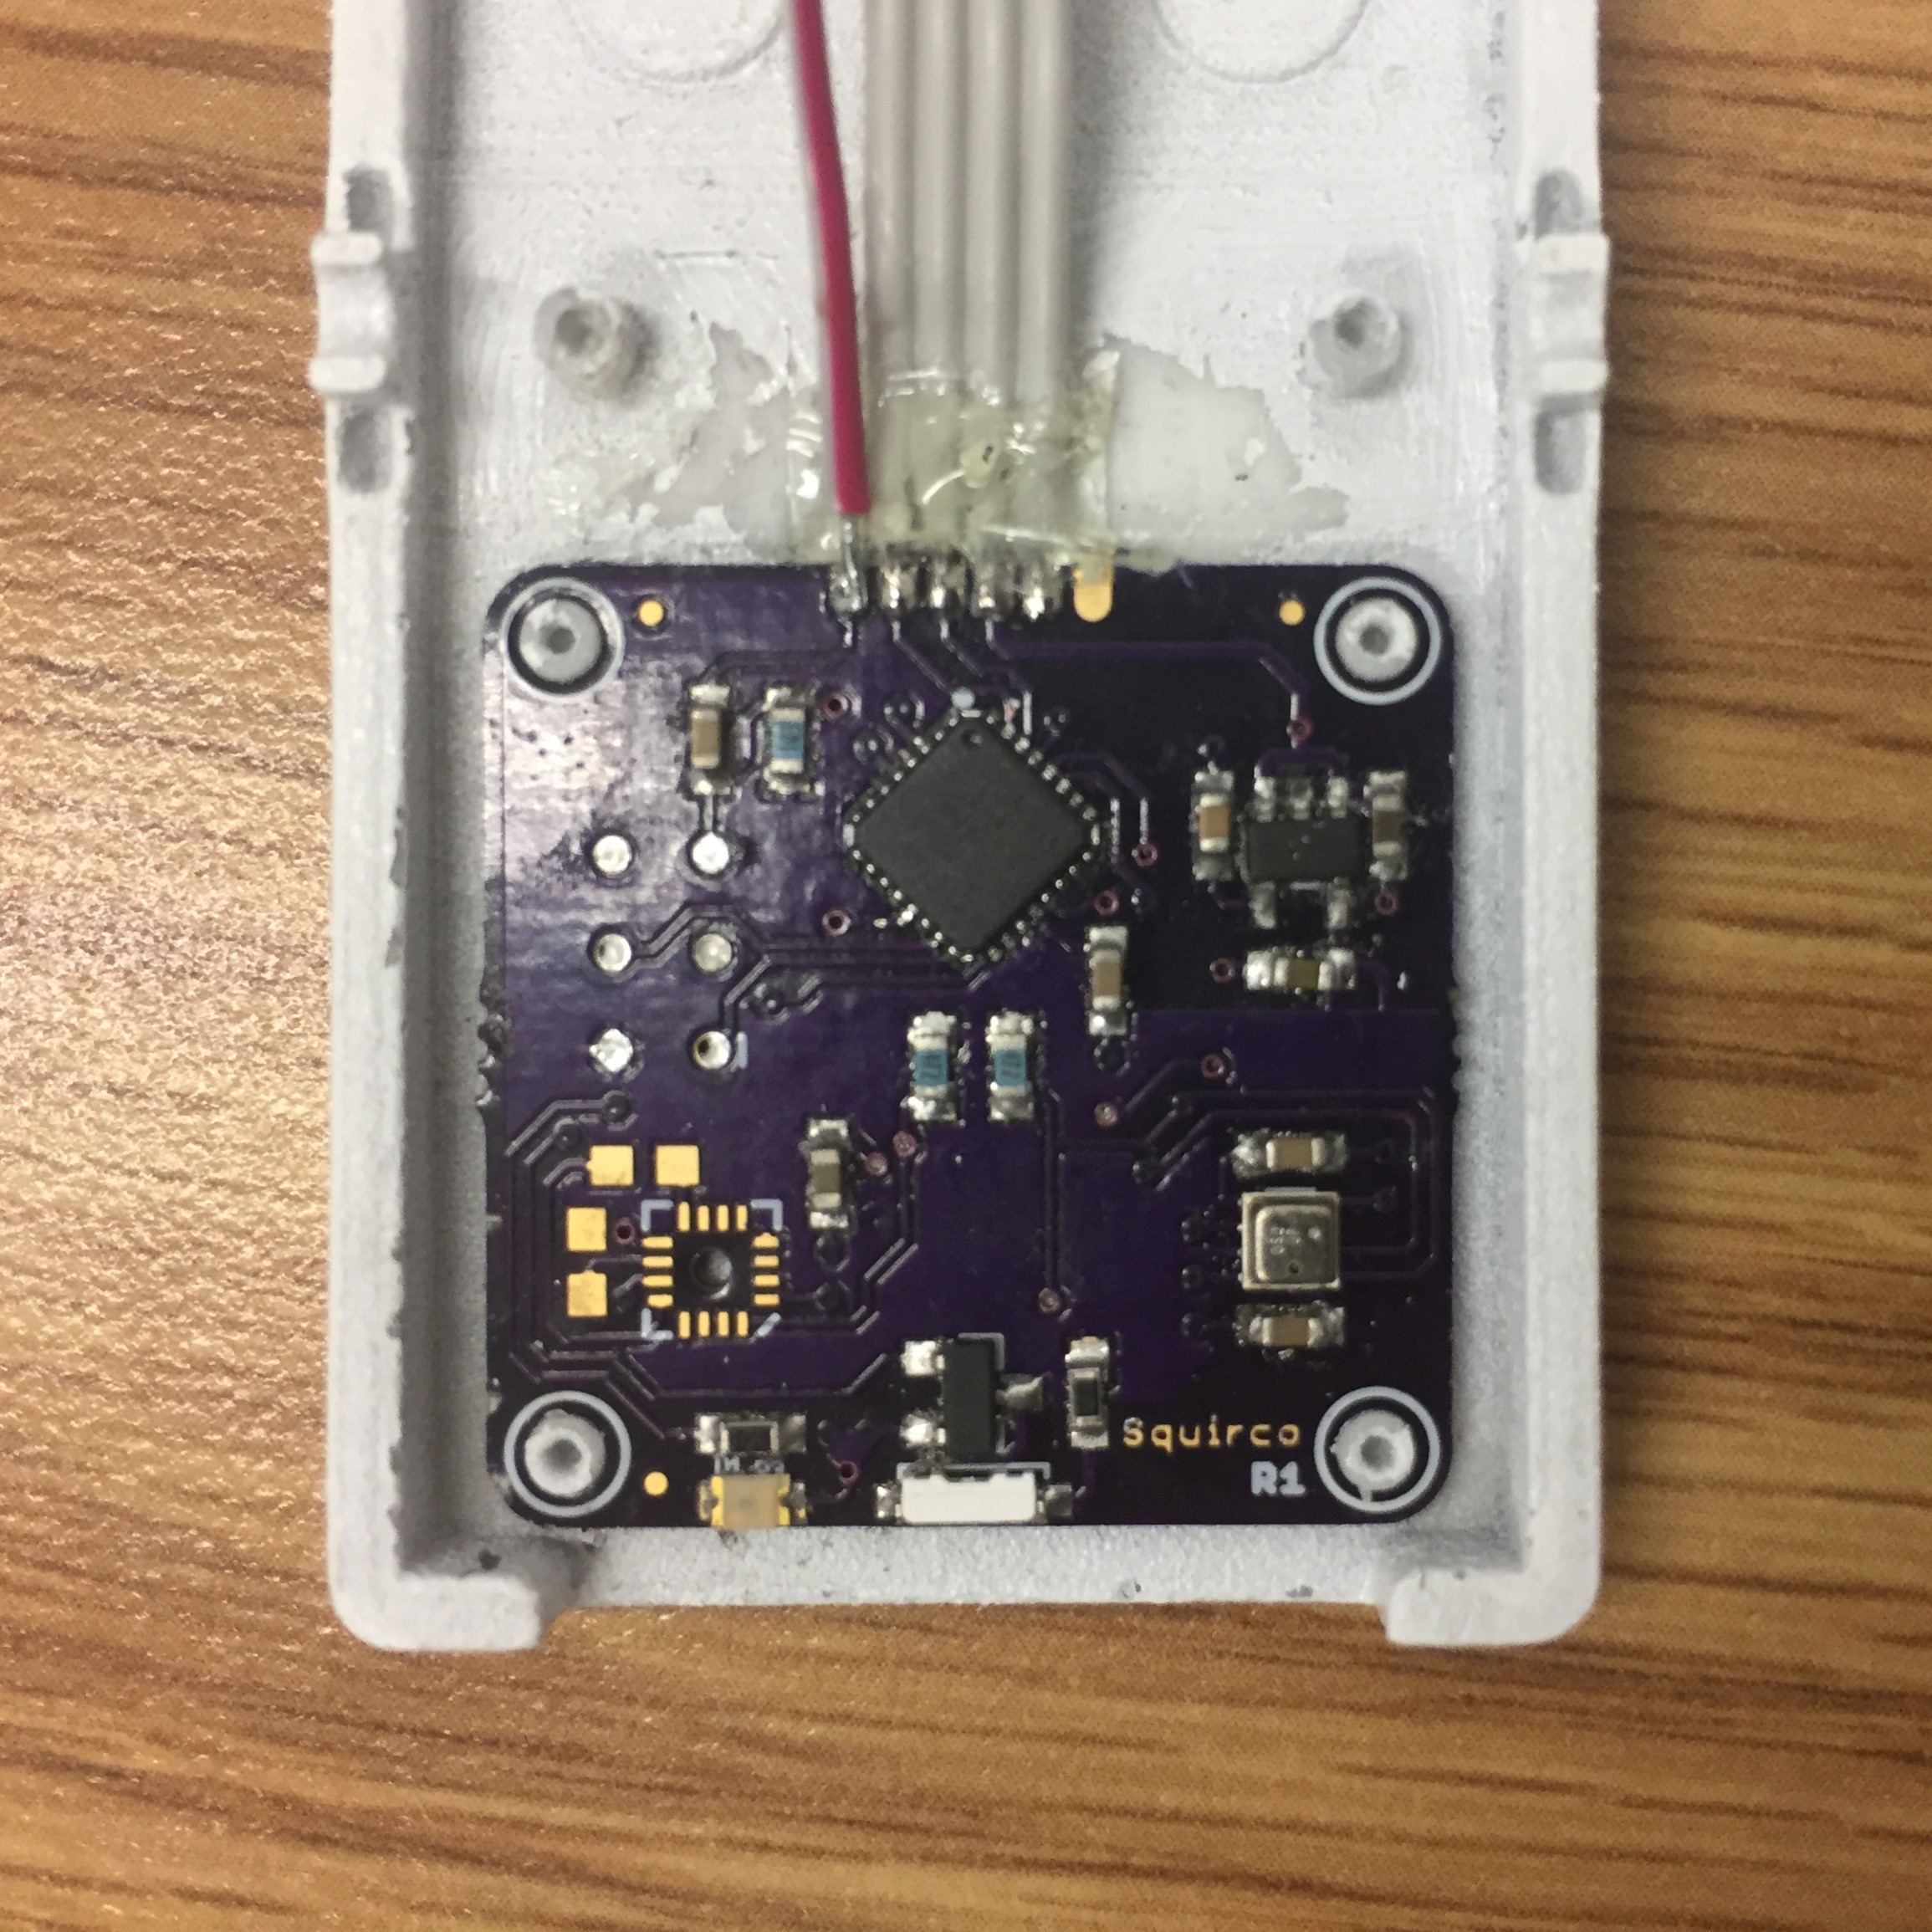
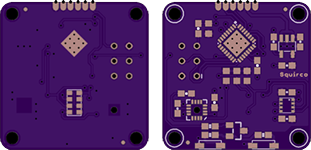
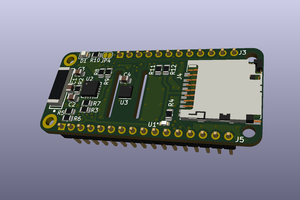
Hardware:

Version 2 of light switch has standalone sensor hub and a networking board, instead of the fully integrated design of version 1. This makes the design much more robust. Currently, the sensor hub is powered by an ATMEGA328p and the networking unit is a ESP8266, which will likely be replaced by a ESP32 when it's released.

Software:

Software is the most important part of this project; in fact, the hardware is designed specifically to run the software features. Below are some example features enabled by the sensor network.

Lighting Control:

- Lighting usage pattern learning

- Dynamic timeout and shutoff

- Smart Bulb discovery and pairing

Energy Management:

- Distributed temperature sensing for better climate control

- Full house presence detection for more accurate home/away detection

- Light, temperature and presence can be used in conjunction with electric window shades to improve indoor climate control.

Security:

- Presence / Away learning can send messages to your smart phone when people is detected in/near the house when no one is normally present

- Lighting Replay: After obtaining usual lighting usage patterns, the lights can be controlled to simulate normal usage when no one is present. Enabled for Vacation Mode.

Networking and Control:

- MQTT communication protocol for easy and robust networking
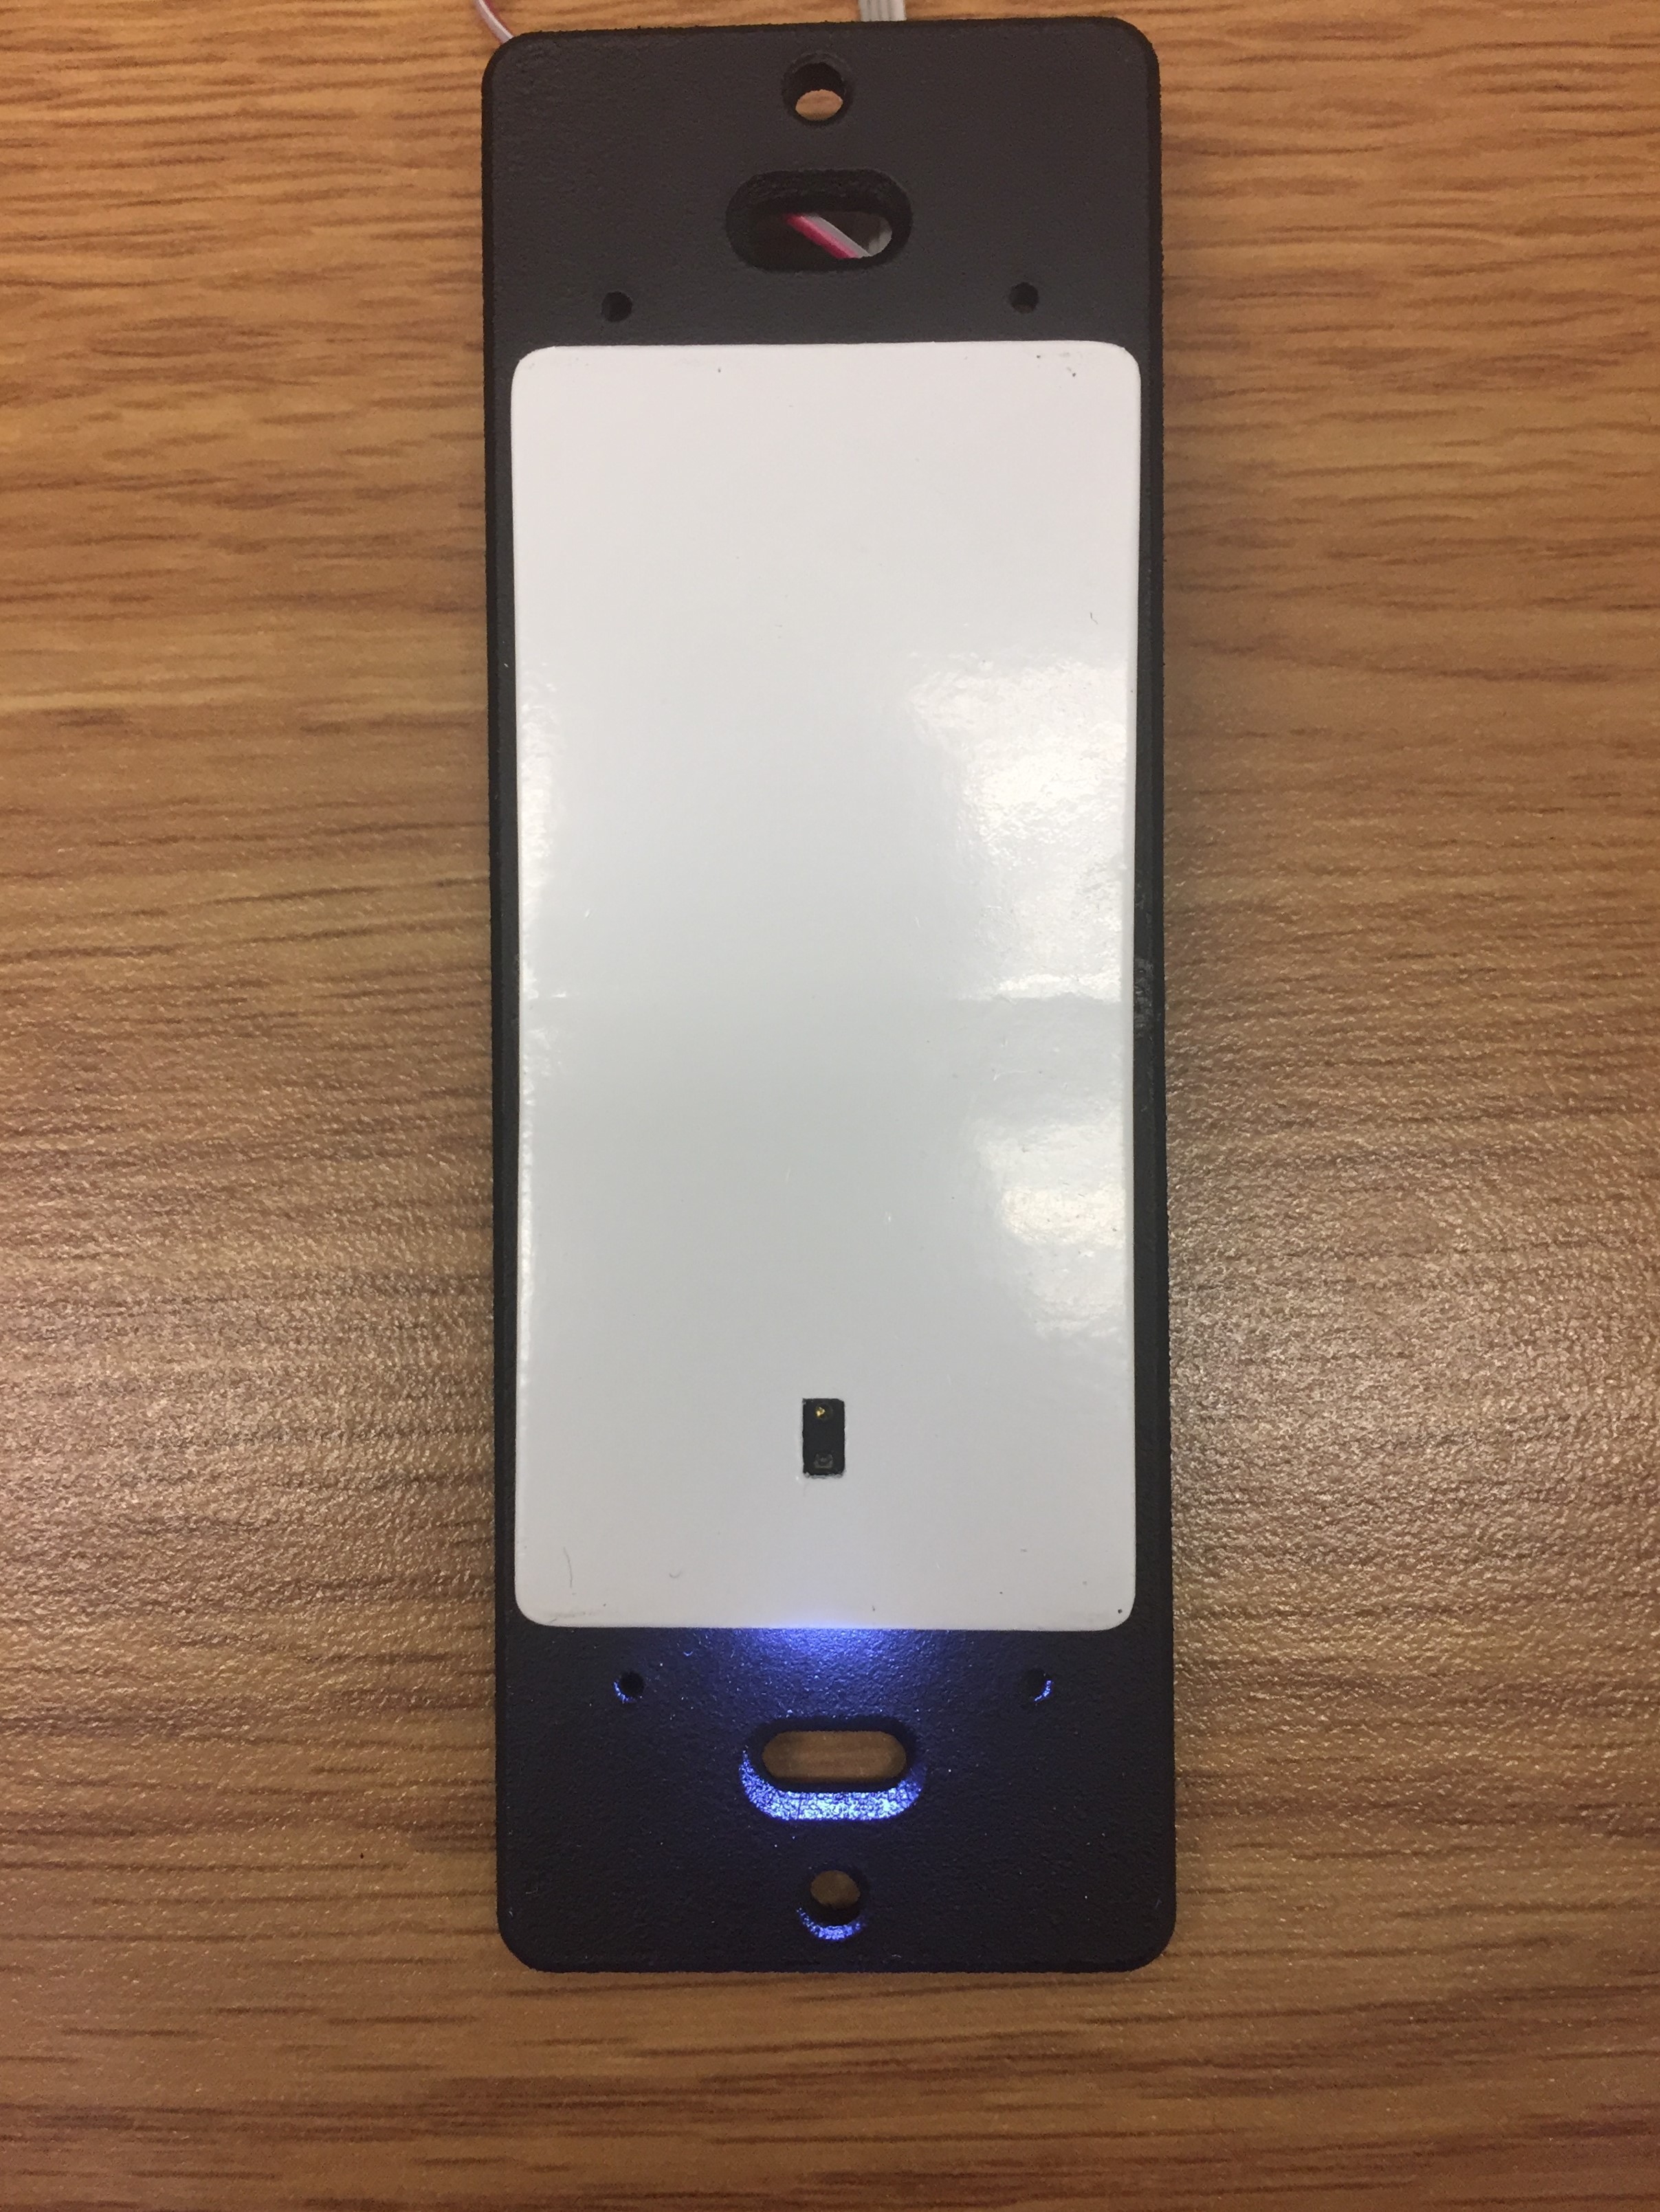
QoL:

- The light switch has a built-in, high brightness LED that acts as a night light. It can be set to three modes: off, on when it's dark, or on when it's dark and a hand is approaching.

  • 1 × BME280 Temperature, pressure, humidity sensor
  • 1 × HMC5883L Sensors / Hall Effect, Magnetic
  • 1 × VCNL4040
  • 1 × ATMEGA328 Microprocessors, Microcontrollers, DSPs / ARM, RISC-Based Microcontrollers

  • Sensor Board v2 - Complete at Last!

    Steven08/25/2016 at 16:11 0 comments

    Those of you who are keen eyed might have noticed that I changed the cover photo for this project a few weeks ago, when I pretty much finalized the design for v2, scheduled to be installed sometime in September. I'm happy to announce that I finished testing the sensor board and everything seems to work as intended.

    Check out some photos:

    The range of the proximity sensor has dramatically improved over version 1.5, where the maximum range is less than 10cm. v2's proximity detection range is around 25cm, which is a much more reasonable range to trigger the night light. The firmware has been updated as well (go to my github)

    The next step is to finalize the firmware for the ESP8266. I'm going to port all my code to the wonderful Homie library. It does pretty much everything I wanted to do but it's a lot more polished.

    Until next time!

  • Sensor Hardware Files Released!

    Steven08/18/2016 at 20:27 0 comments

    Quick update:
    The PCB files for the sensor board is now on my github repo.

  • ESP8266 Firmware Published!

    Steven07/15/2016 at 16:02 0 comments

    I managed to get the ESP8266 firmware up to a reasonably usable state this week. You can find them on my github here.

    The ESP8266 is set up to communicate over MQTT (shoutout to Elliot for his wonderful mini-series on MQTT). Button and relay operation is prioritized higher than any networking features since these are the primary functions of the device. The repo is likely to be updated quite frequently as I prepare for installations in September.

    Right now I'm playing around with my broker/hub configuration. The hub project page will be seeing more updates when I find a configuration that I like.

    That's it for now. As always, chat with me if you got any ideas!

  • Functional Prototype Complete!

    Steven07/08/2016 at 17:32 0 comments

    Quick update:
    Got the ESP8266 working. Using adafruit.io as a temporary mqtt broker which works fine. A bit of hardware refinement and I can replace v1 in my wall soon.

    Next step:

    Relentless software polish.

    Also, I'm starting up the Thermostat/Hub project again.

    Update: firmware uploaded to GitHub

  • v2 - Future Proofing

    Steven06/05/2016 at 00:22 0 comments

    A few months back, I pushed the ATMEGA256RFR2 to the limit. It was no longer sufficient for what I need.

    During this time, I played with a few different MCUS, including ESP8266 and some NXP chips. This created another problem - whenever I needed to switch chip vendors, all the code had to be re-written. The time cost was simply too big to continue, so I had to find another solution: decoupling the sensors with the main processor. What does this mean?

    Basically, I replaced the RFR2 with an ATMEGA328P(B), and put all the sensors on a single, 1 square inch PCB. Choosing the 328 ensured that my code could be reused, thus saving a lot of time. The 328 is responsible for processing and transmitting the sensor data over UART, so that I can use any network processor without having to re-write the sensor code.

    This independence also means that the sensor board and the main MCU can be upgraded separately. The advantage of this design is quite obvious.

    There are also numerous other design changes made. I will go into more detail once I finish with the sensor board.

  • Update: Next Iteration Hardware

    Steven11/28/2015 at 00:41 0 comments

    Last time I briefly wrote about the upgrades to the sensors and firmware. Today I'm writing about the newly redesigned hardware that's almost ready to be sent to the fab.

    The previous version of the hardware had the logic board inside the plastic casing. It was fine for the simple analog sensor, but with the switch to the more complex digital sensors, it became too much to handle. This, in addition to all the "accessory" boards, made hardware design difficult in general.

    Eventually, I had to make a decision to scrap my current design and re-design the entire logic assembly. After long hours of re-thinking and re-designing, I was able to condense 5 PCBs into a single one.

    Here it is:

    Left: New Design. Right: Slightly updated older design.

    The new board is 30% smaller, and uses board space much better than its predecessor. Instead of fitting inside the case, the new board fits inside the button. This means that the ICs and sensors have more airflow around them, the ambient light sensor sits flush with the button without an adaptor board. Most importantly, the antenna is brought outside the wall, which is much better.

    The area containing the main MCU is sized to fit several wireless modules, in anticipation of switching to the ESP32 sometime next year (assuming the ESP32 does what I think it does).

    I'm going to send these to the fab sometime within a few weeks. Assuming everything works, I will be giving away some of the leftover boards to people who are interested in this little project.

    Until next time!

  • Next Iteration

    Steven11/05/2015 at 22:40 0 comments

    It's been a while since I posted an update, so I think a progress update is in order.

    I've been using the previous prototype for the last 3 months, and every day I'm discovering what tweaks are needed to create more useful data, as well as improving the user experience. I'm going to list some of the changes below:

    Mechanical:

    - The mechanical assembly is narrower

    - A new, simpler hinge mechanism was designed

    Electronics:

    - The iBeacon components have been removed.

    - The potential cost of the iBeacon assembly was used to upgrade the sensors. Instead of the analog temperature and ALS sensors, all the sensors have been upgraded to digital

    - The NTC was replaced by a BME280, which measure temperature, humidity, and pressure

    - The Ambient Light Sensor was replaced by a APDS9960, which measures RGBW, proximity, and gesture

    - A magnetometer was added to obtain the direction the light switch is facing

    - An additional "Neopixel" was added to make night light stronger.

    On top of these changes, the PCB layout was changed to accommodate any future sensor additions, which means that as time goes on, an I2C enabled BLE unit can be installed to regain any iBeacon functions.

    Software:

    - The entire code base was updated to be more efficient.

    - OTA update is making progress

    Feature Design:

    One of the main problems with "smart devices" that purely provide data (such as fitness trackers) is that the people who use them don't know what to do with the data presented to them. The feature list was revised to make the data "actionable", which means that the network will act (or not act) automatically based on data, or the data presented to the user will trigger them to make decisions to act (or not act)

    I will have more information as the next iteration gets built and assembled. Depending on where the next batch of PCBs are ordered, I may also have some to give away to people who are interested in testing this out.

    That's all for now.

  • Firmware Files Released

    Steven08/17/2015 at 20:09 0 comments

    Today, I released the firmware files for the light switch on my Github repository. The code has been completely re-written and cleaned up. Features that were deemed not ready for public release have been removed for now, and I will update the code as those features are re-written to a higher working standard.

    Release notes for this version are as follows:

    v0.5b

    Initial commit after re-write from v0.4c. Some features have been re-written to work more efficiently. Some features have been removed for further re-write.

    Working features:

    • Light switch control, both hardware and from remote software
    • Temperature measurement
    • Ambient light measurement
    • Networking and System Join Chain

    Features to be re-implemented:

    • on-device sync mode
    • LED control
    • Presence Detection

    Features under experimentation

    • OTA update

    I'm still playing with the CC2541 chip. I decided to see if I can move the microwave tomography features to that chip since it's constantly broadcasting anyway. This allows for better resource allocation between the two chips.

    In other news, I've revised the hardware slightly and upgraded the NTC to a BME280, which was intended for a multi-switch version. This will give temperature, humidity and pressure data across every sensor node, which will improve the accuracy and functionality for many things to come.

    If you're one of the brave ones that are willing to try, or have tried (!) playing the hardware/firmware, please let me know how it goes. Feedback is very important.

    Now that these sensor nodes are nearly working as designed. it's time to spend more time on the device that makes all the data work: Squirco Smart Home System - Hub + Thermostat. Things are about to get interesting.

  • Plans for Software Release

    Steven07/05/2015 at 19:12 0 comments

    Because I got too focused on Microwave Tomography, and because of how much work is still left to do, many parts of the software are functional, but still incomplete. Over the next two months, I plan to finish and release all of the software as I finish each individual bit.

    Seeing how many projects on HaD.io that use a similar setup, I hope this will benefit everyone with interest in home automation.

    Stay tuned.

  • Programming Adaptor and BOM Released

    Steven06/21/2015 at 02:47 0 comments

    The Eagle files for the Programming Adaptor, as well as the BOM for the logic and power PCBs have been released on GitHub. Check them out here.

View all 20 project logs

Enjoy this project?

Share

Discussions

bob wrote 02/26/2017 at 00:38 point

I like your project a lot and want to develop something similar.  I'm having a bit of trouble though seeing how all the parts (including the 3d printed ones) fit together.  Do you have diagrams or photos illustrating a complete installation?

  Are you sure? yes | no

Steven wrote 02/28/2017 at 00:06 point

The button and a clip basically sandwich the base plate and create a hinge. I've uploaded STL files for this version here: http://www.thingiverse.com/thing:2141220

  Are you sure? yes | no

bob wrote 03/08/2017 at 18:34 point

Do you have tips for printing these objects?  They appear to require supports.  What slicer and material are you using? 

  Are you sure? yes | no

Steven wrote 03/09/2017 at 05:20 point

when I prototype the design I use my Form 1+ and auto generate supports. For installation testing I send it to Shapeways. Keep in mind these are designed for injection moulding, so they're no longer optimized for 3D printing. 

  Are you sure? yes | no

physiphile wrote 08/26/2016 at 03:16 point

I'm building an ESP sensor board into a light switch as well. I use a mems mic that I gained to high sensitivity. Right now I just have it trigger the rest of my automation system based on magnitude but I'm working on streaming audio (need to store ADC values to wav chunks). I use websockets on the ESP to talk to my "relay" server that handles the messaging and presence/alert filters to trigger the system. 

https://github.com/physiii/open-automation

  Are you sure? yes | no

Steven wrote 08/26/2016 at 04:43 point

neat!

  Are you sure? yes | no

oshpark wrote 08/25/2016 at 16:43 point

Exciting project!

  Are you sure? yes | no

Hydro8 wrote 08/23/2016 at 22:56 point

hi

Very interesting project ! Do you progress on human detection. ?

I'm very interesting, i tried several way (pir, ir, sound...) But i didn't find a good way to détecteur human presence. 

Thank you

  Are you sure? yes | no

Steven wrote 08/24/2016 at 00:25 point

Hi,
Human presence detection is still in development. I can tell you that I'm feeding every sensor data, plus RF disturbance into a neural network to detect and predict where people are and where they will be.

  Are you sure? yes | no

Hydro8 wrote 08/27/2016 at 18:33 point

Results are good ? Wich kind of hw do you use to detect 2.4ghz ?

  Are you sure? yes | no

physiphile wrote 08/26/2016 at 03:22 point

Sound works well for me. Make sure your mic is getting the full 0 to 1 volts to the ADC.

  Are you sure? yes | no

Steven wrote 08/28/2016 at 02:44 point

Any type of radio transceiver will work, since all you need is detect a disturbance with RSSI values (basically). I did my proof of concept using an ATMEGA256RFR2 (v1 hardware). Now I'm experimenting with other types of transceivers (BLE, 802.15.4 with phase detection, etc) and getting a better dataset to design and train the NN.

  Are you sure? yes | no

Hydro8 wrote 08/30/2016 at 06:59 point

Great, i hope you will explain when you get something good enought :)

  Are you sure? yes | no

dmritard96 wrote 07/17/2016 at 22:27 point

we are building this but more for the consumer space.  we started with temperature control systems but will branch into load switching for lighting and fans.  how we will do it might be obvious but might not be ;)

https://flair.co

  Are you sure? yes | no

Steven wrote 07/18/2016 at 01:04 point

good luck and remember: hardware is easy, software is hard

  Are you sure? yes | no

dmritard96 wrote 07/18/2016 at 01:09 point

Thanks!  

I think there are different kinds of hard in different pieces.  We are all software engineers with experience building UIs/Embedded and backends with ML.  But what makes software a bit 'easier' is that you can iterate forever.  But when you ship a physical thing, you only get one chance with that unit.  If some vender decided to use a substitute part that your line tests didn't catch, you could be totally screwed for instance.  I think the hard part of hardware besides the cashflow tricks is really making sure you don't ever ship an expensive paperweight...anyhow, happy hacking!

  Are you sure? yes | no

physiphile wrote 08/26/2016 at 13:21 point

I like the idea of distributed heating. I use a wifi thermostat with my software but using distributed units would be better for builders because they won't have to run HVAC and it's more energy efficiency. Are you using an ESP?

  Are you sure? yes | no

D Khazz wrote 05/23/2016 at 05:03 point

Just curious to see if you're still working on this or have any progress.  You've helped me find the APDS-9960 which seems like a very nice sensor to use instead of the old switch.  How are you using the power of the lines coming in as a switch usually only has one leg of the circuit?

  Are you sure? yes | no

Steven wrote 05/24/2016 at 18:08 point

Hey Khazz, I'm actually very close to finishing a major component of the next version, so an update post should be coming within the next few weeks. As far as the power supply goes, it's a pretty standard design. Switchmote has a pretty good schematic here: http://lowpowerlab.com/switchmote/#schematic

  Are you sure? yes | no

Big Country wrote 04/22/2015 at 03:27 point

Looking good!  I had been thinking about a similar project based on LowPowerLab.com 's hardware, specifically the switchmote.  Can't wait to follow your progress. I may have missed it, how do you plan on implementing the automation portion, software-wise? EG Python, Java, VB, etc... The mechanical/physical side looks slick!

  Are you sure? yes | no

Steven wrote 04/22/2015 at 19:32 point

Thanks for the feedback! I stumbled upon the switchmote a while back too and it was pretty cool.

I separated the automation portion into another project log, but haven't posted anything there yet. The automation will be handled using Python on a BBB or rPi2, depending on whichever one is easier to commercialize. Once I finish up some of the major features here (microwave tomography, iBeacon, etc) I'll begin posting over there.

  Are you sure? yes | no

Similar Projects

Does this project spark your interest?

Become a member to follow this project and never miss any updates