In the last project log, the sensor nodes took on the form of light switches. In this project log, I will detail some of the challenges of designing the electronics to fit the form factor (rather than the other way around).
In order to further simplify the user experience of the light switch, we decided to only have the users perform one action when using the light switch: pushing the button. (Gestures were considered at one point but we decided to leave it further down the roadmap). It was very important to get the feel of the click just right (for an example of the wrong feel, try a Belkin WeMo switch). The click had to have a sharp, tactile feel, and also have the right amount of travel. After lots of experimentation, we found that the U12390 by Snaptron gave us the best click, and a three degree rotation around the hinge gave the best amount of travel.
The biggest design challenge came from the giant white button we call the "faceplate". We originally wanted to use a PIR motion sensor to detect human activity in the area, but the laws of physics got in the way (mainly due to material restrictions) and it was scrapped (after three months of testing and design work). A new presence detection method had to be made (which I will talk about in another project log).
The ambient light sensor was the next issue, because the material used for the face plate was not optically transparent, and we were not willing to have a black dot on the face plate. This meant that the only place to mount the ambient light sensor was on top of the light switch, which meant that an additional PCB has to be produced for the ambient light sensor.
The next headache came from the power supply unit. Being inexperience in mains SMPS design, I had to look for a SMPS module that was both decent in performance, as well as low cost. The preliminary candidate right now is one produced by Vigortronix.
All in all, the after five hardware iterations, a final, production ready unit is sitting on my desk ready to be assembled. Here are some photos of it:
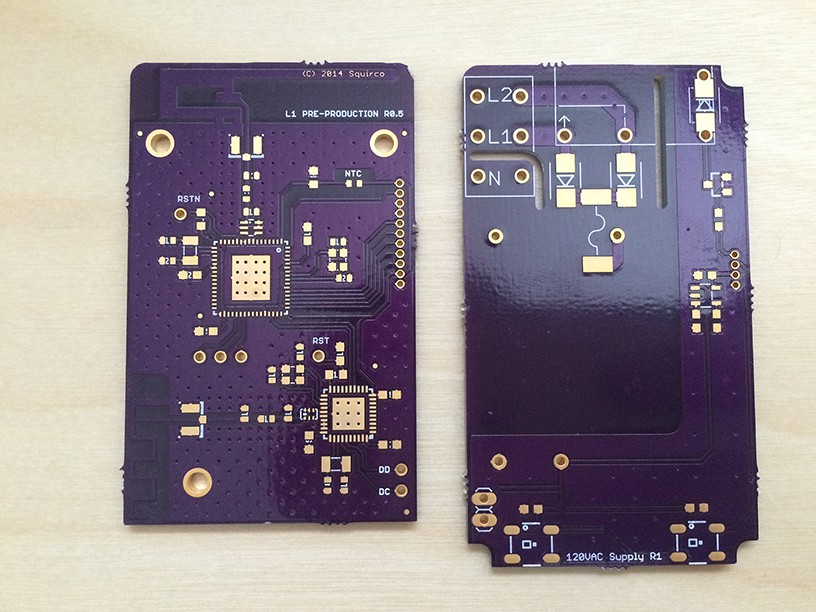
Left: Sensory + logic unit. Right: PSU.
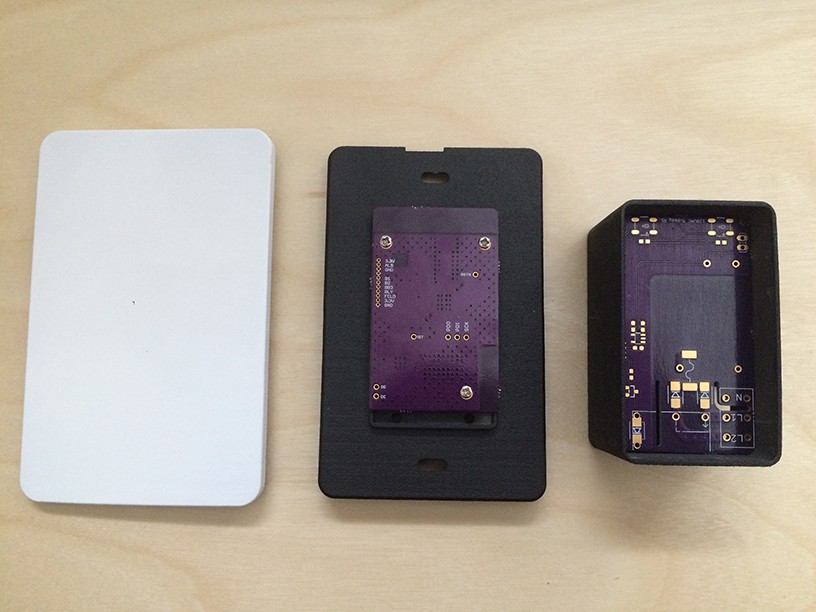
The boards sitting in the (prototype) casing
The prototype casing was designed purely to check the fit of the electronics, therefore lacks many mechanical details (mounting clips, for one). Now that the fit is deemed acceptable, the final shell can be designed and sent to proto labs for DFM check and prototyping.
In the next project log, I will give some detail to how the case was designed, prototyped, and (maybe) give a quick comparison between two 3D printing services, Shapeways and Sculpteo
Discussions
Become a Hackaday.io Member
Create an account to leave a comment. Already have an account? Log In.