 KM4EFP
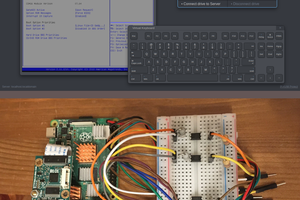
My foxbox consists of a Raspberry Pi model B with Raspbian running pifox and is powered by a 6000mah usb power bank with a mausberrycircuits.com power switch and my gpio setup is laid out on an electro-resales gpio breakout pcb. All this is fitted inside a 30 caliber ammo can by use of non conductive foam padding. It starts transmitting automatically when the Pi is powered on and the transmit switch is flipped on. The transmission of my call sign and fox message and current time runs through gpio 4 and a lpf before reaching the antenna and also lighting an led indicating a transmission is in progress. No handheld is needed the Pi is the radio transmitter. You can also use audio out on the Pi to trigger vox on a handheld radio if your not comfortable building a low pass filter. Led and switches are also optional as well as automatic or manual transmissions and timing. Build your fox the way that suits you. There are many customizeable settings for pifox to fit your needs
0%
0%
Become a Hackaday.io member
Already have an account? Log in.
Just one more thing
To make the experience fit your profile, pick a username and tell us what interests you.
Pick an awesome username
hackaday.io/
Your profile's URL: hackaday.io/username. Max 25 alphanumeric characters.
Pick a few interests
Projects that share your interests
People that share your interests
 mdevaev
 tomtibbetts
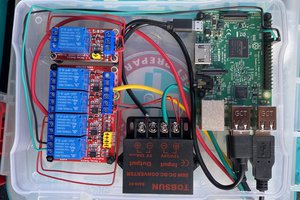
 blinkingthing
 RodolpheH