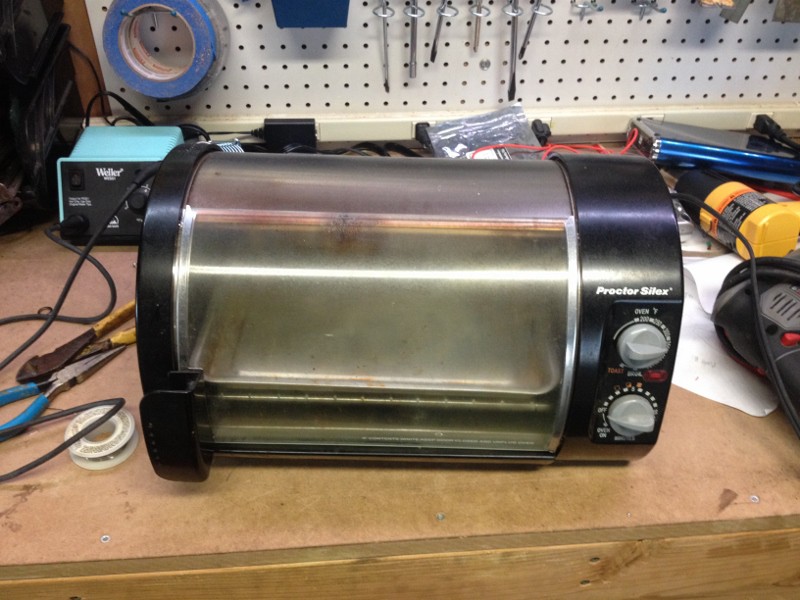
My mom got my wife and I a toaster some time ago; it hasn't seen much use over the last few years, mostly because we don't have the counter space to keep it set up. It's a decent unit--nothing too fancy, no convection system, but it does use quartz elements which heat up quickly. Works well beyond being fairy dirty from use, and it comes with a sweet sliding glass front:
General plan for the retrofit:
- Ditch the timer and broil/oven controls (that selects between the top and both heating elements)
- Add a large solid state relay, so I can switch the two 600W elements using a microprocessor I/O line
- Design some kind of HMI for starting and stopping the oven, as well as seeing current temperature and program status
- Write a bit of code to follow a predefined temperature 'recipe'
- Figure out how to make the entire assembly robust enough to survive the oven's thermal cycling
This has been done before. Many times. In fact, Rocketscream makes a great reflow oven shield. For folks considering this type of project in the future, an off-the-shelf option like this is terrific. I ended up with something a bit more cobbled together.
I popped the side panel off to reveal some pretty basic guts:
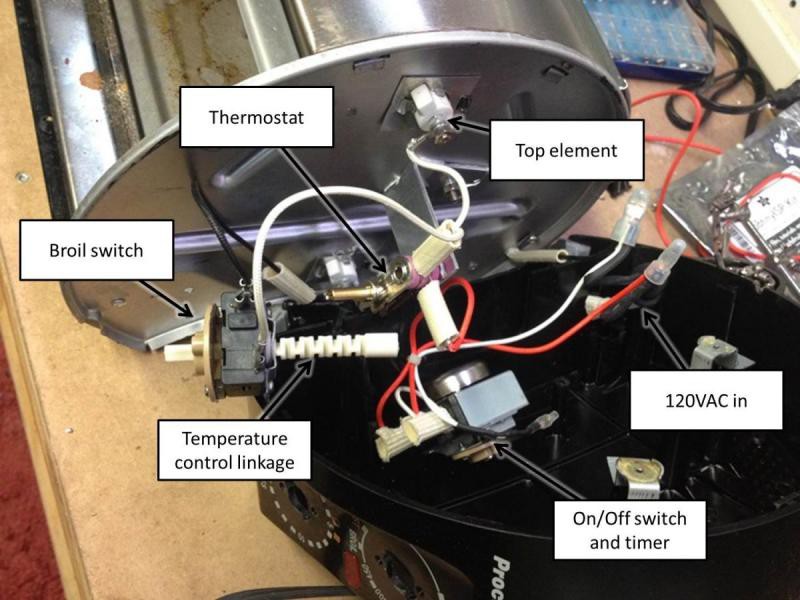
Main thing to notice here: everything is designed to survive high temperatures. All of the crimped connectors are insulated using slip-on fiber covers; not seen here are the ceramic supports that insulated the metal screw retainers (one is above the 'On/Off switch and timer' sign) for securing the cover. Additionally, the case itself produced a fine powder when drilled, similar to a phenolic resin; again, likely designed for high temperature exposure. This concerned me a great deal; if the electronics controlling the reflow oven aren't protected from the heat, what stops them from getting reflowed themselves? Even if that doesn't happen, most semiconductors don't like to operate above 180 F or so. Not good.
This seems like a good time to give some general advice on toaster oven retrofit projects: Don't get too fancy. Build a separate box with all of the control circuits and the relay, and have it switch a [carefully labeled] outlet. Then just set the toaster to a high temperature setting, plug it in to your handy box, and you can leave it completely stock beyond the thermocouple installation. As you'll see, I didn't do that.
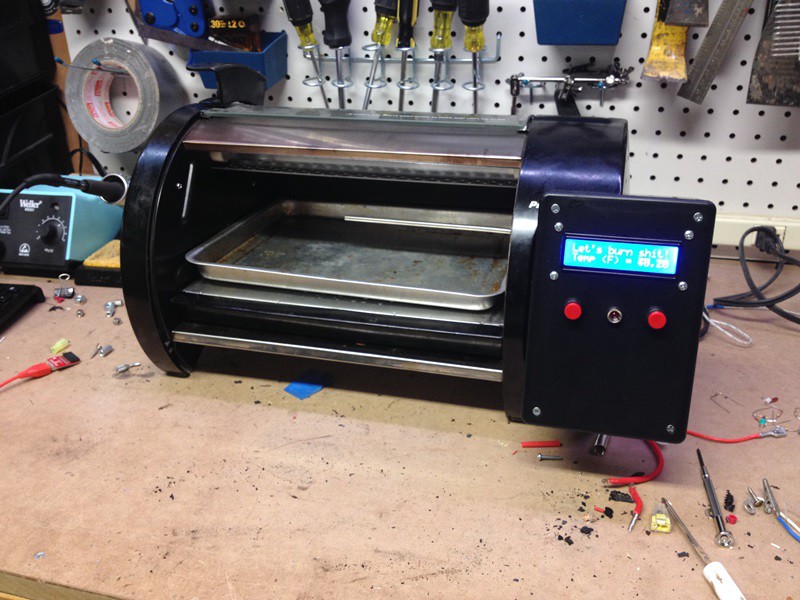
A quick glance through the wiring suggests that the heating elements are both 120VAC, so I cut out the timer assembly and broil switch and wired the quartz tubes in parallel using new crimp rings and scraps of existing fiber insulated wire. I kept the thermostat wired in series with the elements (knob and linkage removed), leaving it set for the highest temperature setting; with luck, if everything goes wrong that will still act as a last-ditch thermal safety switch. Yes, I understand the irony of using the word safe anywhere near this project, but it felt good. On that front, I also installed a 15A/250VAC fuse on the incoming hot AC line, mounted to the plastic enclosure in a handy inline case. Everything else, beyond the thermocouple, ended up mounted in a plastic project box that I bolted to the front of the oven:
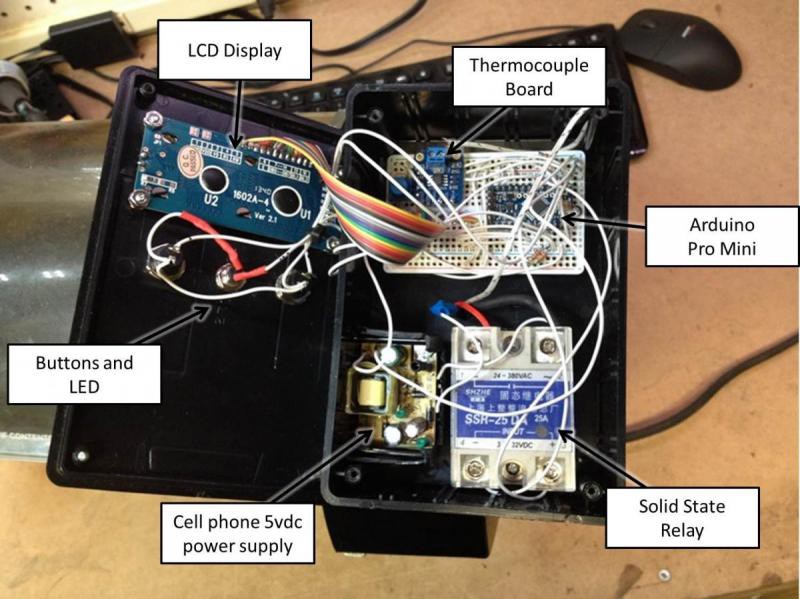
Yup, I already started salvaging Pro Minis from Neurons v0.2 and v0.3. Here it is all buttoned up, with a somewhat profane startup screen:
A few notes on the design:
- Ended up using a different thermocouple; the stainless steel sheathed unit here doesn't respond quickly enough to air temperature changes (it's really designed for liquid applications). I ended up swapping it for a bare bulb device that came with an old DMM, similar to this.
- The interface is fairly simple; the display shows current temperature, set point, and cycle time. Left button starts, right button stops, and the LED shows when the relay is activating the heating elements.
- The program runs on an extra Arduino Pro Mini we had left over from the Neuron v0.2/v0.3 prototypes; the 16x2 LCD is an inverted version of one of Adafruit's handy boards.
- The box is big enough to hold everything, but just barely; between the protoboard (I didn't make a custom board for this), the HUGE solid state relay, the thermocouple board, the 5vdc power supply for the logic circuits (ripped apart an old cell phone wall wart), and a good bit of display wiring, it's fairly packed.
- I've run it up to >500 F a few times prior to uploading a simple run program. Other than a bit of smoke, everything worked as expected; I suspect that's just excess food, as a subsequent tear-down thankfully didn't reveal any burnt components.
I should have put this disclaimer at the beginning, but if you hadn't figured this out: projects like this are dangerous. I'm confident in my ability to handle line voltage and design this system safely, but I'll still never leave the room with it plugged in (let alone running). Furthermore, I always leave the unit closed and far away from anything flammable while it's cooling down. Also, even though we're using lead-free solder, I'll never use this toaster for food again. If you decide to destroy a handy kitchen appliance, I suggest the same protocols. Don't try this at home!
After uploading a rough version of the lead-free solder paste reflow curve, I tried reflowing a few 0603 resisters on a spare RadioShack prototyping board:
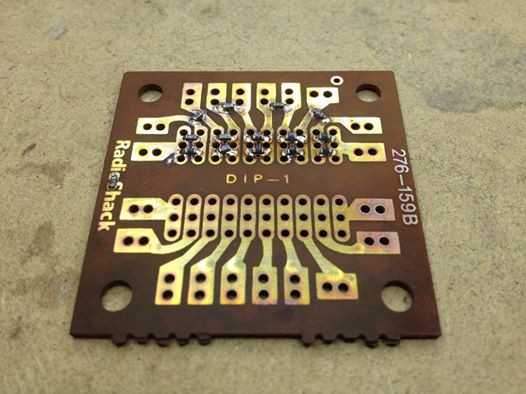
The board clearly isn't made of material designed for reflow temperatures; it started to discolor partway into the process, emitted a horrible smell, and generally stopped looking like a working circuit board. However, the paste reflowed nicely leaving minimal residue, and the resistors all checked out after the operation.
Time to start cranking out Neurons!
 zakqwy
Discussions
Become a Hackaday.io Member
Create an account to leave a comment. Already have an account? Log In.