 Tim Wilkinson
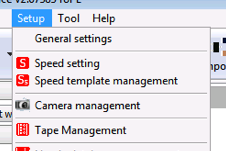
Tapes go in the feeders and need to be configured separately. You find the tape configuration under the Setup menu on the top bar:
Selecting Tape Management opens a pane something like this:
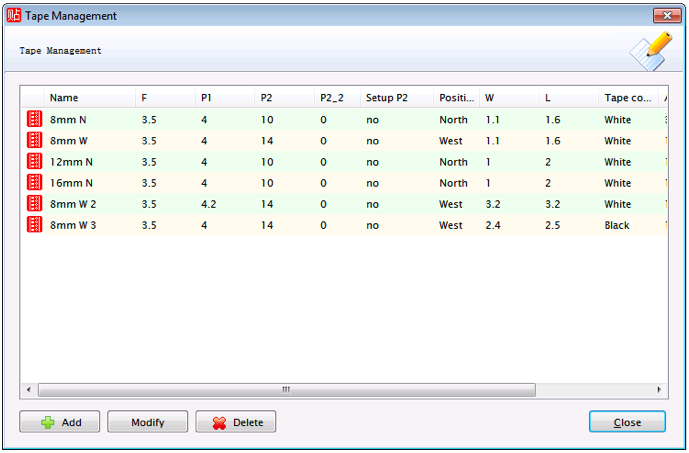
Here I've defined a few tapes. Tapes can be added, modified, or deleted using the buttons at the bottom of this window. To Modify a tape, first select it. Here's a tape I'm currently using:
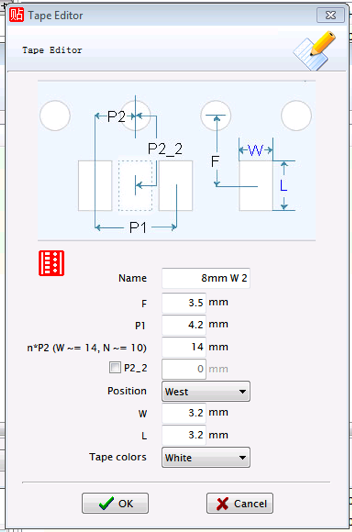
As you can see, tapes have lots of properties. But, if you look at a tape's spec, you should find measurements given for all of these properties. I've tried to pick a name which is, at least in part, meaningful to me. I've included which side of the machine this tape will go and made sure to set the Position appropriately. This is *very* important! If you get this wrong, the machine will attempt to pull the tape in the wrong way and make a terribly noise as it does it (take it from me!). Also be careful with the n*P2 value. P2 is the distance from the middle of the component cavity to the tape sprocket hole. Initially I just used the value for my tape (which was 2mm). This is bad. Here's a picture of a feeder with a little snippet of tape in it:
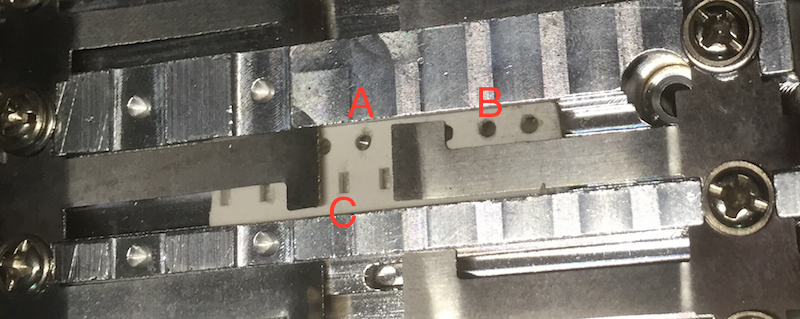
"C" is the spot where a component, and "A" is the feeder hole a distance P2 from it. When the tape advances, the head will drag it a distance of P1 (the distance between two holes). However, if it drags from "A" it will attempt to move the head into the metal flap to the right of A. Again, the machine will make a very bad noise! Instead you should set P2 so it will drag from hole "B". In my case that was 10mm for the North set of feeders, and 14mm for the West. I changed the translation from a simple label to try to remind myself of this fact.
One final value for a tape is the color, which may be black or white. So far I've not found if this is used in anyway.
Discussions
Become a Hackaday.io Member
Create an account to leave a comment. Already have an account? Log In.