Welcome to Ikeakade! 99.5% Done!
As a child of the 80's, I've always had a place in my heart for these arcade games that I spent countless hours and quarters on. Some of my fondest memories include my generous dad taking me and my younger brother to the arcade, giving us a bunch of tokens, hanging out with us despite not really caring about video games, hanging out at the local liquor store playing karate champ and later the original big buttoned street fighter with other kids, and pretty much fainting when we first saw the number of machines at the Disneyland arcade back in the day. So for the past few years, I've totally wanted to build my own arcade cabinet but unfortunately my wife and I love the modern clean lines of the Ikea aesthetic as our small house is pretty much an Ikea showroom. When I approached her a few months ago about this, it was a quick "Heck no! Where would it fit in here? It would totally look out of place even if we had the room for it."
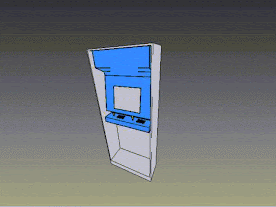
The design...
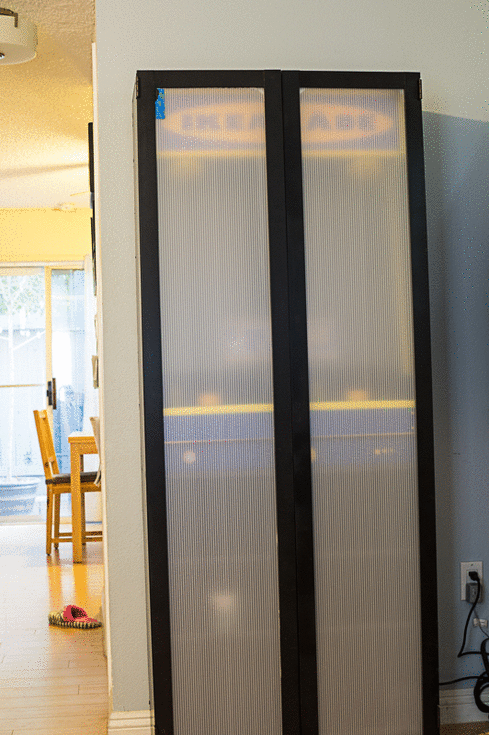
I convinced her to allow me to build and put an arcade cabinet in our living room if I could hide it inside a really slim 11.5" deep Ikea billy bookcase that we had upstairs. I started working on the design using Autodesk Inventor. I figured that I would divide it up into two parts and put them on drawer slides so that they would extend out and make it look like a real arcade cabinet. The marquee and the monitor would make up the top part and the control panel would make up the bottom part.
It was at this point where I decided that I would play up the Ikea aesthetic using their blue and yellow color scheme and even the graphics that they used in their instruction manuals. Our black Ikea Billy bookcase is pretty nondescript from the outside and I wanted to contrast that with the hidden arcade machine that is bright, brash and perhaps even obnoxious with its lights and colors. And thus the Ikeakade was born.
It was at this point where I decided that I would play up the Ikea aesthetic using their blue and yellow color scheme and even the graphics that they used in their instruction manuals. Our black Ikea Billy bookcase is pretty nondescript from the outside and I wanted to contrast that with the hidden arcade machine that is bright, brash and perhaps even obnoxious with its lights and colors. And thus the Ikeakade was born.
Starting the build...
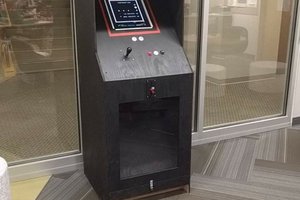
My woodworking skills were rather poor and I lacked a table saw and a router. I borrowed a miter and jig saw from my brother and designed the cabinet on the computer in advance so that I could construct it with the fewest number of cuts. I had bought a multitool and a drill earlier in the year and I went ahead making the cuts. It was here that I learned about the wonders of the sanding attachment tool. I clamped the differently cut two side pieces together and started sanding away until they completely identical to each other. You literally can't tell how horrible my jig sawing abilities are. Another lesson that I learned was that despite the hardware store telling you that the a plank is 10" wide, it is actually only 9.25" wide. I counter sunk my screws using a slightly larger drill bit and filled them with wood putty.
Control Panel...
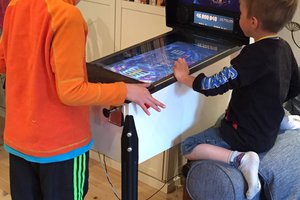
Once I received my buttons, joysticks, and controller from Paradise Arcade, I built a test control panel quickly so I could figure out what bits and how big things actually are and to make sure all of the lights worked out. I also ordered a cheap 2" trackball from Sparkfun. Because it didn't come with any mounting materials, I took some ideas from the way that DaOldMan mounted his in his control panel. I highly recommend this because if you are doing an cabinet for the first time, its a lot easier getting the mistakes out of the way on the practice control panel. I also wanted two spinners on my control panel for games like Ivan Stewart's OffRoad or SuperSprint and after seeing the prices on them I went the DIY route.
Here's the contraption I build to mount the trackball.
You can see the DIY LED...


 jason.gullickson
 zittware
 shlonkin