 mclien
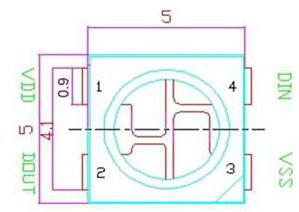
This is the pinout of the ws2812b LEDs:
quite nicly here is that at a 45° angle the power supply can be from both sides, while data goes "trough" it. Which led me to the following design:
This
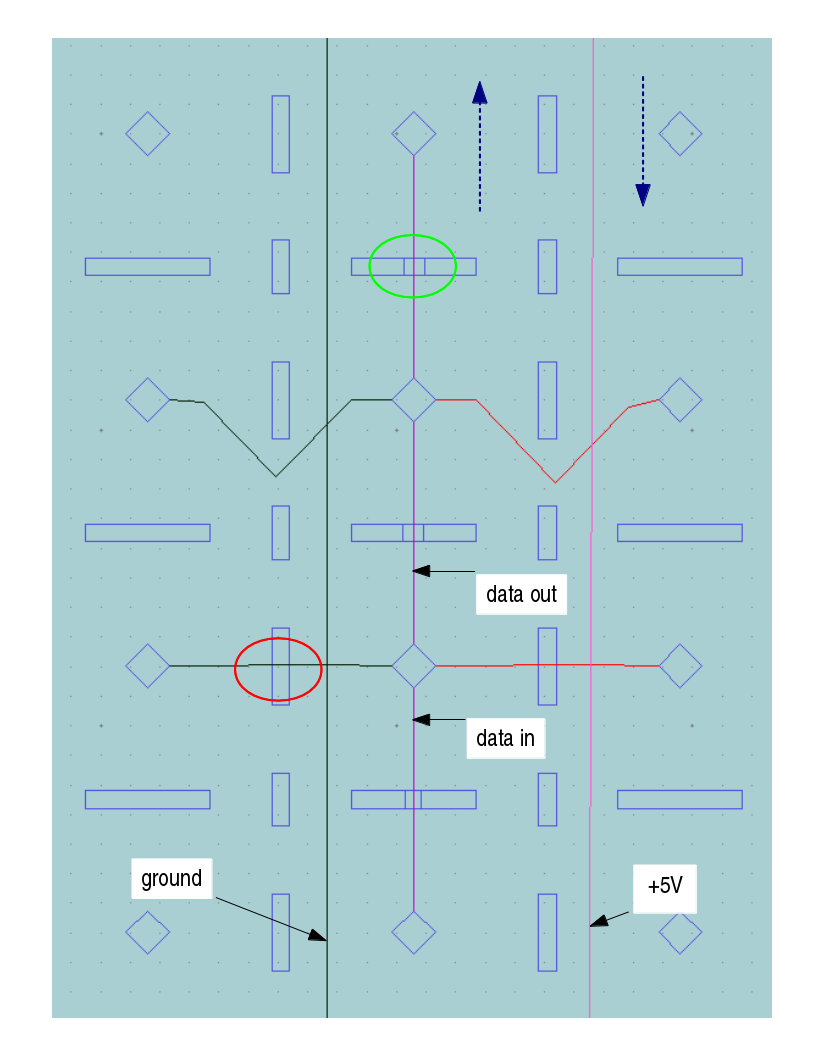
This is the view from the backside. on each LED we have power from the sides, which are supplied by the +5V/ground "rails". Data "flow" starts on bottom turns on top and goes down the next line of LEDs (blue dashed arrows), so the whole matrix is one single LED strip. As you can see I left a notch in each part for the data line (green circle), but not to the power line (was afraid to weaken the parts. red circle). So I went for the upper design, but will change the CAD data with new notches for the power wire aswell, to avoid the V-bended wire parts (see next log entry). Firstly I glued all wire parts from the packside to have all tips in place:
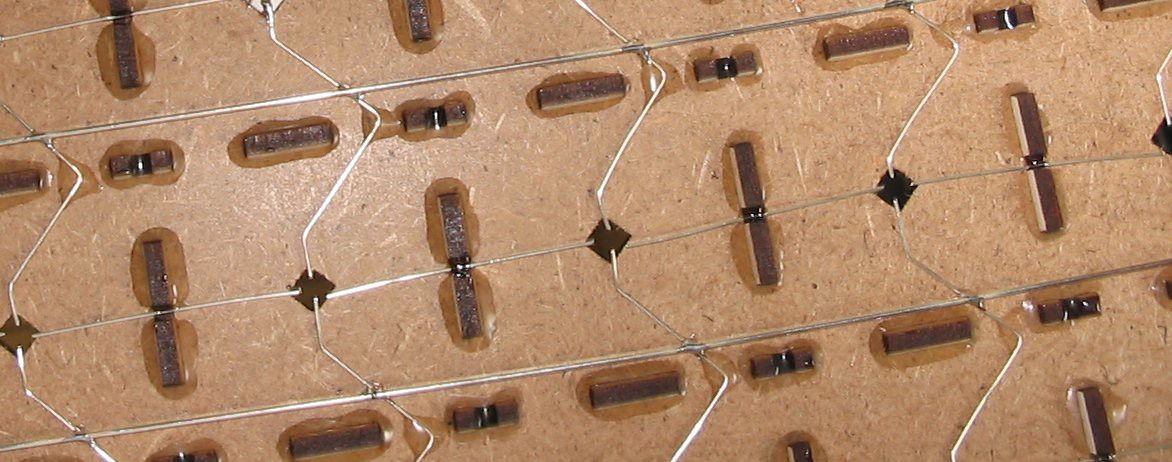
I glued the wire in place just by a spot of epoxy with syringe and blunt cannula. You can also see the gluing of the wooden parts, which were appied in the same way and only from behind.
So with alittle it of bending I had all wires in place. I then set the LEDs in place from top prevented from falling trought by the wire ends and holding in place for soldering by frictioin (holes are 5mm rectangele, solder pads stick out a little from that).
Discussions
Become a Hackaday.io Member
Create an account to leave a comment. Already have an account? Log In.