 mclien
Having glued all wires in place, I first solderd the main power "rails" in place, which is easy: just lay it crossed to the "V"shaped parts that will supply the LEDs and solder it in place. I didn't interconnect them to each other at this time, to be able to test each column separatly. First step is to drop a LED in each "box" from the rail, then I pressed them into the holes with a tweesers and flipped the whole thing over to solder them. Starting with the data connection:
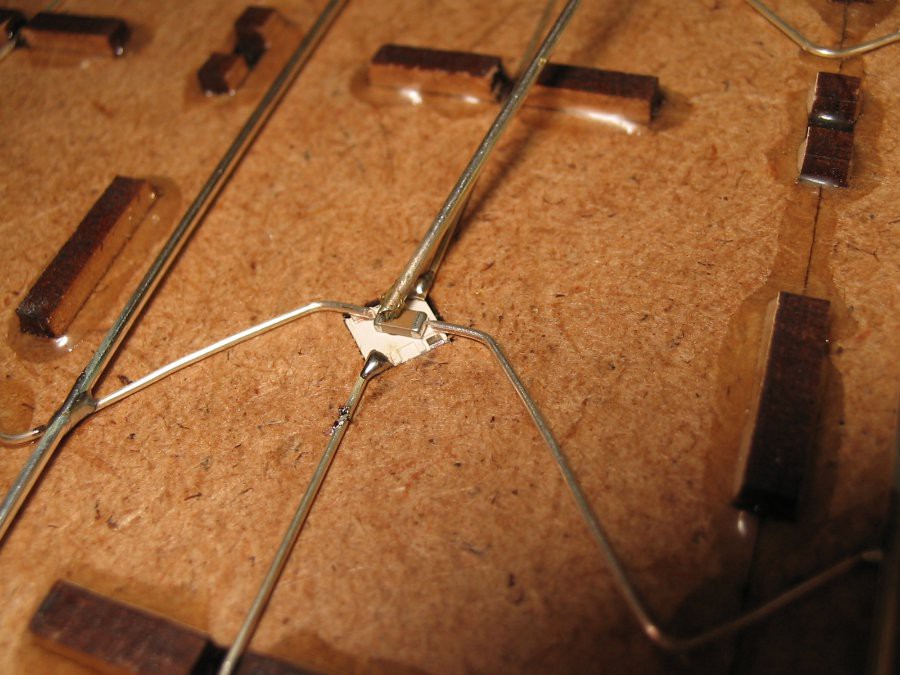
Here we see the data connection already soldered and the preperationfor the trickier one: SOldering the power connection with a capacitor of 3.2x1.6mm. While these little parts tend to stick to the liquid solder with more force tha the gravity will hold them down, one will need the ever missing 3rd hand (that is the one holding the 1mm wire pressing onn the cap from top). My solution is this: Just some piece of metal with a wire taped to it, so it hase some force downwars under which I place the cap.
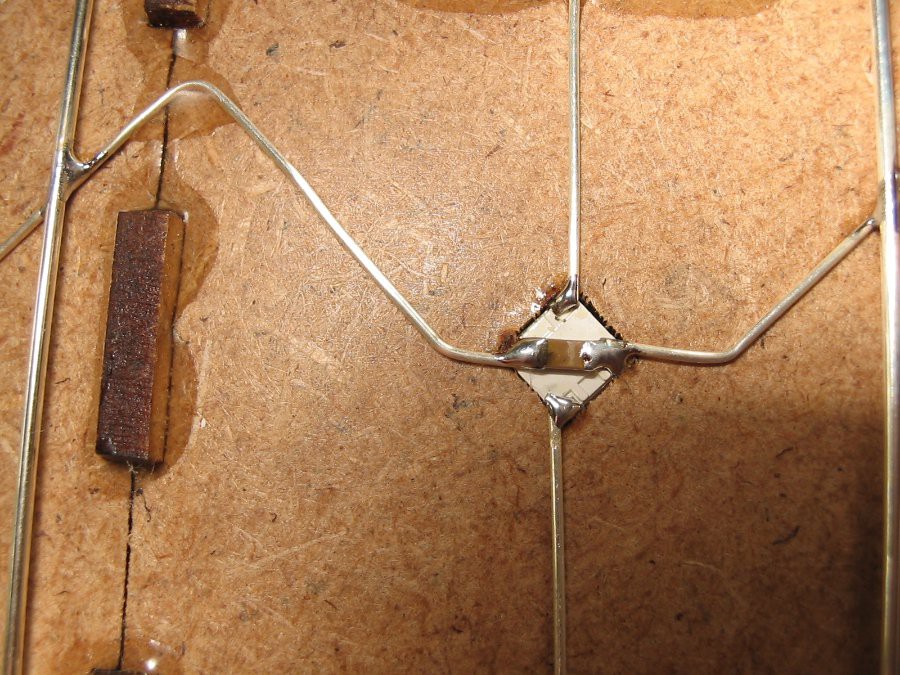

After some practise I found the right position of the positioning of LED, cap and wire (which I was able to bend in position, because gluing was done a bit away). So when nicely done I ended up like in the right picture. After each column I did a testrun with a little sketch (written by sisam) which just blinks through each LED with color white, which makes it instantly visable, if one color is missing. Non coloumn worked at the first try (I tend mostly to miss one solderspot or overheaded the LED and had to exchange it.
When all columns worked fine I closed the gaps in the data and powerlines and tested the whole thing with a new sketch which led 10 LEDs on run over the panel in each color (RGB).
Discussions
Become a Hackaday.io Member
Create an account to leave a comment. Already have an account? Log In.