 mclien
After fiddeling around with some weired adapterchains trying to get some serial to usb working, I decited to look inside.
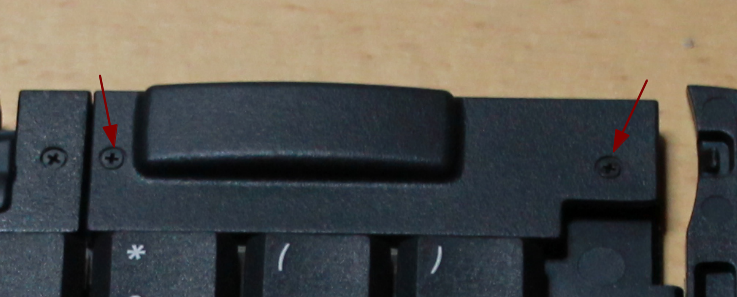
Above the 4-7 keys the connector for the Plam pilot is visable (can be unfolded to a stand for the device) and above th 8-0 keys is the housing of the PCB. 2 screws are visable from top:
But there is a hidden one on the bottom side:
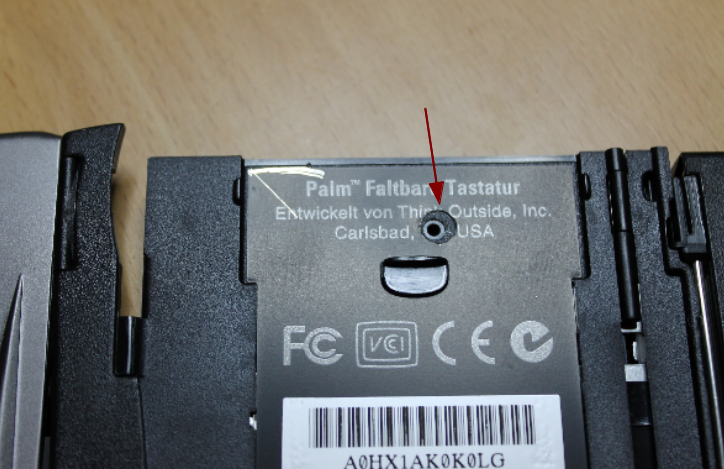
This is tricky to find, since the hole in the picture made by me. The label hiding it is not a simple sticker, but actually a thin metal plate glued to the plastic. I carfulle removed it (trying to bend it as little as possible), punshed the ole with a simple office hole punsh and put it back in place (the glue seems to be a contact adhesive one, so tha worked quite good. Maby now, knowing where the screw hides, it can be achived by using a tine curcular saw aswell.
An finally we se what's inside:
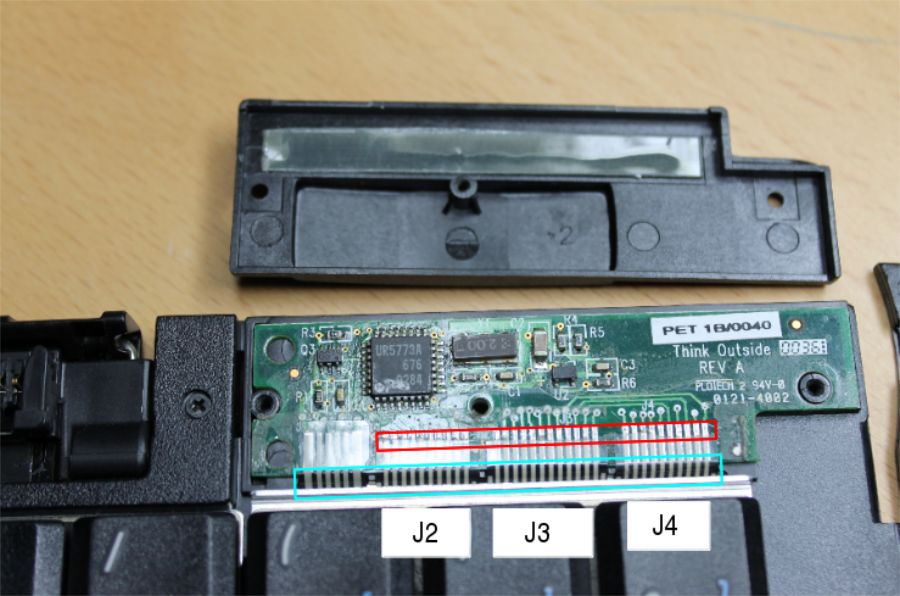
the cyan marking show the 4 lanes of wire, which are connected to the PCB by using a double sided adhesive tape, most likely this one:
http://www.adafruit.com/products/1656
blocks J2-4 are the ones connected to each subblock of the keyboard. The (not labeld) J1 is connectet to the Palm connector. I then spend some tedious work to decipher the matrix. I partly removed the flat ribbon in the rad marked area and used a circuit indicator on the pads. I started with holding the testing points on J1 pin 1 and 2 and started pressing keys until I had a beep, wrote that down in a spreadsheet and the tested J1 pin 1 and 3 and so forth (you get the tedious part, I guess).
But after some patience I finally had the matrix layout for the US and German keyboard (have to upload them some where..)
Discussions
Become a Hackaday.io Member
Create an account to leave a comment. Already have an account? Log In.