 blorgggg
Introduction
Joystick Fun
As we showed in an ealier How-To, hooking a potentiometer knob is one of the easiest ways to control any device. Joysticks are basically two potentiometers connected to each other. These are pretty much just as easy to connect to your Mod, and provide an powerful, intuitive way to control it.
Using the simple code below, you can explore the joystick by moving it up, down, side-to-side, or even give it a twirl!
Materials
- 2-Axis Joystick (from Parallax)
- Breadboard
- Jumper Wires
- USB Breakout Board
- USB Cable
Setup
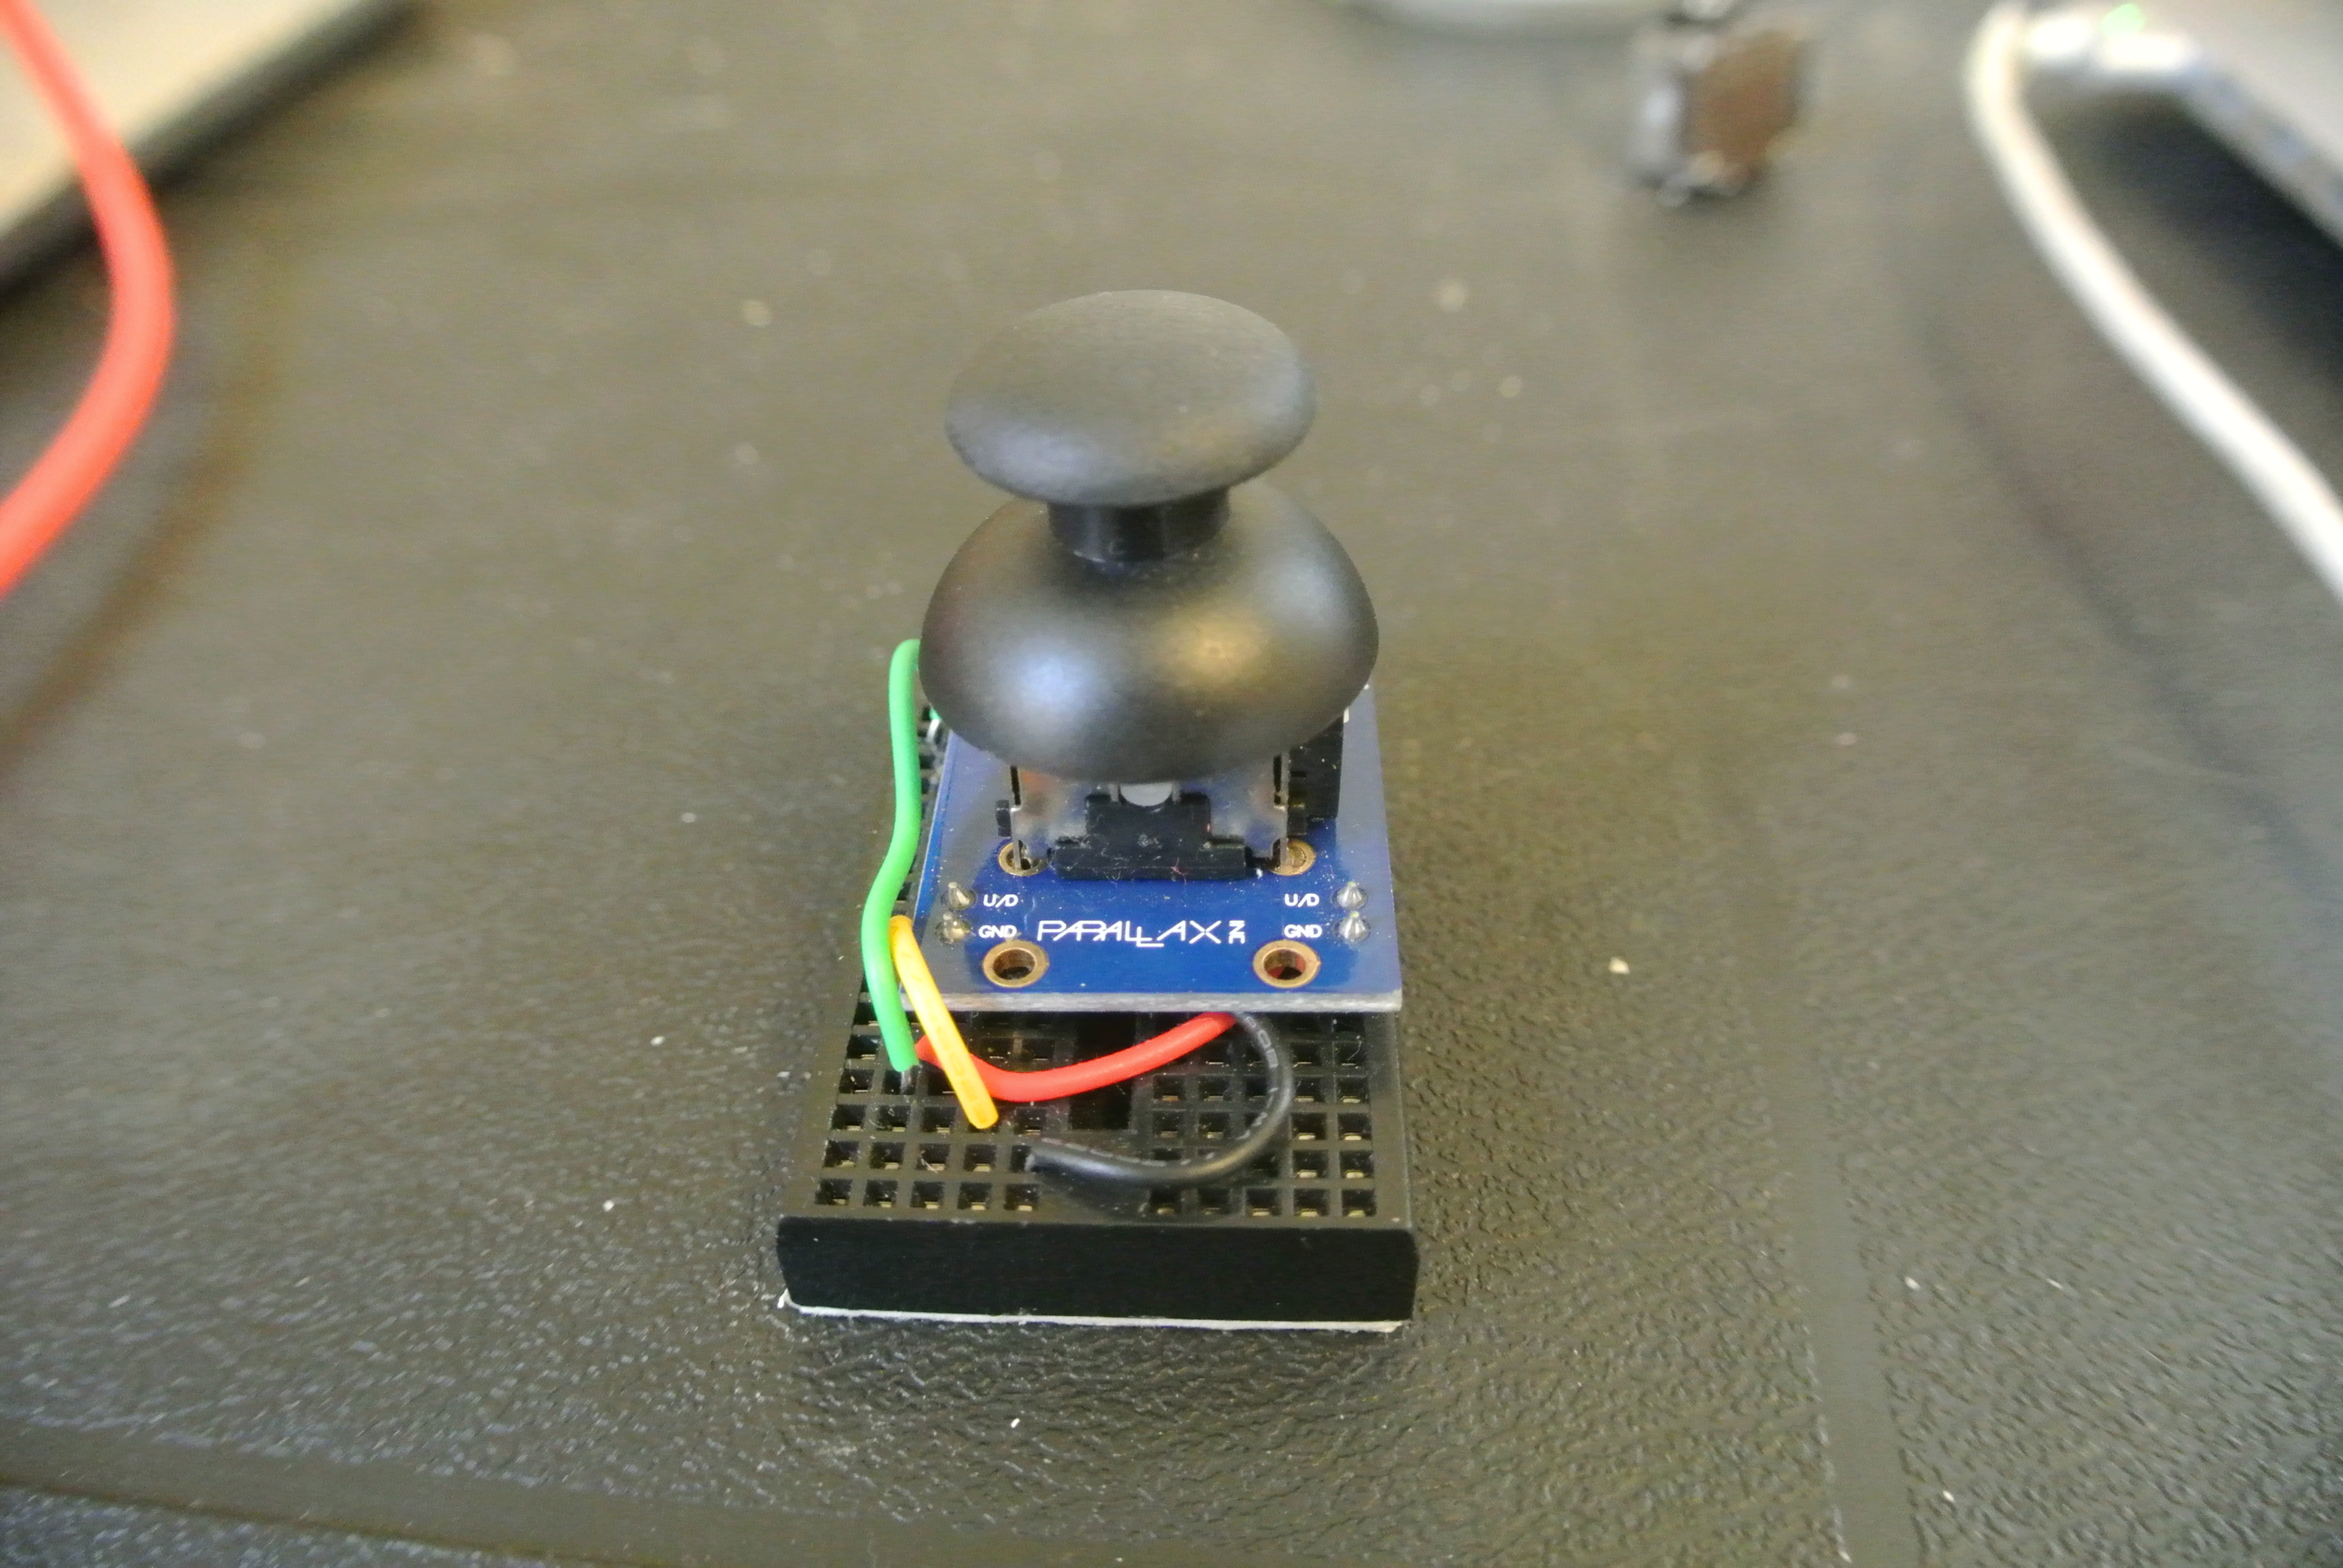
Create JoystickPlace your potentiometer atop your Parallax. Next, take your joystick controller and affix it to the potentiometer. You will then mount your Parallax to the breadboard.
Attach Breakout Board to WiresAfter mounting the Joystick Parallax to the breadboard, place your breakout board to then set your wires to corresponding units.
Placing Wires- Connect green wire to D- of breakout board and L/R of Parallax (Left and Right motion).
- Connect yellow wire to D+ of breakout board and U/D of Joystick Parallax (Up and down Motion).
- Connect black wire to GND of the breakout board and GND of Parallax.
- Connect red wire to VCC of breakout board and U/D+ on Parallax. Connect this also to the L/R+ part of the joystick too
Plug In Code
Plug in the Mod's USB to your computer, and click "Run on Arduino" in the embedded sketch below. This will enable the Mod to detect your controls from the Joystick.Playtime!
After plugging in the code provided above, you are all set to play with the joystick! Explore vibration variation by changing the rotational directional of your joystick to access you or your partner's ideal vibe!


 remotemod328

 Alvaro Ferrán Cifuentes
 hebel23