 niksgarage
The launchpad is an array of 80 buttons, and 160 LEDs, two per key. It's not touch sensitive, but all the same ...
There are five 74HC164, and three 74HC165 inside. 164s (serial to
parallel) drive the LEDs, and 165s read the state of the keys. The
matrix is broken into four columns, each 40 LEDs (and 20 keys) long; you
clock the LED states out, and clock the key states in at the same time.
So, I desoldered the CPU from the board, and wired in an Arduino
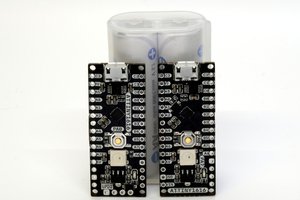
Leonardo - since it was what I have lying around. The eventual target is
a 32u4 micro board from my Chinese friends, when it comes.
The Leonardo happens also to have embedded USB, and there is a lovely lump of hack for the Arduino core called arcore,
which happens to implement a simple USB MIDI interface. I found the
programmers' guide to the Launchpad, so I could code up what was
expected inbound and outbound, and a few days later (well, I have to do
work as well, c'mon now) I have a reasonable emulation of a Launchpad.
The refresh rate is now 70Hz even though I have implemented the three shades
of green and red by PWM. I have a legitimate copy of Renoise for Linux (and Mac), and I wanted to use the Duplex mapper, which has lots of built in maps for Launchpad, but they do use all of the shades of colours.
It also has the benefit of a much faster MIDI implementation than the
original - though maybe no faster than a Launchpad S, which uses a newer
engine. Anyhow, I don't seem to need double buffering or anything like
that to make the update performance OK .. it updates the entire button
array in one refresh time, so as far as the user is concerned, it's
instant.
The designers of the Launchpad thoughtfully left some diamond-shaped pads to make it easy to solder to ..

This made it easy to wire in the 'Pro Micro' Leonardo board .. I had
to change the arduino code a bit, since the ports don't quite line up
with the Leonardo, but the arcore extension loaded fine, Renoise spotted
I had added a USB MIDI device ..

Time to stick the tiny board onto a couple of sponge pads, and wire in a
short micro USB cable to the existing USB connector on the Launchpad -
that way, the 5v serves the existing logic on the motherboard, and
powers the micro board as well. It also means I can avoid trying to
solder anything onto the micro USB connector which are too damnably
small to see. Even with the surgical loupes.
.


 andriy.malyshenko
 Daniel Grießhaber
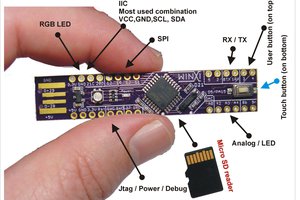
 bobricius
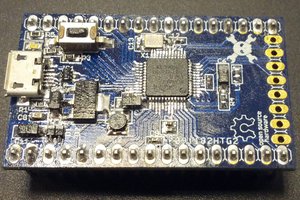
 Michele Perla
Outstanding post! Your practical tips and real-life examples give significant depth to your ideas. <a href="https://www.icecric.news/15-wwe-wrestlers-with-the-most-wins-in-history/">Wrestler with the most wins of all time</a> Your dedication is evident. Can't wait for your next share. Keep the excellence flowing!