 Audrey Robinel
A small update today, about the main power switch.
Previously, i had a small power switch on the breadboard to turn the robot on and off. It was highly impractical, since when you wanted to shut the robot down, not only you had to run after it and catch it, but also reach the switch within the robot. I thus decided to add a bigger button, in a more accessible position. I used a latch pushbutton with an integrated LED :
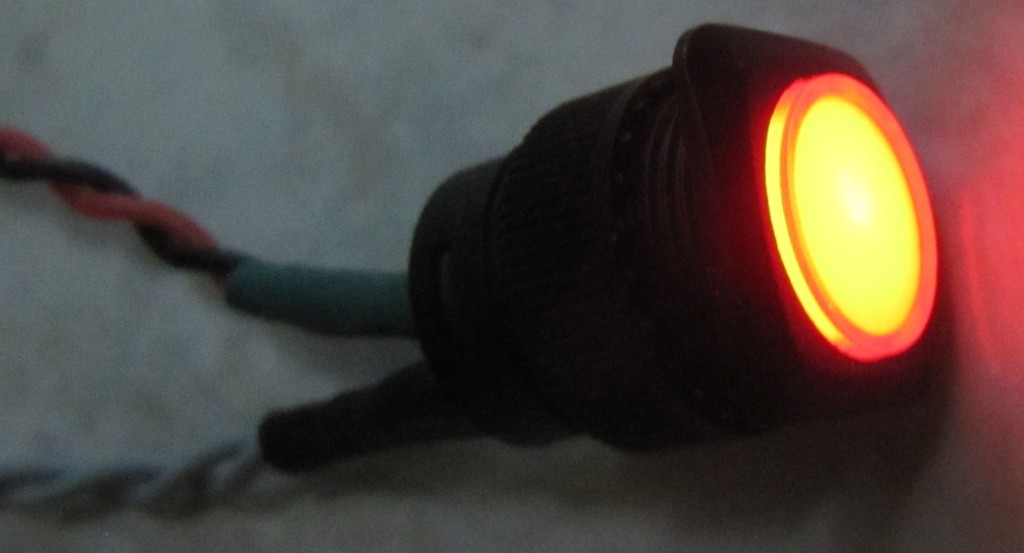
I soldered flexible silicon wires from Adafruit, and used heatshrink tubes to clean it. These wires are really flexible, and are easy to route in the robot.
The LED turns on when the robot turns on, and the switch controls the power output of the battery. If the switch is off, no energy is used. The led also add a "cool factor", which is fun :) It looks like an eye, perhaps later i'll put a "breathing" effect to it.
At this point, i had to find a solution to secure it to the robot. It had to be easily accessible, but not too exposed. I decided that it would be on the back of the robot. I designed a fixation with openscad :
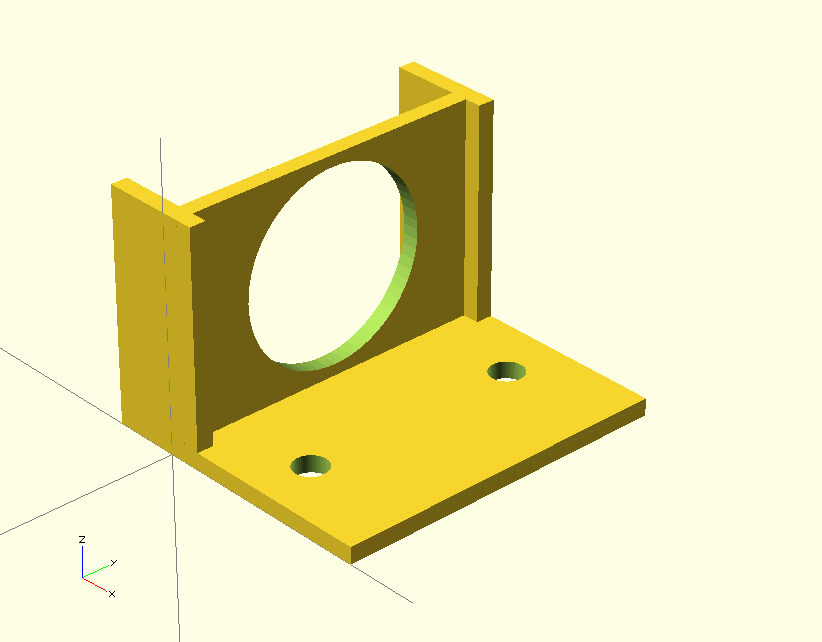
Here is a link to the scad file to the button fixation holder, and a link to the stl file for the button fixation holder.
I added 5mm on each side of the piece, in the front, in order to keep the robot for powering down after a contact with a wall.
I will add a retractable cover later (transparent, of course).
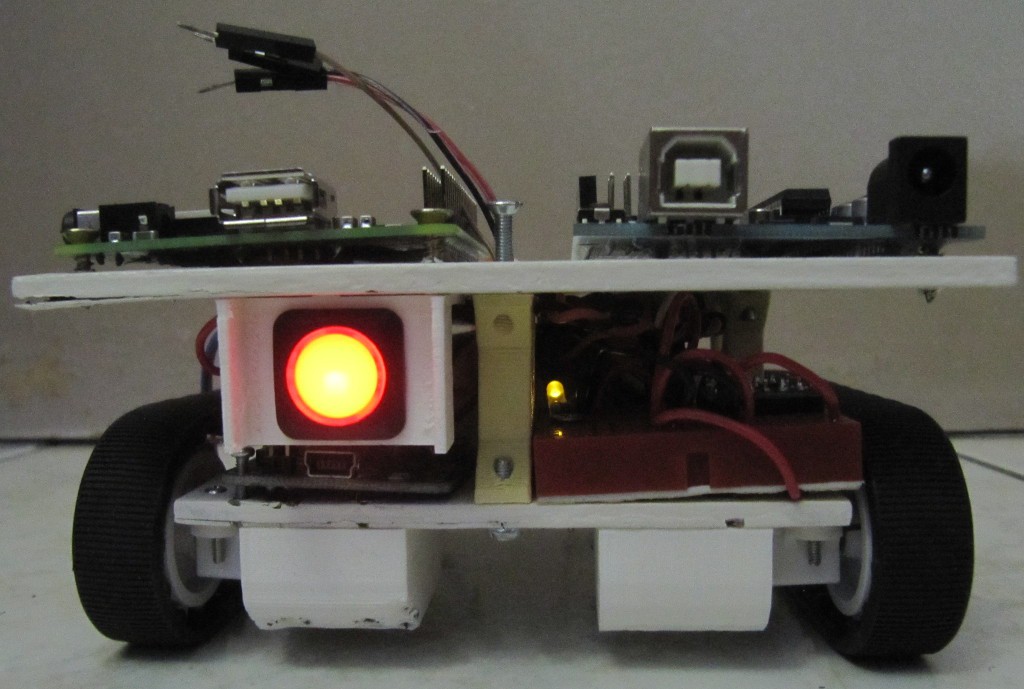
Once everything is in position, this is how it looks (back view of the robot) :
I yet have to update the robot plans for laser cut to add the screw holes for this part.
See you next :)
Discussions
Become a Hackaday.io Member
Create an account to leave a comment. Already have an account? Log In.