 Laura
LauraResearch
After some quick Googling we realized several others have tried and succeed at implementing similar projects. The Kegbot appeared to be the most popular, so away we went.
The main components in this project are a flowmeter, to measure beer volume dispensed, and a solenoid valve, to electronically control the flow.
We decided to keep it simple and cheap for the first run. There millions of valves and flowmeters out there, some may be better or worse than what we have chosen (also things like "Food Grade" certification should maybe be taken into account).
We found the best deals on eBay for a solenoid valve and a flowmeter.
Mechanical Design- Beer lines are 3/16″ ID plastic tubing
- Flowmeter has 1/2″ male threaded fittings
- Solenoid has 1/2″ male threaded fittings
We weren't sure exactly how to make this work, but a trip to Lowe's was inspiring. We bought a 1/2″ threaded coupler to connect the flowmeter to the solenoid, and 1/2″ barb fittings for connecting into the beer lines.
ConstructionJust wrap the pipe threads in Teflon tape to prevent leaks and screw everything together.
Cut the beer line (we cut about 1.5 feet from the keg coupler to make sure we had enough pressure to meet the 3 PSI minimum of the valve) and press the beer line onto the barb fittings.
Electronics Design- The solenoid needs 500mA at 12V
- The flowmeter operates at 5-24V
We will need external high power circuitry to drive the solenoid. The flowmeter can piggyback on the solenoid 12V line. We just need to bring the 12V down to 3V to feed into the MetaWear.
With the external power supply a hard requirement; we decided to buck the 12V line to a 5V line to directly power the MetaWear!
ConstructionAfter a DigiKey order and a chance visit to Goodwill, we discovered exceptionally good prices and a selection of power supplies; we were ready to build.
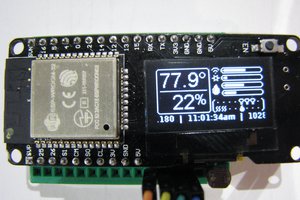
To obtain accurate temperature readings from inside the kegerator, we first installed a thermistor on the MetaWear board as discussed here. We then attached a couple of wires to the GPIO surface mount pads on the back on the MetaWear for interfacing with the solenoid and flowmeter.
We went to work on the proto-board, first soldering down the barrel jack, 5V regulator, power mosfet, resistor divider, and finally the flowmeter header.
We used some extra hot glue for stability.
TestingAfter each section was soldered we performed short/open checks with the multimeter. Then we plugged in the power supply and checked various points for proper voltage readings.
Finally came the first full test; we filled the keg full of water (to prevent wasted beer).
Using the sample iOS App to energize the valve (set GPIO pin 3), and periodically read GPIO pin 2 to see that the flowmeter is toggling.
All thats left is to box it up nicely (we resort to 3D printing) and a quick install.
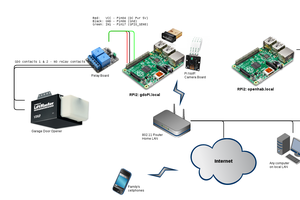
Software Design- Server backend to store various beer and user data
- Web frontend to view and edit server data
- App connects to MetaWear and activates valve and records number of flowmeter ticks then sends to server
- Extra Credit: App only works if user logs in and has beer quota remaining (no work = no beer)!
First we developed a basic iOS App to connect to the MetaWear and turn on the valve and count pulses.
This is quite simple with the MetaWear APIs.
Next it was time to turn attention to the backend/server. As is the case so often with software, there is some open source package that fits perfectly. This time it came in the form of Kegbot (Kegbot and Kegboard are trademarks of Bevbot LLC.) who have an open source a beer server.
Now we just need an App that can interact with the server. Check out the Github project links at the top of this project page.
Using the REST API provided by the server, we were able to use RestKit and get it connected quickly.
Users are able to login, post new drinks, and view the Keg temperature (interacting with the server backend alone could fill an entire blog post, we recommend that you take a look at the KegBot page). Users can nicely view all the...
Read more »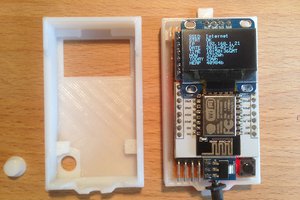
 Jeff Taylor
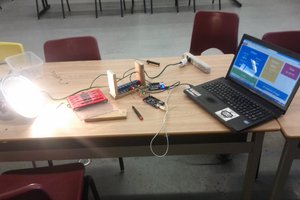
 Ansaf Ahmad