0%
0%
The Wash-Is-Done-inator
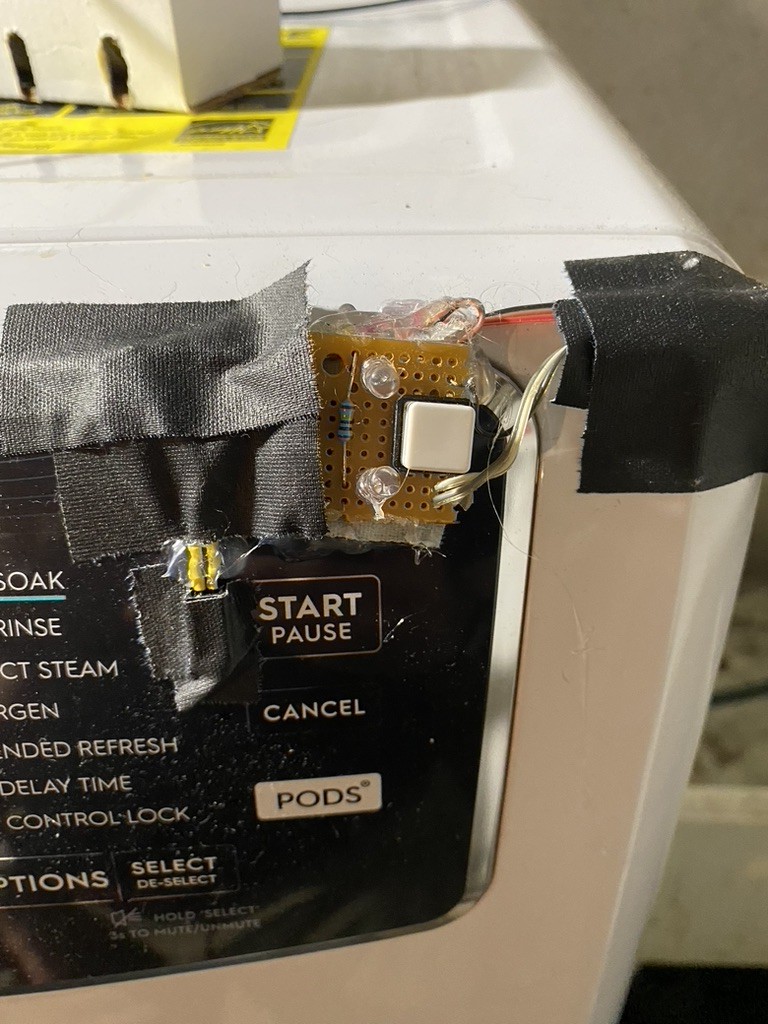
I'm tired of wasting time between when the washing machine finishes, and when I notice it's done. Time to build a gadget!
 Jorj Bauer
Become a Hackaday.io member
Already have an account? Log in.
Just one more thing
To make the experience fit your profile, pick a username and tell us what interests you.
Pick an awesome username
hackaday.io/
Your profile's URL: hackaday.io/username. Max 25 alphanumeric characters.
Pick a few interests
Projects that share your interests
People that share your interests


 davedarko
 Bob Miller

 Mathias Sundgren
I love your spirit! "Is it beautiful? Not really. Does it work? Yes, beautifully!"