 Steve Pendergrast
Vase Dazzler Features
This project uses addressable color LEDs to light up 3D printed a vase of your choice. It includes a compact housing that the vase sits on top of. In the back of the housing are controls: a dial to set brightness and a pushbutton to select one of ten pre-programmed color patterns. Color patterns include fades between colors, blinks, and even a "candle flame" effect.
Here's a video with one of the modes:
Open Source License
This project is open source (Creative Commons Attribution-ShareAlike 4.0 International) and all source files, STL files, source 3D models, etc. are posted publicly for your hacking pleasure.
Parts List
The electronics parts are all non-proprietary and commonly available. You are free to source the parts yourself but if you'd like to help support our future projects please consider purchasing a complete kit from the Vorpal Robotics Store. The kit at the store requires no soldering, making this a very fast and convenient build.
Parts:
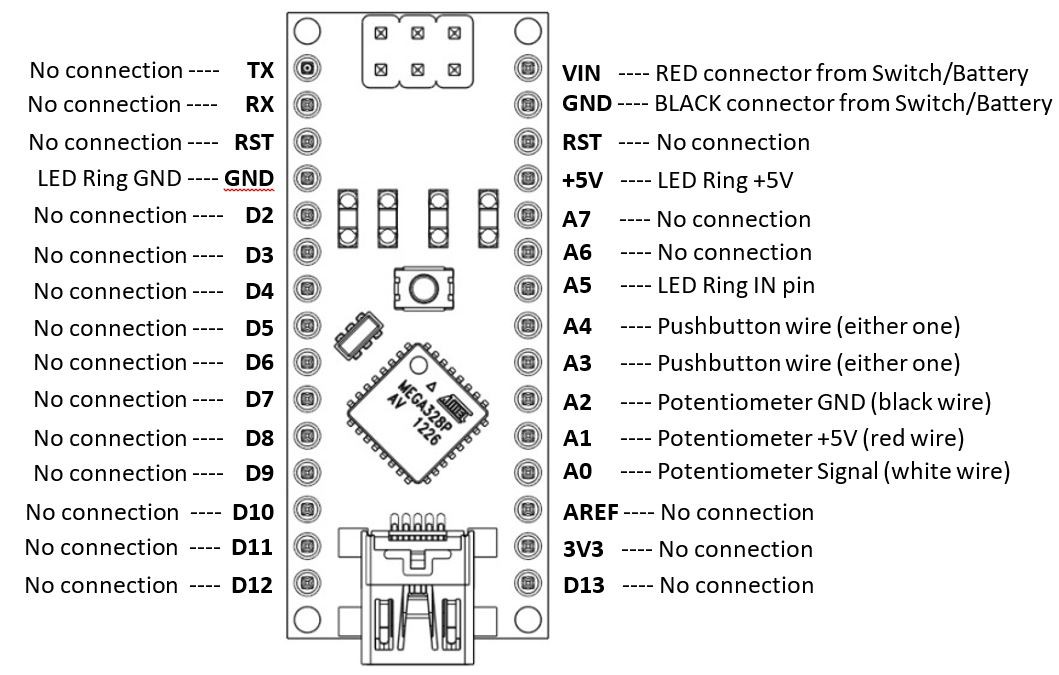
- 1 x Arduino Nano
- 1 x 12 RGB LED light ring. These are addressable LEDs such as WS2812B or similar. Outer diameter is approximately 18mm. You'll need to solder Dupont jumpers on the pads marked IN, VCC, and GND.
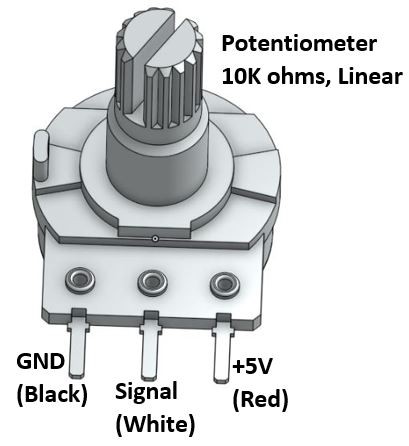
- 1 x 10k ohm linear rotary panel potentiometer with 6mm shaft, nut, and dial cap
- 1 x 12mm diameter panel mount pushbutton
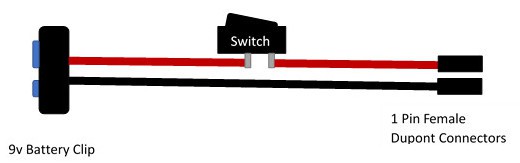
- 1 x 9v battery clip
- 1 x on/off switch which should be rectangular, 9x13mm (this is a common size)Dupont jumper wires, Female-Female
- Either electrical tape or shrink tube to insulate connections if you are not using a kit with presoldered electrical parts.
- A screw, #6-32 by 1/2", or M3x12 both work well with this project.
- Cyanoacrylate glue (e.g. "super glue") or any other glue that works well with 3D printed plastics.
Convenient kits that include all of the above parts, with all soldering completed for you, are available from the Vorpal Robotics Store. This project is open source, however, so feel free to source your own parts.
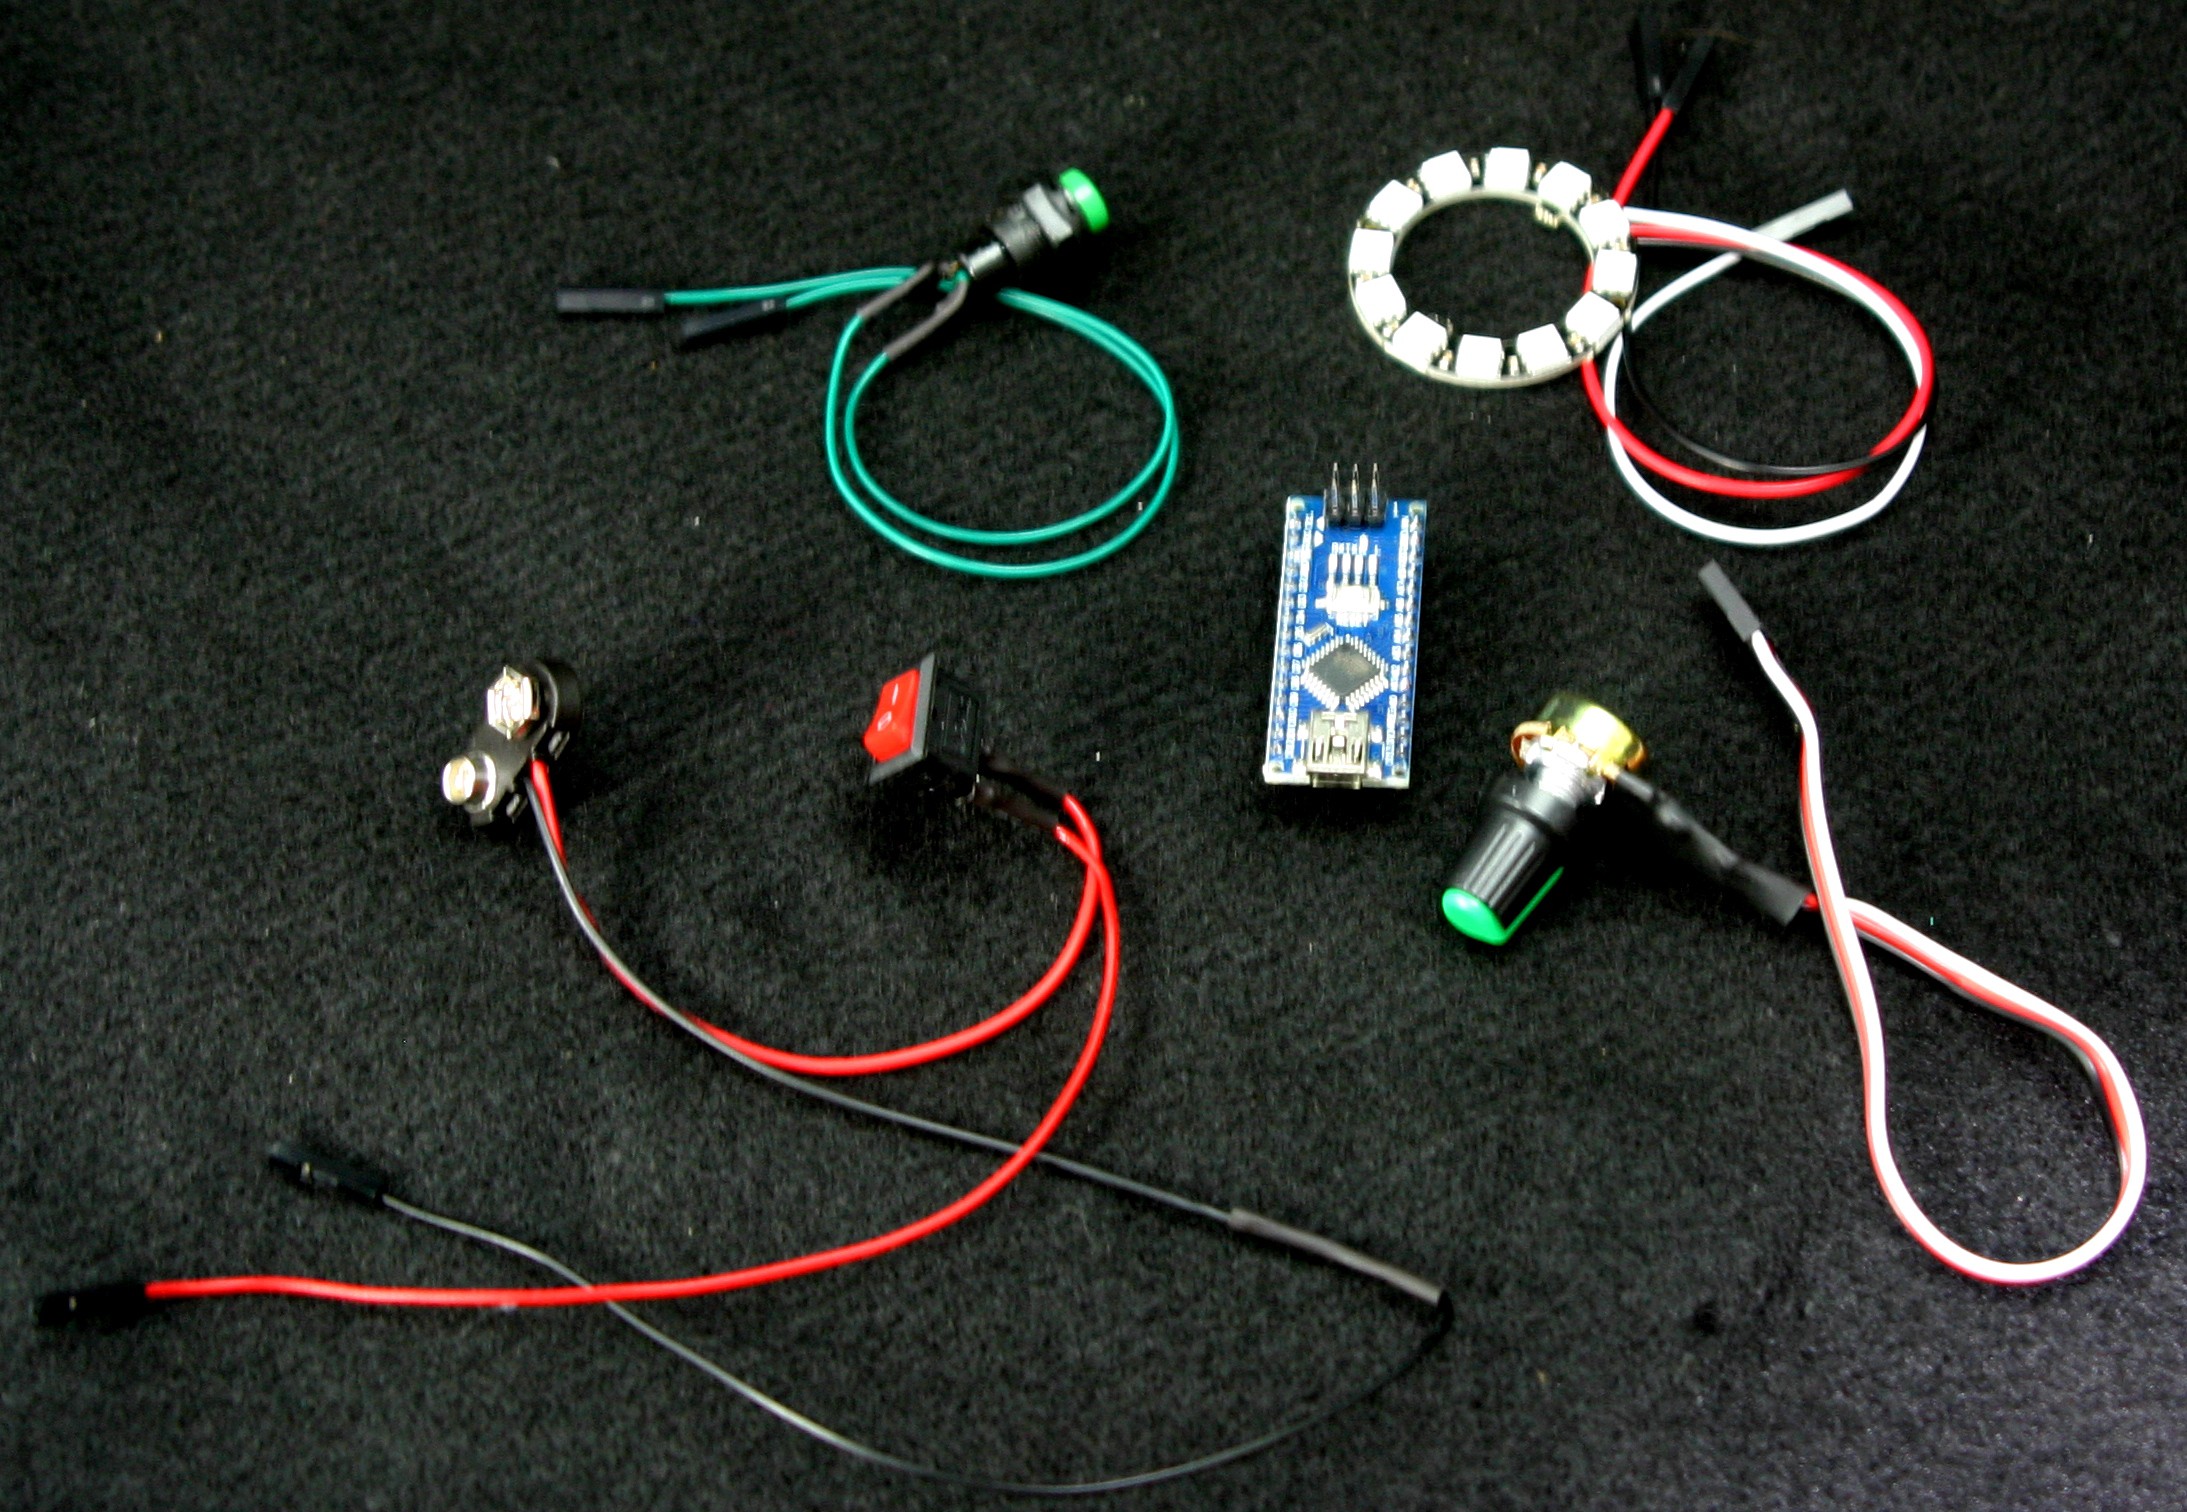
Electronics parts (shown soldered as they would be from the Vorpal Store Kit)
3D Printing Materials:
- Green filament for the flower stem. ABS or PLA are good choices.
- Red filament for the rose. Of course you could use other rose-like colors (pink, white, yellow). Again, ABS or PLA will work well.
- Clear filament for the vase and vase dazzler. I like PETG for this, but you can also find transparent or translucent PLA and other materials.
Tools needed:
- A 3d printer! Even if you don't own one, there could be a nearby Maker space, Hackerspace, or even a public library that offers access at low or no cost. Many schools also have 3d printers that can be used by students and parents.
- Tools for use with the 3d printer usually include some kind of spatula to remove items from the print bed.
- A screwdriver or hex key of the type that works with the screw you selected above.
- If you are not using a kit that provides presoldered parts, you need a soldering iron and solder, and associated equipment.
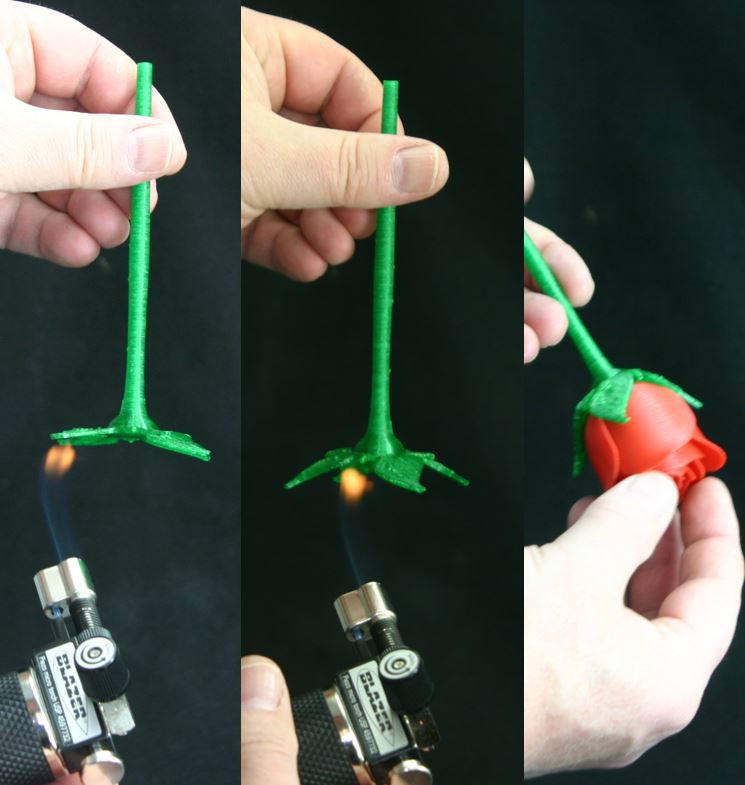
- A butane lighter or butane torch are needed to bend the leaves on the 3D printed stem to natural looking angles.
File Repositories
- Arduino Code on Github
- STL Files on Dropbox (and you can also find them on Thingiverse by searching for "vase dazzler")
- 3D model source on OnShape
Complete instructions
Complete instructions are posted on the Vorpal Robotics Wiki.
Here are a few photos illustrating the basic ideas behind the build.
The flower stem leaves can be made to come down at a natural angle by heating them. Keep the flame moving! Don't let it catch fire. Have a bowl of water ready
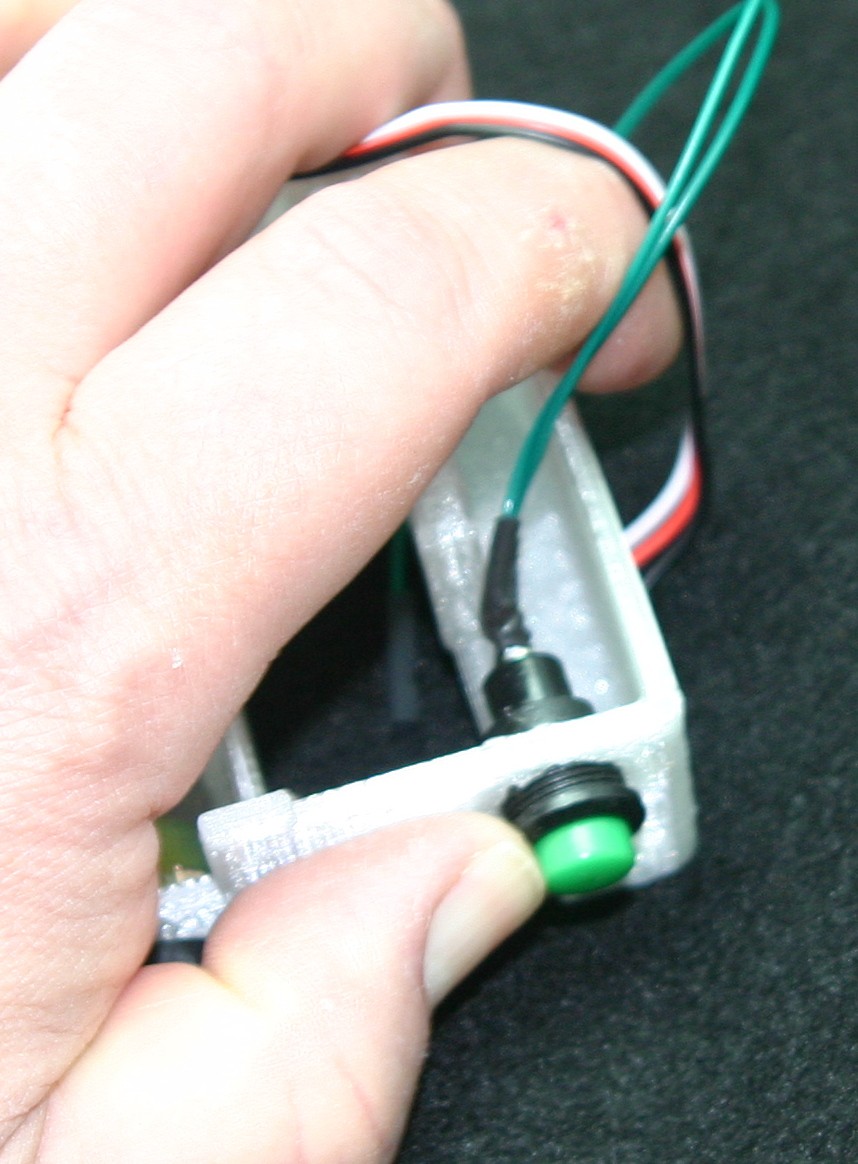
Insert the pushbutton from the front:
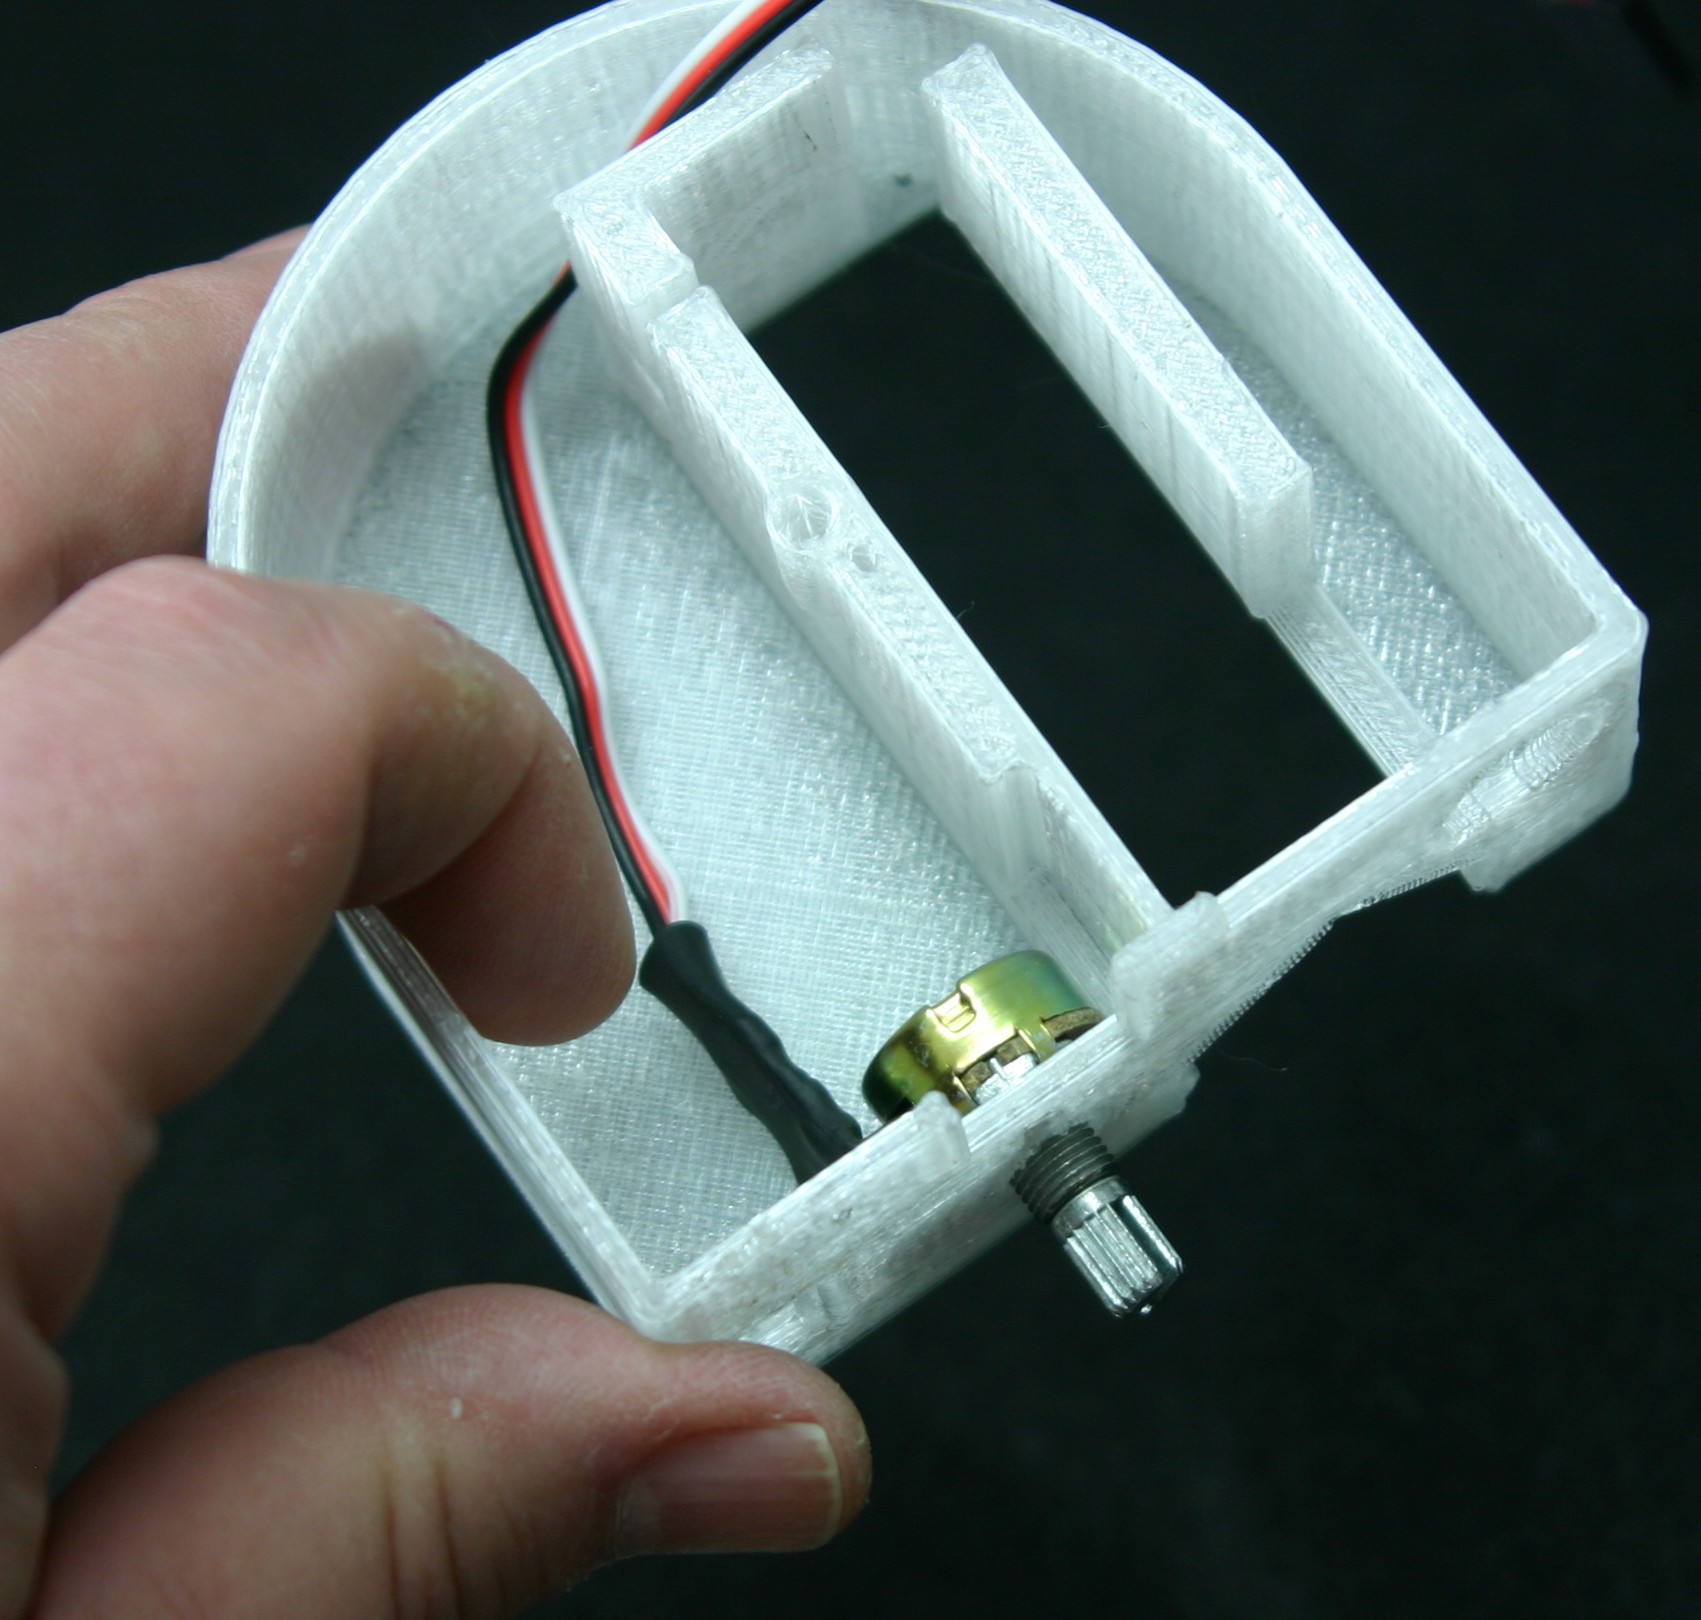
Insert the potentiometer fromm the inside, bend the wires as shown so the nano will have room:
All the electronics are...
Read more »
 Brieuc du Maugouër
 FabLab München
 Brian Brocken
 Gonzalo P. Chomon