Clovis Fritzen
-
Made it work using Teensy LC + ESP8266
07/22/2015 at 00:09 • 0 commentsHello guys! it's being a long time since my last update hahahha, because I've been busy at school (Engineering).
This time I come back bringing good news: I made the WEATHER STATION WORK using a Teensy LC (32-bit uC) and an ESP8266 (wifi) instead of Arduino!. The schematics can be seen below, and also along with the sketch on my GitHub (in the upper left side of this project page):
![]()
And this is how it works: it reads all the sensors periodically (LM35, DHT11, KTY81, LDR, NTC 5k ohms) and sends everything up to the internet (ThingSpeak) every 20 seconds, using the well-known ESP8266-01 .
The only "downside" it that the whole system is 3.3V, so I'm still not able to make the DHT11 work properly (it is not working at all, because it waits for 5V to supply it). Also the ESP8266 is too hungry for current that I had to implement a current source @3.3V specially to it, since the 3.3V supplied by the Teensy was not being enough.
Despite all that tweats and issues, I got it working! you can (hopefully) check it working at https://thingspeak.com/channels/25357
-
I'm ready for a 3D printed case
05/19/2015 at 02:04 • 0 commentsHello everyone, how are you doing?
As I advance in the weather station project, I get myself in need of a couple more parts to make it happen. Three weeks ago I won $50 from #HadPrize to make PCB's on OSHPark; I have now finished the "revision 1" of the PCB's and will soon post pictures of the product's new design.
Also, as you have seen in the last couple of updates, I have made some crucial live tests on the hardware+firmware in a real-world application. I have also posted some charts of the .CSV data the station saved to the microSD card.
This week's prize from hackaday is $50 in 3D-printed parts, and I guess it matches my needs for giving a huge final GO to my weather station!. I am also now finishing the 3D case design on "123D design" software.
All that said, you guys can make sure I will run for the "Best product Design" on the #2015HackadayPrize !! .
-
Serious testing + Teensy LC
05/12/2015 at 03:09 • 0 commentsHi guys, how are you all doing today?
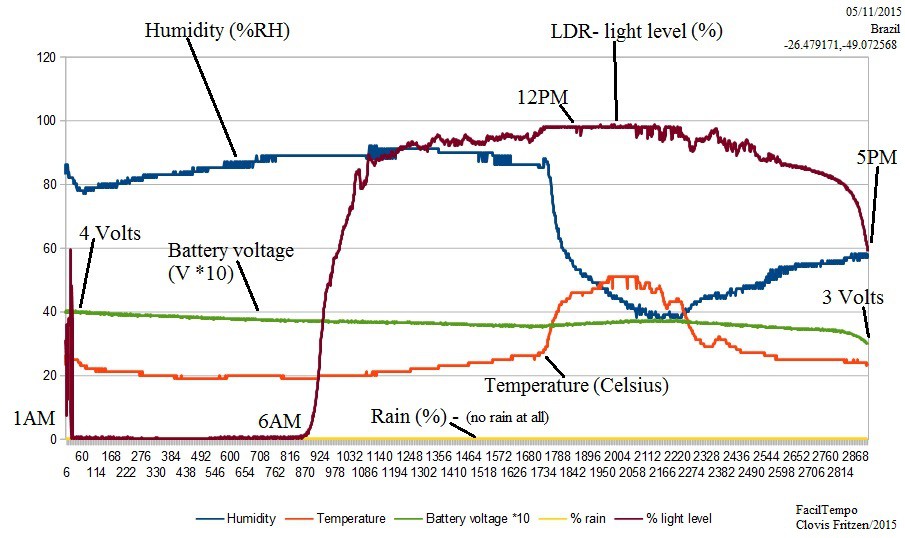
I have made some more (real-life) serious testing to the Weather Station: this time was a battery-endurance test, featuring a solar panel to charge the Li-ion cell back. I was able to gather some data (seen in the chart below), showing that the solar radiation available during the day was not enough to recharge the batteries. Or maybe my hardware concept is not working that well.
![]()
As you can see above the battery (400mAh) lasted for 16 hours, having received a little bit of charge (green line) between 12PM and 3-ish PM. This is because today was a rainy day and also because the Southern hemisphere is entering the winter right now.
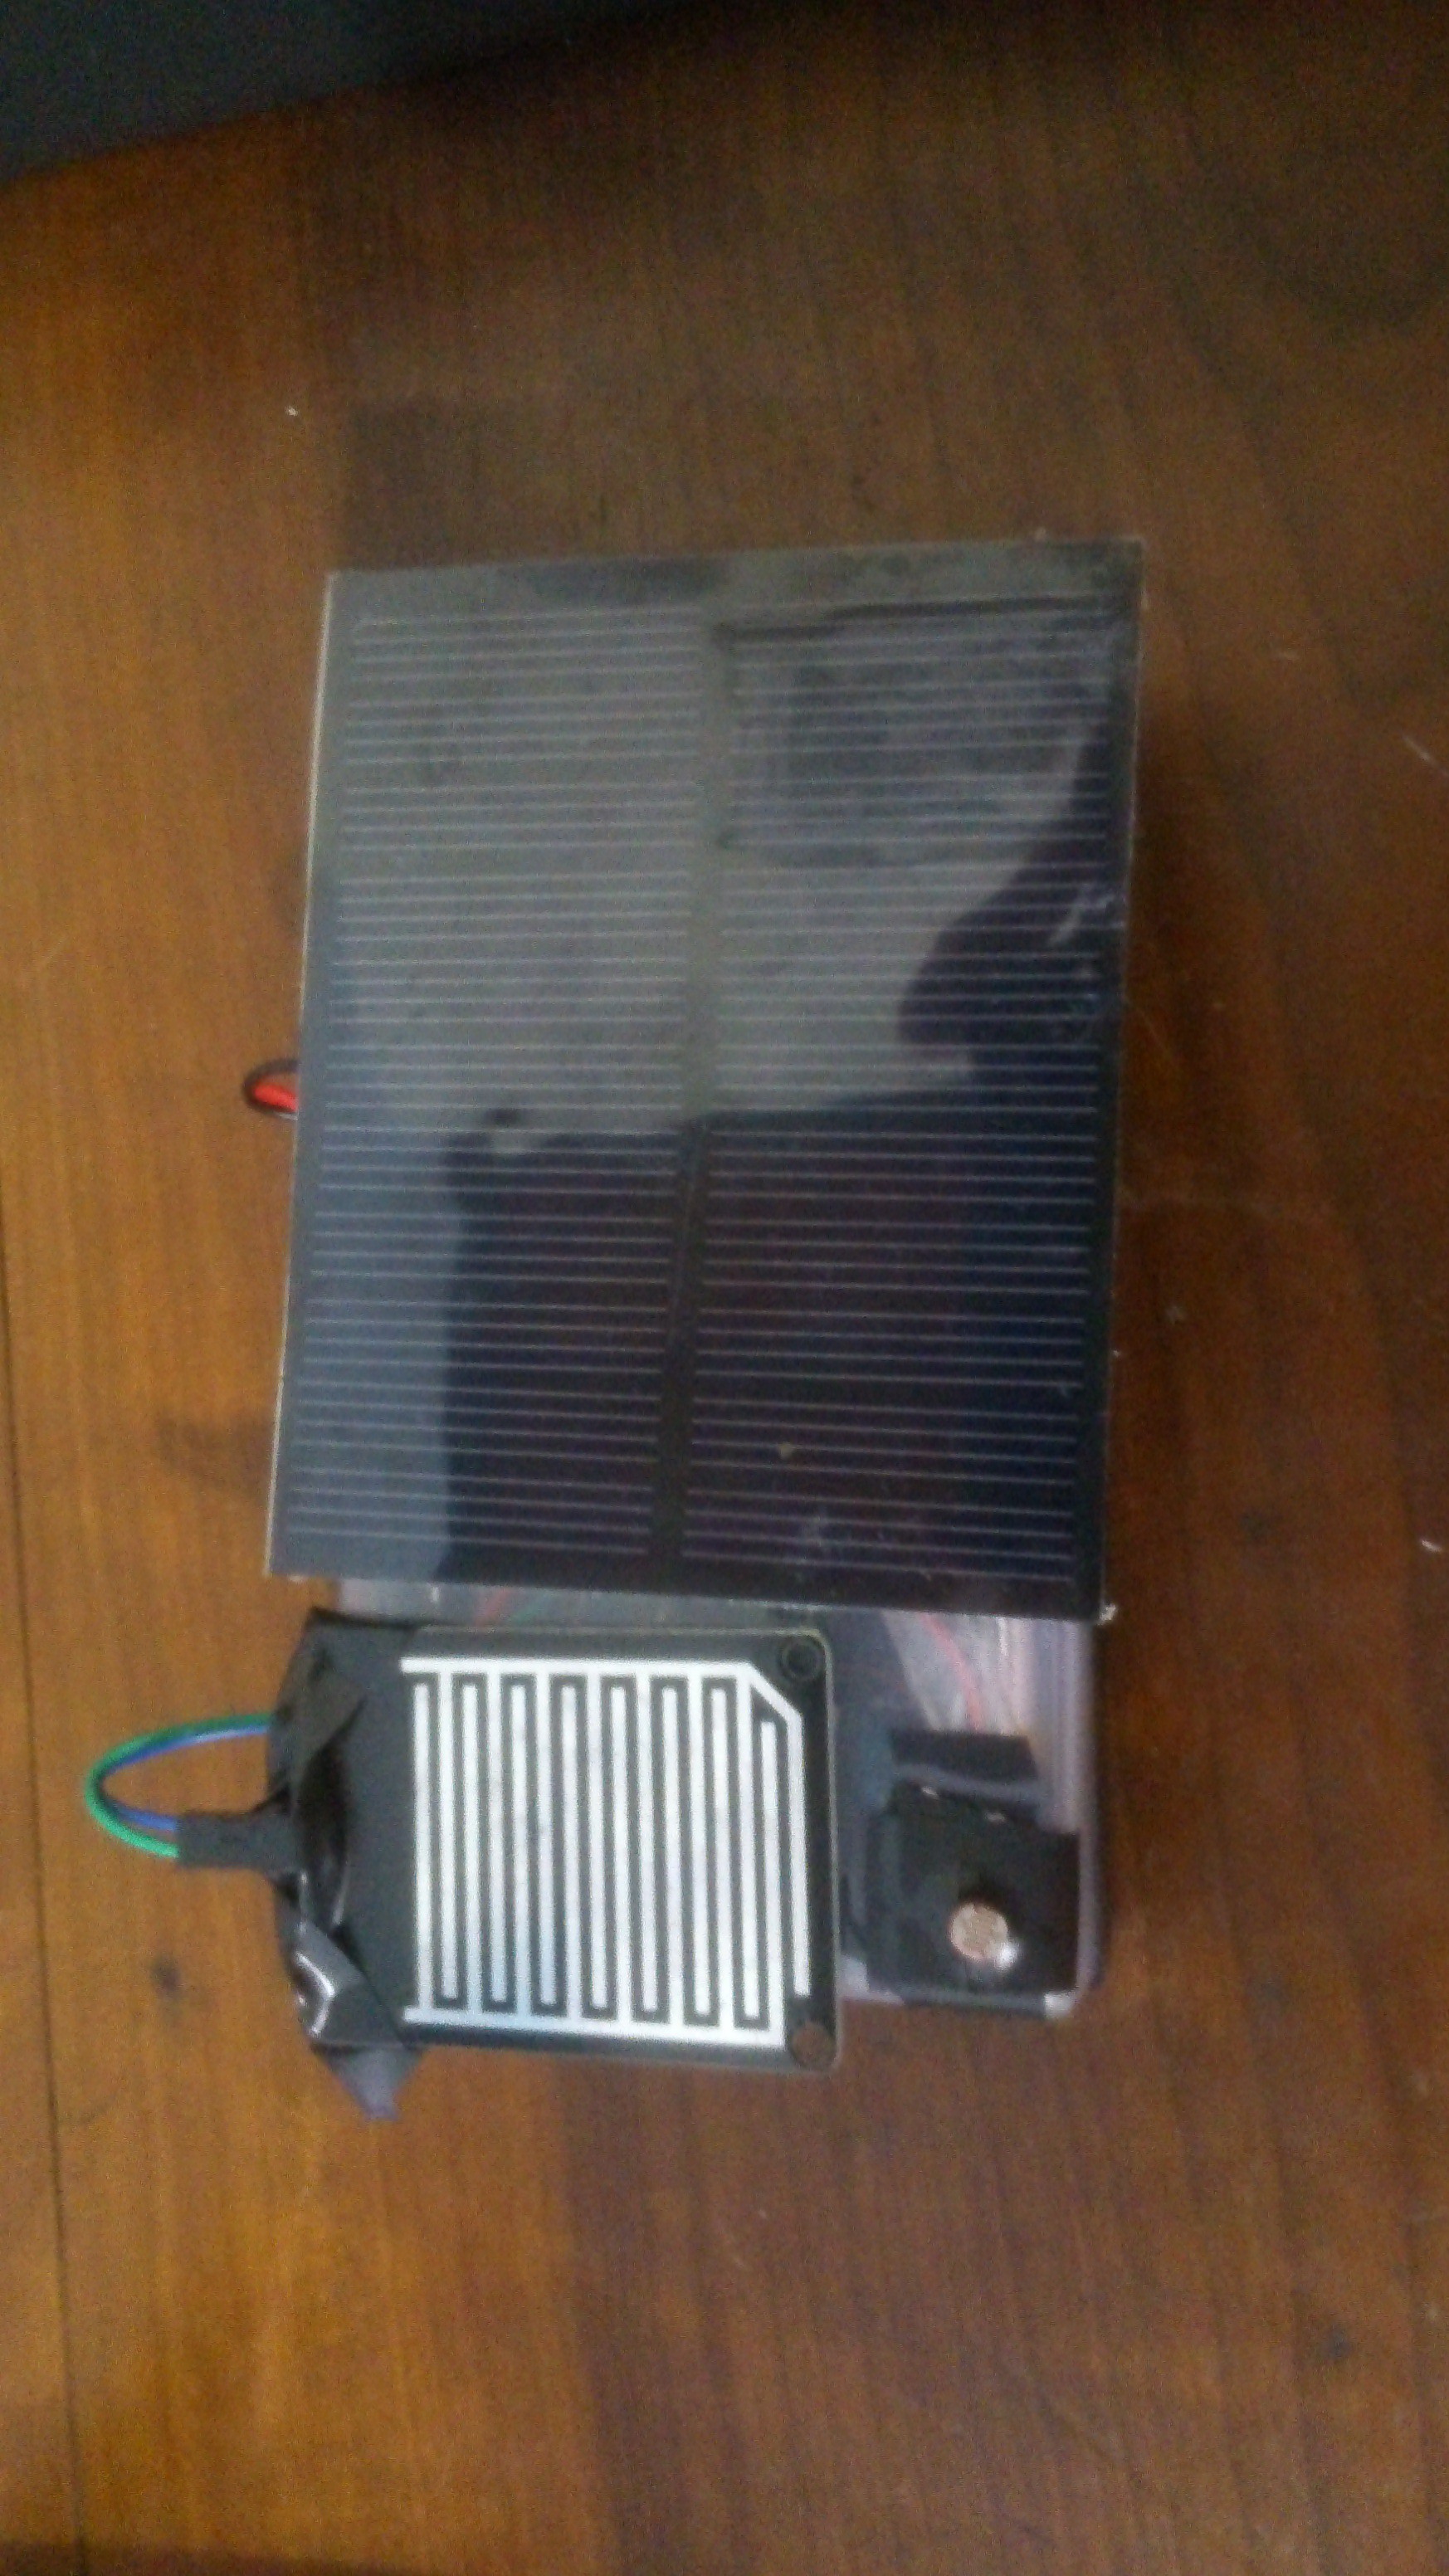
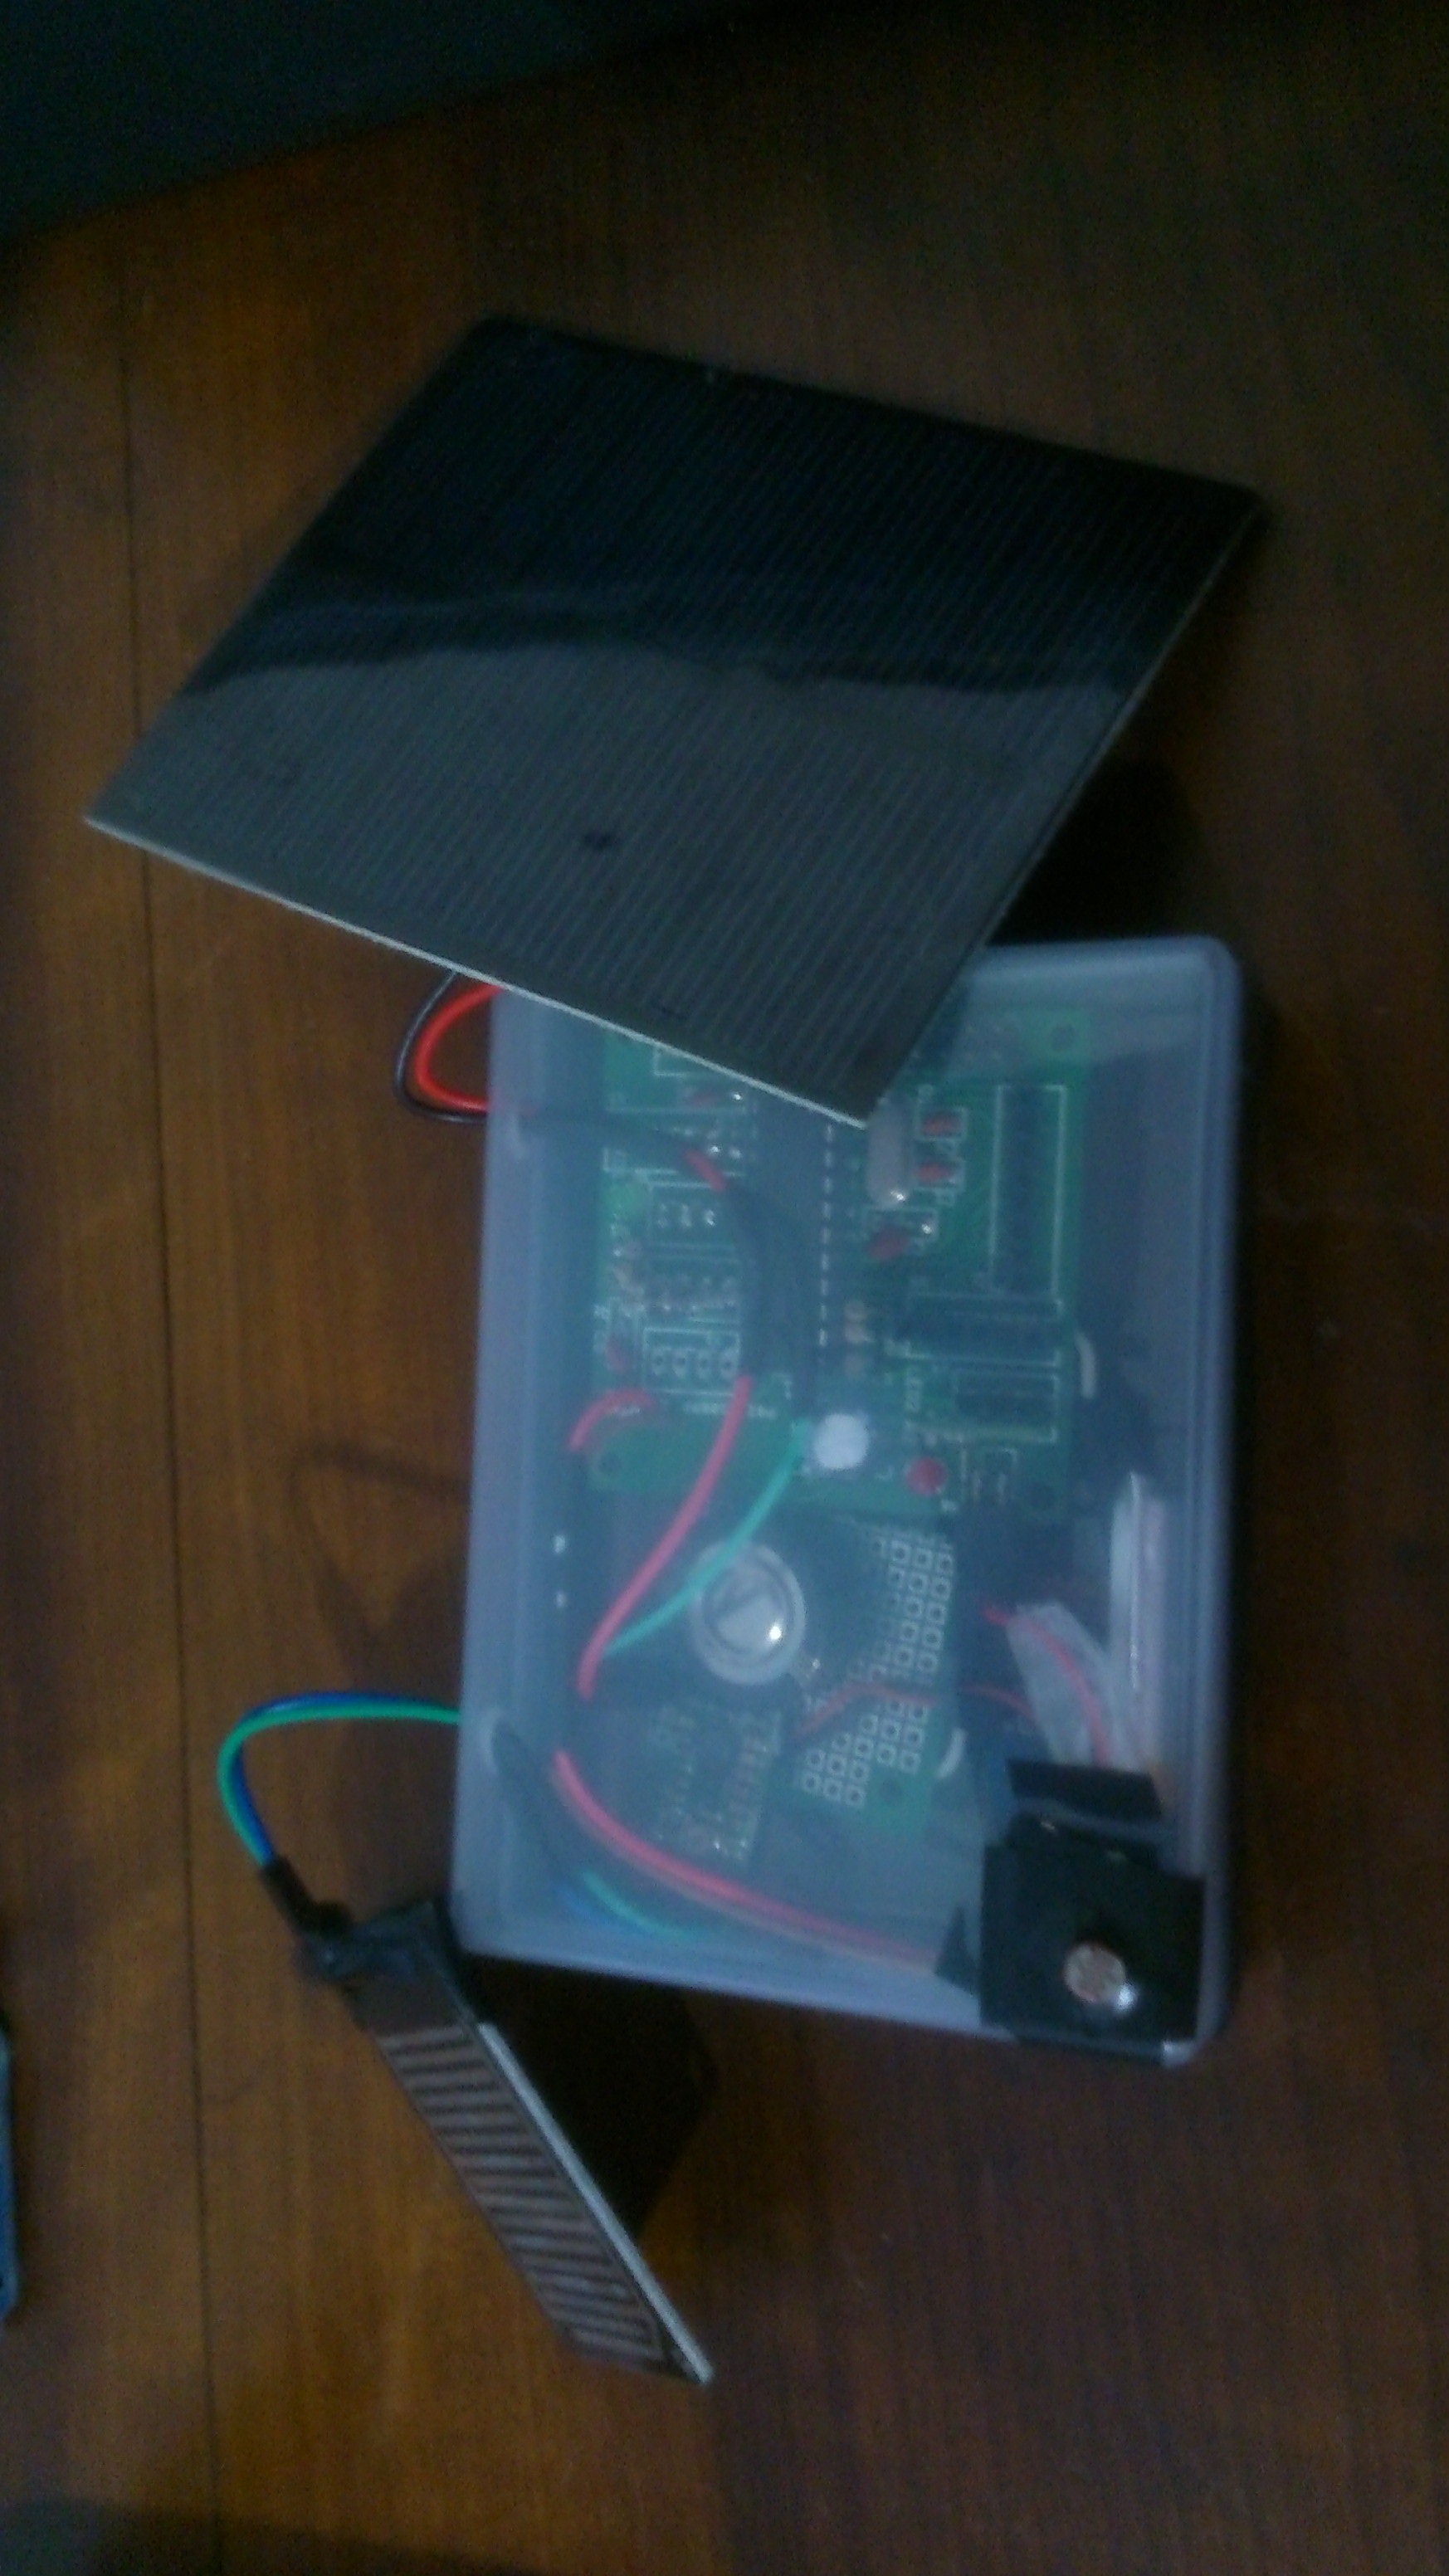
Below you can see pictures of my "final" design (still missing the ESP8266 for wifi), inside a re-purposed plastic box (which originally came with my Espruino, from a Kickstarter campaing).
![]()
![]()
There are more and more details about the hardware to come, although the schamatics and PCB are in the left-side link area of this project, for you guys to use it.
What I also want to touch at is the weekly #Had giveaway, which is sending out 125 Teensy LC this week!. That's a small-size-low-power-consumption-Cortex-M0-Arduino-compatible board, that could fit perfectly on my weather station, replacing the current ATMEGA328-based desing. So what you guys thing? does my project deserve a Teensy to go?
-
LightBlue Bean - BLE weather station!
05/05/2015 at 02:03 • 0 commentsHi makers, hackers!
This week's hackaday giveaway is about the LightBlue Bean, a [BLE+ Arduino Uno] board; that could surely find a deeply-fitted use on my weather station!! the idea is: I flash my sketch on LightBlue's ATMEGA (just like I would do to my custom board) and instantly gain Bluetooth BLE communication; so I will be able to connect (for example) a cellphone directly to my weather station and gather environment data right in my hands!.
Of course that has a ton of potential: adding BLE to a standalone Arduino (in this case, a weather station) may bring new possibilities of application to this project, such as alarms (rain-level, sun-radiation level, temperature trigger, etc).
So I hope I get my hands on one LightBlue Bean an be able to test and validate my ideas :) .
-
I'm in need of new PCB's!
04/27/2015 at 03:42 • 0 commentsGood morning everyone, how are you doing today?
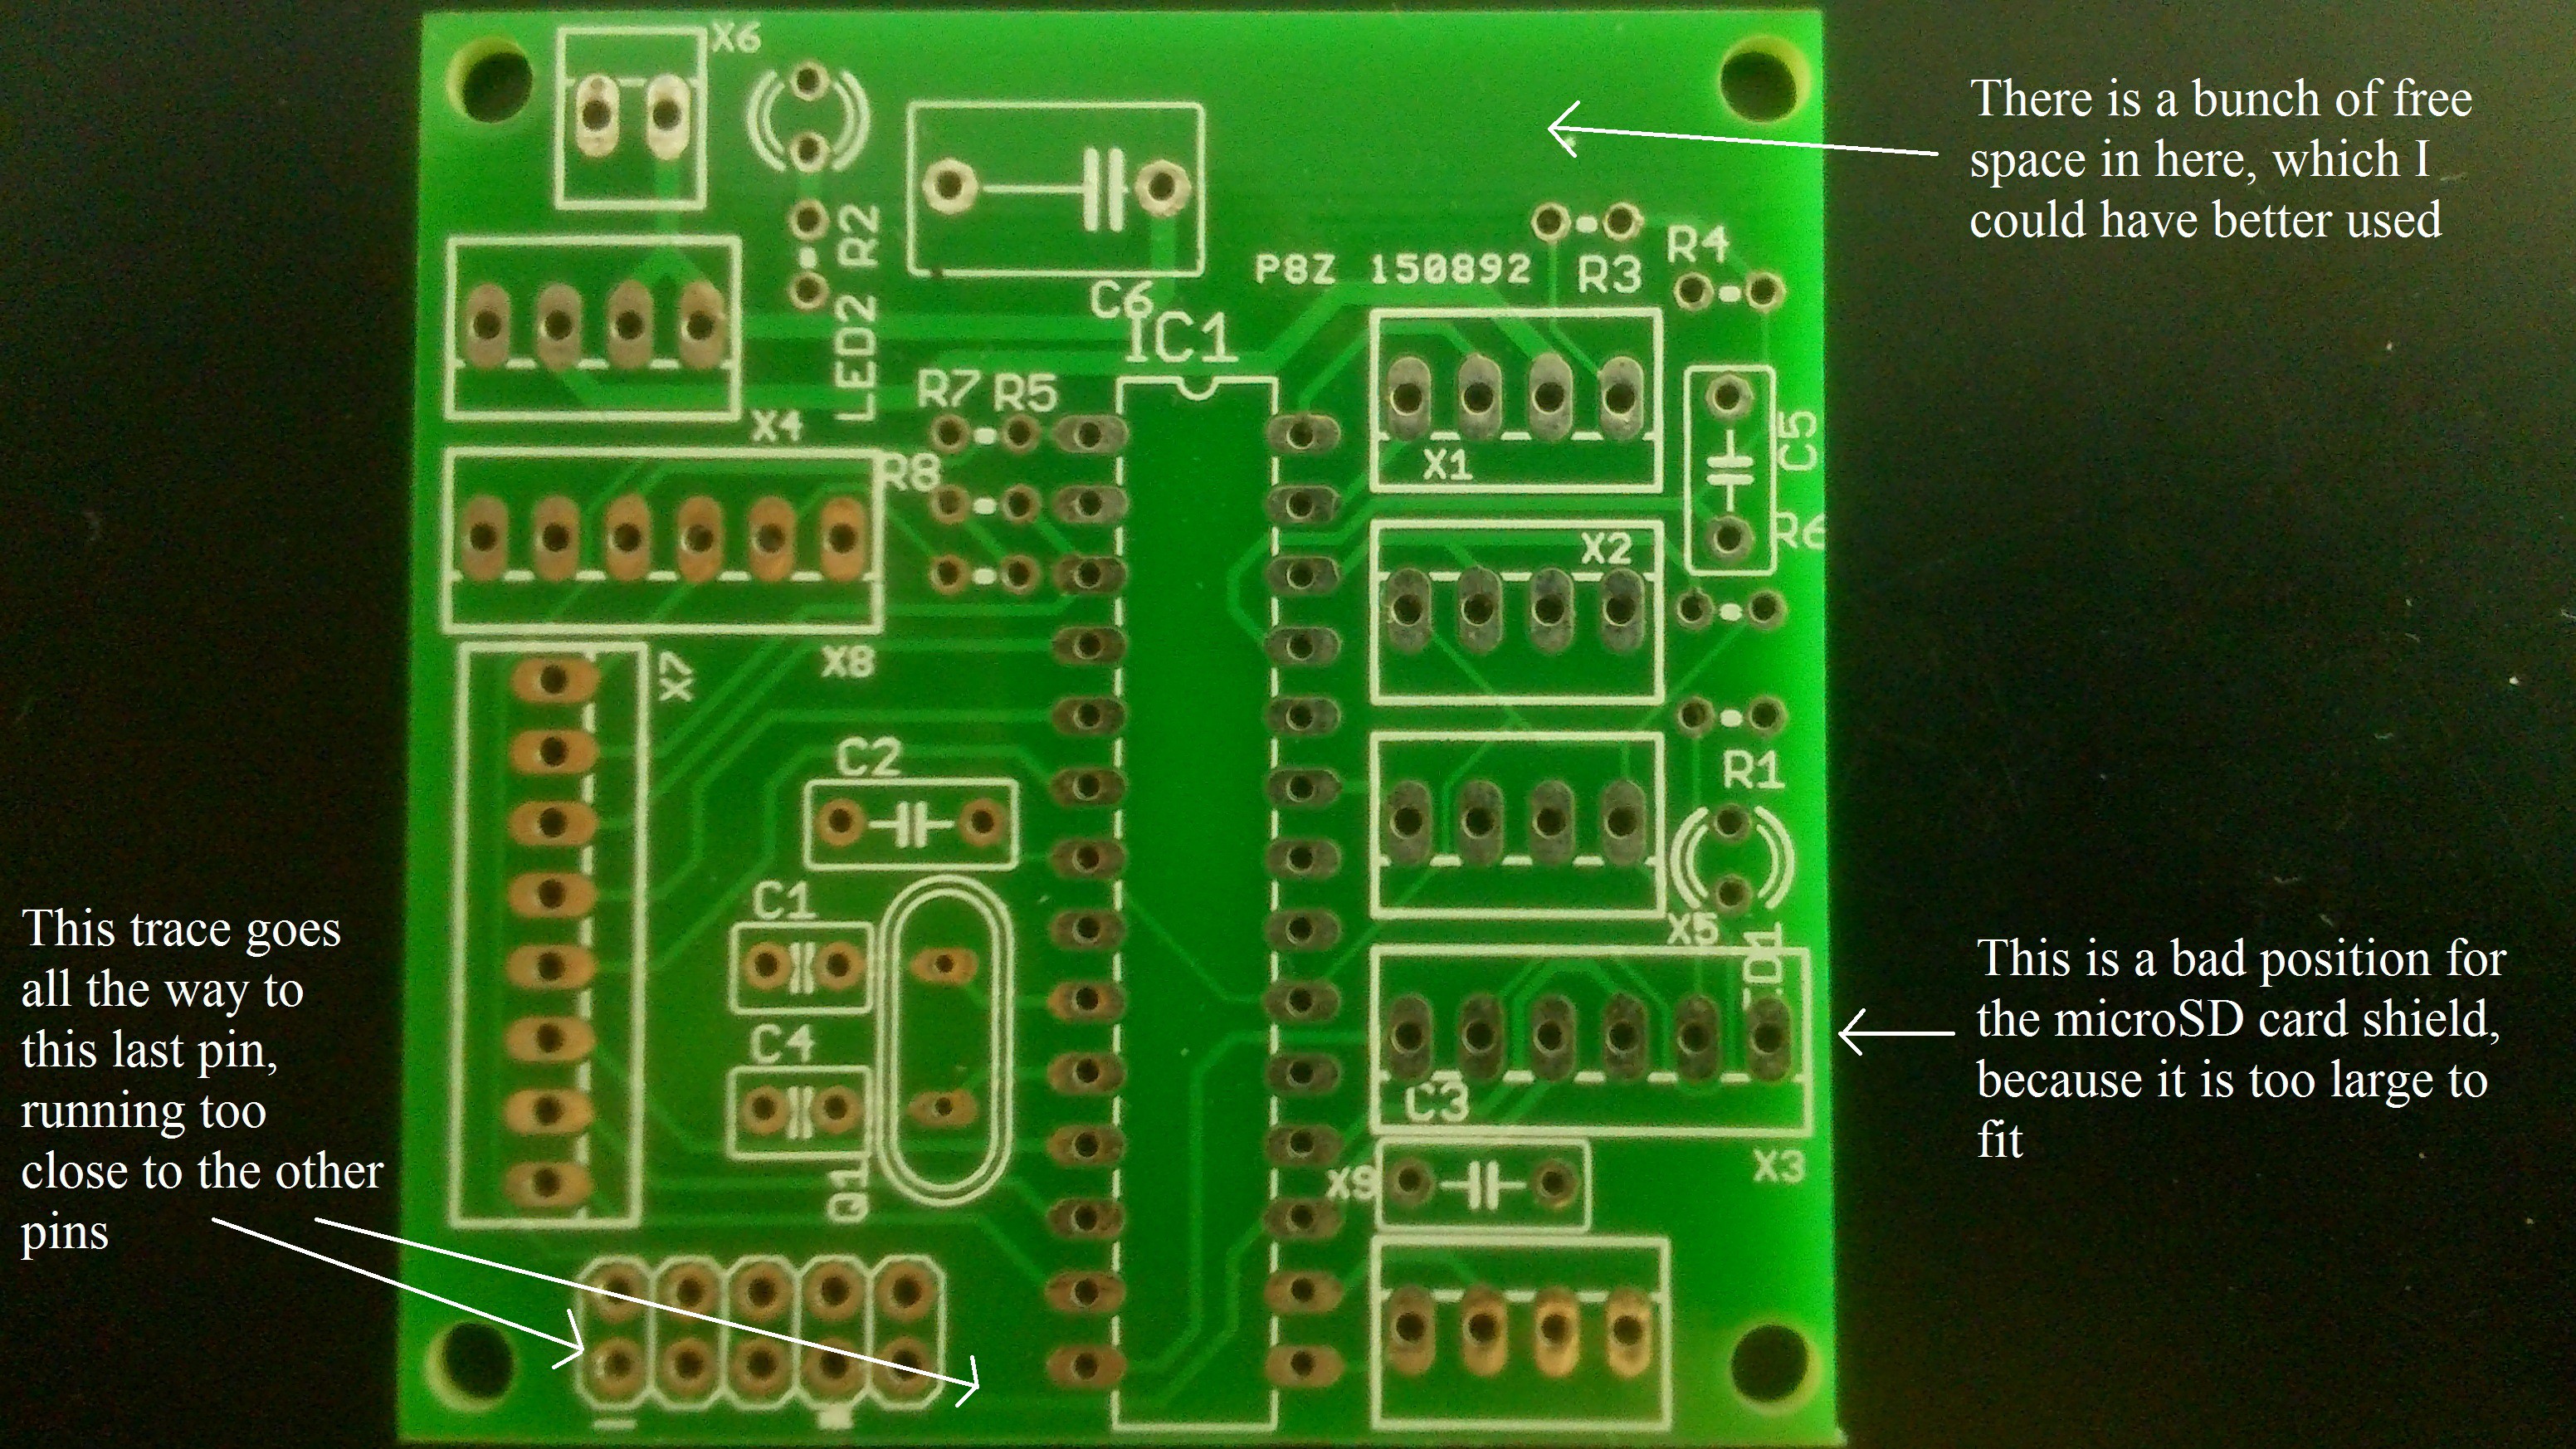
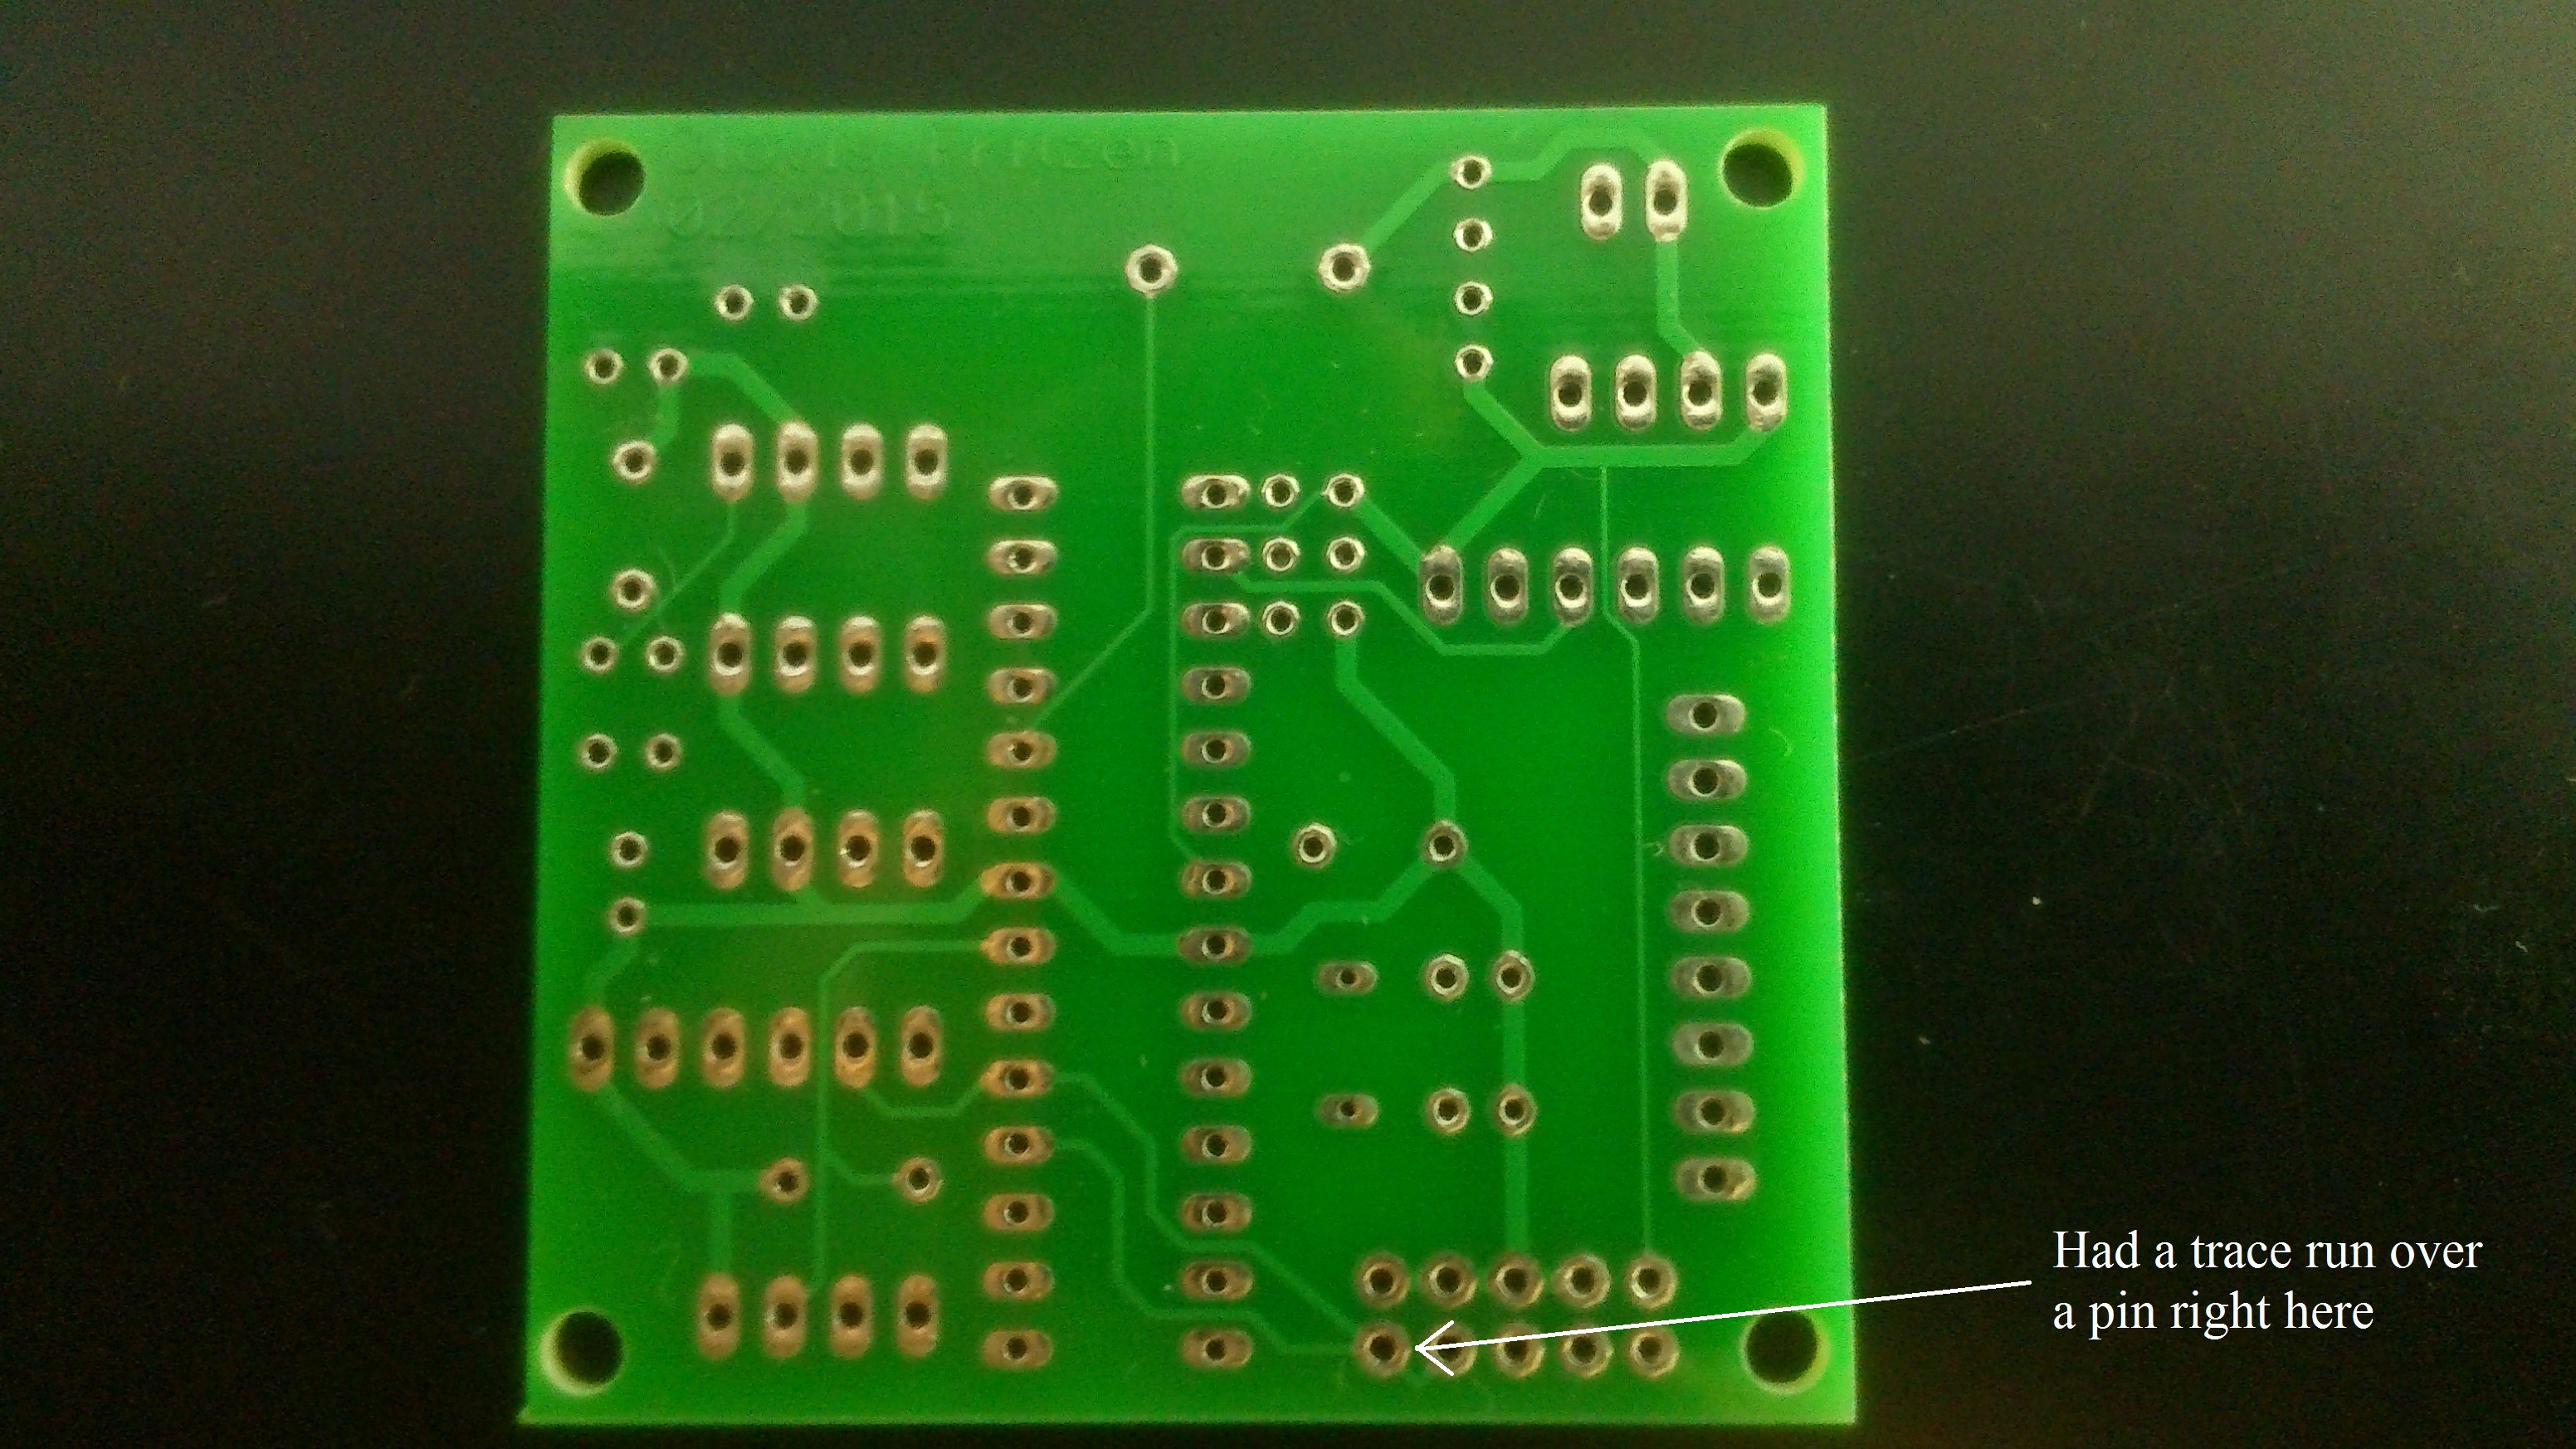
After receiving my first prototype PCB's, I've come across some small glitches on it (actually, errors I have made on designing it), but nothing that stopped me from testing the weather station and validated the idea.
So the next step down the road to making this project is making the second revision of the PCB, implementing improvements and correcting bugs. The pictures below show why I need another round of PCB's:
![]()
![]()
Another further step (which I'm already working on) is implementing communications between the weather station and the internet; my original idea is to use those cheap 433MHz ask radio modules, sending data over to another Arduino (which then is connected to the internet through wi-fi).
-
Further hardware testing
04/17/2015 at 01:53 • 0 commentsHello guys, how are you doing today?
I have taken some time to test two of my board's features: DHT11 (temperature and humidity sensor) and SDcard slot.
I soldered the DHT11 straight to the PCB; the microSD card is in a Catalex Breakout board, connected to by PCB through a pin header.To "debug" these test I am using an Arduino UNO as ISP. This test has worked nicely, even saving DHT11 data to the microSD card.
Next step will be testing the BMP180 (pressure sensor) on my board; it will happen as soon as I receive this component from China by mail.
-
Blink test for the PCB
04/10/2015 at 23:26 • 0 commentsAs for today, I successfully tested the BlinkWithoutDelay on my standalone board (custom designed by me). This video can be found below:
Next step will be uploading my custom sketch to it and actually testing how it works in the wild (outside home, supplied by solar panels, etc).
-
How long it takes for things to arrive in Brazil
04/09/2015 at 19:13 • 1 commentHello Everyone,
I just wanted to keep you updated on the progress of my project: it has been waiting for components from China for almost 60 days now!. I live here in Brazil (South America), where things from eBay, AliExpress, etc take forever to arrive (due to our horribly slow state-run mail system!!).
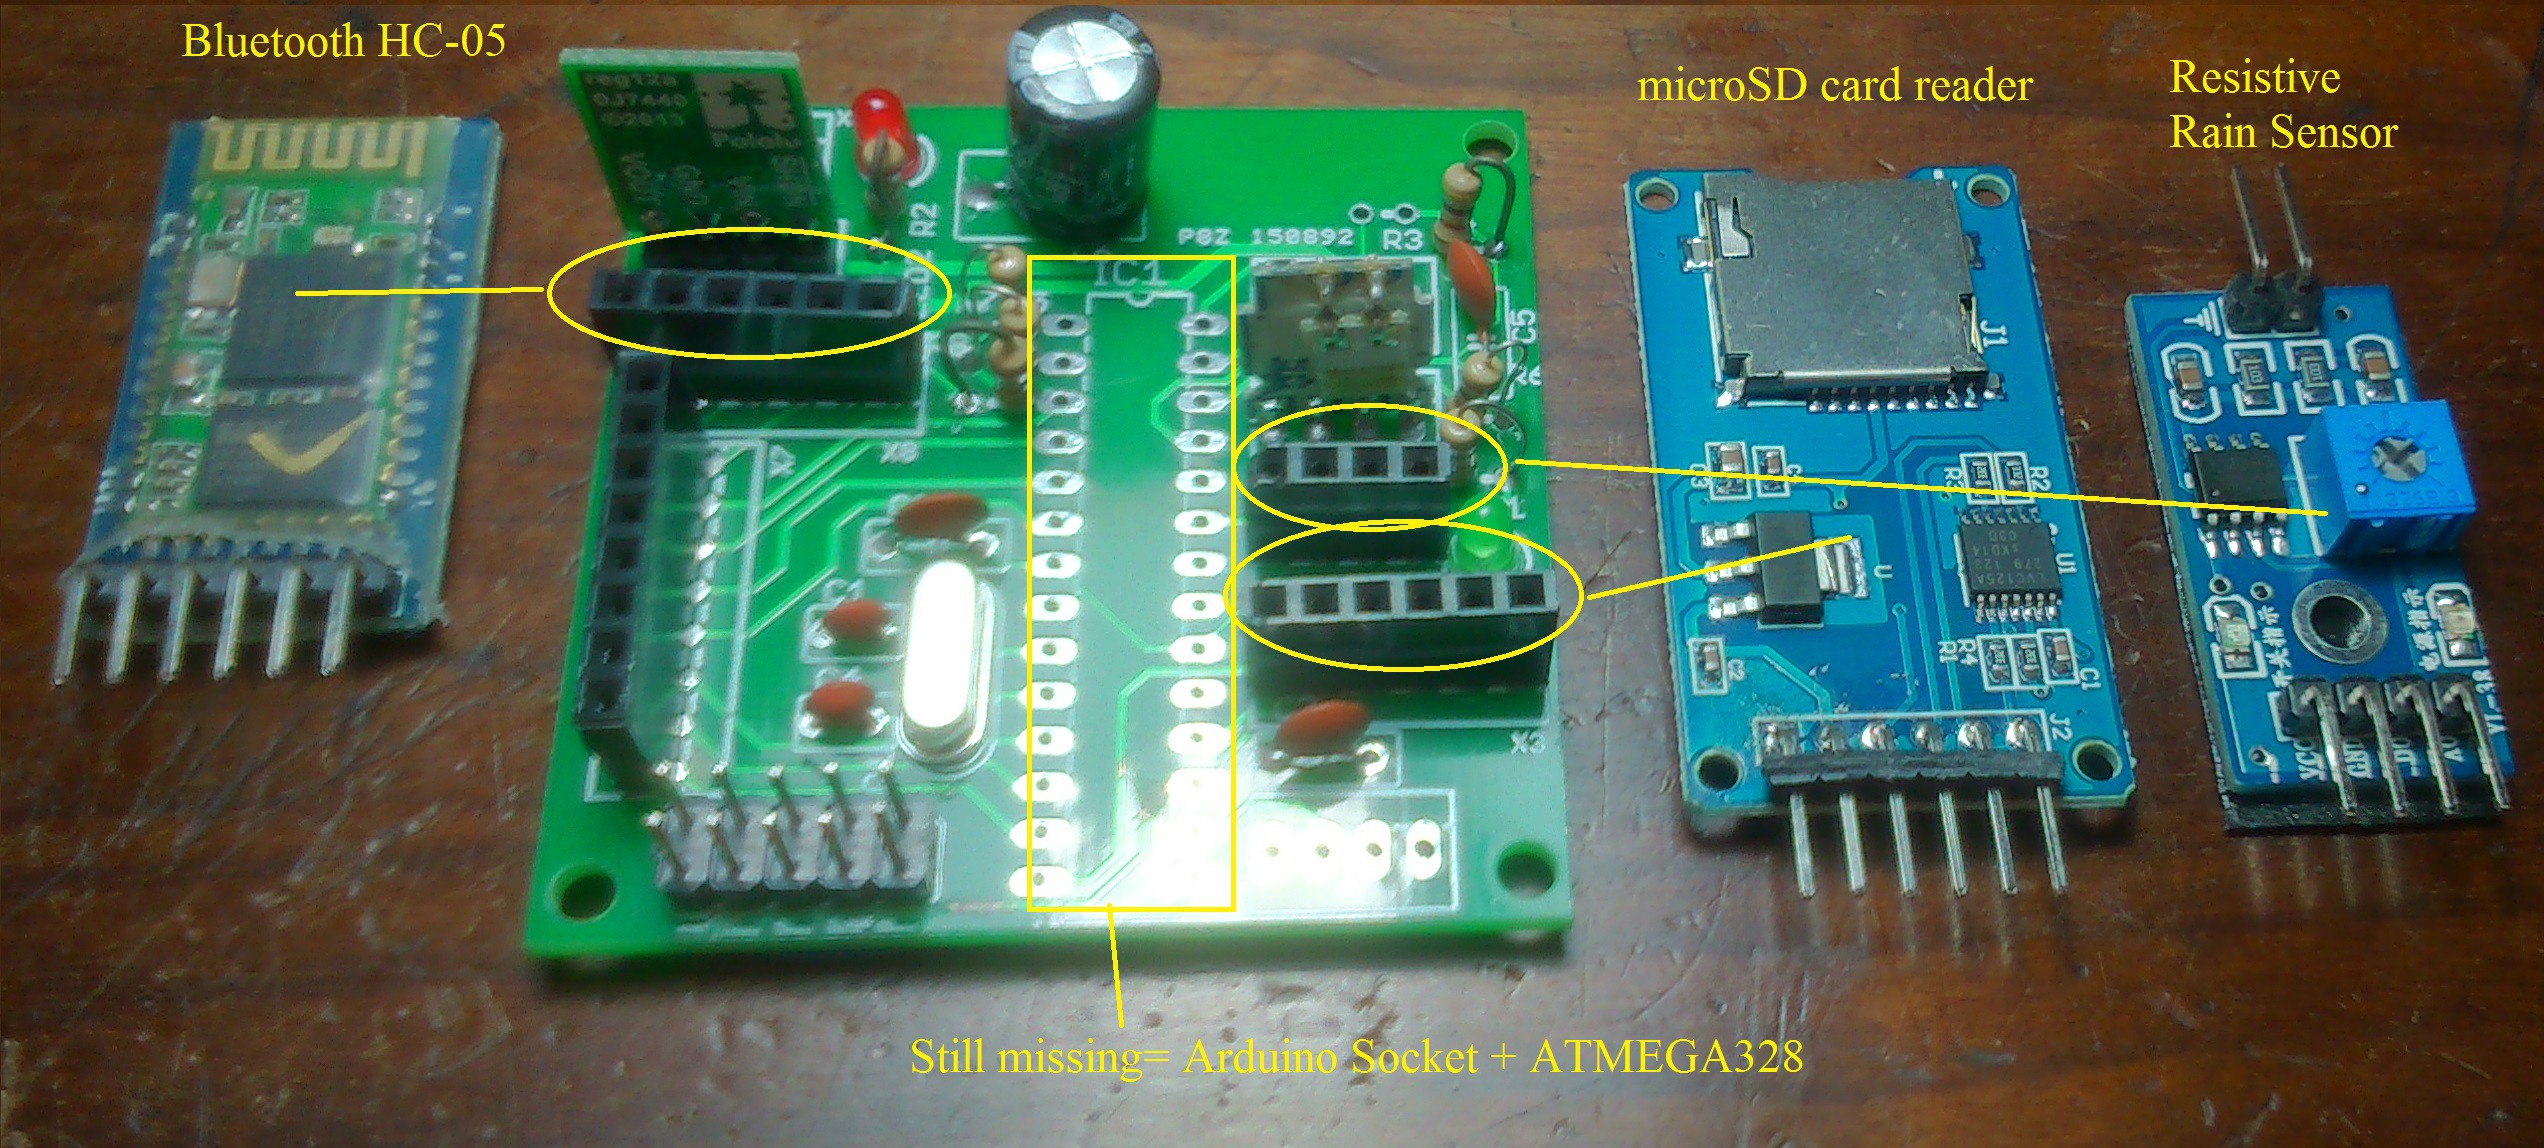
Anyway, as thing slowly arrive to me, I make some progress: I have everything shown in the picture below, but still miss the following:
A) DIL16 socket for ATMEGA328 (Arduino),
B) BMP180 pressure/temperature sensor.
![]()
When I receive at least the DIL socket on the mail I will be able to start testing my neat little weather station, so stay tuned :)
-
from idea to prototype
03/09/2015 at 12:06 • 0 commentsWhat I have done so far is:
- Had the idea
- Wrote Arduino sketch
- Captured the schematic
- Assembled and tested a prototype in the breadboard (supplied by solar panels)
- Ardered a prototype PCB, and started assembling components on it.
FacilTempo - weather station
Saving the planet from global warming requires monitoring the weather, so having a weather station is the least we all can do to help