 Peter Walsh
Summary
1) The power driver board works
2) The control board works
3) The basic control software works
4) I can levitate small bits of paper
A video demo of ultrasonic levitation showing off the system is below.
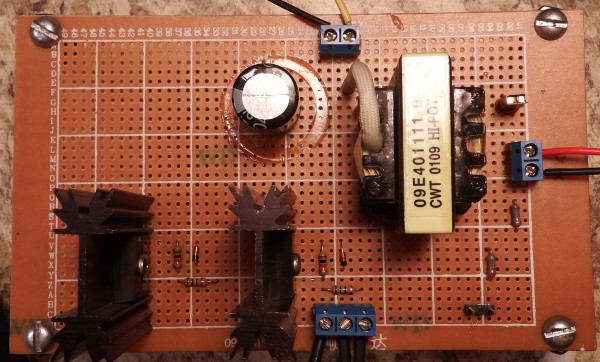
The power driver board is soldered!
For my best shot at the next interim prize, I need to show something soldered, and also have a circuit schematic.
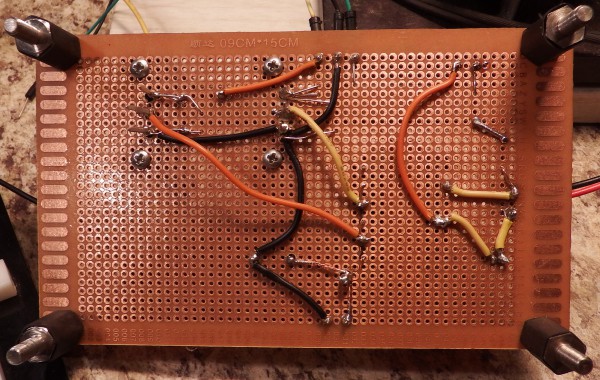
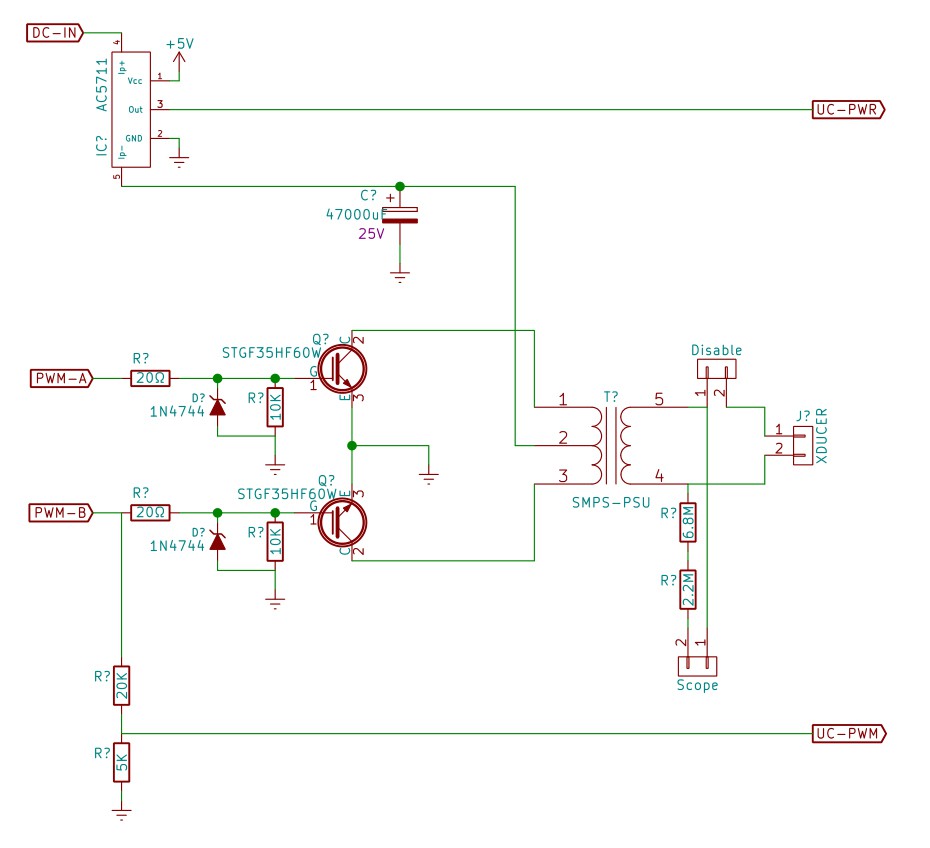
Here's the driver board, and here's the back of the driver board, and here's the schematic. Note the back: it's soldered!
 |  |  |
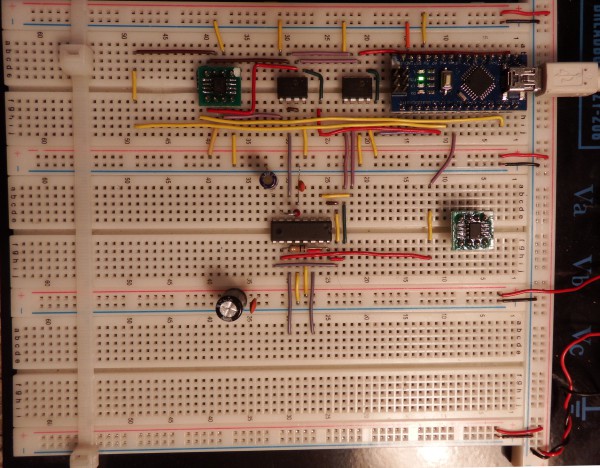
The control board is... not soldered!
I use protoboards when possible - it's easier to tinker with things and fix problems. The driver board handles a lot of power and voltage, so I soldered that, but the control board... it's not soldered. I mounted ICs on carrier boards though, and *theyre* soldered. That counts, right?
Right now I only have direct control - no feedback. This means that I can set the PWM and frequency, but there's no feedback keeping things at the setpoints. That software hasn't been written yet.
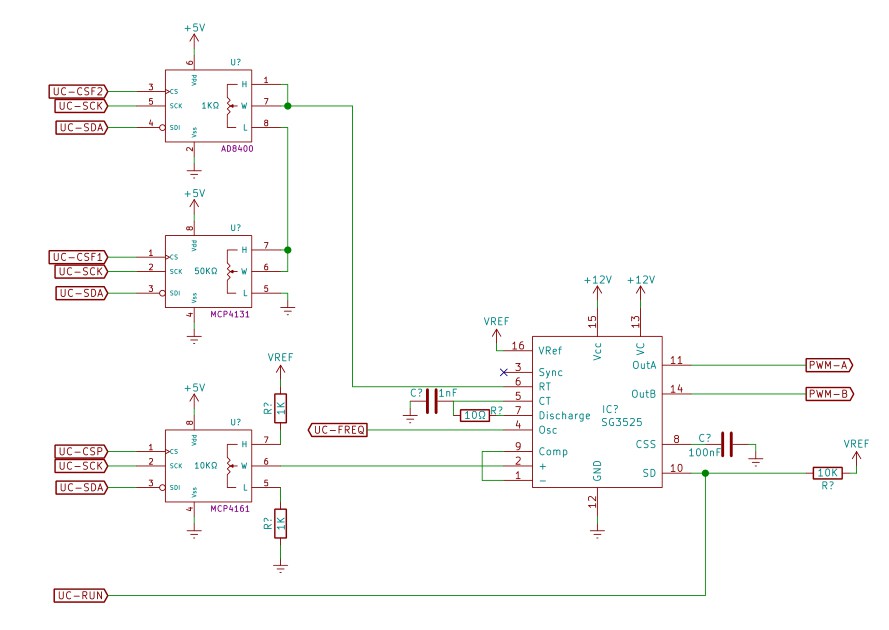
Here's the control board, and here's the schematic. Note the components on carrier boards - they're soldered!
 |  |
And... the system works!
Mike Harrison built an ultrasonic levitation system which was featured on Hackaday awhile back, so for fun I decided to see if I could reproduce his results. After a few minutes of tinkering, I was able to levitate a small piece of tissue.
The transducer generates plane waves, which are reflected from the aluminum plate over top. The height of the transducer is adjusted so that the distance to the plate is some multiple of half the wavelength.
The result is a standing wave with nodes and anti-nodes, which are seen as "steps" as the tissue paper is played up and down.
I video'd a quick tour of my system, and the levitation results. (Note to self: use better lighting next time.)
A note on Philosophy
People keep asking me why I don't "just go buy stuff" for the project - it would make development *so* much easier.
Usually it's when they hear that I'm casting the aluminum horn. "Just order round stock from McMaster Carr, then you know what alloy you have, you don't have to worry about bubbles, and this-or-that other issue that I've just now thought of. It'd be so much easier..."
The purpose of the project is to put ultrasonic tools in the hands of hackers, and this year's prize is to change the world, so I'm thinking globally.
A 2.75" piece of round stock from McMaster Carr costs about $50. While that may not seem like much as an individual purchase, you can't have many $50 purchases in a project before it starts to get out of reach. The project already requires a $50 transducer from eBay, and I don't want to compound the costs.
Also, I'm regarding people across the world who might not have access to McMaster Carr. African nations, Cuba, maybe some Eastern European places don't have UPS delivery from the US, but might have access to sand, a junked car, an iron pot, and a bonfire.
So I'm structuring the project to reuse common materials as much as possible. If you can find 2 ATX power supplies, a laptop, and an arduino, you can purchase a transducer for $50 and build the rest for under $50.
If you're good at scrounging, you might do it for less: power transistors and heat sinks are in old power supplies, and I've seen the digital pots in CDRom drives. You might also be able to find pot ICs on a motherboard or old sound card.
All the info needed for the project will be available on GitHub: schematics, software, instructions, and where to get materials. Look for it in about 6 months, once the Hackaday prize contest winds down and the development is complete.
User supplied display
I had originally thought to build a system with an embedded display and control buttons, but thinking it through I now believe a serial interface is more useful.
Displays come and go faster than Lada Gaga's wardrobe. In five years, I don't want the project to languish because people can't find the specific graphics display needed by the software, and I don't want software versions for different hardware either. Laptops and PCs will be available long into the future, and eliminating that section simplifies the project.
Also, laptop control means the user can write programs to run the system in ways specific to his needs. With commands such as start/stop/set power/set frequency/set timer available on the serial port, it's not hard to build a scripting system based on Perl or Python to control the system.
Embedded Arduino Nano
For even more simplicity, I'm using an embedded Arduino Nano as a component.
A PCB taking an Atmega chip and associated hardware isn't terribly difficult to design and would reduce the costs a *little*, but it's really hard to beat a $2.18 Nano board from eBay. Using the Nano as a component eliminates a lot of tricky soldering, it's known to work, a hacker is more likely to have one on-hand (fewer parts to order), and it can even be socketed so you can remove it and use it for other projects.
Additionally, I'm discovering that much of the circuitry can be done in software, such as power control and calibration. This makes the control board even simpler to build, It eliminates adjustment pots, the end user doesn't need a scope or DVM for tuning, and so forth.
All things considered, for the PCB I'm just going to throw in a Nano and be done with it. Maybe have pinouts for either a Nano or a regular Arduino, so the user can just populate whichever one they have on hand.
Discussions
Become a Hackaday.io Member
Create an account to leave a comment. Already have an account? Log In.