-
Lessons learned
08/16/2020 at 15:24 • 0 commentsThis is a completed project, expect no more updates or changes.
I'm still working on improving the Haber process, but using a different method, and I have made some progress. I'll start and update a new project describing my work at some point.
People have been asking about transducer power supplies, so here is a list of "Lessons Learned" that might be of interest to others.
LESSONS LEARNED
Firstly, make a circuit that's self-resonant. Trying to keep the transducer in resonance across changing conditions is a PITA, and the conditions will change based on the transducer heating up, changes in the moisture content of the air, and myriad other factors that cannot be easily controlled.
Instead, make an oscillator with the transducer as the oscillating element, or make some analog feedback that automatically constrains an oscillator to the transducer frequency. The Cheap Chinese circuit described in my log entry (link below) shows one way to do this: take the return from the transducer through a toroid, and then wind a secondary coil on the toroid to tap off a synchronous signal, then use that signal to run a push-pull circuit of some kind.
https://cdn.hackaday.io/images/7856741430093121127.png
(An induction heater circuit seems like a good way to drive the transducer. You would still need feedback to get the self-resonance.)
https://www.instructables.com/topics/HELP-measure-resonate-on-induction-heating-/
Next, don't use an Arduino for [direct] frequency measurements or generation.
The Arduino timer resolution at the transducer frequency doesn't have sufficient resolution. You could a really high frequency micro such as a RasPi (1.1 GHz) or an SDR digitizer or similar.
A much better way to do this (than using a micro) is to get an AD9850 board from eBay and command it using an Arduino.
Next, don't use a cheap transducer from eBay.
It turns out that the transducers available on eBay are rejects - they're slightly off frequency and have a very low "q-factor". This means that they are "mushy" and don't ring very well. It's like the difference between a metal bell and a plastic bell - because the plastic has a low "Q", it doesn't ring very loud.
Instead, bite the bullet and get a quality transducer from a known source, which will ship with specs from testing.
-
Reboot / Restart
10/27/2016 at 17:57 • 1 commentTL;DR
- Back from vacation, project is on
- Working on new circuits/boards
- Anyone have suggestions for storing/generating Hydrogen?
- New resonance measuring board in the works
I took a vacation from the project for about a year, and as part of that I entered the HAD prize with another project (lasercut optics bench) and did a lot of kayaking. The prize project won one of the interim prizes, so that worked out pretty well. The prize money will go towards this project.
Meanwhile I've been doing research and running down some ideas, and I came up with a new and interesting approach. It's a rather obscure, little-known effect that has not been explored in the literature. Those are the best kind!
It may be a way to get around the activation energy requirement at room temperature. If it works out, it would be a legitimate advancement worthy of a paper at least.
I don't want to outline the method quite yet, because it would be easy for some grad student somewhere to "scoop" me on the process: they have access to lots of equipment, while I have to build things up from scratch.
I am working on the project with renewed vigor, but not focusing on ultrasonic cavitation. The new idea uses ultrasonics indirectly, but it'll be awhile before I can piece together the equipment needed. I have to build some specialized electronics first.
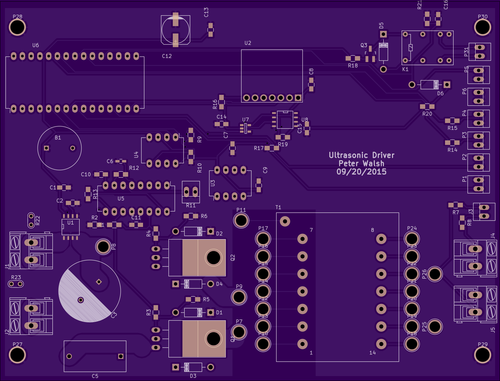
I have ordered initial PCBs from China, which have arrived (ye gods, PCB boards are cheap!), populated one board, and am using it as an exploration tool to build up more complicated boards.
(IOW, the board is the raw amplifier, I'll add more electronics, make a new board, and repeat, testing and tuning at each step.)
If all goes as planned, the system might lead to a new tool that hackers can build. More on that later.
Also, I purchased a Nitrogen tank and regulator, so using Nitrogen is now much easier.
I'm still planning on making Hydrogen, which is a pain but Hydrogen can be dangerous and it's easy to make (drop some Aluminum into acid or base). I can reduce the risk by making only as much as needed for testing.
I'm planning to install a much better ventilation system, should be adequate for small gaseous samples.
Anyone have suggestions or better ideas for working with Hydrogen?
I have a new resonance finder circuit that I built into an arduino shield, and I'm casually building up the software for it. It's a semi-portable probe that lets me measure the resonant frequency of transducers and horns. Makes it easy to mill down the horns.
I haven't uploaded specs or images yet, because ultrasonics are 'kinda tangential to the project right now.
Dealing with the touchscreen interface is a pain - the display shares I/O pins with the touchscreen, so the touchscreen default Arduino library doesn't work with the display.
Had to rewrite the 'damn thing from scratch. Still working on that, leisurely.
-
A leisurely blog
12/30/2015 at 03:46 • 2 commentsSummary
The delete image formatting bug, described below, is preventing me from making blog entries.
I'll pick this up again once it's fixed.
- Hackaday.io is pants
- Still working on project
- Got a neat mug for Christmas
- Back of the envelope calculation
Hackaday.io is pants
I have just now discovered that pressing the delete key removes image formatting (float left/right, resize) and size information - when the cursor is positioned anywhere within the post.
This means that if I discover a typo and want to correct it, pressing the delete key anywhere in the text will remove image formatting tags throughout the post.
I really wish HAD had implemented one of the various standards, instead of rolling their own system. It's really difficult to interleave text and images in a pleasing manner, and viewing text on a differently-sized monitor makes my careful formatting look like crap.
The DocuWiki standard, or the MarkDown standard, or even html tags have specific renderings that can be relied upon, and they could have imported an open-source rendering library for any of these standards and saved months of work, debugging, and bug response.
Still working on the project
I'm still working on the project. I haven't been idle, I just haven't been blogging about it. Also the holidays came and went (both of them), and I was still a little fried from the contest.
At this point, I'm 'kinda blocked by the image formatting bug described above.
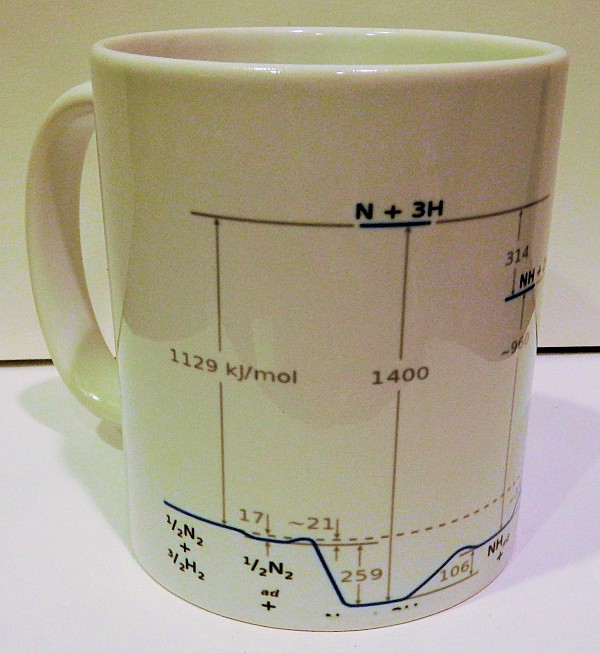
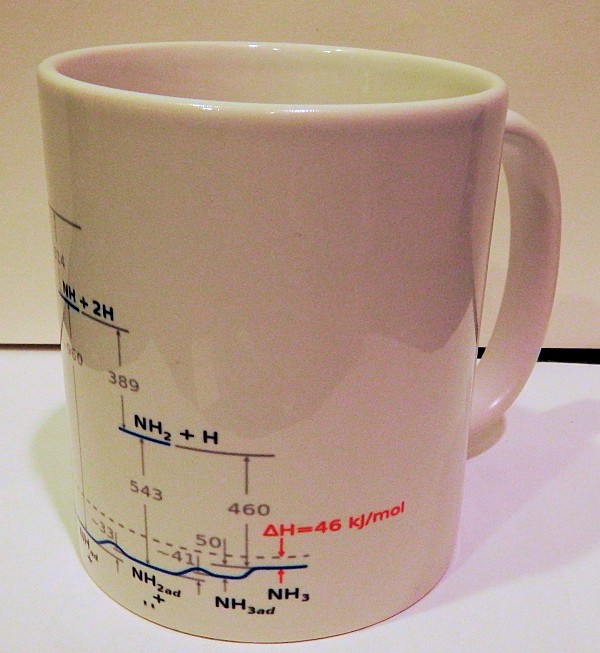
I got this for Christmas. The diagram is the bond activation energy for the conversion of Nitrogen and Hydrogen into Ammonia. Ignore the huge images - Hackaday.io keeps deleting the image size information.![]()
![]()
Back of the envelope calculation
TO BE CONTINUED
-
Vacation's over - back to work
11/02/2015 at 02:14 • 0 commentsSummary
- Project vacation is over
- Diary-style blogs are an interesting motivational technique
- Original reaction chamber doesn't work as hoped
- Three new chamber designs in the works
- Some new "secret sauce" things to try
- Looking into bubble-sonoluminescence
Vacation is over
As mentioned in a previous blog, I took a month vacation from the project to decompress. Keeping up with the Hackaday prize was good in that it held me to a schedule, but bad because the schedule tended to overrule my quality of life.
Future blog posts will come less frequently - I'm hoping for one a month from now on.
Public blogging as a motivational technique
As a scientist-type I'm used to keeping a notebook of experiments, calculations and whatnot. I didn't see the value of this until I actually started doing it - and now I can't imagine doing anything without it. I actually keep 3 notebooks for different categories of my studies: one for the Haber thing, one for tool development, and one for all other projects. Now that I'm doing it, the psychological/motivational benefits of notebook'ing are obvious.
I've come to wonder if keeping an online "diary" has similar benefits. Here I am writing "dear diary" updates, knowing that 111 people are interested enough to follow my progress and 51 thought it was worthy of a skull.
Putting yourself in front of people like that has to have an effect on motivation.
Most science is done in a lab by individuals, and the only others who know what's happening are the lead scientist and perhaps a few team members. The world only finds out when results are published, and if the experiments fail it's not all that embarrassing.
With the internet we have the opportunity for "performance" science, where a researcher does his thing in front of an audience, and has to show results or get boo'ed off the stage.
As an added extra, if the audience can throw suggestions and comments at the researcher, answering and defending against objections would more clearly crystallize the concepts in the researcher's mind.
It's an interesting situation.
I think I'll continue with the diary-style blogs for awhile and see where it leads.
As mentioned previously, I expect to be looking into the Haber process for the next couple of years, so this will be an (anecdotal) "experiment-within-an-experiment".
Reaction chamber doesn't work as hoped
![]()
After much fiddling with bubbles in the reaction chamber, I've concluded that the chamber is not a good design. Currents and eddys within the liquid make it impractical to hold a bubble in the right place.
The instability is probably due to having an area of focused energy surrounded by a chaotic buffer area. The transducer horn makes a focused rectangular "duct" of pressure within the water, but areas outside the duct are free to flow. This causes currents and eddies which are large enough to grab any bubble and throw it around the chamber willy-nilly.
So for the next step I'm making new chambers.
Three new chambers in the works
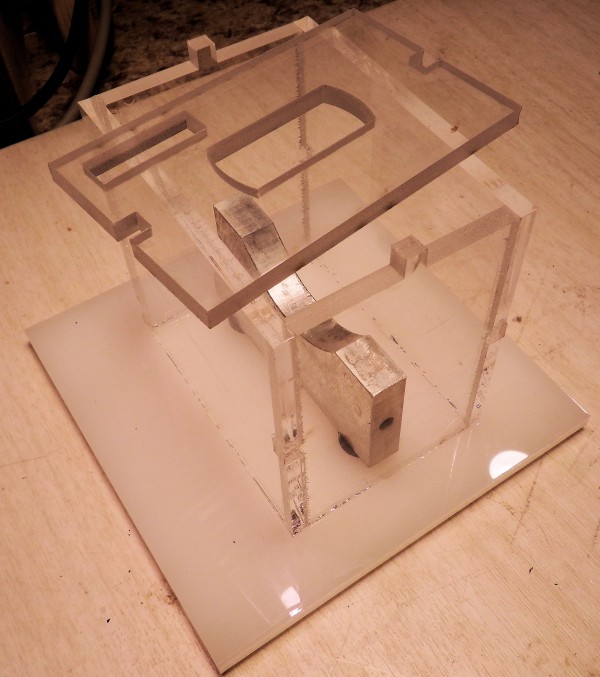
One chamber will be acrylic in the shape of the focused duct, with no outside areas to swirl around. Basically, a rectangular chamber with the same profile as the (rectangular) horn end.
![]()
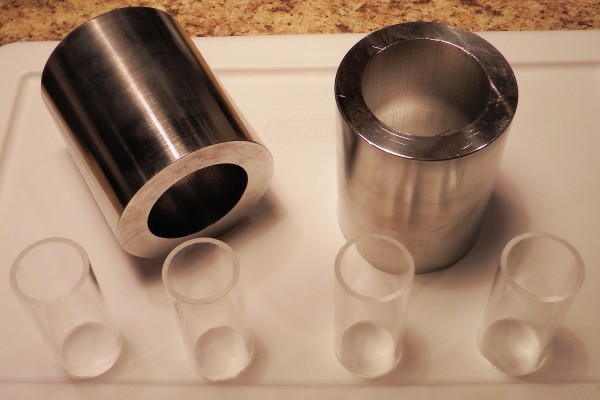
For the second design, I found a pair of Aluminum cylinders at the scrapyard and turned down the inner diameters to the size and shape of the transducer 1:1 horn.
When filled with water, the cylinders should make a resonance chamber in the form used by researchers. This should let me reproduce experiments from published research.
The advantage of this type of chamber is that it's easy to tune: simply raise or lower the transducer until the chamber acoustics match the transducer.
The disadvantage is that you can't see directly into the chamber. I can probably get around this by mounting the chamber on a glass plate and looking through the bottom. A future post will tell whether this works or not.
(This might also be an advantage. Opaque sides would eliminate ambient light - making it easy to detect and/or photograph things going on in the chamber. More on this later.)
I also bought some polycarbonate tubes for use as reaction chambers. I chose polycarbonate over acrylic because acrylic tends to shatter when stressed, while polycarbonate tends to deform.
Also, polycarbonate has a glass-transition temperature of about 150 C, so it should be shapeable using a heat gun. The plan is to mount the tubes in the lathe at slow RPM, soften the plastic with a heat gun, and "encourage" the tube to form an hourglass configuration.
![]()
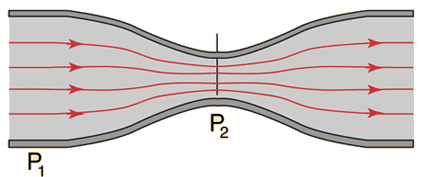
According to Bernoulli's law, the energy at the transducer interface should be the same as the energy at the hourglass restriction. Pressure is energy per volume, so if the "waist" is 1/10 the diameter of the ends, the water should have the same energy in 1/100 of the volume, for a resulting 100x increase in pressure. (Assuming resonance conditions; ie - little or no flow through the restriction, and ignoring potential energy from the head of water above the restriction.)
With a water inlet on one end and an outlet on the other, it might be possible to force bubbles through the hourglass restriction, encountering the 100x pressure magnification along the way.
Brief notes
a) I've got some ideas for an improved driver board. Hardware (read: electronics) has arrived, perhaps by this time next year I'll have a board I'm actually happy with.
b) I've got some new "secret sauce" things to try, to be described at a later date...
c) I was planning a post which goes into more depth on the technical aspects of sonoluminescence bubbles, but the 'damn Hackaday.io system borks all my latex equations. Including equations entered into previous logs.
This is apparently a bug in their system... I think I'll wait until this is fixed.
-
Call for collaborators
09/29/2015 at 00:03 • 0 commentsSummary:
.) Call for collaborators
.) Didn't make the cut
.) New board design should be better
.) New reaction vessel should be... interesting
.) Entropy and the Haber process
Call for collaborators
If you'd like to join the project, ask to join my GitHub groups: Sonicators, for people who want to develop and build the system, and/or AmineGroup, for people who want to design and conduct experiments (of any type, not just ammonia ones).
Or contact me through the Hackaday.io.
Didn't make the cut
The project didn't make it into the next round of the contest. This is a little disappointing, but also a relief - keeping up with the contest requirements takes a fair amount of time and constant stress.
I'm now free to proceed at a more leisurely pace.
The intent of the project was to build a system capable of exploring ultrasonic chemistry, and I've done that. I now have 3 systems capable of ultrasonic processing, and can easily make more if needed.
A big thanks to everyone following the project and who gave feedback and support with skulls and such. I really appreciate the interest, and I hope you enjoyed the build log dialogs.
Since the project focus will now be on chemistry (and not electronics), I'll be adding build logs at a slower pace, and probably using the GitHub wiki instead of the Hackaday system. I find the Hackaday system very difficult to use, and the results aren't really easy for others to view.
New board design should be better
I had frozen the electronics for purposes of the contest: it did all the things I needed it to do, there was no compelling reason to change it.
Since then, I've come up with some new features that shouldn't be too hard to implement - some things that make the board easier to build, some convenience features, and some for a more robust project.
1) The board as designed allows the user to sweep the frequency and determine the resonance point of the transducer/horn using a separately plugged input. Having this sweep without plugging/unplugging the transducer would be a convenient feature to have. I think the appropriate choice would be to use a relay on the transducer output that automatically switches the transducer between the low-voltage sweep and the high-voltage power output as needed.
2) The current design requires a center-tapped SMPS transformer. These are available but uncommon (about 10% of all ATX supplies I've looked at), and being able to use a single-winding device would allow the user to use any transformer of suitable power. Using a pre-made class-d amplifier might accomplish this. A pre-built class-d smplifier board on eBay for around $30 (more or less, depending on power) might suffice, and would reduce the amount of soldering the user has to do.
3) A higher voltage power supply makes everything easier: the trace widths for 10 amps (12 volts) is around half an inch, which are nigh impossible to route on a board. Printer or laptop power supplies in the 20-40 volt range are available for thin money on eBay ($10). This would allow the circuit board to use thinner traces. Also, the higher input voltage means a higher transducer output voltage, so the system could push more power through an off-resonance transducer.
All told, the driver board will go through another rev of design, and V2.0 will be easier to build, easier to use, and more robust.
New hardware has been ordered - waiting for delivery.
New reaction chamber
Now that I've got an ultrasonic system, it's time to do some experiments!
I've discovered that holding a bubble underwater is a hard problem, partly due to physics and partly due to currents in the reaction chamber.
![]()
To get around the latter, I've been mulling over some new reaction chamber designs.
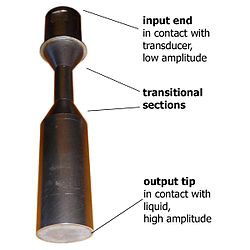
A type of horn called a "barbell" is sometimes used for ultrasonic processing. It's tuned to the resonant frequency of the transducer, and the weighted ends vibrate back and forth, as expected.
![]()
Additionally, most ultrasonic experimental setups use a "tuned chamber", which makes use of standing waves in the conducting media (usually water).
So...
I'm wondering if water itself can be used as an ultrasonic resonant horn.
Water has a bulk modulus of around 2 gPa (about 20,000 atm), which should be more than adequate for a resonant horn at the power levels we're dealing with.
A polycarbonate tube in the shape of an hourglass should concentrate the ultrasonic energy according to Laplace's law. Anything in the restricted section (the "waist") of the tube should experience an enormous energy density.
Furthermore, an inlet at the bottom and an outlet at the top should force induced bubbles to pass through the narrower section.
Further furthermore, tuning the system is simply adjusting the height of the water column in the hourglass. A tuned horn with an O-ring seal and appropriate height adjustment should be able to easily allow the user to create standing waves within the chamber.
It turns out this is an actual thing, it's called a "flow through reactor", and made by a company sonomechanics.com. (I'd show a picture, but their image is copy-protected.)
So I've got some polycarbonate tubes on order, and will be playing around with new and improved reaction chambers in the near future.
Entropy and the Haber process
Converting Nitrogen is seemingly easy: the reaction is exothermic, so we only need to heat the source gases and Ammonia should form. The excess energy can heat more gas, so the conversion should be self-sustaining, like a flame. Ignite the fuel, give it a continuous supply, and collect the combustion products.
Easy peasy.
Unfortunately, it doesn't work that way. Whether a reaction will occur depends not the release of heat, but on the release of entropy.
The Haber reaction is exothermic, and this release of heat increases the entropy of the universe. At the same time, 4 atoms of source become 1 atom of product, and this *decreases* the entropy of the universe. There's more ways that 4 atoms can be arranged in a box than there is to arrange 1 atom.
We can calculate the amount of entropy lost (or gained) in the reaction by subtracting the entropy of Hydrogen and Nitrogen from the entropy of Ammonia:
Entropy from the release of heat is just the energy divided by the temperature. Since it's inversely proportional to temperature, doubling the [absolute] temperature will halve the increase.
At room temperature, the entropy increase from the release of heat is greater than the entropy decrease from the reduction in states, so the reaction is favored. At higher temperatures, the entropy increase from "release of heat" is smaller than the entropy decrease from "change of states", the total change of entropy is negative, and the reaction is no longer favored.
To ignite the reaction you first need to break N2 molecules into individual N atoms, and this requires a great deal of initial energy which is regained in subsequent steps. The molecules in normal air have a bell-curve spread of energies, and very few have enough energy to react: at room temperature only a handful of molecules will be converted each second.
Raising the temperature increases the probability that molecules will have enough energy to react, but then the entropy from released heat no longer outweighs the entropy decrease from the reaction, so the reaction is not favored.
It's catch-22: At room temperature the reaction is favored but cannot start. At high temperatures, the reaction can start but isn't favored.
Increasing the pressure of the reactants will tend to favor the products so you can use this to offset the deficit in entropy.
The Bosch-Haber process tries to find a "sweet spot" by increasing the temperature to get a reasonable number of N2 molecules to break apart, and high pressure to make the process favor the products.
At 200 ATM and 400 degrees, the yield is 15%.
Reaction vessels for this pressure and temperature are expensive, and the process requires multiple cycles of compression, decompression, removal of ammonia, and recompression. This takes a *lot* of energy and uses *very* expensive compressors which wear out over time and have to be replaced.
This is why the Haber process is energy intensive.
-
Fixing Nitrogen, first attempts
09/26/2015 at 22:46 • 2 commentsSummary:
.) Would you purchase an ultrasonic kit?
.) Kit quick sketch
.) Making (and holding) a bubble underwater is a hard problem
Would you purchase a kit?
![]()
My goal for the project was to have a system for exploring the Haber process, which I now have.
The specs and design files are in the repository, but the project isn't trivial. There's some expertise needed in assembling the electronics, designing and tuning the horn, and setting up the system. Also, a builder would have to make a PCB and purchase components in single quantity from several vendors.
I was wondering if there's any interest in a kit. I could purchase parts in batch quantities and parcel them out for people to assemble. The kit (listed below) would include a PCB, all components, a transducer, aluminum stock for a horn, and a pre-programmed Nano. The cost would be about $200, which is 4x the cost of materials.
This is not something I'm planning to do. Sales and marketing is tedious, and I'd much rather be doing experiments and building things.
...but if there's enough interest I might be convinced.
If you would probably purchase a kit 6 months from now for $200, please leave a response below. I'll decide based on the number of responses.
Kit quick sketch
A "quick sketch" of what I think would go into the kit. The specifics aren't important (to answer the question), it's just to get a feel for the amount of interest.
The kit would contain:
- A PCB
- All components
- A pre-programmed Arduino Nano
- The SMPS power transformer
- One transducer
- One 4" length of aluminum rod
The user would need to:
- Supply a project enclosure
- Supply a power supply
- Make mounting hardware (lasercut acrylic pieces)
- Turn the rod into a horn, depending on the application
- Assemble the PCB
As an alternate kit, levitation doesn't require a horn or tuning. A kit demonstrating ultrasonic levitation would include everything you need, including mounting hardware and power supply, for about the same price (4x the material cost.)
Making (and holding) a bubble underwater is a hard problem
![]()
Generating and holding bubbles underwater at the end of a tube is hard, due to the dynamics of surface tension.
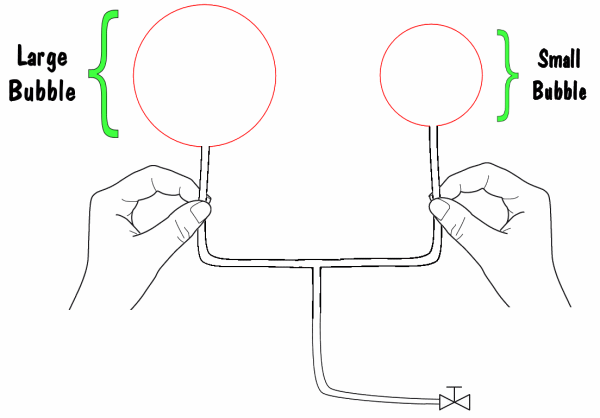
Suppose you are holding a large bubble and a small bubble at the ends of a connected tube, by pinching the tubes shut.
Which of the following happens when you stop pinching the tubes and allow the pressure to equalize?
- The large bubble gets smaller, the small one gets bigger
- The large bubble gets bigger, the small one gets smaller
- The bubbles stay the same
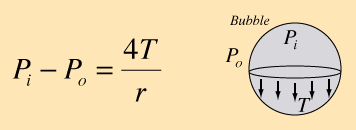
As it happens, the force due to surface tension is in inverse proportion to the radius, which means that the smaller bubble has a higher pressure (on the inside) than the bigger bubble. The small bubble will contract while the bigger one expands.
![]()
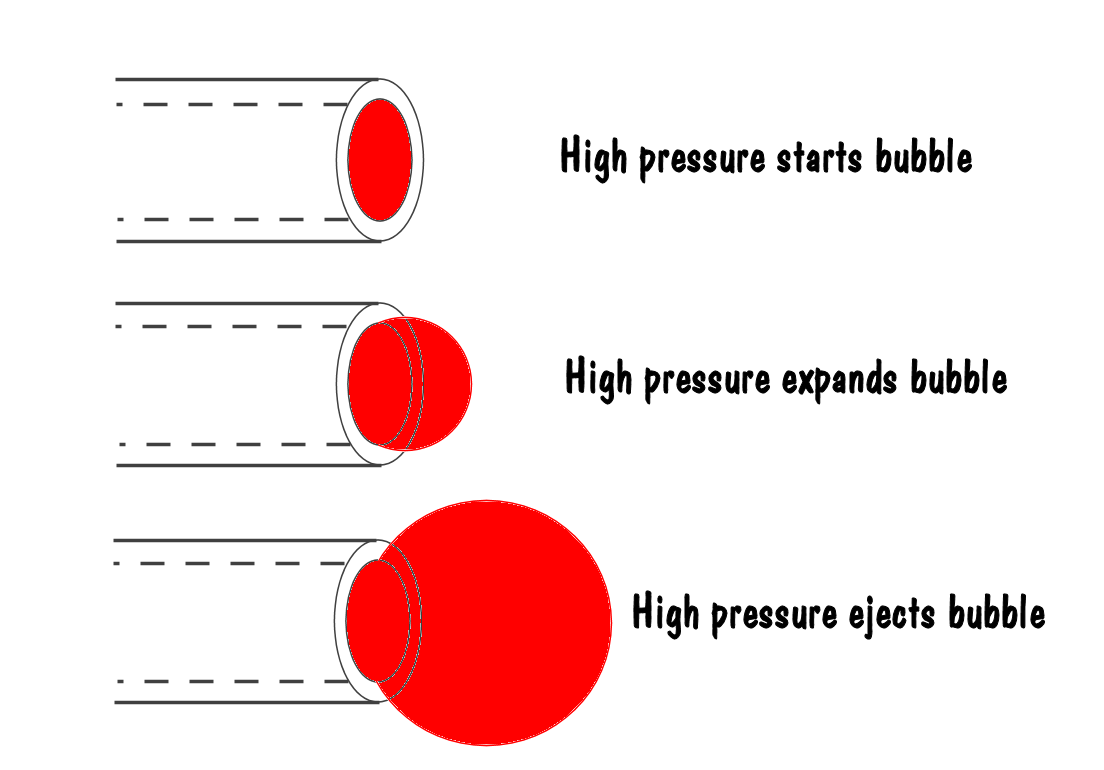
Next consider a tube immersed in water.
The small surface area across the end of the tube requires a high pressure to start a bubble.
If the volume of the tube is large relative to the volume of the bubble, then pushing out the bubble will not appreciably change the tube pressure. The tube air is effectively at constant pressure.
Since a bigger bubble requires less pressure, the constant pressure in the tube tends to overinflate the bubble, eventually causing it to break off and float away. If the pressure is high enough to start a bubble, it's high enough to inflate and eject a bubble.
So to hold a bubble at the end of a tube, you need to immediately back off on the pressure once the bubble starts to form. This is hard for a human, and pretty much impossible for a computer.
...so I need another method of generating and holding bubbles under water.
I've got some ideas to try.
Maybe I don't need to actually *hold* the bubble in place, maybe I can break off a bubble and let it float up into the cavitation focal point. Maybe I can "catch" the bubble on a plate or something. Maybe I can generate the bubble with the tube pointing down instead of up.
Yep - this is science. Keep trying things until you get something that works.
(Also, ordered syringe tips of various sizes to see if I can adjust the bubble size.)
-
Post-contest update
09/21/2015 at 21:55 • 0 comments.) New Git repository with everything: hardware, electronics, software
.) PCB layout is complete, available in GitHub
.) Sample boards ordered from OSH Park, I should have them October 7th, more or less.
The new GitHub repository has everything so far: all the hardware files, the schematics, and the software.
The only thing missing is the PCB layout, only because I'm having so much trouble getting it done with Kicad. This will probably get sorted in the next day or two, then the layout will go up as well.
The repository is here:
https://github.com/Sonicators/UltrasonicSystem.git
(NB: Having NO problems with GitGui whatsoever. Git is awesome!)
PCB layout is complete, the board files are available in the repository.
The board was ordered from OSH park, I should get the prototypes back around October 7th, more or less, then I can see if populating the board will result in a working system.
OSH Park has a wonderful interface! It's completely seamless, and very informative. E-mails are sent informing me of the status and predicted dates for delivery and such. Really neat!
Three boards are $123. Yikes!
After some googling, I've decided that a 5-board run from a low-cost site on eBay puts the board at around $10. That's a lot better, and I can optimize the board for a better price.
The original plan was to use an ATX power supply box as a project enclosure, but there's a lot of unused space on the board, and components are only on one side. I could easily chop $25 off of the OSH price.
![]()
-
Big Data Dump
09/20/2015 at 23:25 • 2 commentsSummary
.) September contest video is ready
.) Chemistry is an experimental science
.) Making diamonds with ultrasound
.) Copper nanoparticle emulsions
.) Graphene emulsions
.) Making an air bell
.) All the stuff
.) New schematic update
September contest video
The contest video for September is up on the project page.
The video quality isn't the best: the camera is crooked, the lighting has dark and light bands (why?), moving objects (my hands) have jagged edges, the dialog has mistakes, and the scenes are poorly spliced.
But it explains the problem (to be solved) to a non-technical audience, and has a good overview of the system and how to build it.
It probably should place more emphasis on what the system can be used for rather than the Haber aspects (mixing, drilling, levitation, etc.). I hope it's clear to the judges that this can be used for more than just exploring Haber.
I'm hoping that the video quality really doesn't matter, as advertised. Other contest project videos seem more polished.
Chemistry is an experimental science
Chemistry is very much an experimental science.
For a clear example, note that chemists had predicted graphene to be impermeable to water. The holes in a carbon hexagon structure are too small to pass water molecules, so graphene should act as a water barrier.
It doesn't.
In fact, not only does water pass through graphene, it acts as if the graphene isn't there. This has many potential applications, not least of which is desalinization...
but my point is that Chemistry often doesn't predict the outcome of an experiment.
It's not that Chemists don't know the underlying principles, it's more a case of not knowing *which* underlying principle will dominate. As the graphene paper shows, it was only after the experiment was performed that chemists went in and re-analyzed the situation, and figured out why graphene was water permeable.
That's good news for us hackers. There's a lot of interesting chemistry waiting to be discovered, and some of it will be accessible if you have an ultrasonic system to play with.
Such as...
Making diamonds with ultrasound
Graphite-to-diamond transformation induced by ultrasound cavitation
Summary: Ultrasonic cavitation of graphite suspended in oil produces diamond grit. Although the researchers used a 1000 watt ultrasonic system, the actual chamber energy density was only 80W/cm^2.
This Hackaday project entry can produce that energy density.
![]()
Copper nanoparticle emulsions
Synthesis of copper nanoparticles by two different methods
A recently discovered (2005, I believe) chemical reaction uses copper chloride and ascorbic acid to make copper nanoparticles. Copper chloride is readily available, and ascorbic acid (vitamin C) is available on eBay for pennies.
I've actually tried this, it's trivial. You get a precipitate of finely-divided copper lining the bottom of your flask, and the particle size is determined by the reaction temperature. You can "tune" the reaction to generate whichever size of particle you need.
This would make a conducting ink, except that copper forms a surface oxide that's non-conductive. The nanoparticles are small and have such enormous surface area that the oxides reduce conduction and the result has little or no conductivity. Pressing the particles - as with a spoon - mashes them together and reduces the surface area. You can make PCB traces this way.
See "Copper Nanoparticles for Printed Electronics: Routes Towards Achieving Oxidation Stability" for more info.
An ultrasonic system can make an oil/water emulsion that will last for days.
Would an oil emulsion of copper nanoparticles have any use?
Graphene emulsions
On the subject of emulsions, note that graphene suspensions can be made with a blender and soap.
Would this process benefit from sonification?
Would an emulsion of oil and graphene have useful properties?
Making an air bell
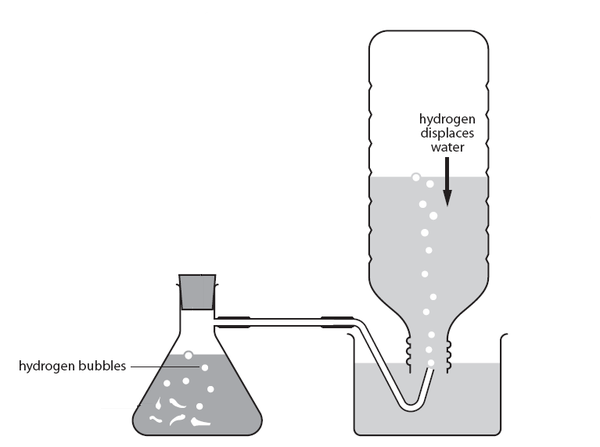
The gas collection system was the last piece I needed for the project - an "air bell".
![]()
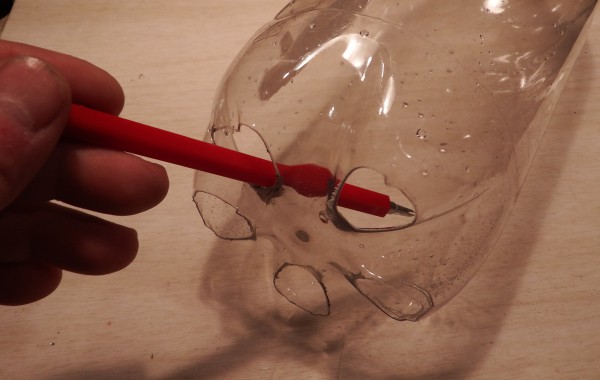
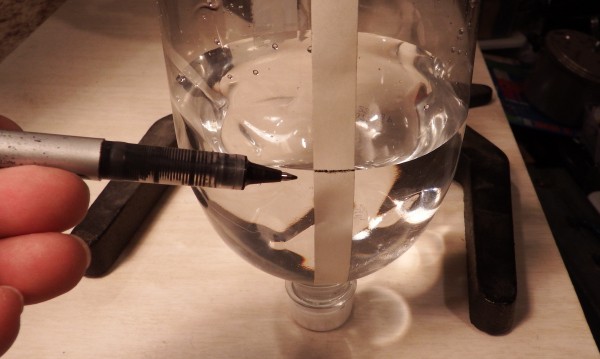
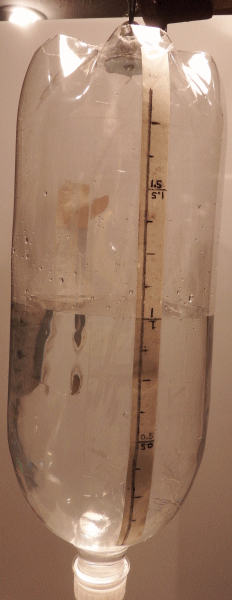
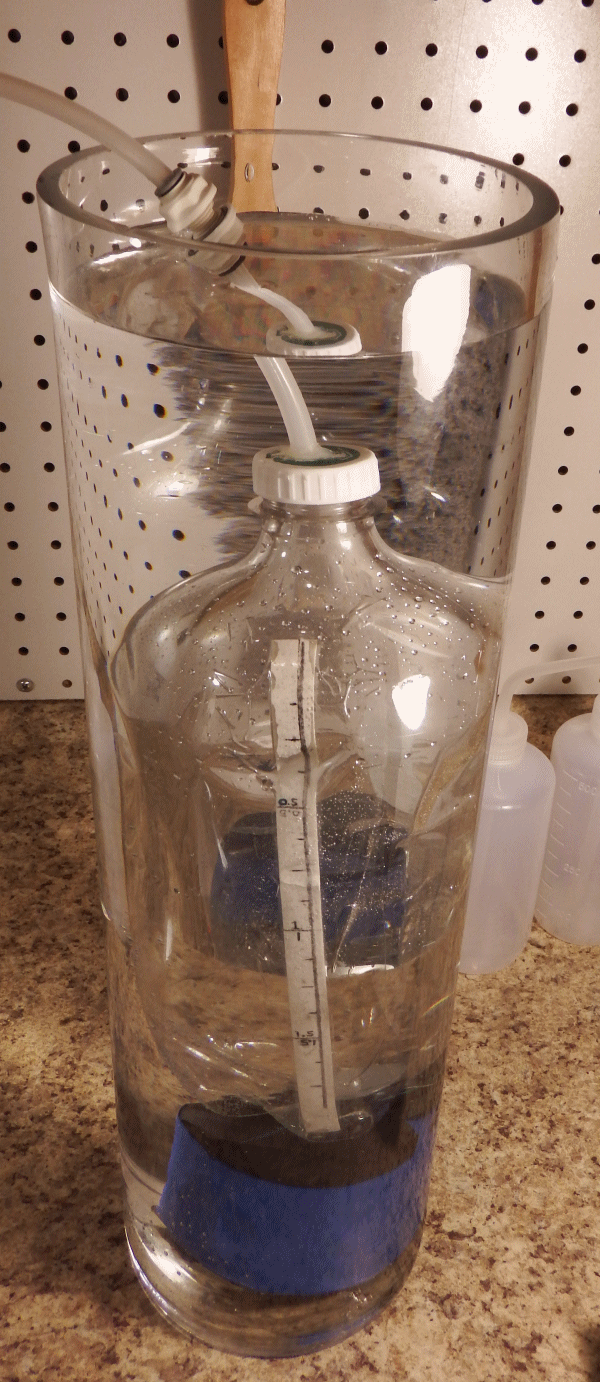
Cut the bottom out of a 2-liter bottle and hang it inside a glass flower vase from an art supply house. Weigh it down, drill a hole and hot-glue some PVC tubing into the cap.
Easy peasy!
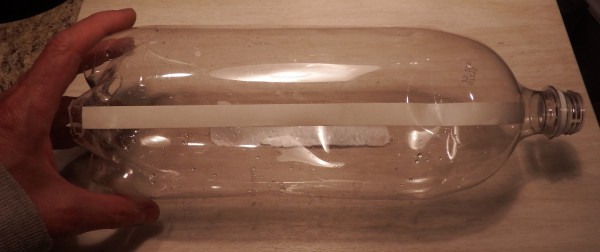
To calibrate, I hung the bell upside down (cap down) and stuck a piece of tape along the sides. I then weighed out 500g of water using a scale, added this to the bell, and marked the water level (accounting for meniscus). I repeated this procedure until the bottle was full.
I then tested by filling the bottle to one of the marks and weighing the result.
It's accurate to within 1%, which is good enough for my purposes.
I snake a a tube from the Nitrogen generator through the bottom of the bell and add gas until the water level reaches the right level, then I do the same with 3x more volume of Hydrogen.
![]()
![]()
![]()
![]()
![]()
All the stuff
I'll be making a big data dump into the GitHub project wiki and the build instructions on Hackaday.io, so I went 'kinda crazy with taking photographs.
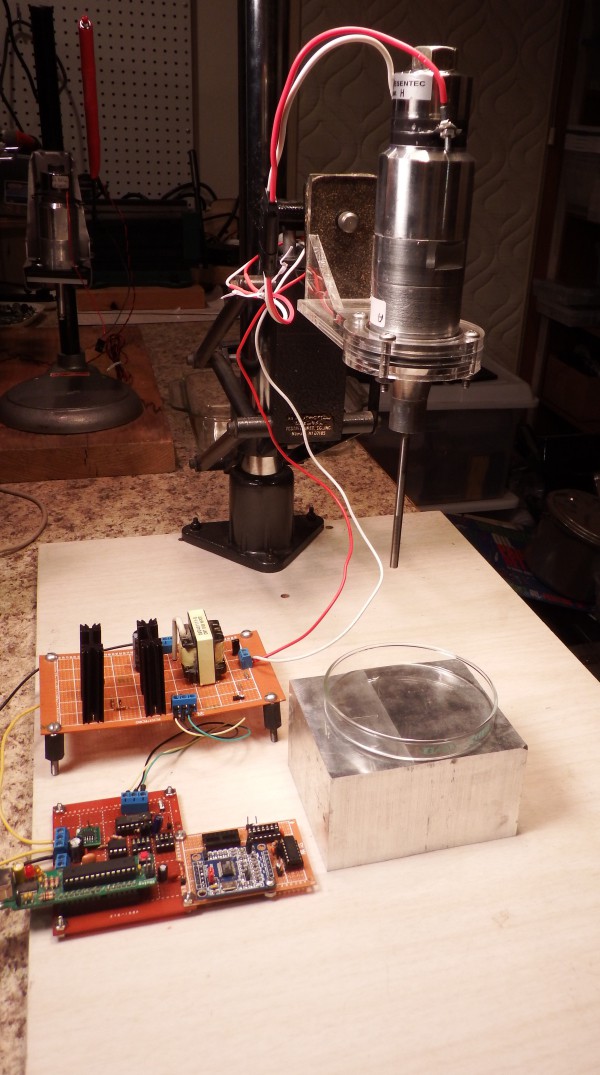
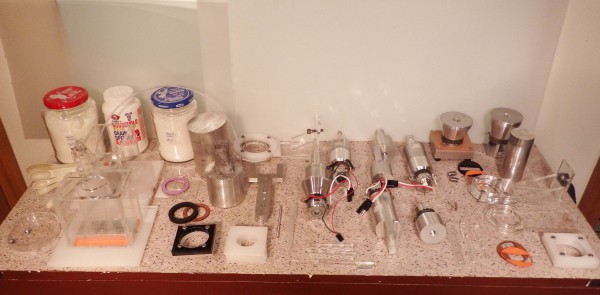
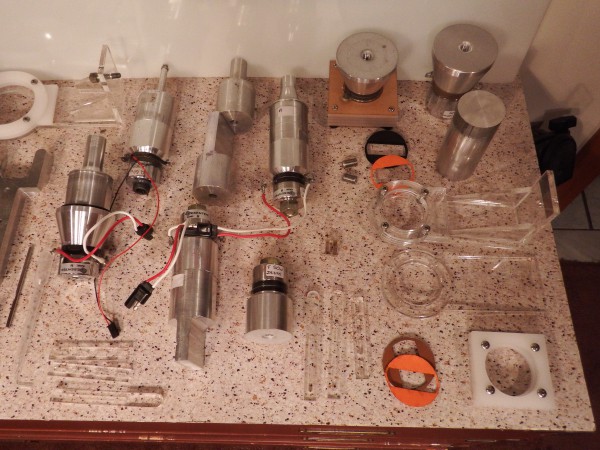
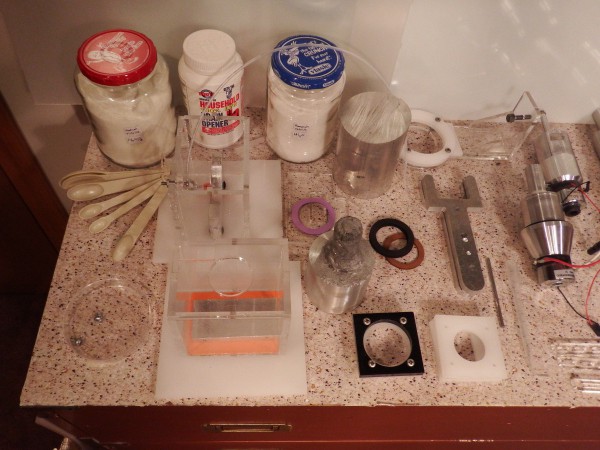
Here's all the project accessories. This doesn't include the air bell, the drill press stand (transducer holder), or the driver board.
![]()
![]()
![]()
New schematic
The new circuit is working in prototype, has been schematically captured, and I am having SO MUCH trouble with Kicad!
After many hours of swearing and tweaking, everything is finally working, and it only takes me a half an hour to make small changes to the schematic.
Now I know why people spend thousands of dollars on Altium. Sheesh!
Anyway, the new circuit is up in the project description. It's the original circuit, except using an AD9833 for frequency control instead of digital pots.
I've made 4 improvements in the schematic that are not on the prototype board, but they're relatively safe and I think they'll work out of the box, or at least require minimal debugging.
The plan is to have the PCB laid out and order boards from OSH Park in the next week, which should arrive in 2 weeks.
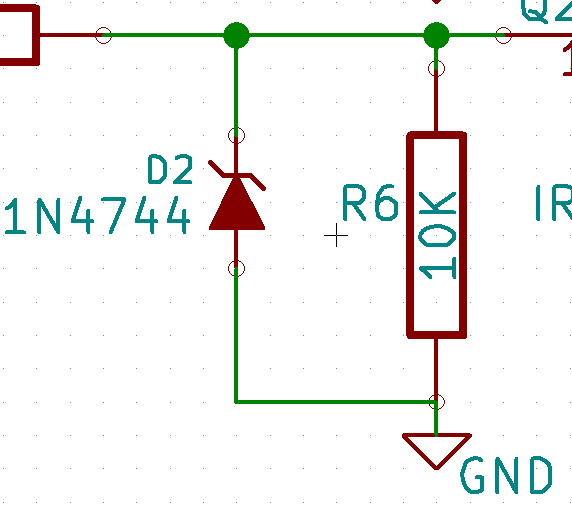
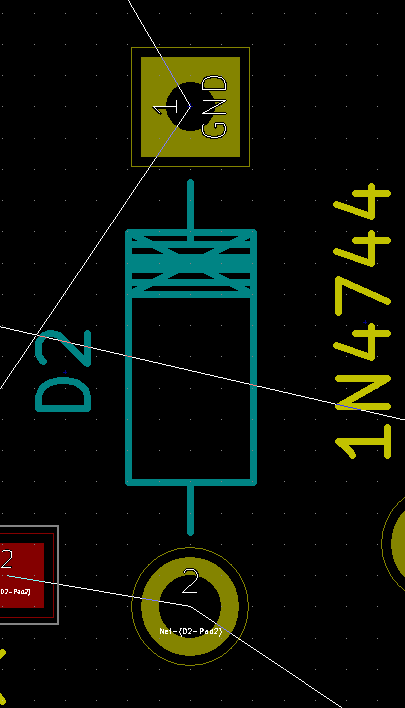
Here's an example Kicad trouble: the diode in the schematic points away from ground, but on the PCB it points *towards* ground. I have no idea why this is, and I have no idea how to fix it. And yes, I've made and loaded the netlist several times. It's something in the program, not the schematic!
![]()
![]()
-
Random update
09/09/2015 at 20:11 • 0 comments.) Reaction chamber v3.0
.) Complete list of components, $50 total cost
.) Trying a "bubble plate"
.) Capturing bubbles in a standing wave works... 'sorta
Reaction chamber, v3.0
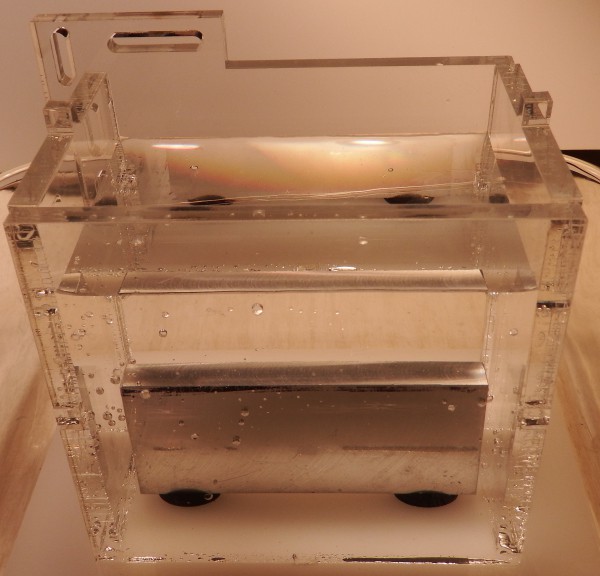
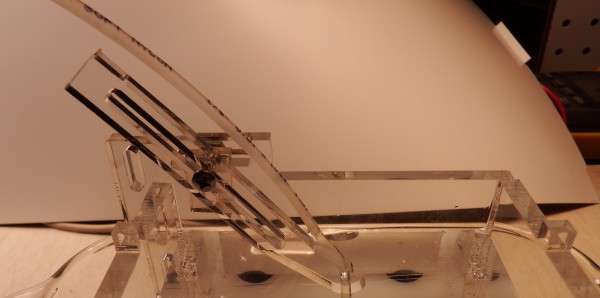
The tube holder for the reaction chamber was a bit unwieldy, so I added mounting tabs to the back plate of the reaction chamber and changed the lid as needed.
The new version holds the tube firmly in place, and has extra mounting holes for future use.
The chamber layout is now based on a specific thickness and vendor for acrylic (Plaskolite, 5.75mm), so it's easy for anyone to cut out and assemble.
To use a different thickness you'll have to resize the tabs and notches - if I get time after the contest maybe I'll make a parametric program that generates the pattern based on the thickness the user has available.
![]()
![]()
Completed list of components
The Hackaday.io project components are complete and final (I hope!). All chips are listed, except I glossed over minor electronic things like passives and XOR gates and such.
The final list of components are:
- 1 × Ultrasonic Transducer (Available from eBay for under $20).
- 1 × 100mm of 6061 aluminum rod (To make a tuned aluminum horn. About $10 on eBay).
- 2 × ATX power supply (One supply for power, one to scavenge the SMPS transformer).
- 1 × Arduino nano (Control board interface).
- 1 × UC3525 Pulse width modulator IC.
- 1 × MCP4161 10K Digital potentiometer.
- 1 × MCP4131 50K Digital potentiometer.
- 1 × AD9833 Sin/Square/Triangle generator (About $6 on eBay).
- 1 × ACS712 Hall effect current sensor.
- 1 × PCB, assorted passives.
- 1 × Transducer mount (made from wood or acrylic, or whatever).
With parts from eBay the whole system costs around $50, not counting the 2 ATX supplies.
Bubble Plate
Holding a bubble at the end of the gas inlet tube is proving to be problematic. There's a fine line between having a bubble and either a) no bubble, or b) releasing a bubble.
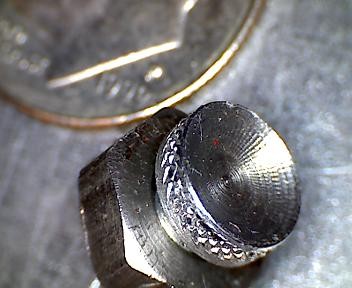
I want the bubble held stationary, so I machined a concave depression into the head of a small bolt. This will attach to the gas inlet tube and serve as a catcher plate for released bubbles. This way I can position the bubble with the plate and not have to worry about keeping it at the end of the tube.
UPDATE: It works well enough, but isn't sturdily mounted to the gas tube - it keeps flipping over. Oh well - it's a nut & bolt, shouldn't be to hard to figure out a mounting bracket.
![]()
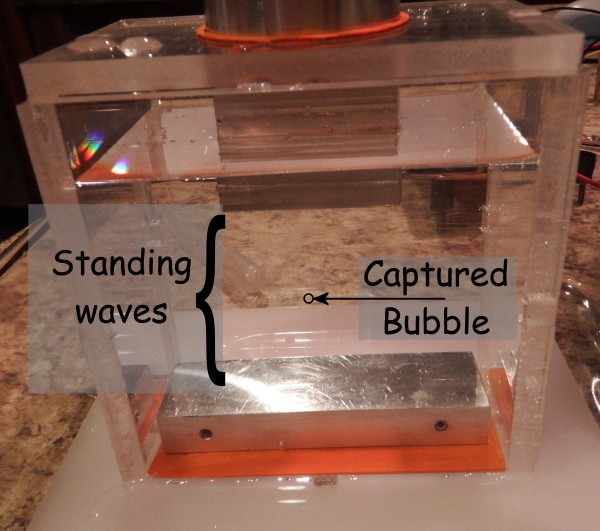
Capturing bubbles in a standing wave
Thinking about ultrasonic levitation, I got to wondering if the reverse was possible. Can a standing wave capture a bubble under water?
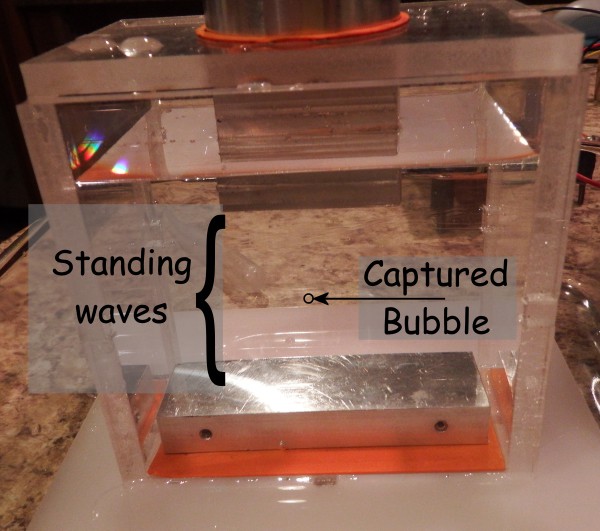
It turns out it can. I was able to get a bubble to "hover" above a reflecting plate for about a minute before it wandered off.
Once.
I don't have a picture because it's hard to place the bubble in just the right position. Several times I positioned the bubble, only to have it fly away a few seconds later. It was definitely hovering for those few seconds, however.
This really isn't the right horn or the right way to do this. If I get some time I'll play around some more later. Maybe a horn with a slight depression would arrange the energy to better capture the bubble.
The speed of sound in water is 1482 m/s, the frequency is 28,000 hz, so the half wavelength is 26.46 mm.
Position a flat horn any multiple of this distance over the reflecting plate to get standing waves.
![]()
-
Things are progressing
09/03/2015 at 03:27 • 0 commentsQuick update:
.) Home made rheoscopic fluid works
.) The driver board satisfies all system requirements
.) New hardware, new board design is coming along
.) Fixed an issue with board current on USB connections
.) Fixed an Arduino Nano windows driver problem
.) Hope to try making ammonia "real soon now"...
Home made rheoscopic fluid
Finely ground mica mixed with water makes "rheoscopic fluid" which shows currents and eddies in swirling water. Powdered mica is available in the makeup section of eBay in various colors.
The result is a sort of silky, swirly mixture that makes long lines that follow the current patterns. It's hard to explain, but there's lots of images on google that show the effect.
I only used a tiny amount of mica because I wanted to keep the water transparent. The fluid works, I can see the current patterns, it just wasn't very informative.
Ah well - this is science. I suppose this is an example of "Hackaday Fail". Still, the home made rheoscopic fluid seems to work well enough.
Board works, all requirements met
As mentioned in my previous log, the new board is stable up to 150 watts.
Some things could be improved (I have a list), but in its current state the board satisfies all design requirements for the project. I could use it as is, or cautiously make some upgrades.
I have 4 hardware improvements that should be straightforward. My plan is to get these working on a proto-board, then do schematic capture and and have PCBs made.
Too many chips, not enough power
A standard USB connection can supply a maximum of 100 mA of current. The AD9850 sine generator requires 76 mA, and the board also has an Arduino, an FT232 converter, and at least 2 power LEDs.
So it came as no surprise that the components were struggling with the limited amount of power available.
The solution is to power the circuit from the ATX 5V line, and of course the "smart power circuit" on the arduino board will have none of it, so the quick solution is to cut the red wire on a USB cable.
The cheap Chinese knockoff Nano "smart switch" circuit doesn't work well. I can't run the 12 V line to the arduino onboard regulator either, but I may not need it - see below.
![]()
Nano windows driver problem
The Arduino Nano windows device driver was causing a lot of problems.
With the Nano sending output to a serial window, after awhile the mouse would go wild - the pointer would move and select things seemingly at random.
The only way around it was to reboot the computer, at which point you would get another hour or two of development until the mouse went wacky. This hampered development quite a bit.
![]()
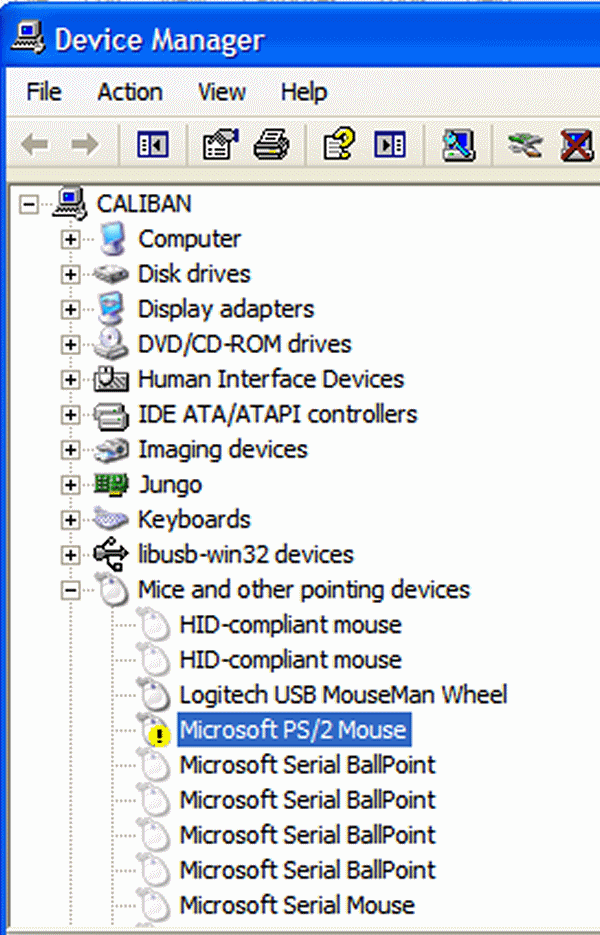
I finally discovered the cause: the system identifies the serial port as a microsoft mouse product, so in addition to being a serial port the device was being installed as a mouse!
This is a problem with the Chinese knockoff driver CHSER340.exe. I can't find Nano's with real FTDI chips any more - nowadays everyone uses the knockoff USB interfaces.
The solution is to disable the unwanted mouse in the hardware manager. Assuming you don't actually *have* a "Microsoft Serial Ballpoint" or other serial mouse, this should fix the problem.
It turns out this is a known windows problem.
AD9833 is cheaper and simpler
One of the 4 proposed improvements is to use an AD9833 sin/square/triangle generator, which only needs 5 mA.
Additionally, the squarewave output reduces the component count and complexity of the circuit: a single XOR can turn the squarewave into short pulses needed by the UC3525 PWM chip, and double the frequency which is *also* needed by the UC3525 PWM chip.
Curiously, a development board on eBay costs less than the chip itself.
Specifically, the AD9833 chip costs $10 on DigiKey (quantity: 1), but a breakout board with the chip, a 25 mHz crystal, and decoupling capacitors is only $6.99 on eBay. Go figure.
If I use the dev board as a component, this reduces cost and reduces the number of SMD components needed to assemble the board! The interface is a line of standard 0.1" pins, which are trivial to solder.
UPDATE: I've got a software driver, the chip seems to work, so I'll include it in the final version.
And way accurate
I've been checking the generated frequency against a calibrated frequency counter, and the results are exactly right.
And I mean exactly - each generated frequency measures exactly the right value on the counter, with no error!
Improve the Haber process
See if ultrasonic cavitation can be used to fixate atmospheric Nitrogen less expensively than the Haber process.
 Peter Walsh