 tEEonE
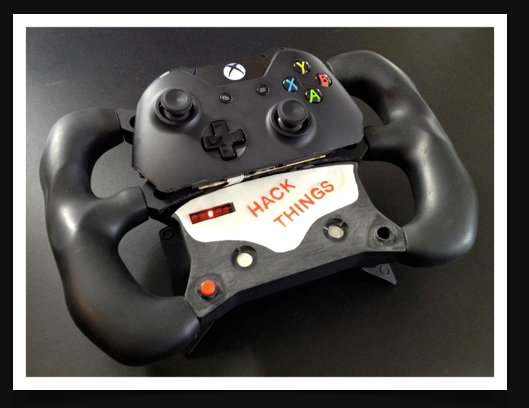
Introduction
- I love racing games, and along with the Xbox One came Forza 5!
- The few steering wheels for XB1 are super expensive and bulky
- The XB1 controller is a new device and i was dying to take one apart
- I had a spare SRW-S1 lying around
- I thought it would be a cool hack!
Parts used
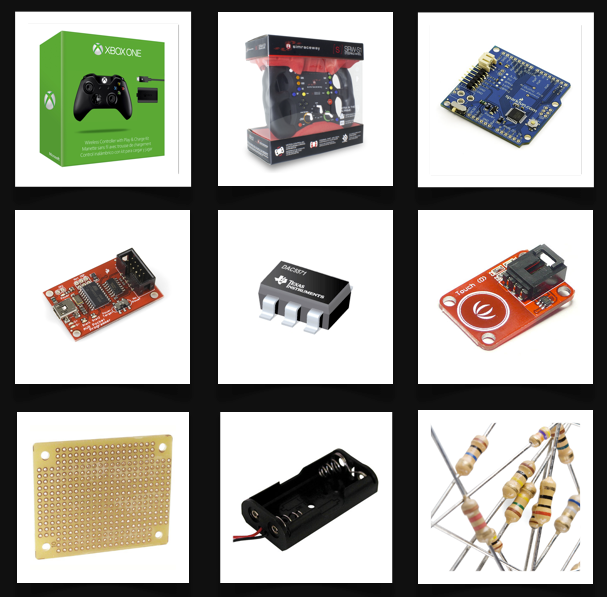
- Xbox One Controller
- Simraceway SRW-S1
- Arduino Pro & AVR programmer
- TI DAC551 & adapter board
- 2 x TTP223 based touch sensor module
- Perfboard & pin headers
- Battery holder 2 x AA
- Misc. resistors
Err.. why?

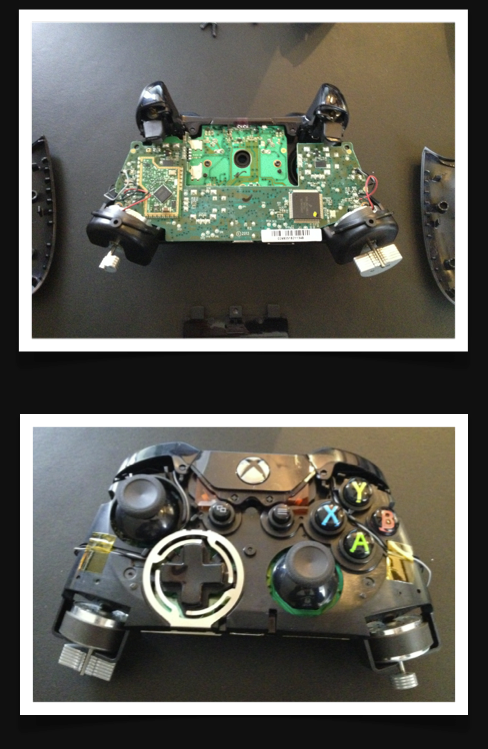
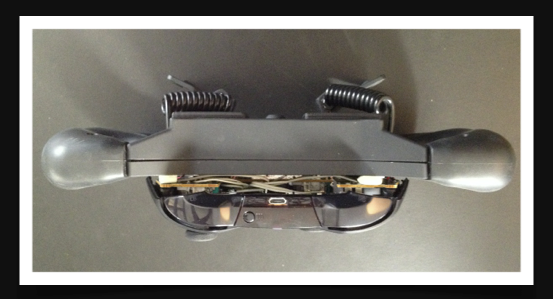
I started by purchasing a XB1 controller and proceeded to take it apart (don’t you just love buying stuff and take it apart even before its initial use). The XB1 controller has a nice mechanical build, which means that you end up with pretty much all the electronic parts still attached together and working while having no external housing components attached. This made it easier to figure out how it works, and do the needed measurements. I was only interested in replacing the inputs for steering, gas and brakes. I then proceeded to take apart the SRW-S1, just to find out that this was very suited for the hack as well. The main body has lots of space once the PCBA is removed, so I would be able to fit in whatever I needed. The paddles were mechanically functional without the original PCBA, and the accelerometer was actually mounted in a module, that could easily be detached, and as you’ll later find, even the PCB layout for the rest of the wheel, accommodated for some easy hacking
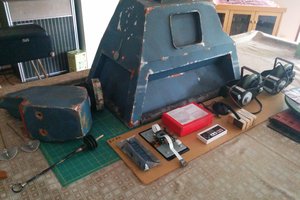
Mechanical
The SRW-S1 provided a great platform for this build! After the PCBA was removed, there was very little mechanical alteration needed. There was some basic things like screw bosses that could get in the way, but they were easily removed with a Dremel. Also a couple of holes were cut in the original housing to accommodate the rumble motors, and two 3D printed parts were added, to seal off the holes. The front housing of the SRW-S1 was cut in half down the middle - following a horizontal line. This provided a two piece top cover, that could be taken off independently.
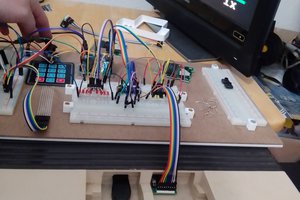
Electronics overall
The project relies on a few basic hacks; feeding the controller the right voltage levels at the right points. Ill get into the details of steering and gas/brake later, but in general I knew the hack needed a micro controller. I opted for an Arduino - this is my go to platform for rapid prototypes in many cases; development is fairly straightforward, the platform is pretty forgiving if you mess something up, but most importantly; there is a huge open community.
Because this project is powered off the XB1 controllers battery, it was important that the micro controller worked on 3.3 V. This is an easily sourced voltage on the controller. I had an Arduino Pro (basically a Duemilanove with ATmega328, but rigged to run on 3.3V instead of 5V) around, that i thought would be great for reading the accelerometer and controlling the outputs.

 deftcoyote
 sjm4306
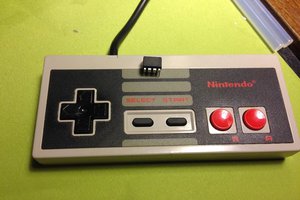
 Andrew Bills