-
Presence sensors again!
02/28/2017 at 21:59 • 0 commentsThat nice man Malc Crook (https://hackaday.io/mal8837) contacted me after my last post on this (https://lamm.space/2016/09/10/presence-sensors-revisited/) to say he'd bought some sensors from the same supplier and they were different yet again.
Malc sent me some sensors to hack and return to him so I've added a new post at https://lamm.space/2017/02/28/presence-sensors-again/ with details.
Hopefully this will help some people!
Ian.
-
Presence sensors revisited
09/10/2016 at 18:45 • 0 commentsIn a previous post I talked about 24v presence sensors for Loxone home automation:
https://hackaday.io/project/4857/log/16523-is-there-anybody-there-click-once-for-yes
Shout out to Malc Crook (https://hackaday.io/mal8837) and Adam (https://hackaday.io/Bobbsta10) who both contacted me to say that the PIR linked to in the original post is no longer the one you get when you order the same item from the same seller.
Fear not, for I have hacked the new one this evening and it’s pretty straight forward.
Filled with hate for the hackaday.io editing UI as I am, I moved posts over to the hackspace site at http://lamm.space/ though it does look like they've at least introduced the ability to save drafts now...
The rest of the post along with images can be found at http://lamm.space/2016/09/10/presence-sensors-revisited/
Ian.
-
Squeezing a quart into a pint pot
07/12/2015 at 15:36 • 0 commentsSo you've used up your eight digital outputs on lighting circuits but you've got another two to add, what do you do now?!
Options
There are a number of different routes to solving this problem that I can think of, there are probably others.
- Loxone expansion unit
- Cost £339
- Adds an additional 12 digital inputs, 8 digital outputs, 4 analogue inputs and outputs.
- http://shop.loxone.com/enuk/extension.html
- Loxone Nano IO Air
- Cost £90 *
- Adds 2 digital outputs and 6 digital inputs
- http://shop.loxone.com/enuk/air-base-extension.html
- You need an Air Base interface - http://shop.loxone.com/enuk/air-base-extension.html
- * Cost is plus £87 for Air Base if you don't have one
- DMX unit
- Cost is whatever you want to spend on a DMX device *
- DMX is a protocol designed for theatre lighting so a huge number of off the shelf solutions exist
- You need a DMX interface - http://shop.loxone.com/enuk/dmx-extension.html
- * Cost is plus £237 for a DMX interface if you don't have one
- EnOcean relay unit
- Cost is whatever you want to spend on an EnOcean device *
- You neen an EnOcean interface - http://shop.loxone.com/enuk/enocean-extension.html
- * Cost is plus £255 for an EnOcean interface if you don't have one
- Relay module
- Cost £5 to £100 - depends on which relay modules you buy
- Adds one or more relay output
- Some knowledge of electronics is required to make this work for you
- This is the option we'll be discussing
Hardware
LimitsBefore we start talking about the how, let's talk about the limitations and issues.
Our Miniserver analog outputs are capable of delivering between 0 and 10 volts at up to 20mA, tech specs at http://www.loxone.com/enen/service/documentation/miniserver/miniserver-setup.html:
"4 analogue ouputs 0 - 10VDC, 12 bit resolution (20mA maximum output current)"
Whatever solution we choose has to be within those limits.
Relay module selectionOn contemplation of the options, I went for using some Pololu SPDT relay modules - https://www.coolcomponents.co.uk/basic-spdt-relay-carrier-with-5vdc-relay-assembled.html
I took the time to look at the diagram for these (https://www.pololu.com/file/0J618/pololu-basic-spdt-relay-carrier-schematic-diagram.pdf) to establish how the switching is being done. In this case, it's a BSS138 (https://www.pololu.com/file/0J620/BSS138-7-F.pdf). I didn't understand all the details, so I asked someone else for advice on how to interpret the data sheet and then I tested them with a meter when the modules arrived.
At 5v from a bench supply, the draw on the gate is around 0.05mA which is well within the tolerances specified. Do your own tests, don't assume that ordering identical hardware from the same supplier will give identical results! There are no guarantees that the parts won't have changed due to supply issues by the time they arrive on your bench.
My annoyance with these modules is that they're 5v which is just a pain as it means dropping from 24v in order to feed the modules. I used a switched mode power supply board from ebay, I bought ten a while back from China for not very much money. As of yet I've not managed to mount it nicely in my enclosure :(
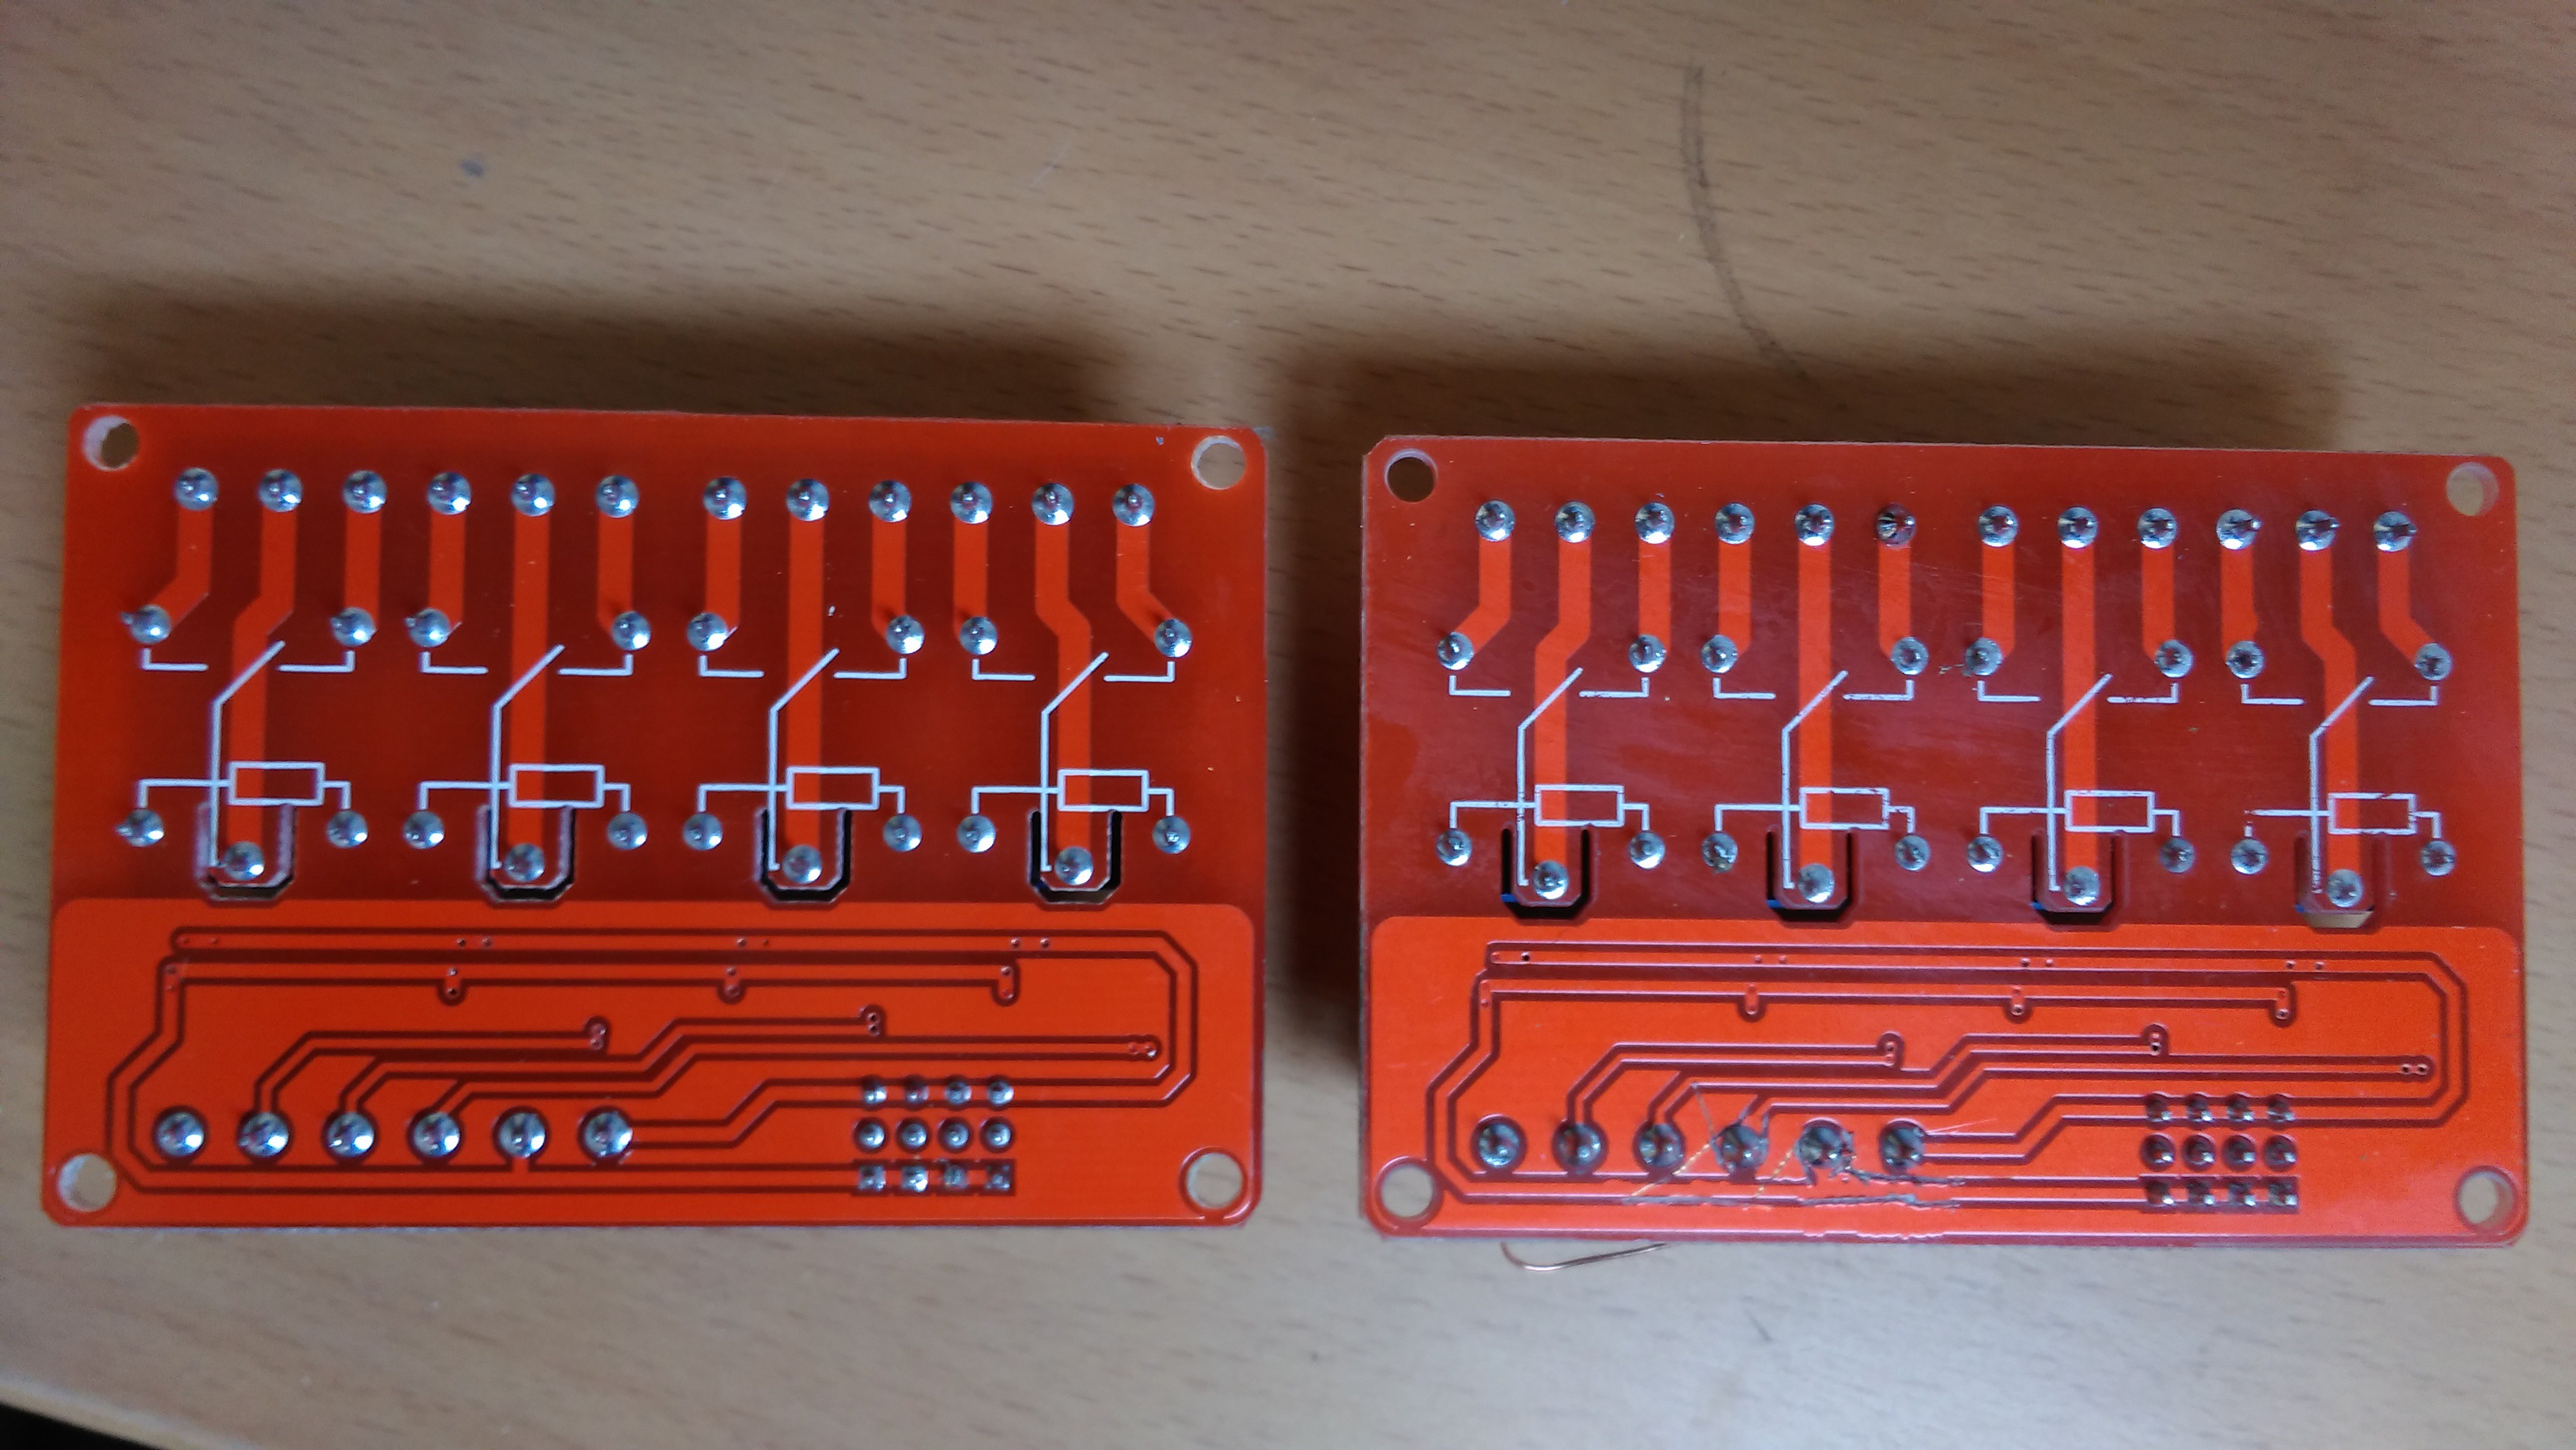
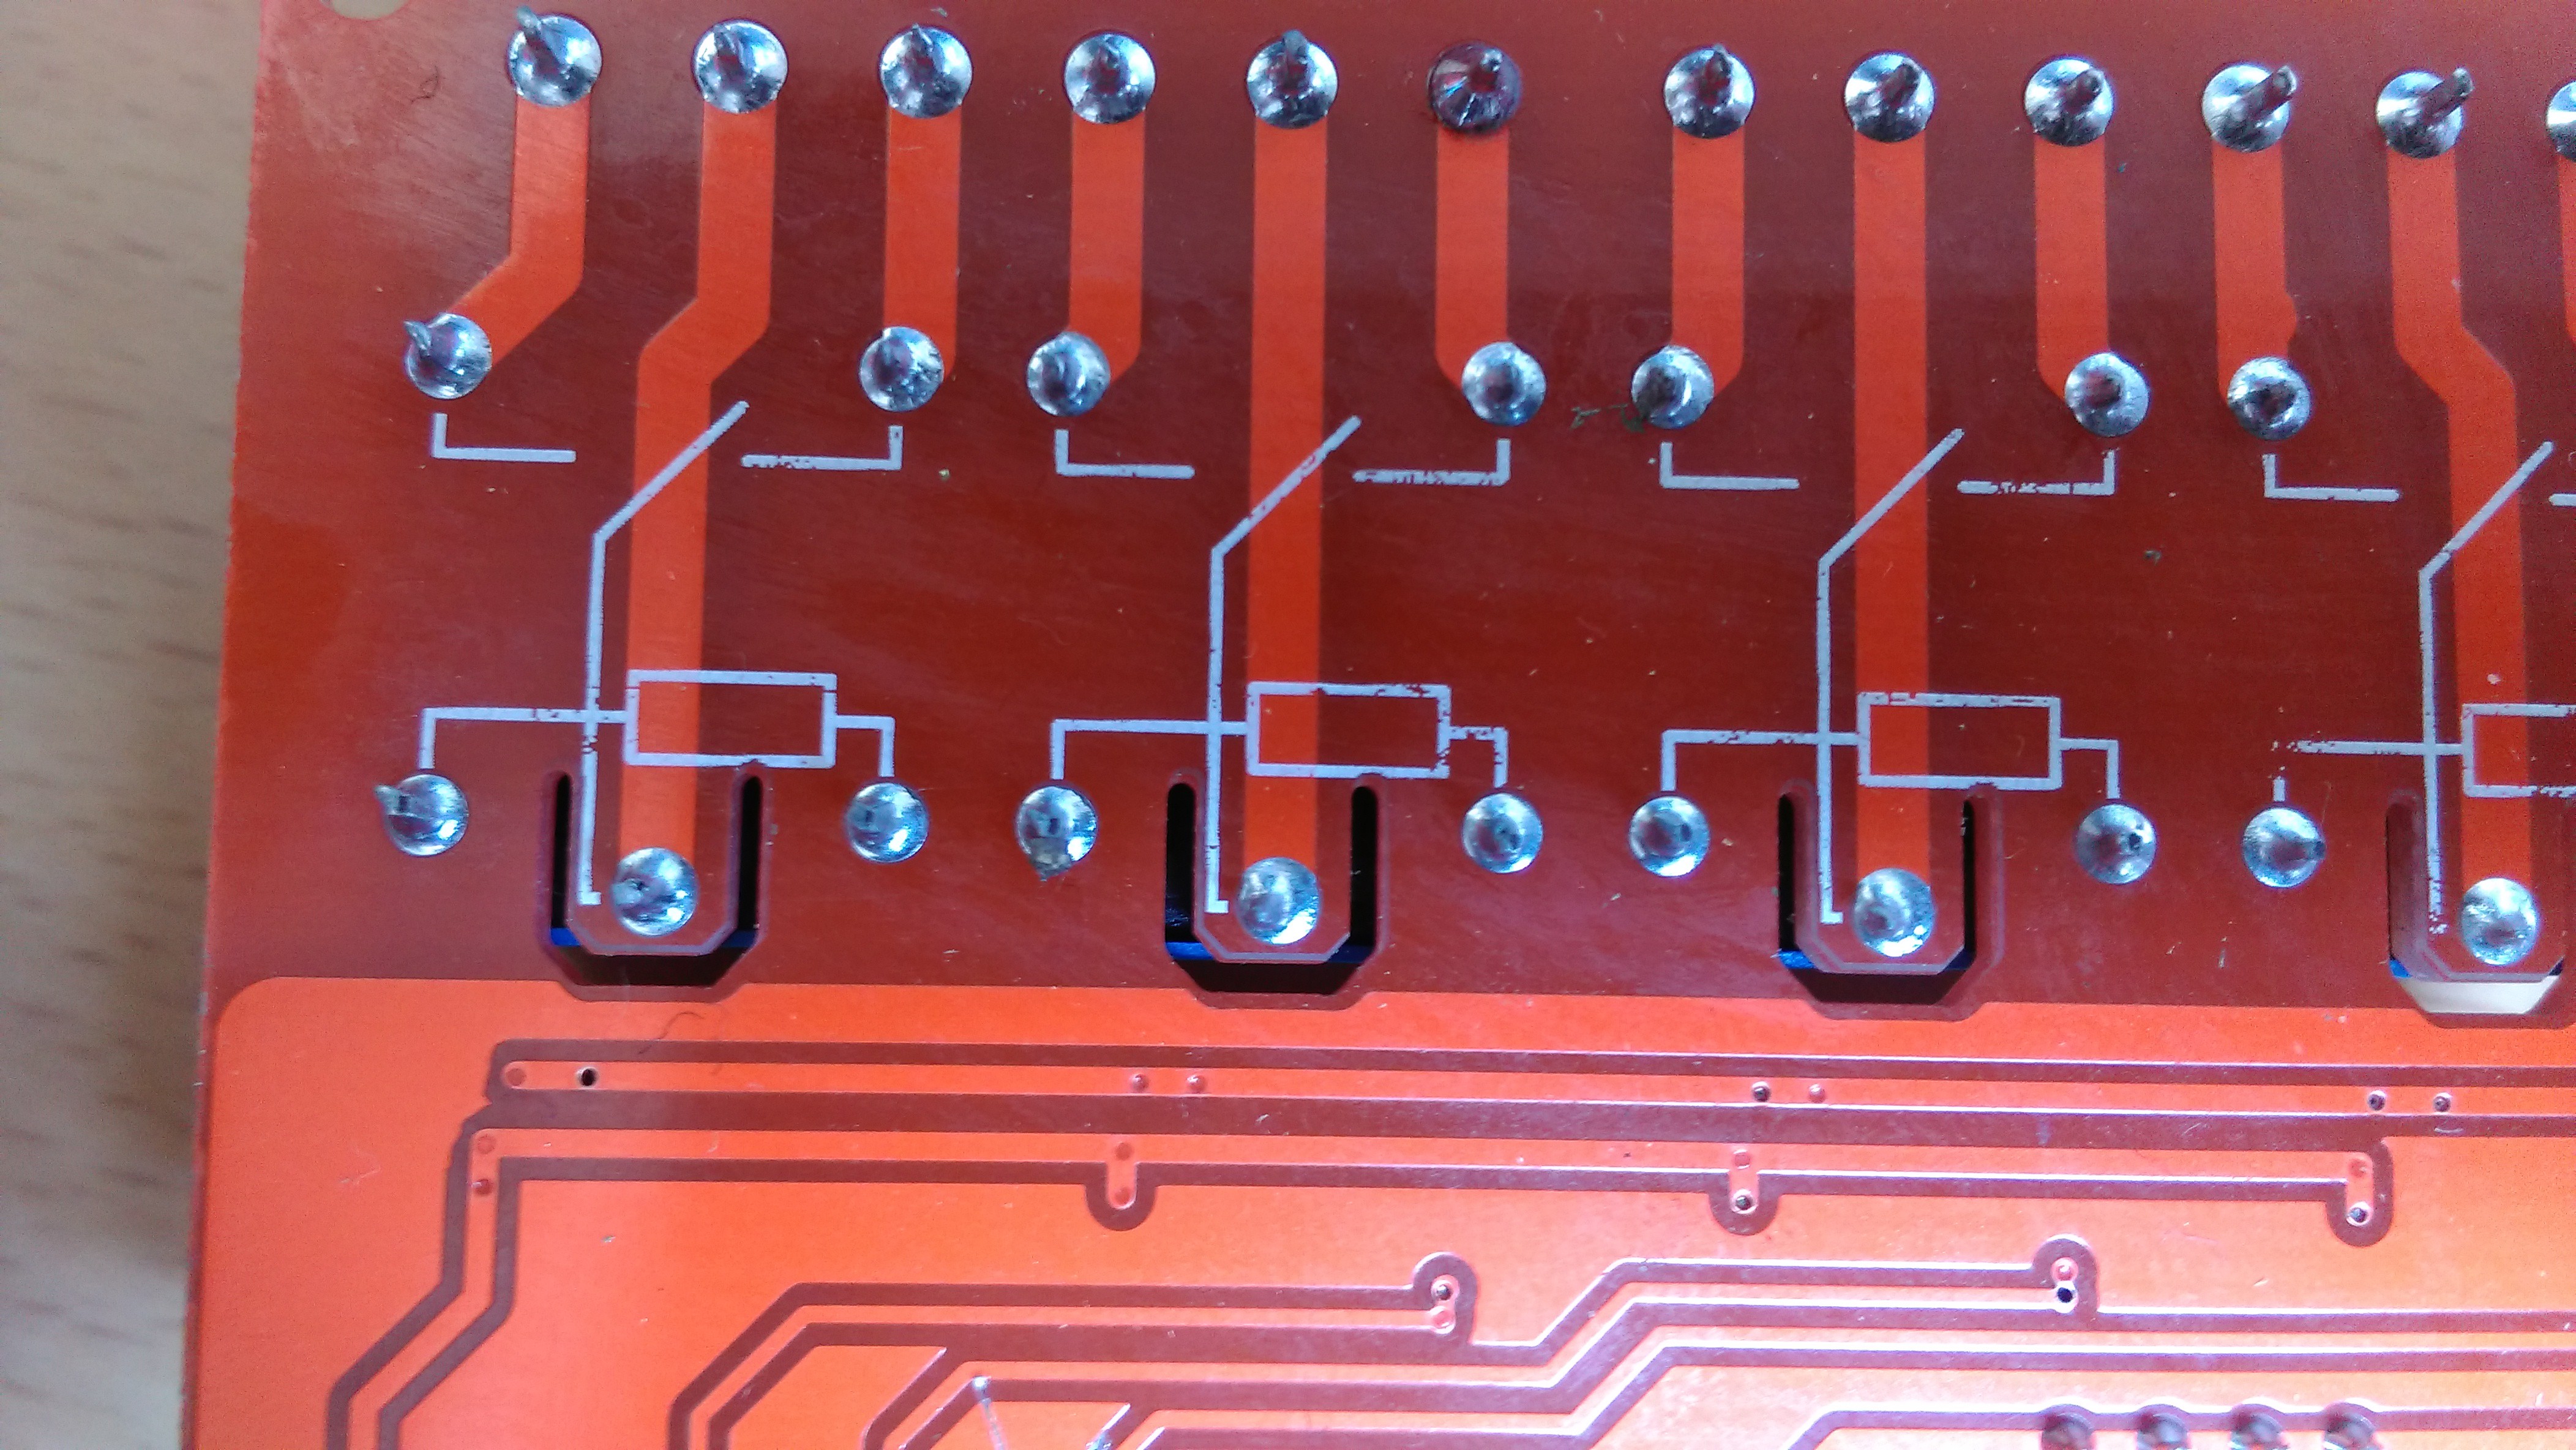
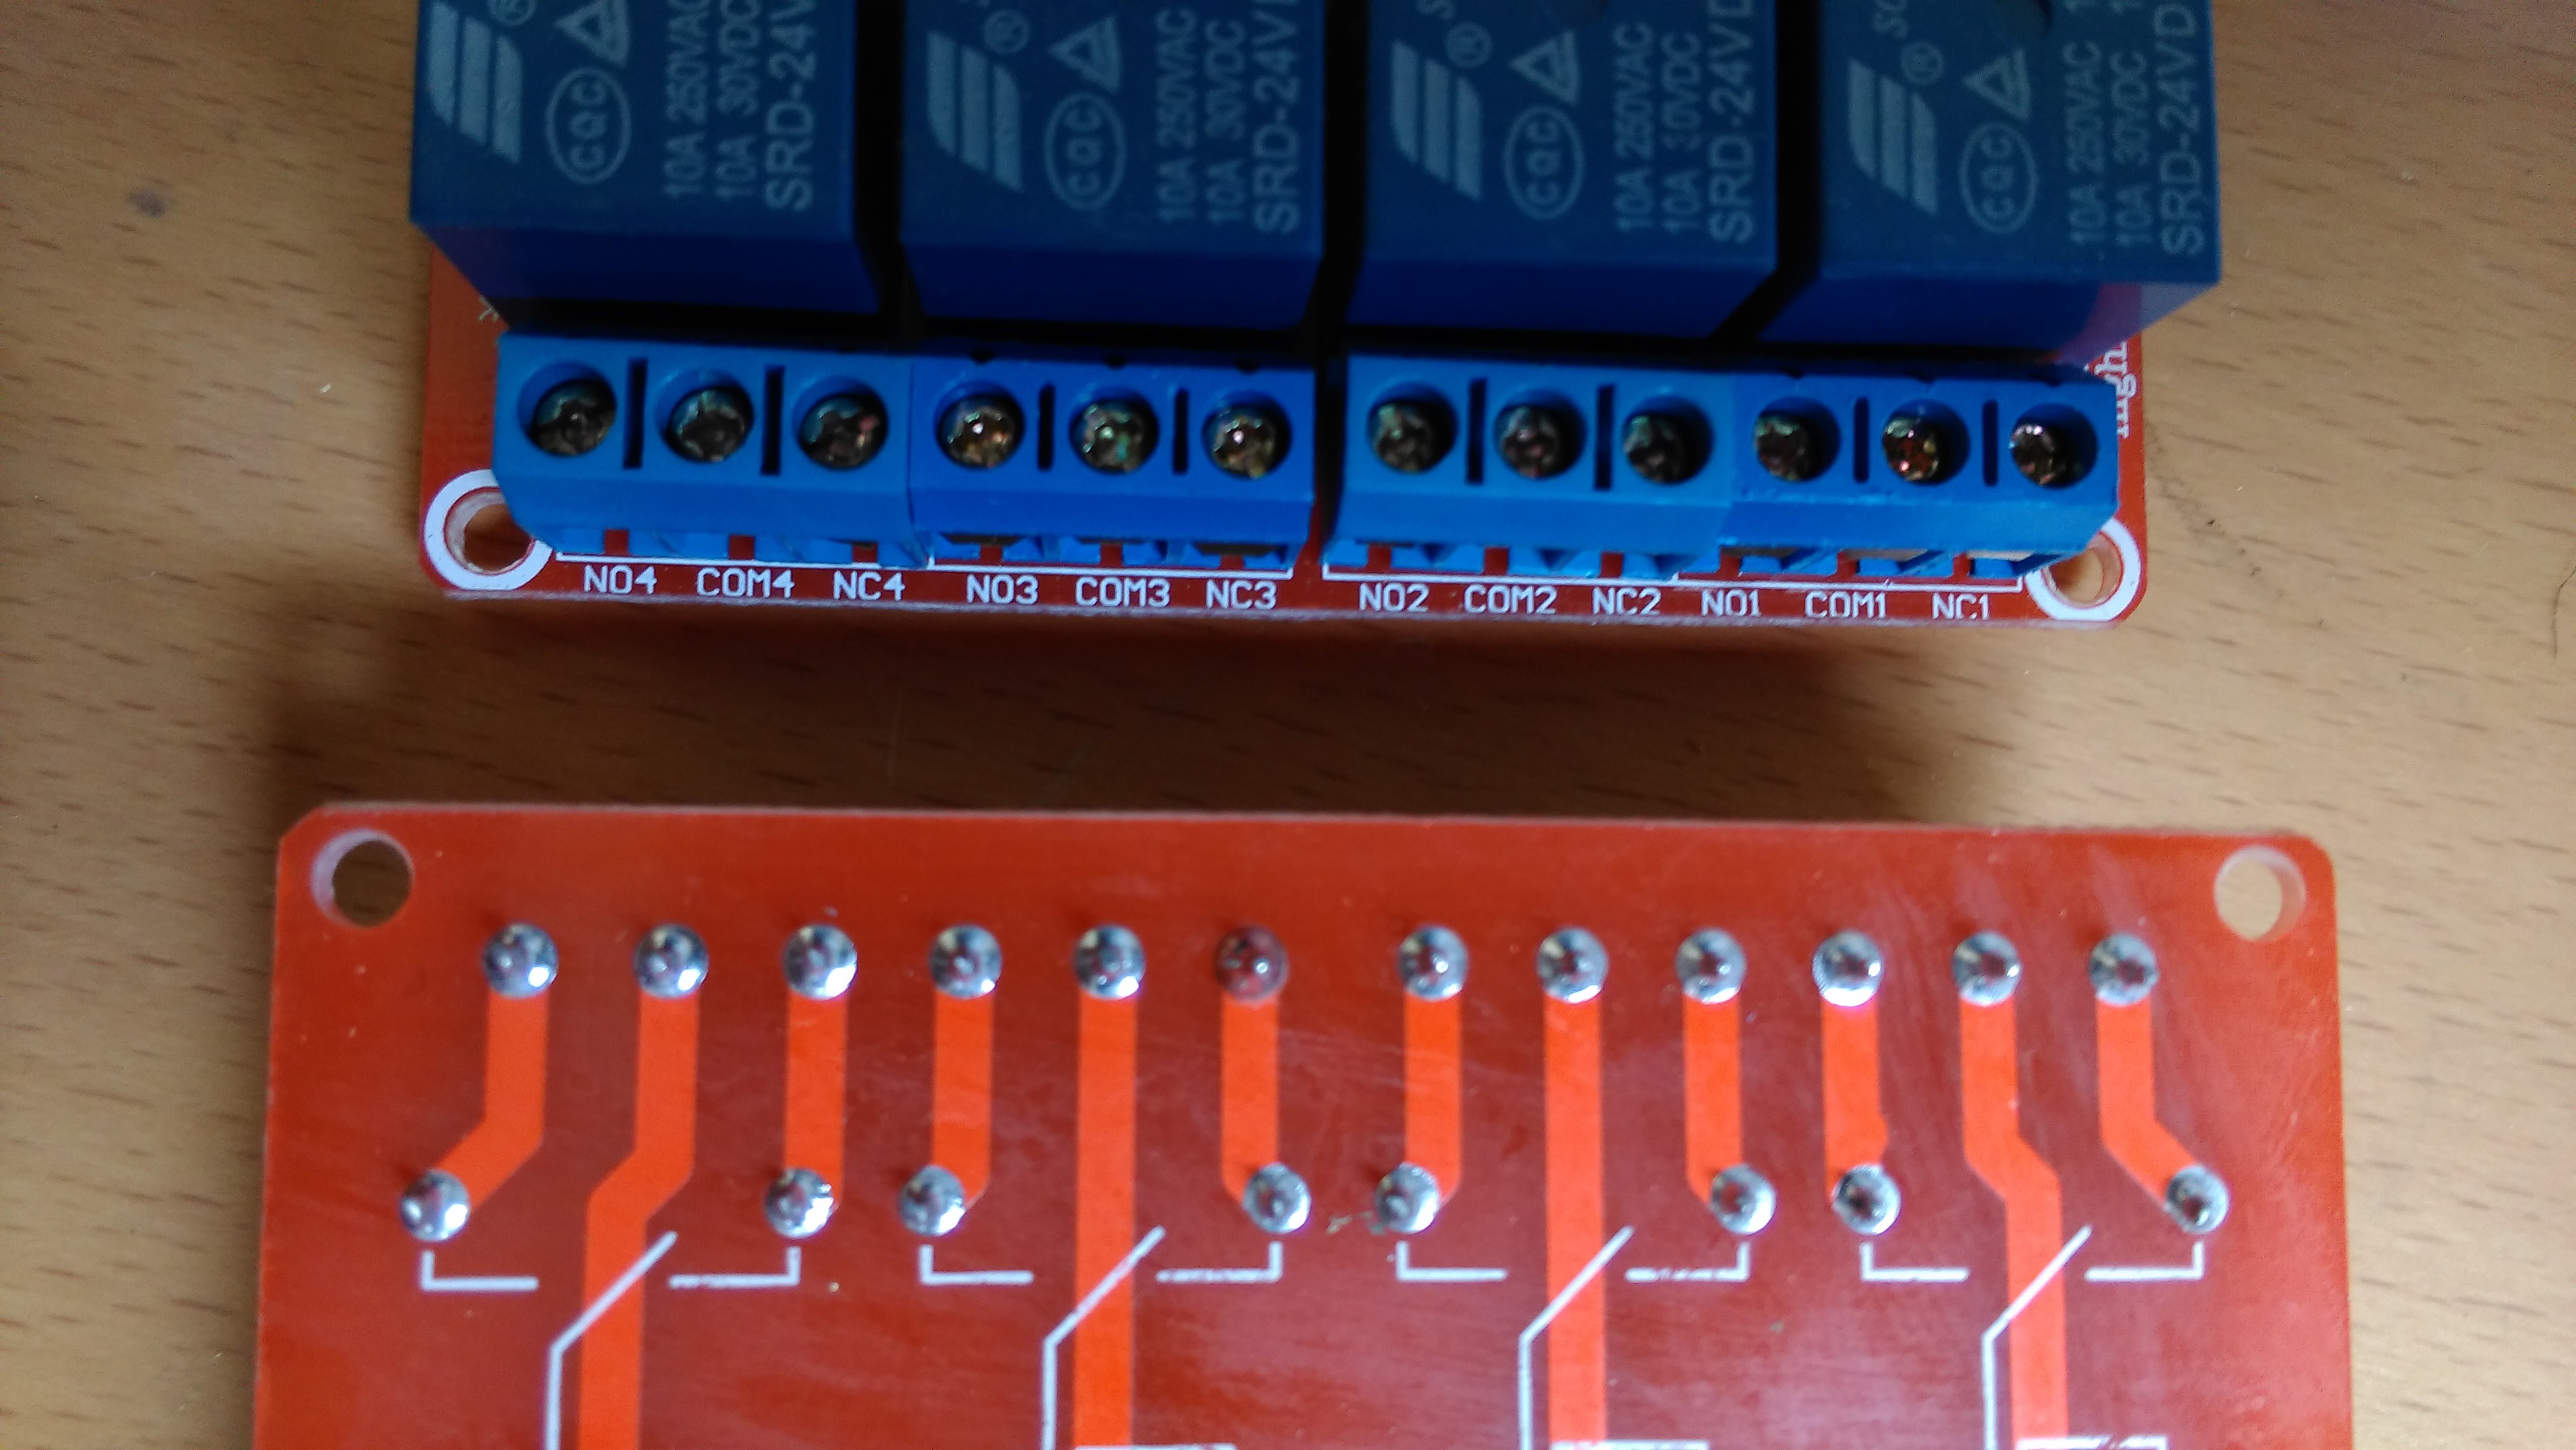
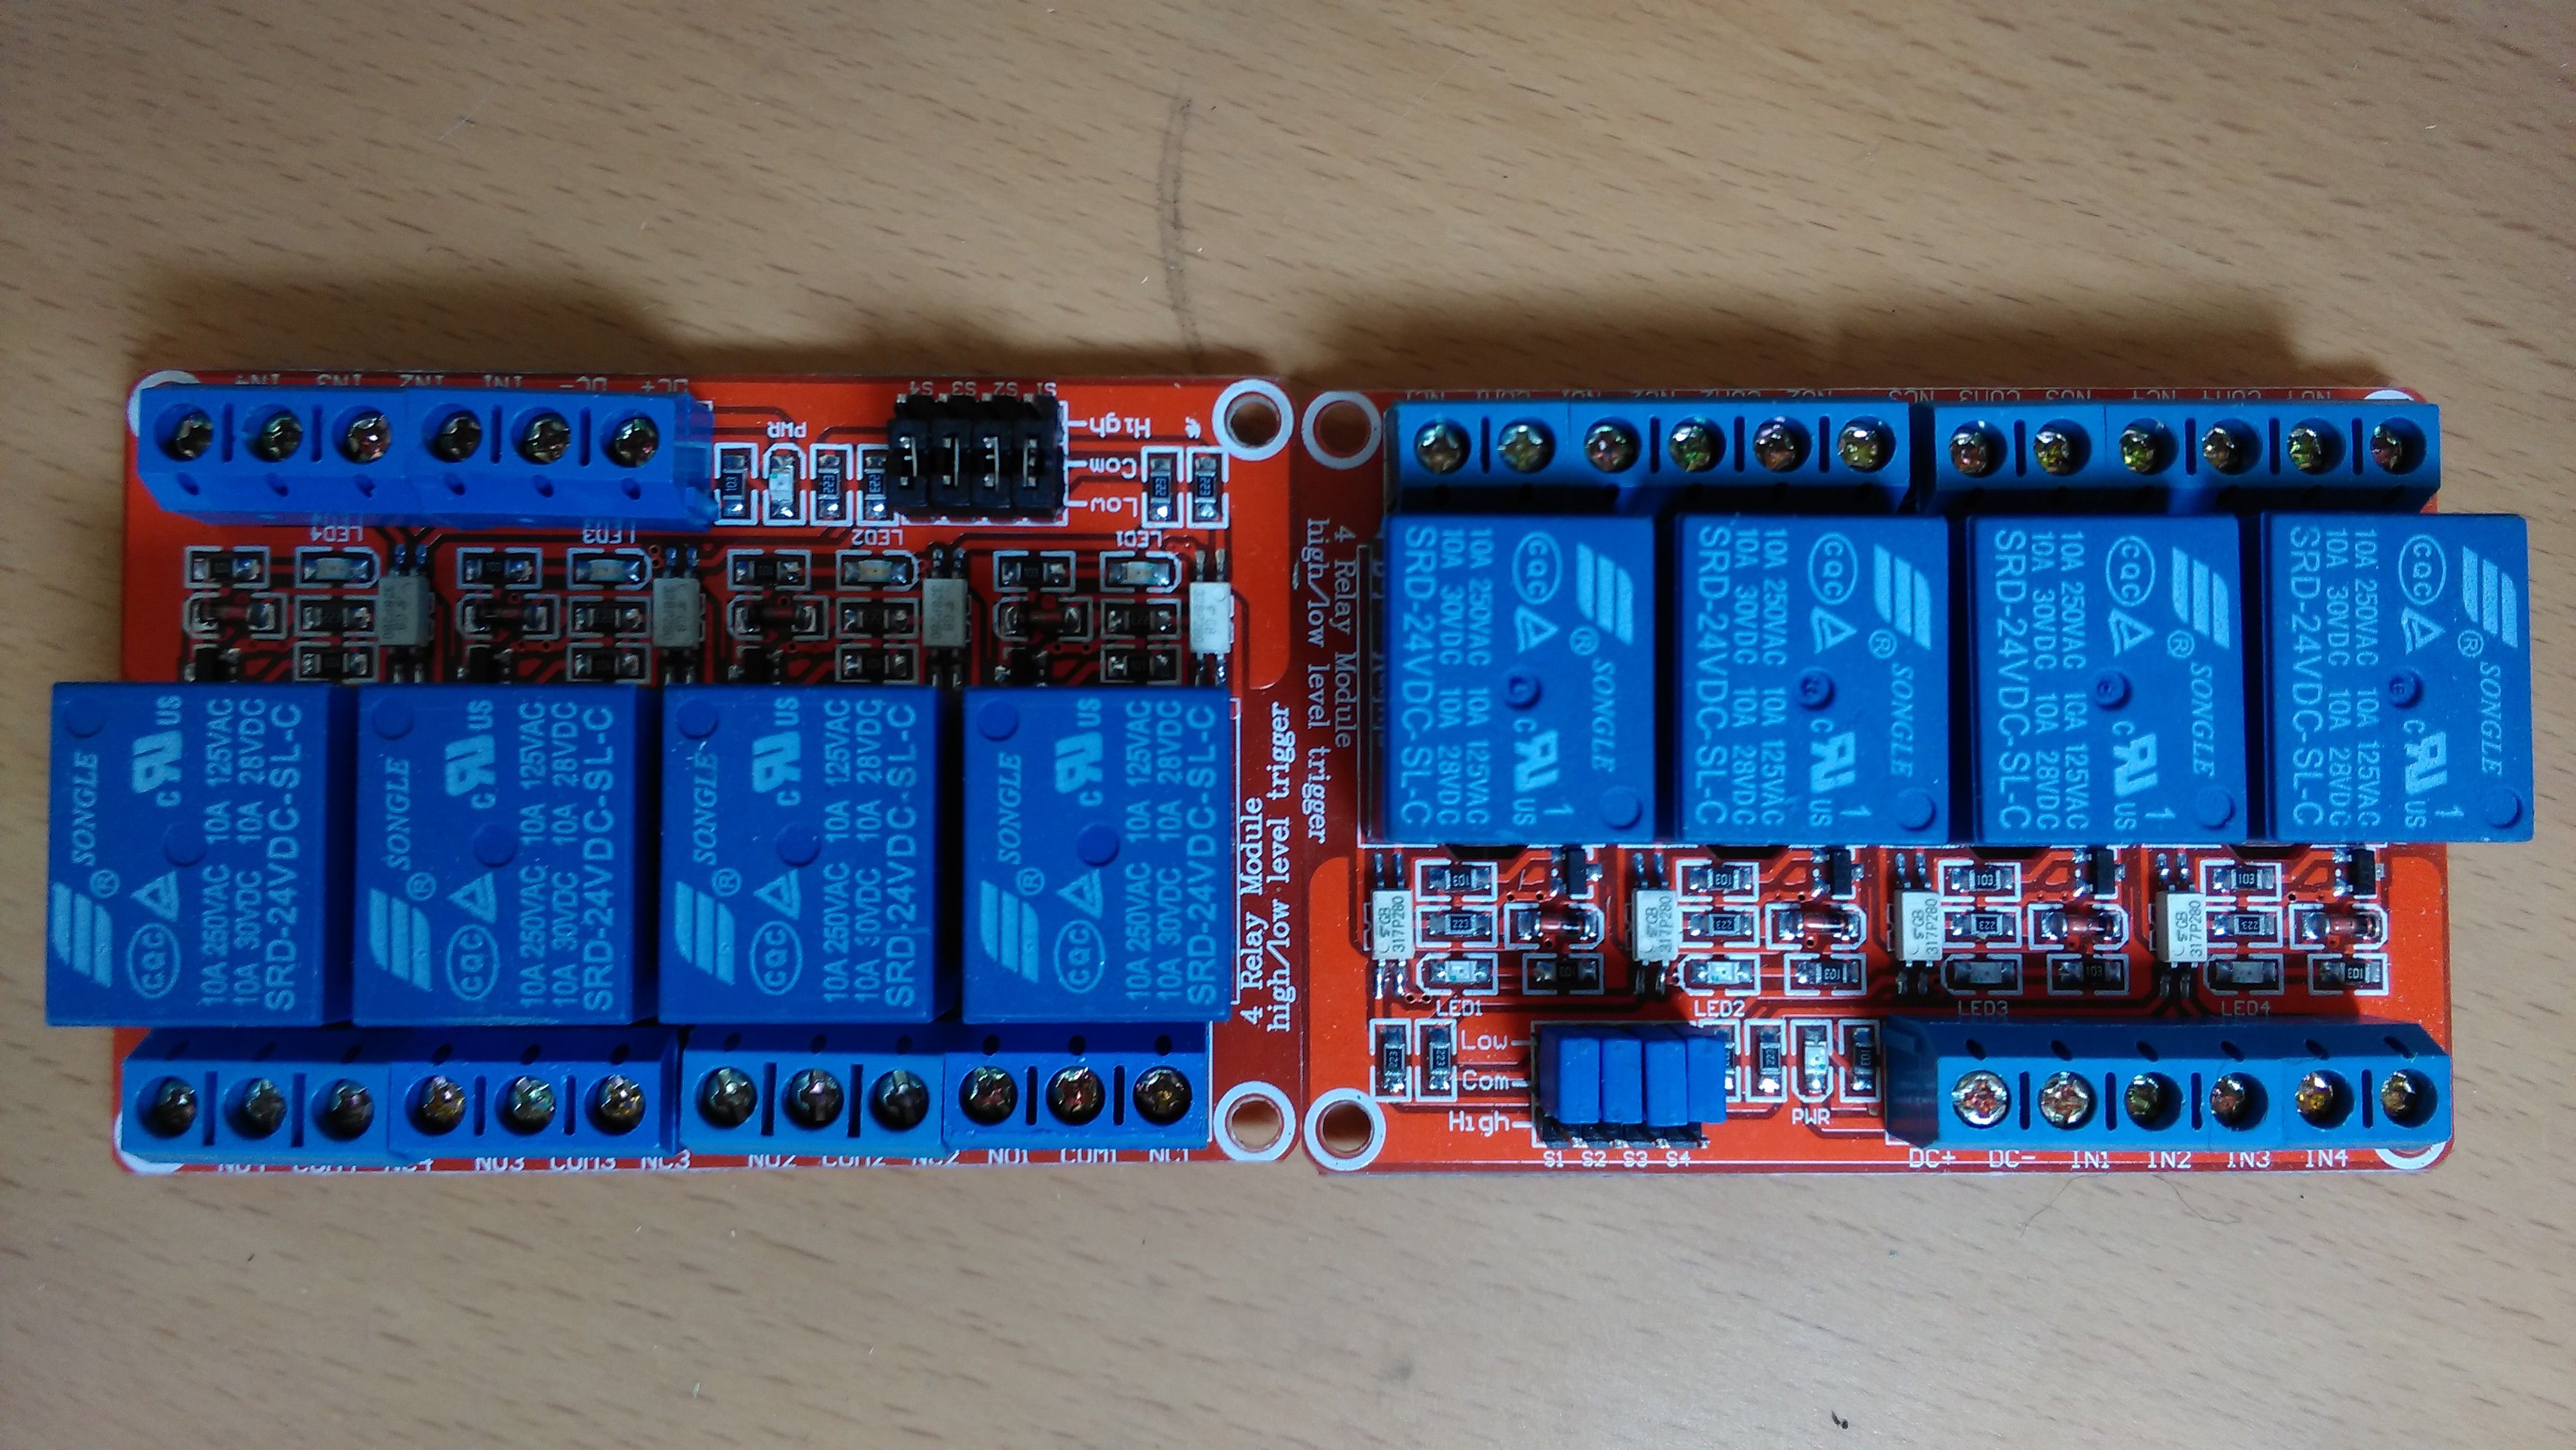
In an ideal world I'd find a nice 24v four relay board that will do the job without need of additional parts, I found one on ebay that looked about right so I ordered a couple for test. They took a while to arrive from China but I decided it was worth a punt to see if it would work out. The jury is still out on this, the boards themselves look fine in terms of track spacing and isolation:
![]()
![]()
![]()
![]()
Testing gives me similar data to the Pololu modules.
Here are the figures:
Testing of relay modules
Module Trigger voltage Trigger current 5v Pololu rly01a 5v 0.05mA 24v ebay module 10v 0.4mA Mounting the modules
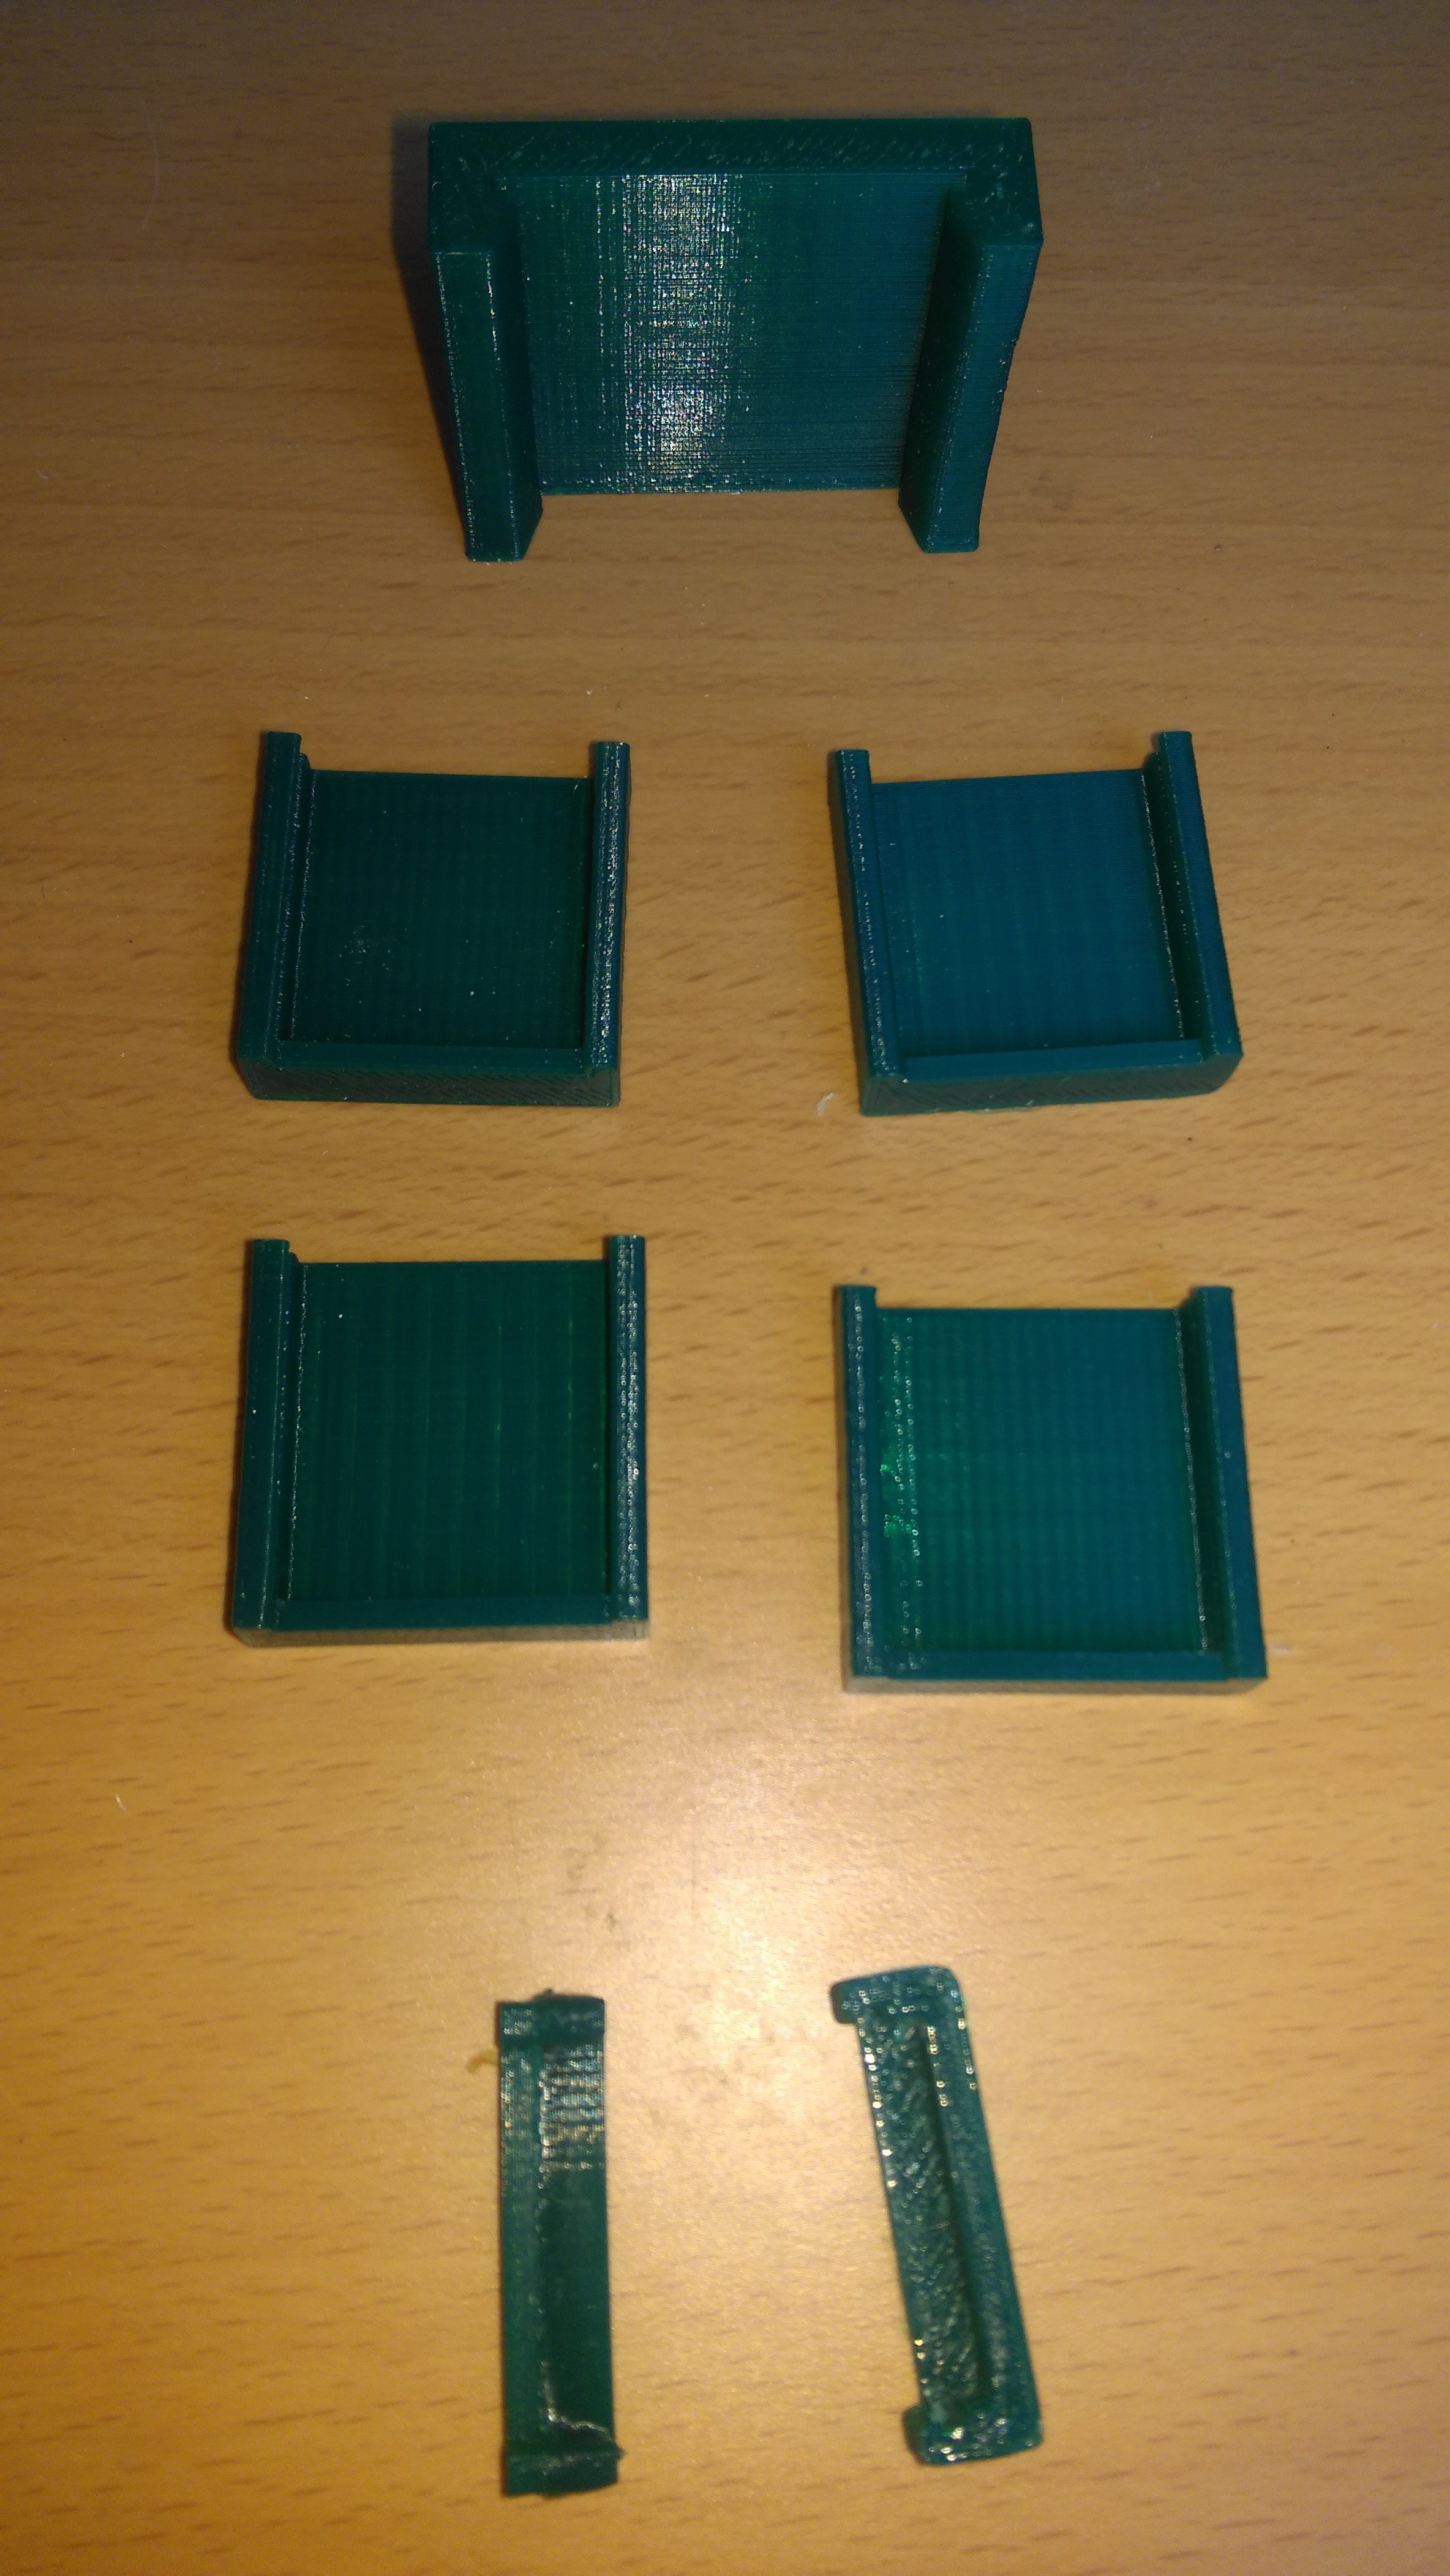
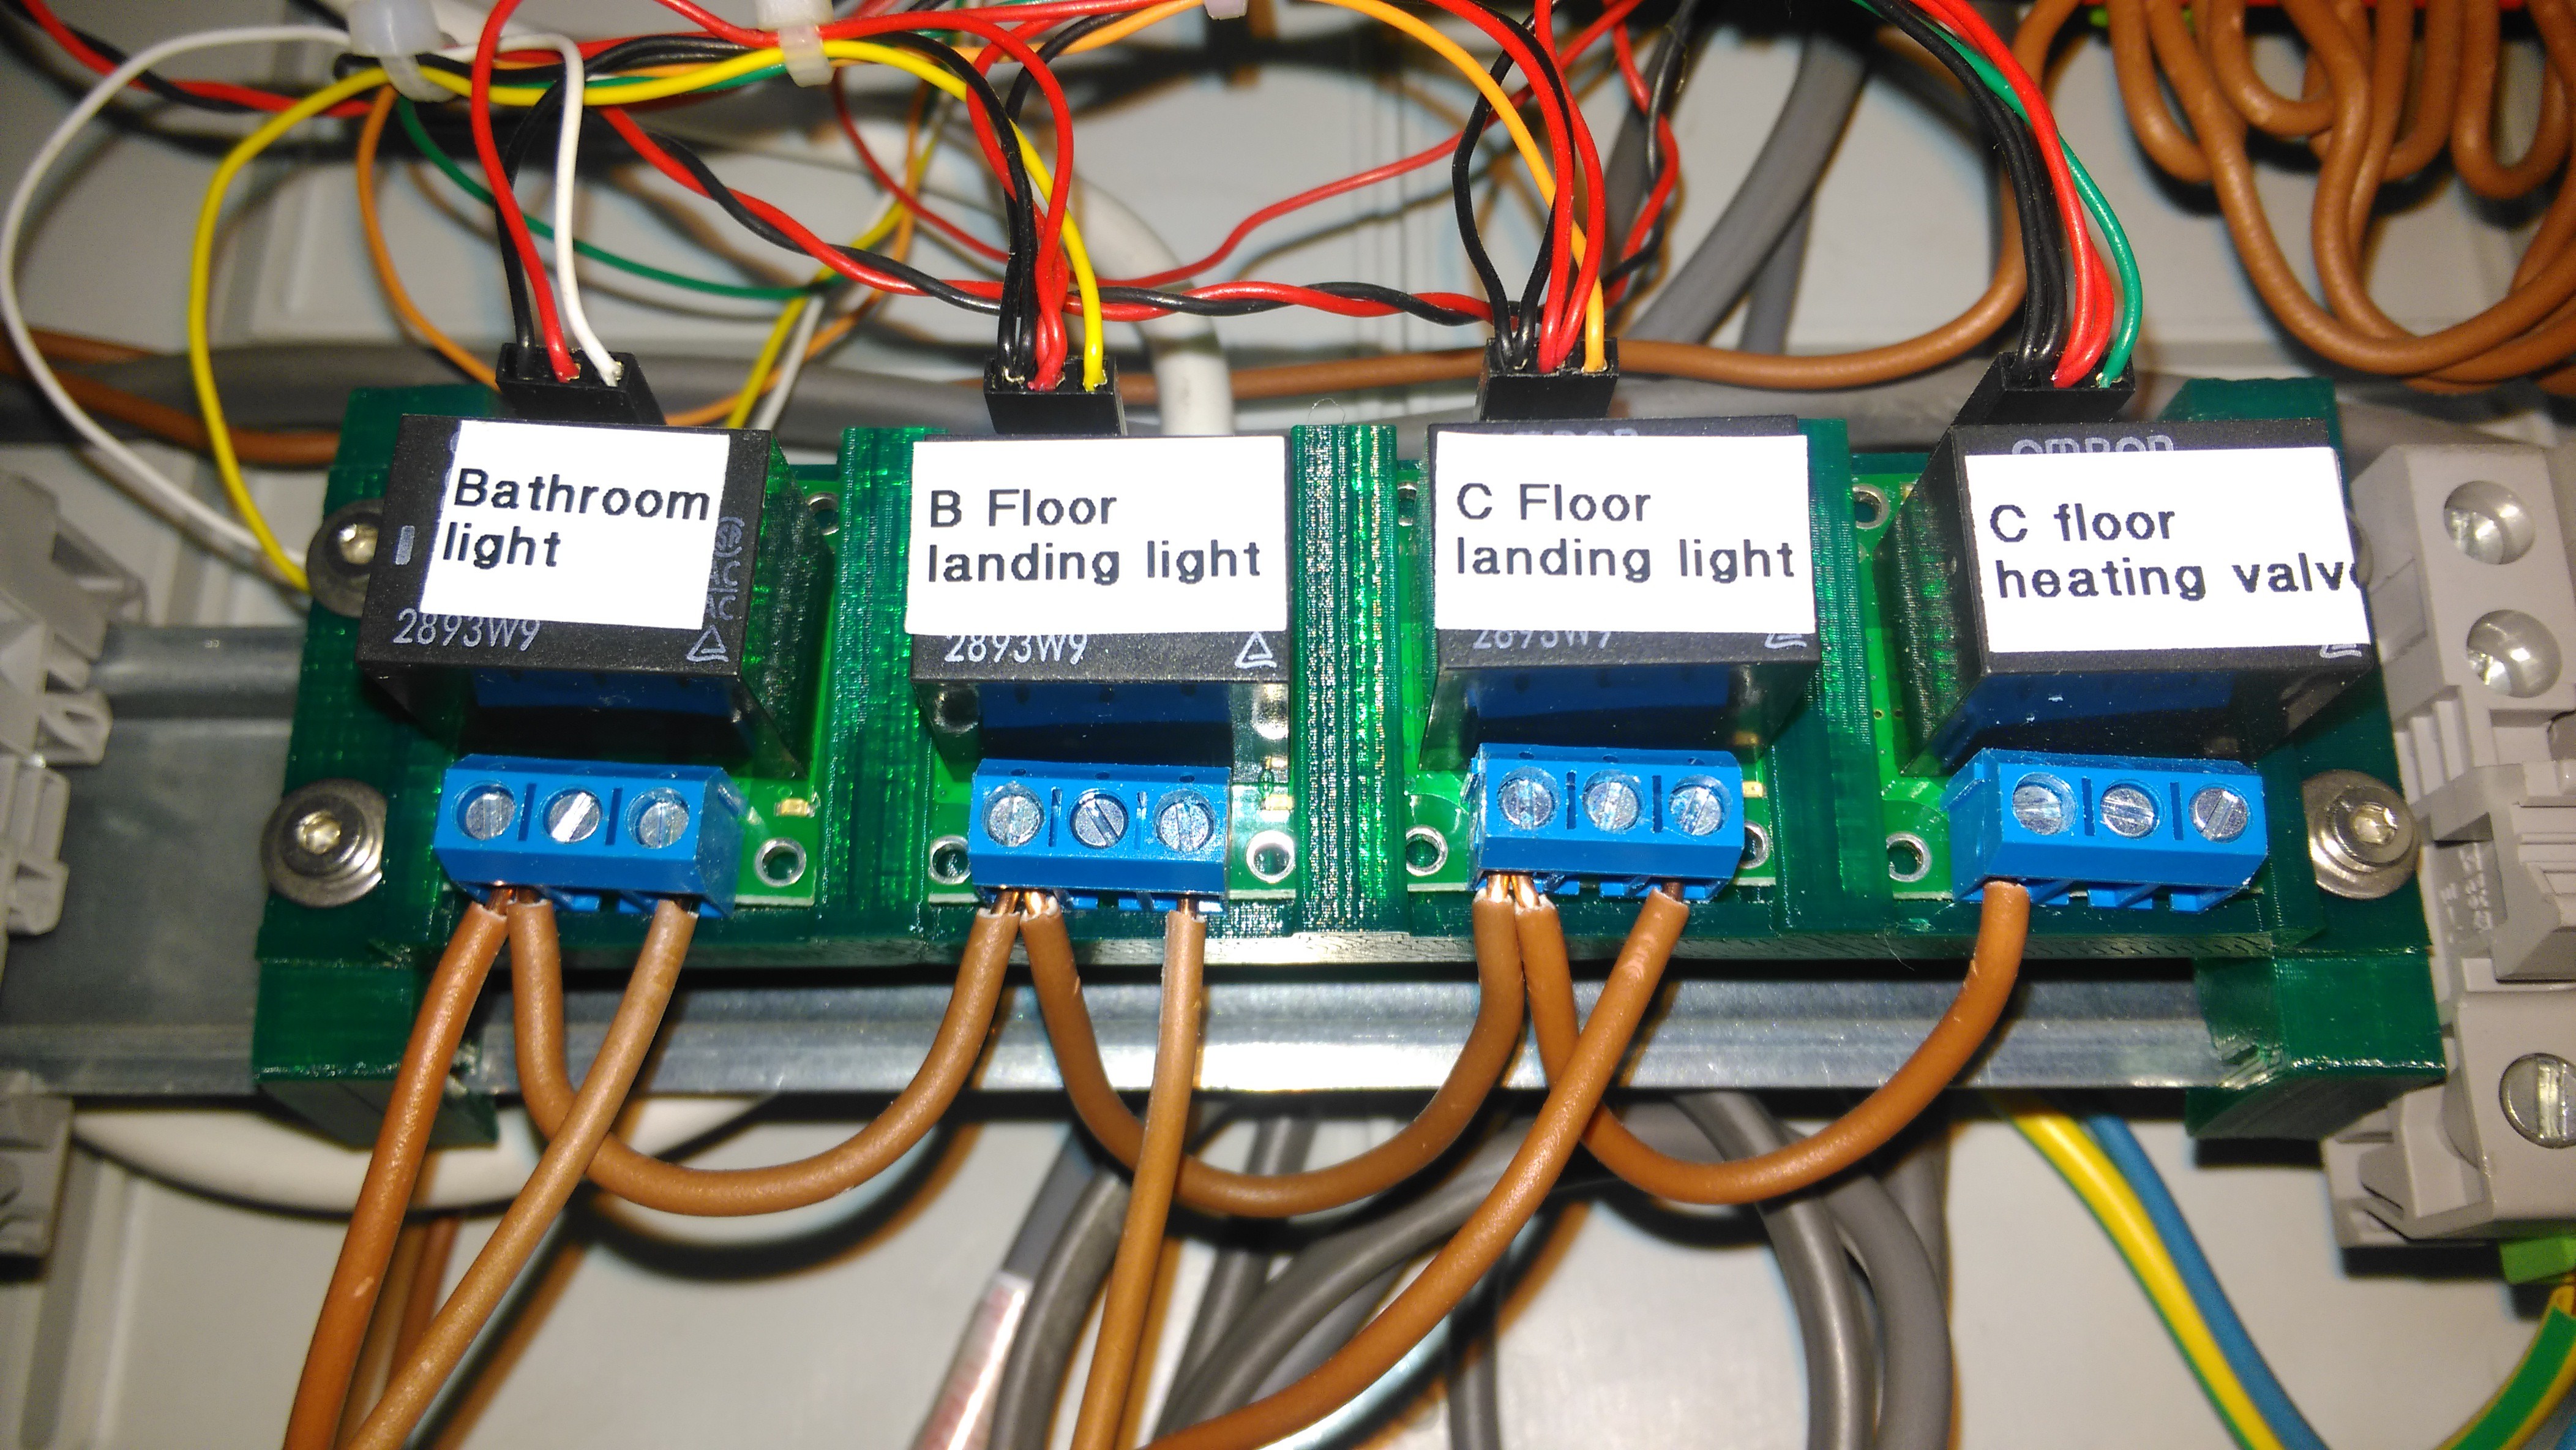
Unless the modules are designed for DIN rail use, your next problem is how to mount them. I'm a member of the Lancaster And Morecambe Makers (http://lamm.hackspace.org.uk/) and we have 3d printers, so I asked Tom to design me a holder for the four Pololu modules to DIN rail mount them. I've been poking him to write a blog post on it for a while but he's not gotten to it yet so I'll have to post for that when he gets his finger out :)
![]()
The top centre part is a DIN rail clip, the others are various iterations of single module holders.
![]()
And that's the four module holder with the relays installed and a DIN rail clip mounted at either end.
Software
Having checked the relay modules won't blow up your Miniserver or Extension, we've wired it all up and we're ready to program it. Lighting controller, input, output and we're done!
![]()
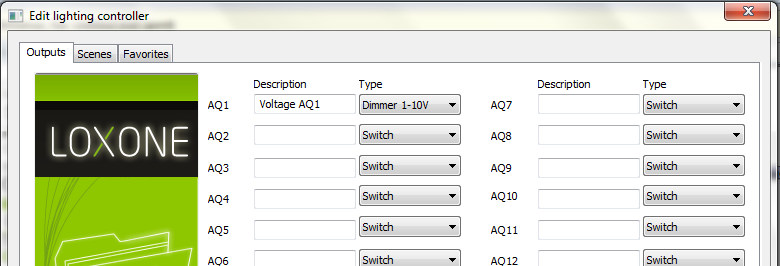
Actually, not so much. I started to get a headache at this point as I just couldn't work out why this didn't work as expected. When I originally mentioned that I was using Linux, I mentioned that there was a gotcha that affects the lighting controller block..... that's what we're seeing here. If I fish out a Windows machine and open the configuration, I can double-click the block and get more information on things like Outputs, Scenes and Favourites. Here's the outputs tab for you to guess at the issue:
![]()
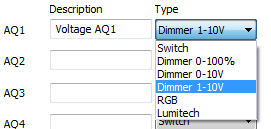
The issue is that if you connect a lighting controller block to a digital output, it knows that the digital output is a 'Switch and can only be in one of two states. If you connect it to an analogue output, then it assumes that the thing you're connecting it to is a 'Dimmer 1-10V'. For this to work we need to change that to be 'Switch' or the thing will behave really oddly and you'll spend a couple of hours trying to work out what the hell is wrong. I encourage you to take a look at the Testing area of Loxone Config and specifically the 'Start Liveview using the current file', had I done this sooner I would have seen the voltage on the output gradually rising while I was pressing the button rather than going straight from zero to five volts.
![]()
![]()
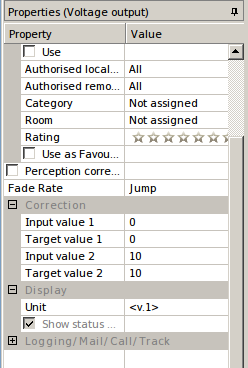
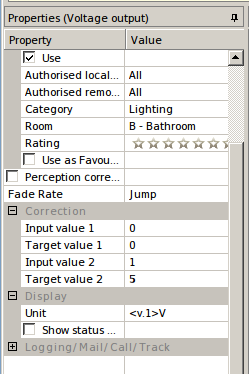
Five volts? But the analogue input goes up to ten! Yes, and if you allow the analogue output voltage to go up to ten, the bloody 5v relay module brns out in our test environment on the bench. Let's not do that, replacing hardware is expensive. To limit that to five volts we need to change configuration on each of the analogue outputs:
Here's the defaults for an output:
![]()
And here's our changed one:
![]()
Specifically you're looking to change the following:
- Input value 2 - 1
- Output value 2 - 5
- Unit - <v.1>V
Remember to do this for each of your outputs and hey presto you just won four additional mains capable outputs!
This hack isn't for everyone, unless you understand how the testing was performed in order to check on current limits, you could seriously damage your Loxone equipment. Don't attempt this without checking the kit you buy thoroughly for this and for safety. I've chosen to use the Pololu modules from UK supplier Cool Components for my first attempt at this, but I will be trying the 24v modules from China with my next expansion module installation. When I do that the 5v configuration on the output won't be needed and neither will the switched mode PSU module which looks unsightly.
My reasons may not be your reasons.
Thanks to people who've commented and poked me to remind me I should be posting more, it's good to know that people are reading and enjoying my notes :)
Next time we'll talk about cabling and how to make it look fabulous!
- Loxone expansion unit
-
What shall we wrap it all up in?
06/04/2015 at 21:44 • 2 commentsAny enclosure needs to be easy to access yet provide enough space to get all of our cables in and out without being too big. A tough challenge!
Once our technology solution is chosen, we have to mount it, cable it, make it all look pretty and label it. What's the best enclosure to buy for all of that? We're looking for DIN rail to mount our Loxone. Loxone are now endorsing an enclosure from Future Automation which wasn't an option when I was sourcing components:
![]()
Details are at http://www.futureautomation.co.uk/Product/Details/LXN
My only thoughts on reviewing this enclosure is that it has the potential to mix low voltage (Voltage Band 1) and mains (Voltage Band 2) in the same cable containment. That's dependent on what modules you install where and how you position them.
15th and 16th edition of the wiring regs makes specific mention of cables sharing the same containment (see https://www.tlc-direct.co.uk/Book/6.6.1.htm). We can only share containment if "every cable is insulated for the highest voltage present, or each conductor in a multicore cable is insulated for the highest voltage present". So our low voltage signalling cable for the switches has to be insulated to 230v AC in order to share containment. Loxone even recommend this in their blog post at http://blog.loxone.com/enuk/how-to-lay-out-your-smart-home-distribution-board/ so if you're going to use one of these distribution boards be aware of that and make sure you follow the recommendations about keeping signalling one side and mains the other.
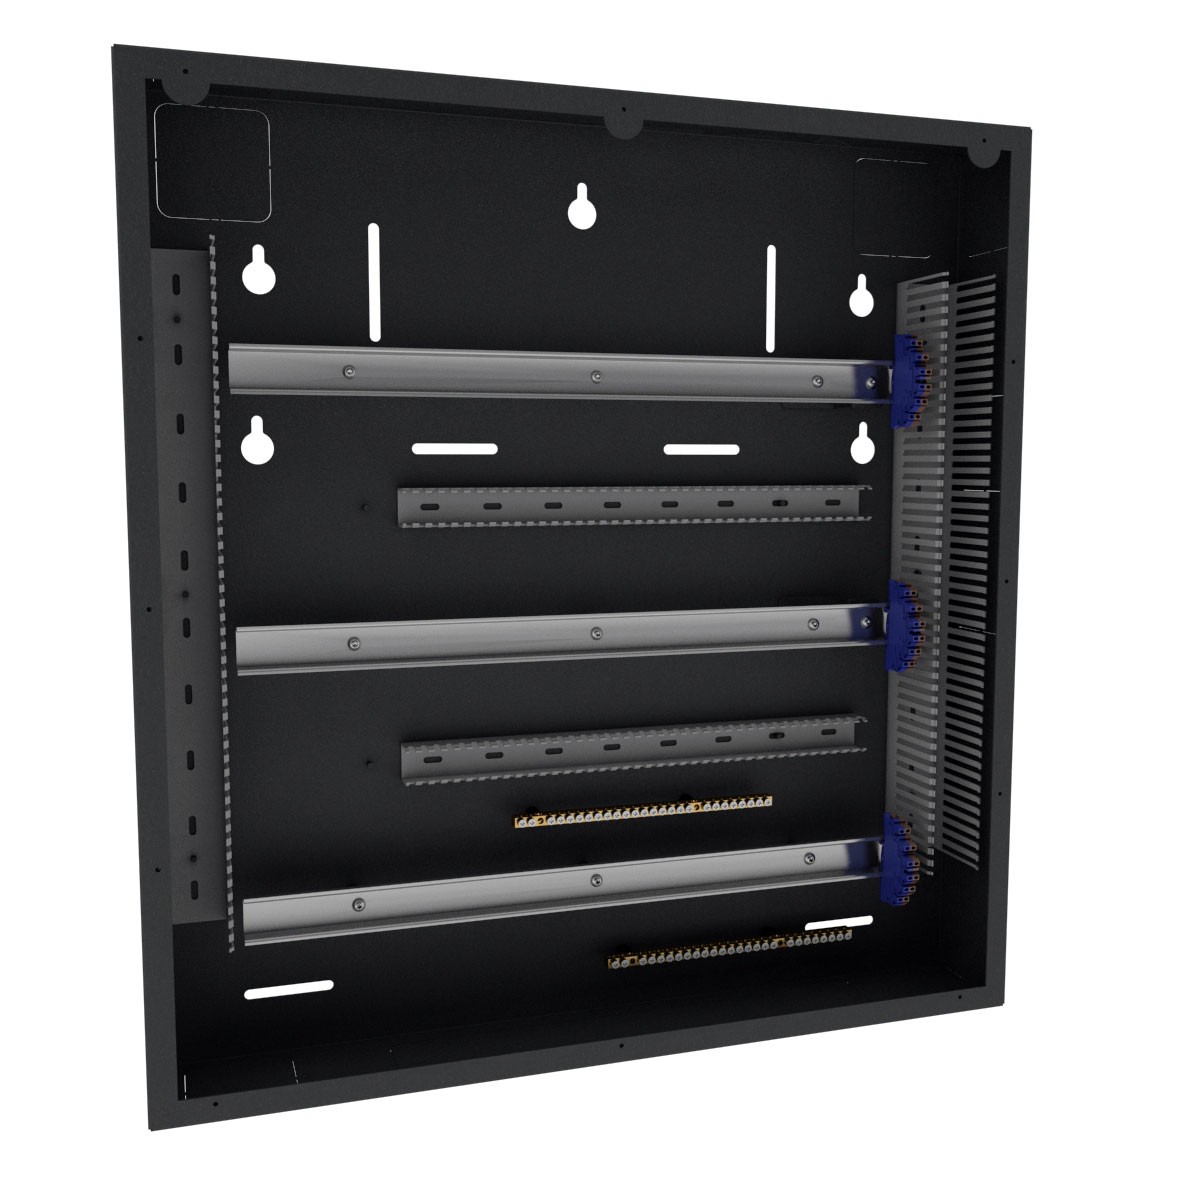
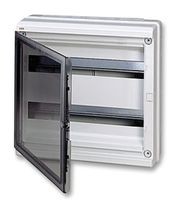
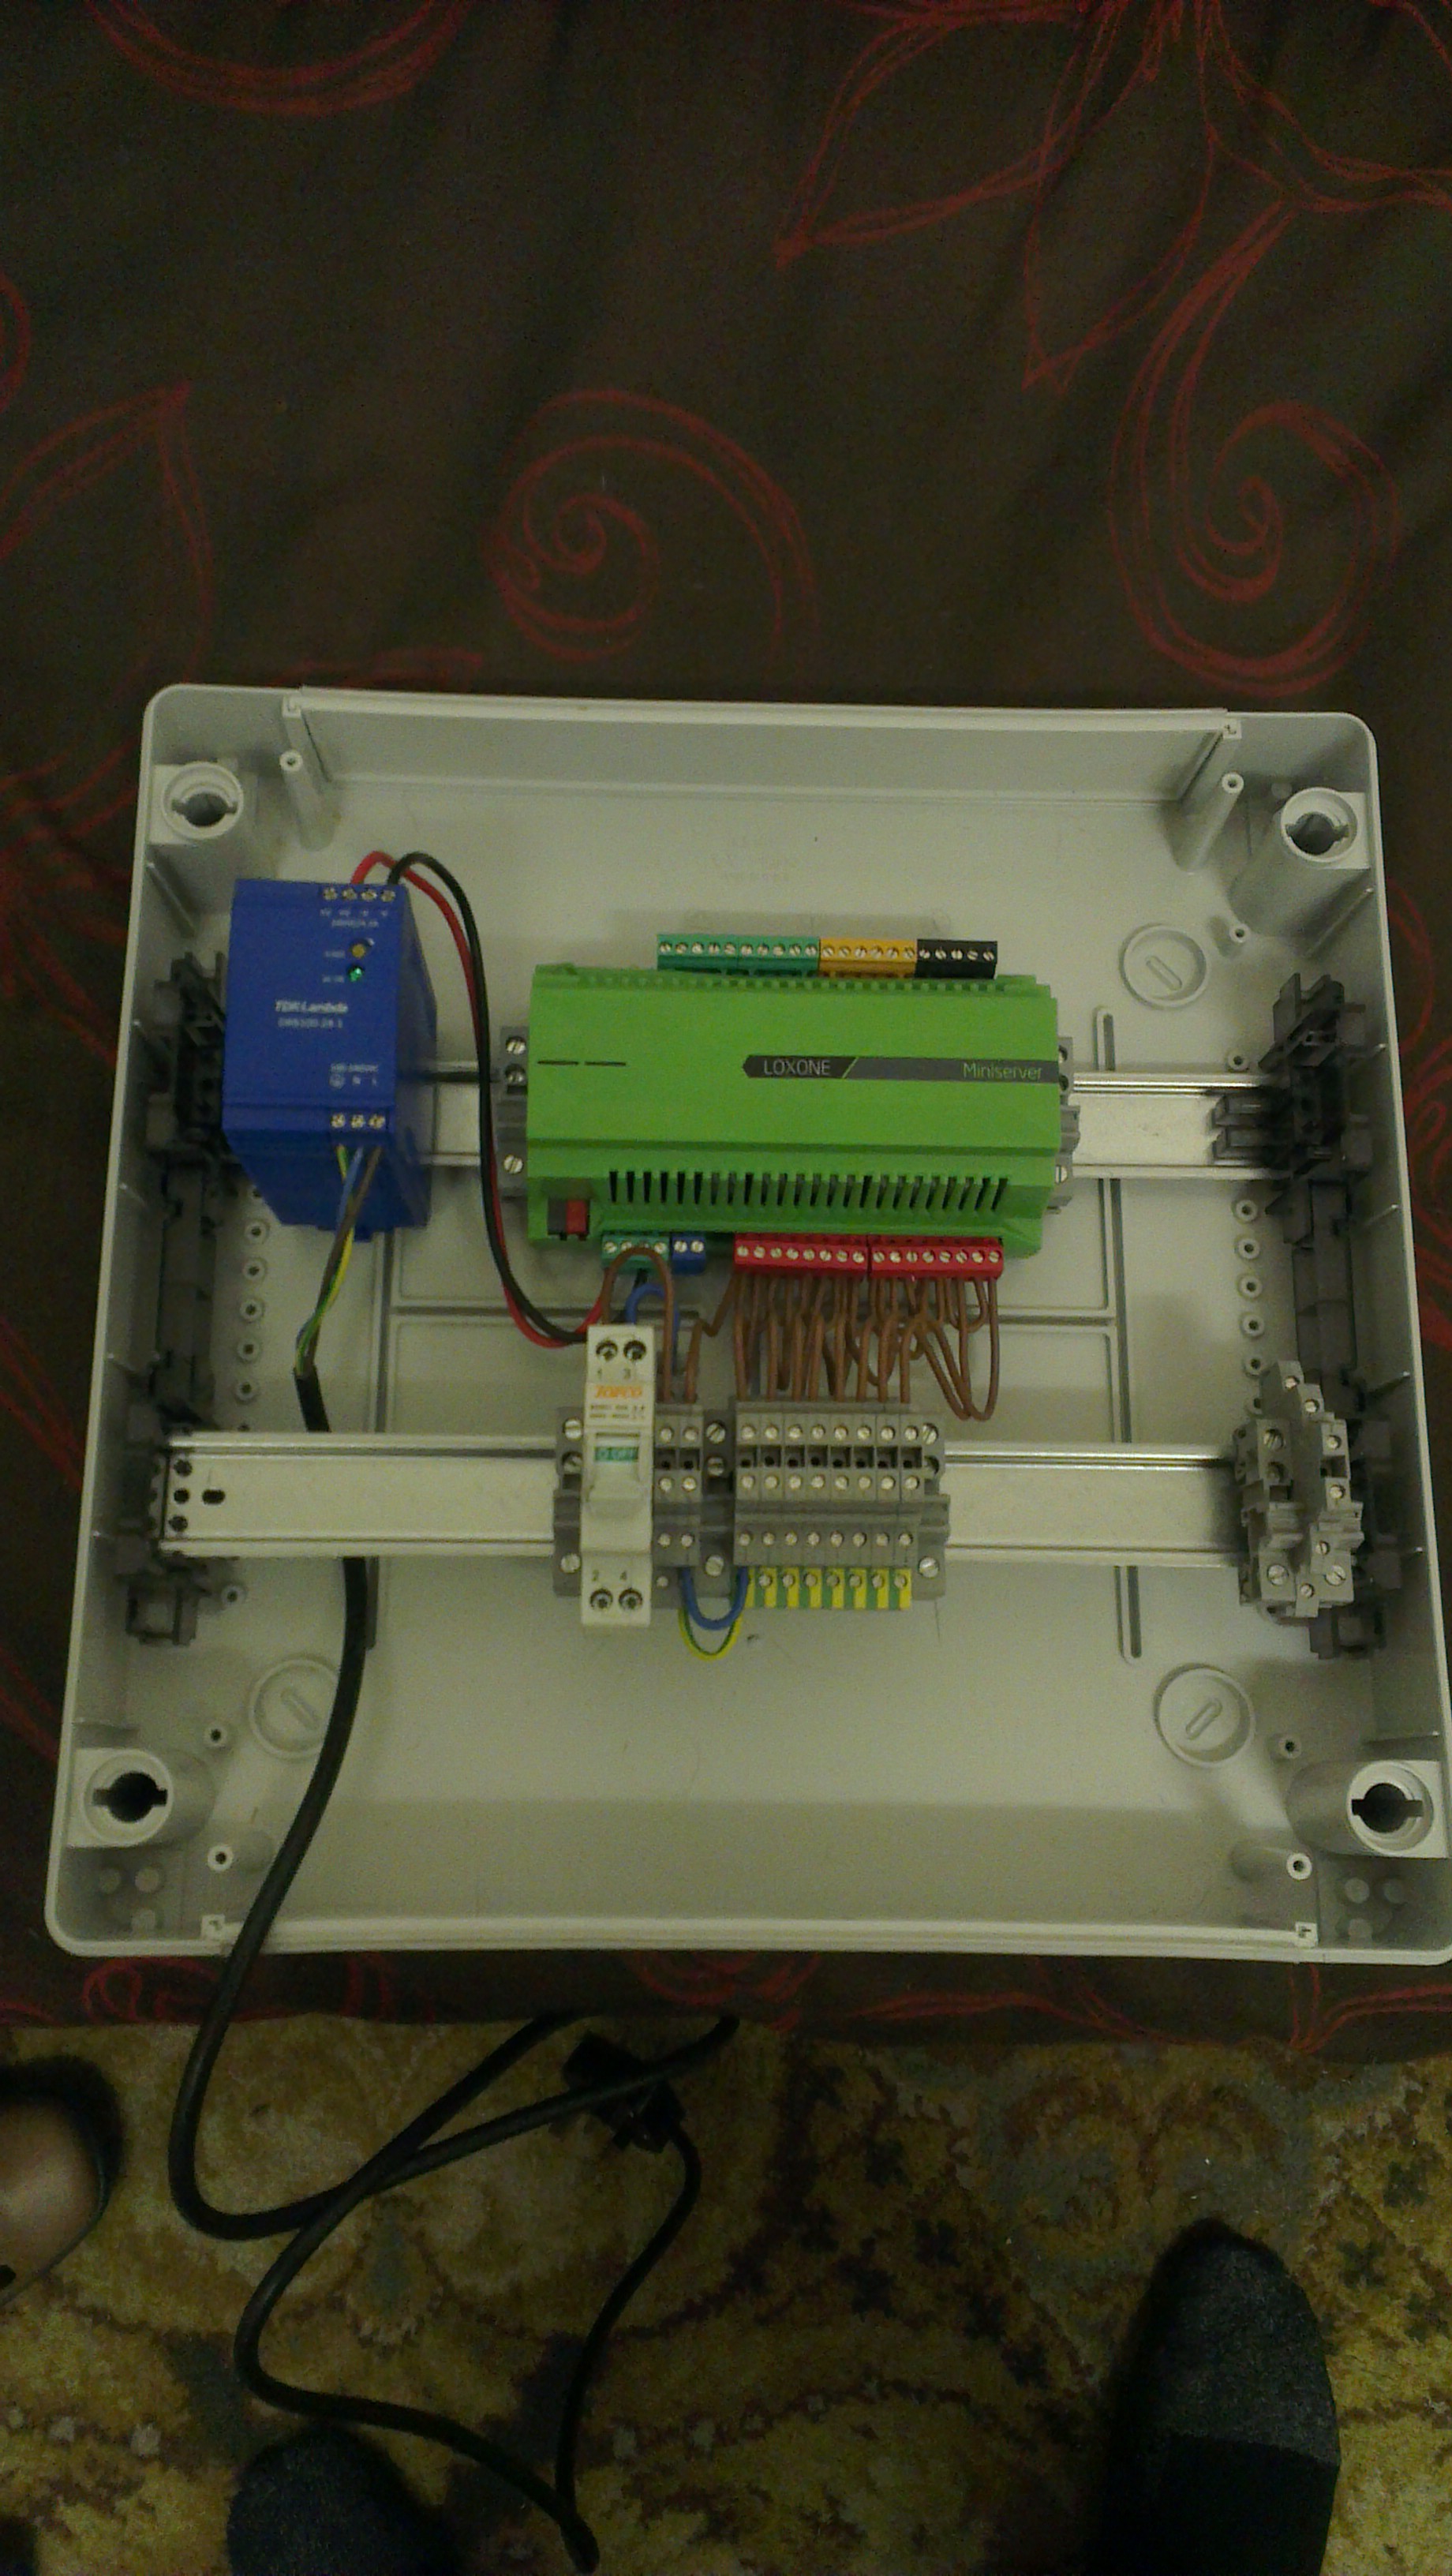
I chose to use an ABB Control 12755, which is not a choice I would recommend. At 36 modules and measuring in at 390 x 370 x 140mm it's also IP65. It's overkill with a capital O, and it created some of it's own interesting issues.
![]()
I opted for a large enclosure believing that it would make the task of cabling easier, but in retrospect it made it harder. The ABB range offers bus rails for this box, but good luck trying to find them to buy in the UK.
No bus rails leaves us with a couple of choices, we can add DIN mount bus rails or we can use terminal blocks, I went with terminal blocks. Again, this is not a choice I would recommend. These are the terminal components I used:
- Phoenix Contact 2715979 DIKD1.5 Through termination from MCB
- Phoenix Contact 2717016 DOK1.5 actuator for light fittings
- Phoenix Contact 2715940 Terminal block insertion bridge EB 80-DIK BU (Blue)
- Phoenix Contact 2715788 Terminal block insertion bridge EB 80-DIK WH (White)
- Phoenix Contact E/UK End clamp, DIN rail mount
![]()
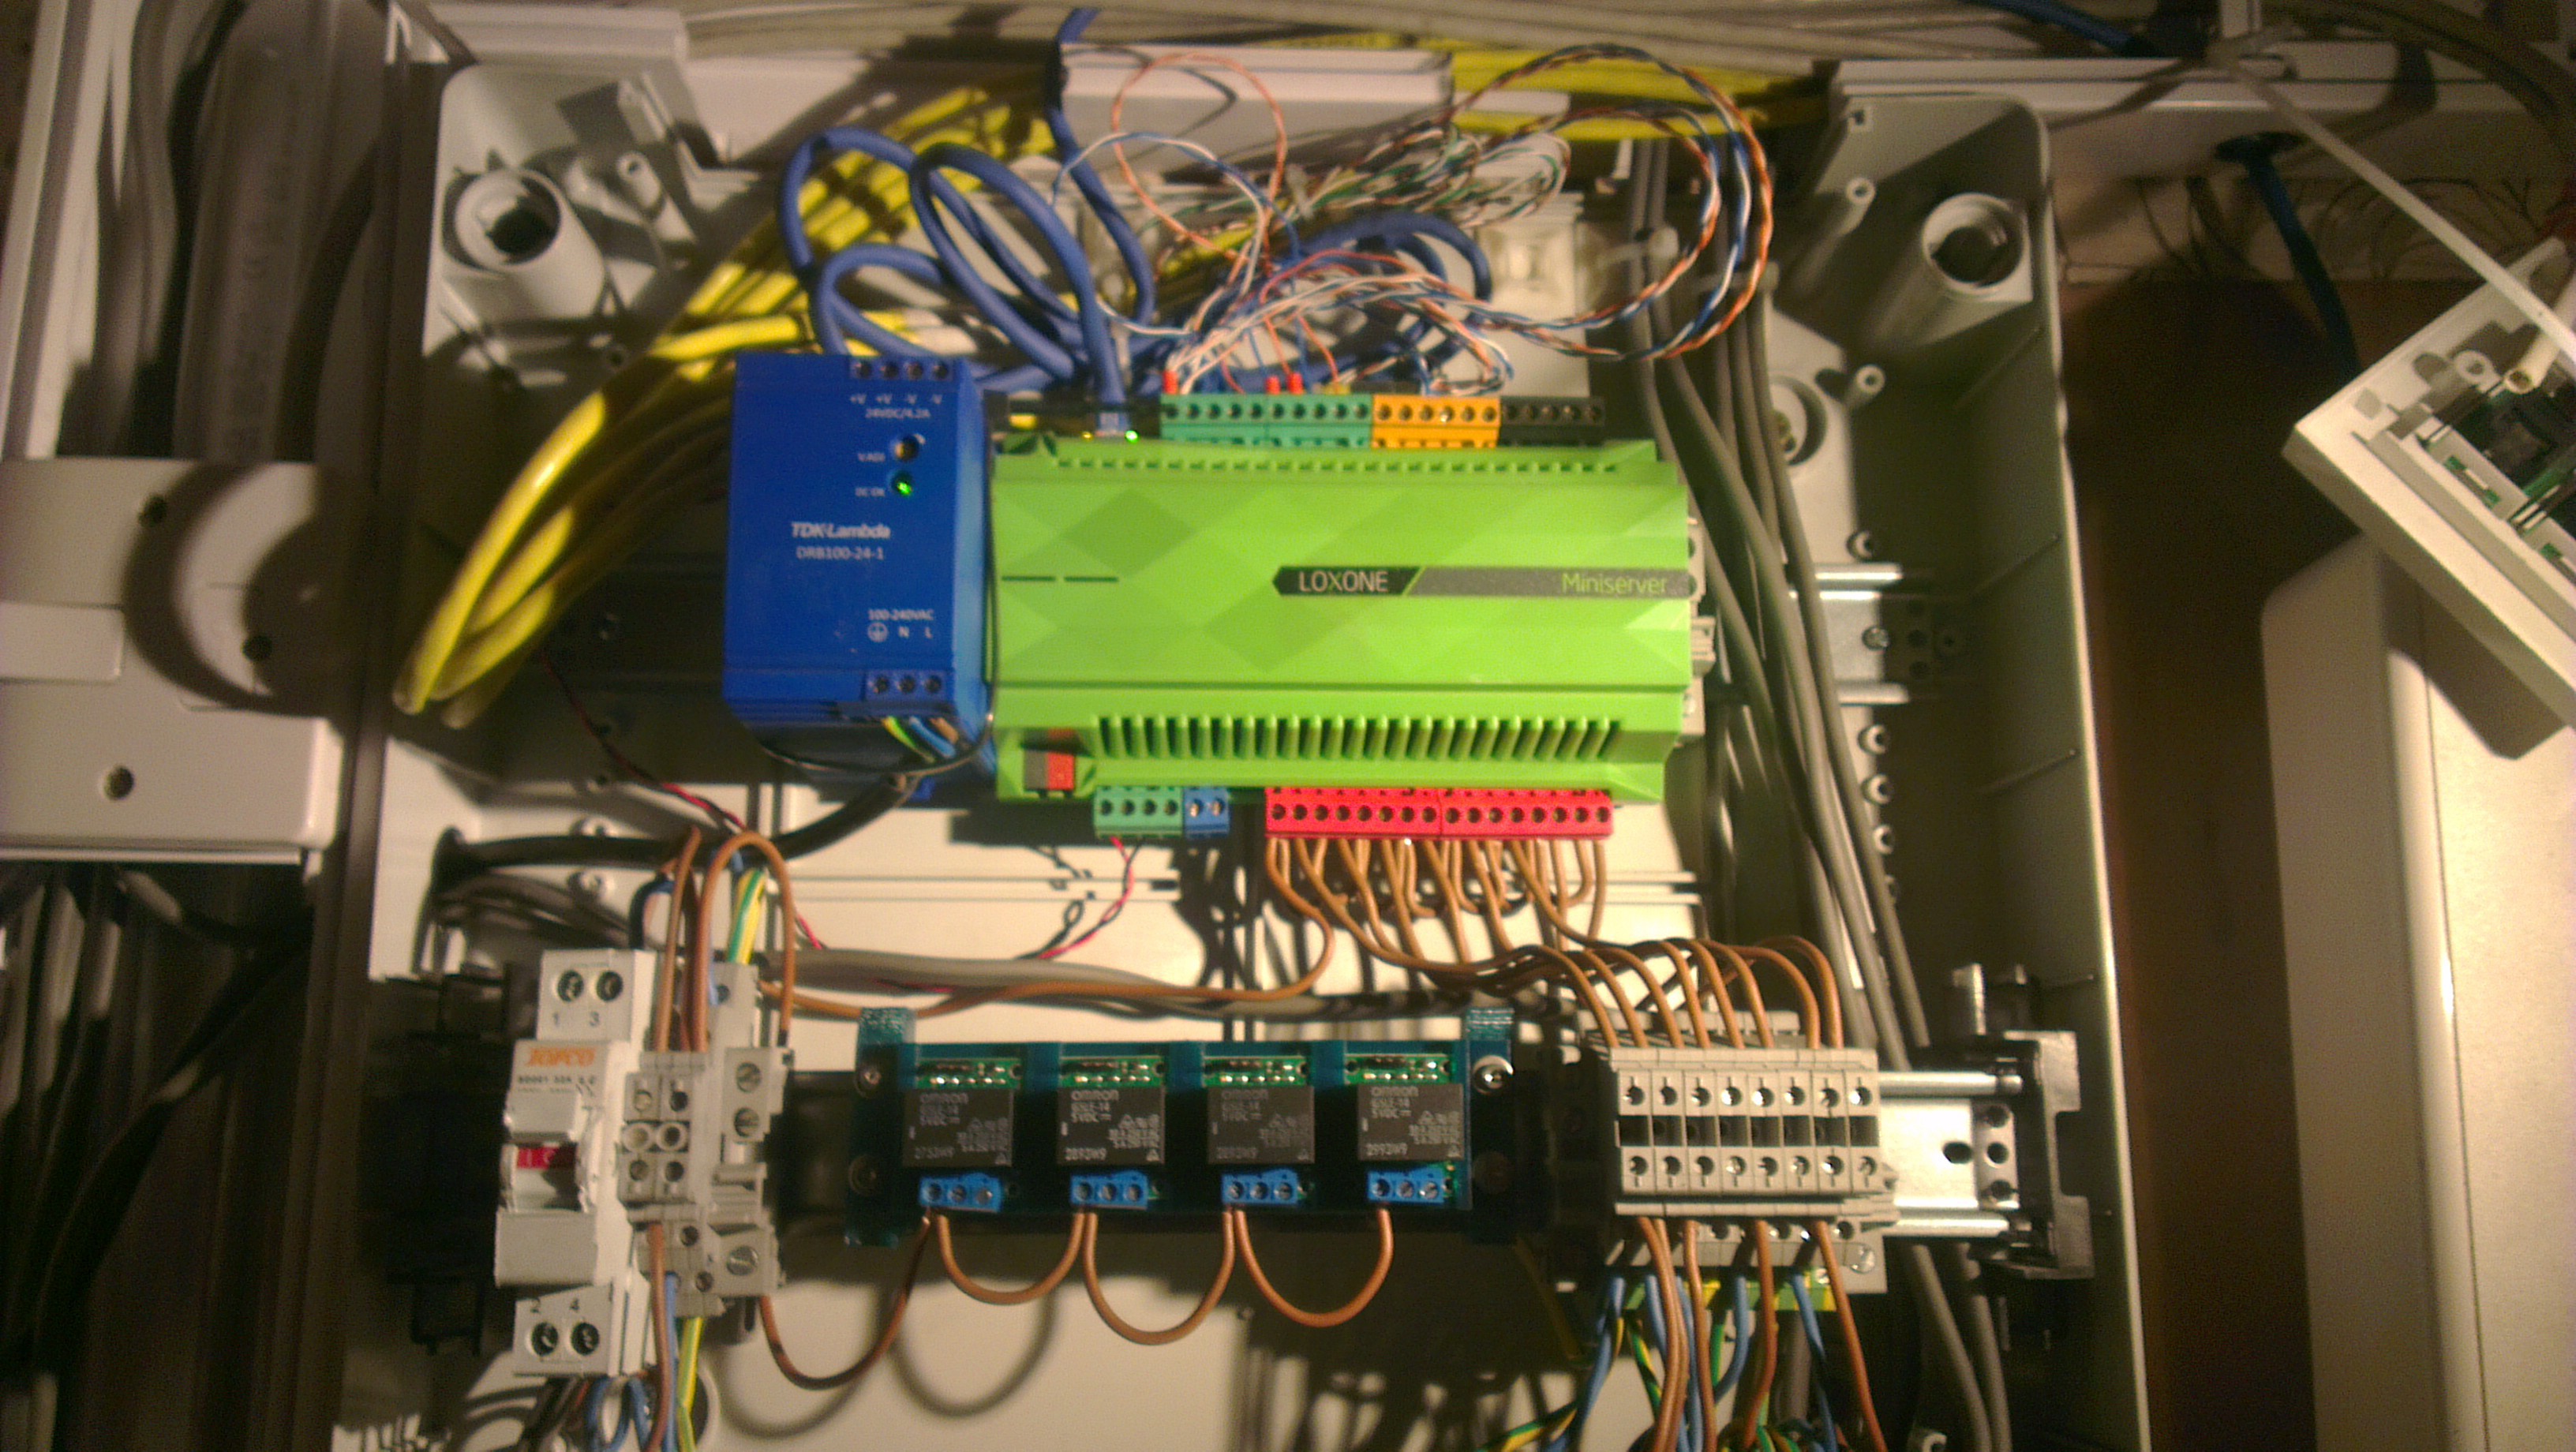
So that all looks good, what's wrong I hear you ask? Many things sadly, some of which are now too late to correct in my current installation of the miniserver. I'll talk more about the details of my cabling in a subsequent post, but for now here's a more up to date photograph:
![]()
Some of the issues are:
- Separation of cabling turned out to be harder than intended, should have used smaller DIN rails and finger trunking up the sides
- I've decided I hate the terminal blocks, I don't think they make things easier
- It would be nicer to terminate the Cat5e with RJ45 plugs but that might well take more room
I attempted to save money by purchasing my 24v power supply from Farnell rather than from Loxone, which saved about £10? This turned out to be another mistake, the Farnell PSU has the terminations at the top of the enclosure, and the top of the PSU is wider than a standard DIN rail module so I had to cut the cover of the enclosure to allow for the wider power supply. It looks unseamly and the terminations are outside of the enclosure which means exposed mains when the front cover is open. I've done my best to cover this with insulated ferrules but it's not good :(
Next time I'll be blogging about expanding outputs using relay modules and the associated configuration.
-
Is there anybody there? Click once for yes!
04/14/2015 at 20:01 • 10 commentsSo following on from my previous post about switches at https://hackaday.io/project/4857-commercial-home-automation/log/16130-switches-are-simple-right let's talk about Passive Infra Red (PIR) sensors.
Loxone Presence SensorCost: OMG HOW MUCH?!
Summary: No way in hell I'm buying one at that price
Supplier: Loxone![]()
Wow, the price of this is staggering. It's got a light level sensor and a PIR in it. I'm not going to buy one, but I'm including it here without much comment.
Manufacturers site - http://shop.loxone.com/enuk/presence-sensor.html
Generic presence sensorCost: Low (£10)
Summary: Not quite what I'm after, but I can hack this.
Supplier: Low Energy Supermarket Ebay shop![]()
I purchased this with the thought that I would place them in some rooms outside of the automation system like the toilet and possibly the kitchen. I ran it in the kitchen for a while until it finally started to annoy me. There's an adjustable timer and light level sensor which means that once the light drops below a certain level the PIR will activate the light until no presence is detected and the timer runs down. It's 240v mains, which isn't great for working with, so having gotten annoyed with it and removed it (Claire nearly cut herself after the lights in the kitchen went out) I took it apart for a looksee.
![]()
So what's the black tube? It's a fuse, that's a good thing. Otherwise not much of interest.
![]()
Oh hello! That's a 24v relay. That means that we're looking at a 24v DC supply. *grin* The Loxone kit is 24v DC, which I don't think I've mentioned so far. The two circuit boards are a mains power supply and the combined PIR and logic board with the two variable resistors on. Removing or modifying the back board *should* give us a board that we can power with 24v and will trigger a 24v line when activity and suitable light level are detected. We don't actually care about the light level or the timer so we can turn both right down. Now we have something we can connect directly to a Loxone digital input and feed into a lighting controller block for a fraction of the cost of the official presence sensor. This I like :)
Purchased from Low Energy Supermarket Ebay Shop - http://www.ebay.co.uk/itm/230776895665
Hacking the generic PIRSome time after writing the top half of this post, I got to the testing. Tests on the generic PIR revealed that indeed it was 24v as expected. A simple full wave rectification circuit with four 1N4007 diodes, a couple of capacitors, a signal diode and a couple of resistors.
![Surplus components removed from the PCB]()
![PCB with surplus components removed - attempt 1]()
![PCB with surplus components removed - attempt 1 with links]()
Turns out the signal diode was mostly redundant as far as I can tell, it's included to eliminate back EMF but that's actually dealt with by one of the power diodes without need for it. Eh, I put one of the power diodes back in and removed the signal diode.
![PCB with components removed - attempt 2]()
So testing! Lets see what the current consumption is like on this after the modification
![Voltage 24.1v, current 7.3mA with PIR off]()
![Voltage 24.1v, current 21.9mA with PIR on]()
Huzzah! 24v DC PIR with low current consumption and low cost. Our terminals are now switched 24v DC, 0v and +24v DC enabling us to use this on an input as suggested above. The input can then be mapped to the sensor input on the lighting controller and programming via the Loxone as documented.
I'm very happy with this money saving hack and will be buying a few more of these sensors in the very near future!
-
Switches are simple, right?
04/05/2015 at 21:01 • 2 commentsOkay, I'm editing this as my first attempt has been badly mangled somehow. Starting to regret using hackaday.io for this, seriously guys is there no markdown or something I can use with copy and paste from somewhere else or a preview option?!
Switches are simple right? You'd think so but when talking about home automation, not so much. Trying to find a UK back box switch of the right kind turned out to be harder than I thought...
From my general understanding and indeed from the videos I've watched, Loxone mostly assumes that you're going to go one of three routes:
- Single pole single throw (SPST) momentary push to make
- KNX switches
- PIR sensors
For the purposes of this discussion, I'm going to ignore the KNX route as it doesn't meet my requirement of cheap ;) you can get KNX kit that's relatively cheap, but you're looking at £40 for a two button interface that you then still need to wire switches to much in the same way as the inputs on the Loxone.
I'm going to save passive infrared sensors for another post as I'm not done hacking on that yet... :)
So SPST momentary switches as my electronics knowledge would have me believe is what I want, the issue is that's not what electricians call them. Electricians call them 'retractive' switches, they may be single or double throw (SPDT). Having spent ages searching for standard UK faceplate SPST or SPDT switches, I can assure you that you'll have more success when you use the "correct" term.
Having established the correct search term to use, I managed to identify some suitable switches. @daveyb0y recommended some switches from Screwfix, so I got some of those to try too.
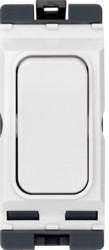
Varilight White 10A 2-Way & Off Retractive Switch
Cost: Low
Summary: Poor quality - feels cheap though you get what you pay for.
Supplier: Screwfix![]()
This one came recommended by @daveyb0y and was available from Screwfix, which meant I could order and collect locally. It's a grid system module so in addition to the module you need a frame and then a nice front to cover over the metalwork. Grid system means there's more cost than initially meets the eye however it scales from one to lots of switches in a panel should you need that. I really wasn't impressed, though this is my first experience with a grid system. The metalwork portion of the grid floats in the centre of the backbox not really touching anything, then the front plastic cover sits on top of this. I found that it was almost impossible to get the plastic front to sit flush with the wall without it bowing on one of the sides due to overtightening the plastic cover screws. I'm probably doing something wrong but I was massively unimpressed given the plastic portion of the faceplate is the only thing to press it against the wall with. Willing to accept that I don't know how to fit these, but my current recommendation would be to avoid them.
Details - http://www.screwfix.com/p/varilight-white-10a-2-way-off-retractive-switch/27120
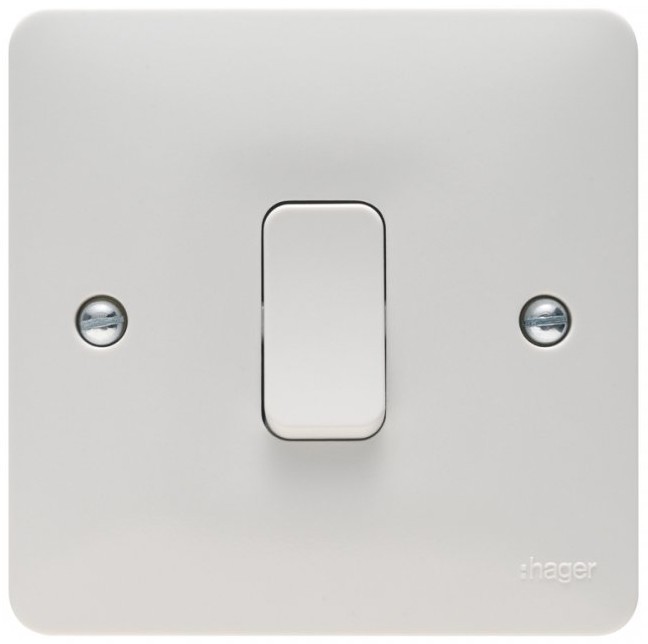
Hager WMPS12R Push Switch
Cost: Low
Summary: Excellent quality and feel, would recommend for single gang.
Supplier: Yesss Electrical![]()
I called in Yesss Electrical on the off chance that they might have some retractive switches given that they advertise home automation things. This is what they had, and I'm so glad that I found them. The action and feel of the switch is really excellent and of similar quality that you find in MK fixtures. For single gang this is now my go to switch.
Manufacturers site - http://www.hager.co.uk/product-catalogue/wiring-accessories/sollysta/white-moulded/white-moulded-switches/wmps12r/42249.htm
Bought from Yesss Electrical - http://www.yesss.co.uk/cable-switches-sockets-c2/sockets-switches-c150/tv-sky-telephone-c302/push-switch-wide-rocker-with-grey-face-plate-wmps12r-p4709Hager WMGS22R Two way Retractive Switch
Cost: Low
Summary: Haven't used these switches so I can't comment.![]()
Having looked to see what else Hager had to offer, I was disappointed to find that they only do a single or grid module of their retractive switches. If the grid module is as good as the single switch, then it will be excellent.
Manufacturers site - http://www.hager.co.uk/product-catalogue/wiring-accessories/sollysta/grid/white-moulded/wmgs22r/46937.htm
Available from Yesss Electricial - http://www.yesss.co.uk/cable-switches-sockets-c2/grid-plates-switches-c480/switches-c861/20a-2way-retractive-switch-wmgs22r-p4650Varilight Two gang ultra flat brushed brass effect
Cost: Medium
Summary: Been impressed so far, though time will tell.
Supplier: My Switch Shop![]()
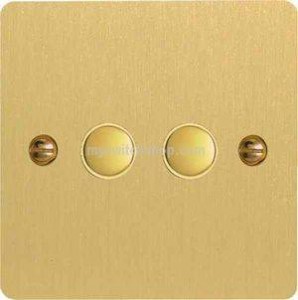
FBM2 Varilight 2 Gang (Double), 6 Amp Impulse Retractive Switch (Push To Make), Ultra Flat Brushed Brass Effect
My significant other said that she didn't want a plain light switch in her bedroom, so the search began for a suitable brass effect fitting. This is what I found, and so far I've been impressed. The quality of the fitting feels good, though the action of the switches isn't the best. Time will tell on this, but for the finish and price they're great.
Bought from My Switch Shop - http://www.myswitchshop.com/index.php?main_page=product_info&products_id=9854
Varilight three gang ultra flat brushed brass effect
Cost: Medium
Summary: Been impressed so far, though time will tell.
Supplier: My Switch Shop![]()
XFBM3 Varilight 3 Gang (Triple), 6 Amp Impulse Retractive Switch (Push To Make), Ultra Flat Brushed Brass Effect
Same again, Claire said she wanted something nicer in the hallways and on the stairs so I found these. They'll be mounted vertically for top, middle and bottom floors. The two outer buttons seem to stick slightly on the plate with the middle button seeming stiff. Again we'll see how these do in the longer term.
Bought from My Switch Shop - http://www.myswitchshop.com/index.php?main_page=product_info&products_id=9858
MK 3190 Ceiling pull cord
Cost: Medium
Summary: Not purchased yet so comments limited.
Supplier: TLC Direct![]() MK 3190 6 Amp 2 Way Ceiling Pull Cord Switch (Red Cord
MK 3190 6 Amp 2 Way Ceiling Pull Cord Switch (Red CordThis is so far the only retractive pull cord I've managed to find and it's designed to be used as an alarm cord. So if you replace the red cord with a standard white one, it looks exactly like a standard pull cord. It's MK so I expect the usual level of quality that comes with that and no issues at all.
From TLC Direct - http://www.tlc-direct.co.uk/Products/MK3190.html
Once you realise that you need to be searching for retractive switches, there's a number of manufacturers that have suitable solutions. The main difference between each product is price ranging wildly from £3 to ££££ depending on what kind of finish you desire and your personal tastes. I can only speak to the things I've purchased or seen as a result of my purchases, as always your mileage may vary :) -
The software only runs on Windows?!
03/28/2015 at 17:56 • 0 commentsSo from my previous post, you might gather I'm a GNU Linux Open Source toting hippie socialist type. You'd be right :)
So I bought hardware who's configuration software only works on Windows. It also runs under Wine with some caveats.
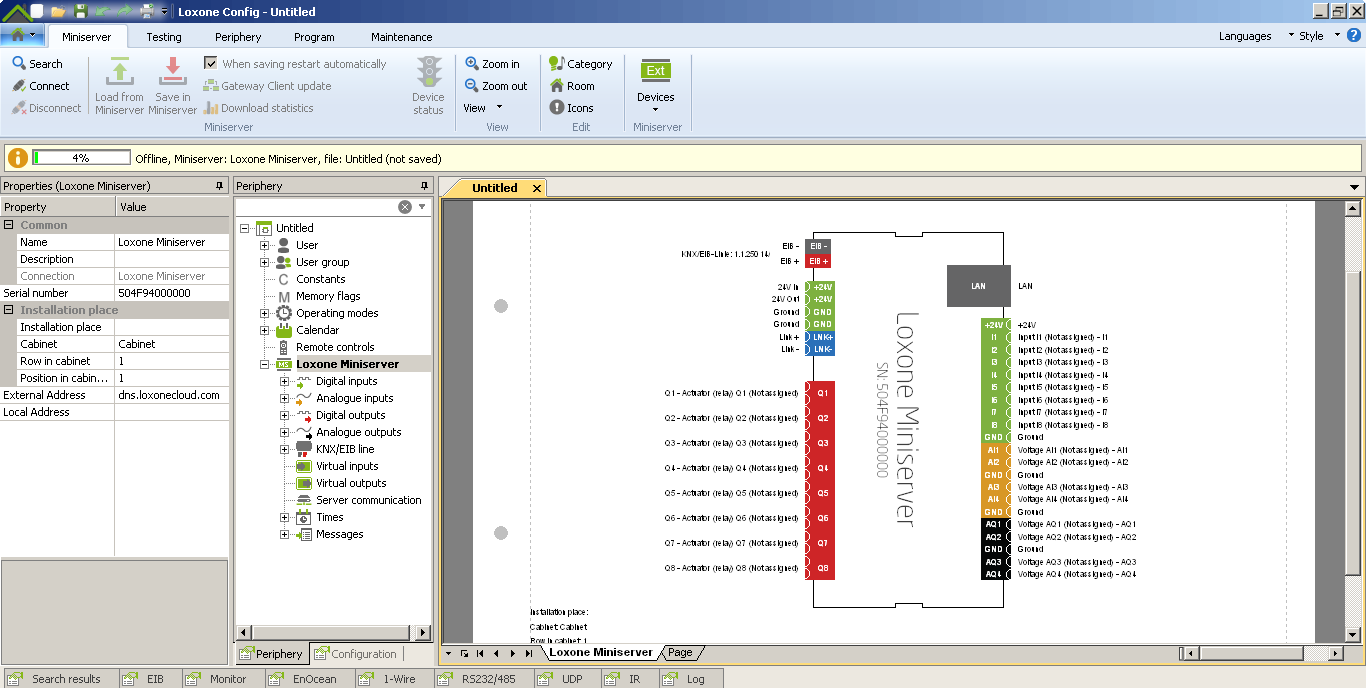
The Loxone Config software is an easy to use graphical user interface. Simply select components to work with, drag and drop them into pages and add blocks to make them do things.
The suggestion is that a page should be created for each room and category, 'Bathroom lighting' for example. The main reason to do this is so that components and blocks placed on a page have their room and category attributes correctly set, this matters for the UI presentation on mobile telephones or via the web UI.
![]() The components we're interested in right now are:
The components we're interested in right now are:- Digital inputs
- Digital outputs
- Analogue inputs
- Analogue outputs
So let's assume that we're fitting a light in the bathroom, I'm going to ignore the discussion of switches for now as that's a post on it's own :) Our switch comes in on digital input 1 and our ceiling rose is attached to digital output 1. Let's step through this.
Create the page:- Create a new page in Loxone Config
- Set name of the page to 'Bathroom Lighting'
- Set category to 'Lighting'
- Set room to 'Bathroom'
Add the components to the page:
- Expand 'Digital Inputs' and drag 'Input I1' onto the page and drop it
- Set the name to 'Bathroom PB1' meaning bathroom push button #1
We might be using a switch, in which case SW1 might be better. All of my switches are push buttons. - Expand 'Digital Outputs' and drag 'Actuator (relay) Q1' onto the page and drop it
- Set the name to 'Bathroom ceiling rose'
You'll notice the room and category have been set for you on both components.
For now, we don't need to worry about any of the other settings, the defaults are fine.At this point, one might connect the input directly to the output and expect it to work. Which it does. Kind of :) When you press the button, the light comes on and when you release it, the light will go off. This is probably not quite what you want.
Consulting the documentation didn't seem to give a clear indication on how to do this, so digging around in the UI turned up the 'Push-button' which on testing does what we need.![]() So we now have a working light switch! Huzzah! What else do we need to know? This is the point that I started looking at the Loxone UK Youtube channel https://www.youtube.com/user/LoxoneVideoENU starting with the 'Loxone Config for Beginners' series of videos:
So we now have a working light switch! Huzzah! What else do we need to know? This is the point that I started looking at the Loxone UK Youtube channel https://www.youtube.com/user/LoxoneVideoENU starting with the 'Loxone Config for Beginners' series of videos:Part two is what we've configured above and the rest of the series talks through some of the things I've hinted at. The very last video suggests using a 'Lighting controller' rather than the simple example using a 'Push-button' component. There's more detail on that in this video:
So my advice is take the time to watch the videos as it will save you time in trying to work it out on your own.
My approach has been:- Make use of a lighting controller for each room
- Each digital input push button is connected to a trigger input
- Each digital output light fitting is connected to the 'Analogue output' of the lighting controller
- Create a constant called 'Keep state after power cycle' with a value of 1
- Add the constant to all pages connecting it to the Remanence input of the lighting controller (looks like a battery)
- Bedrooms have both a ceiling light and a bedside light
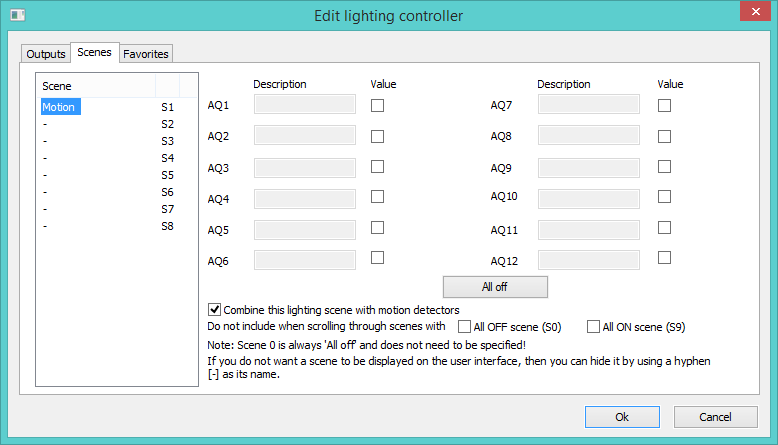
All this is straight forward once you get the hang of how to do it. The annoyance here is that the lighting controller opens an additional dialogue when you double-click it. Or at least it does under Windows, under Wine and Linux, it does nothing. Which means that you can't configure lighting scenes, outputs or any of the other details found there.
Here's what you're missing:![]() Setting scenes is only really significant if you have more than a couple of lights attached to it, though by default you seem to end up with scenes that you didn't create which then appear in the web UI and on the Android app. You need to have the application under Windows to be able to remove the scenes you don't want.
Setting scenes is only really significant if you have more than a couple of lights attached to it, though by default you seem to end up with scenes that you didn't create which then appear in the web UI and on the Android app. You need to have the application under Windows to be able to remove the scenes you don't want.
So to recap, the simple things are really simple once you know which bits you need to use for your particular situation. Watch the videos to learn about the basics and then freestyle from there. If you're using Linux, Loxone Config will mostly work under Wine though specifically so far I've only found the 'Lighting controller' block that has this issue there may be other things that I'm missing and don't know about.
Next we'll discuss switches. Yes. A post all about switches. It's important.... :) -
Which solution to choose?
03/21/2015 at 09:58 • 0 commentsWhen I decided to embark on a home automation project, I spoke to a few people, read some websites and did some thinking. You might well expect that for a project that is a substantial financial outlay and a commitment to an eco system that will be with you for a long time.
See I have a problem. I love Open Source and free software. I love Open Source and free hardware designs. But I also want to be able to sell my house at some point, and in the event that I get hit by a bus I want someone else to be able to come in and understand the nest of wiring I left behind, for the sake of those left behind.
One of the electricians I spoke to told me that I couldn't build my own solution because it would cause issues with my house insurance in the event of an electrical fire. I think that's nonsense if a sensible approach is taken and things checked over by someone suitably qualified after installation, but it's a doubt that was planted.
So for good or ill, I chose to go for a commercial off the shelf solution. A couple were recommended, I looked at them and calculated the cost. After I'd picked myself up off the floor, I pretty much ruled the idea out on the grounds of cost. Idly lamenting this one day at work, a colleague suggested I talk to someone in another team who was in the process of kitting out his house with some neat kit.
I spoke to Dave (a fellow IT geek), and he gave a glowing review of Loxone. It was in fact him that pointed out the issue with getting hit by a bus and someone else needing to be able to program, take over and understand whatever you leave behind. His argument was that at least with a commercial solution, worst case you can find a reseller or partner who can come in and figure it out.
So I did some reading. Looked at the specs. Looked at the cost. Looked at the cost again, then wondered how they were so much cheaper than all the other solutions. Played with the config software, downloaded the Android app. Talked to Dave some more. Then I blew £500 on a Loxone Miniserver, PSU and some toys. The spec in a nutshell:
- 8 digital inputs
- 8 digital outputs (normally open relay rated 5A)
- 4 analogue inputs (0 - 10v)
- 4 analogue outputs (0 - 10v, 20mA max)
- Onboard ethernet
- Web UI
- Free configuration software and Android application
Believe it or not, some of the commercial solutions want to charge you for the hardware and then charge you again for the damn software to configure it. No thanks.
So the downside of this approach is that the Loxone Config software only works on Windows. Blegh. It *mostly* works under Wine, however there are some specific gotchas you need to be aware of that I'll talk about in another post.
Those are my conclusions in retrospect, they probably aren't the same as yours :)
Commercial home automation
Home automation using the Loxone series of home automation products along with hacks to extend functionality and reduce cost
 Ian Norton





 MK 3190 6 Amp 2 Way Ceiling Pull Cord Switch (Red Cord
 The components we're interested in right now are:
 So we now have a working light switch! Huzzah! What else do we need to know? This is the point that I started looking at the Loxone UK Youtube channel
  Setting scenes is only really significant if you have more than a couple of lights attached to it, though by default you seem to end up with scenes that you didn't create which then appear in the web UI and on the Android app. You need to have the application under Windows to be able to remove the scenes you don't want.