Close
0%
0%

SubPos Positioning System

A "dataless" Wi-Fi positioning system that can be used anywhere GPS can't.

Similar projects worth following
When the world's lifeforms are forced into subterranean dwellings due to nuclear fallout, evolution into lizard people or warming of the Earth, we will require a simple method for determining our position underground. In our current age, we are still working out the intricacies associated with determining our location in areas where GPS cannot reach.

SubPos provides a solution to this problem, without the need for expensive licencing, specialised hardware, laborious area profiling or relying on data connectivity (a connection to a location database or cellphone coverage is not required), all while remaining backwards compatible with existing Wi-Fi access points and receivers. It works independently of, or alongside GPS/Wi-Fi Positioning Systems (WPS)/Indoor Positioning Systems (IPS) as an additional positioning data source by exploiting hardware commonly available. All a user wishing to determine their location underground/indoors will require is a Wi-Fi enabled device.

The SubPos Wi-Fi Positioning System is an indoor positioning system that can be used in various environments such as metro lines, shopping malls, carparks, art galleries or even conference centers; essentially anywhere GPS doesn't penetrate. It could also be integrated into an array of IoT enabled devices, from access points to Wi-Fi enabled light-bulbs.

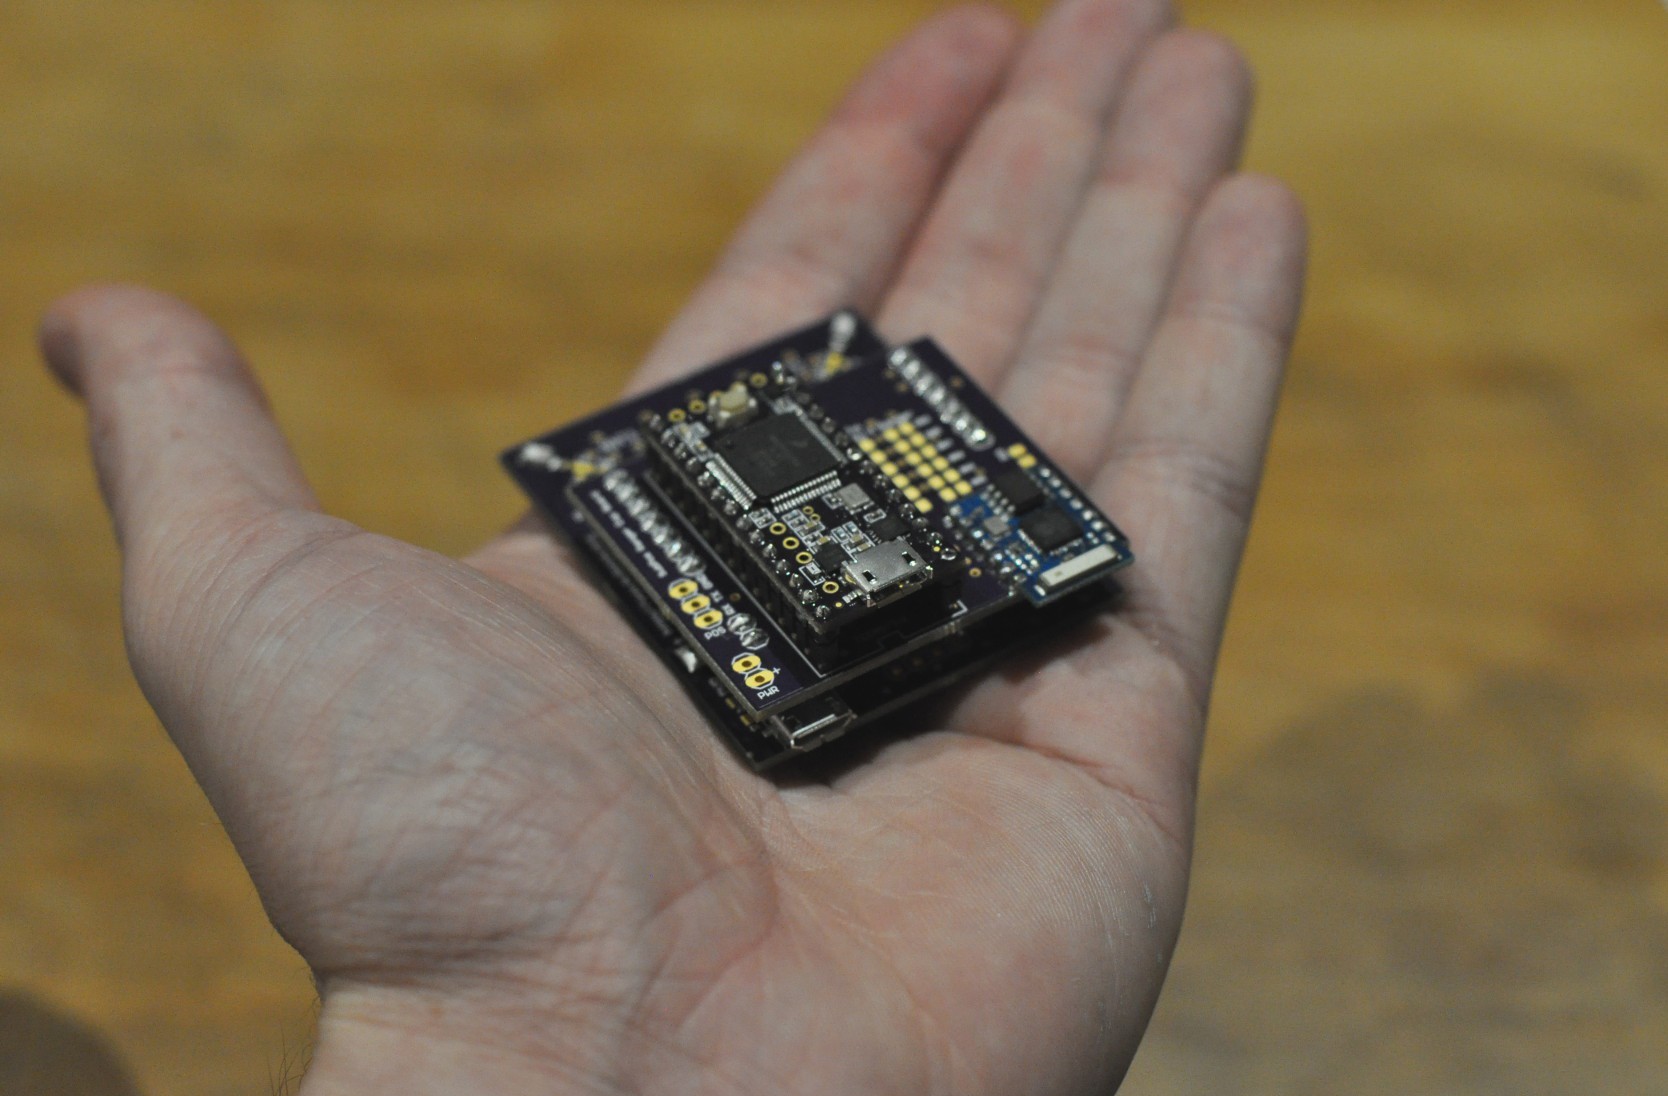
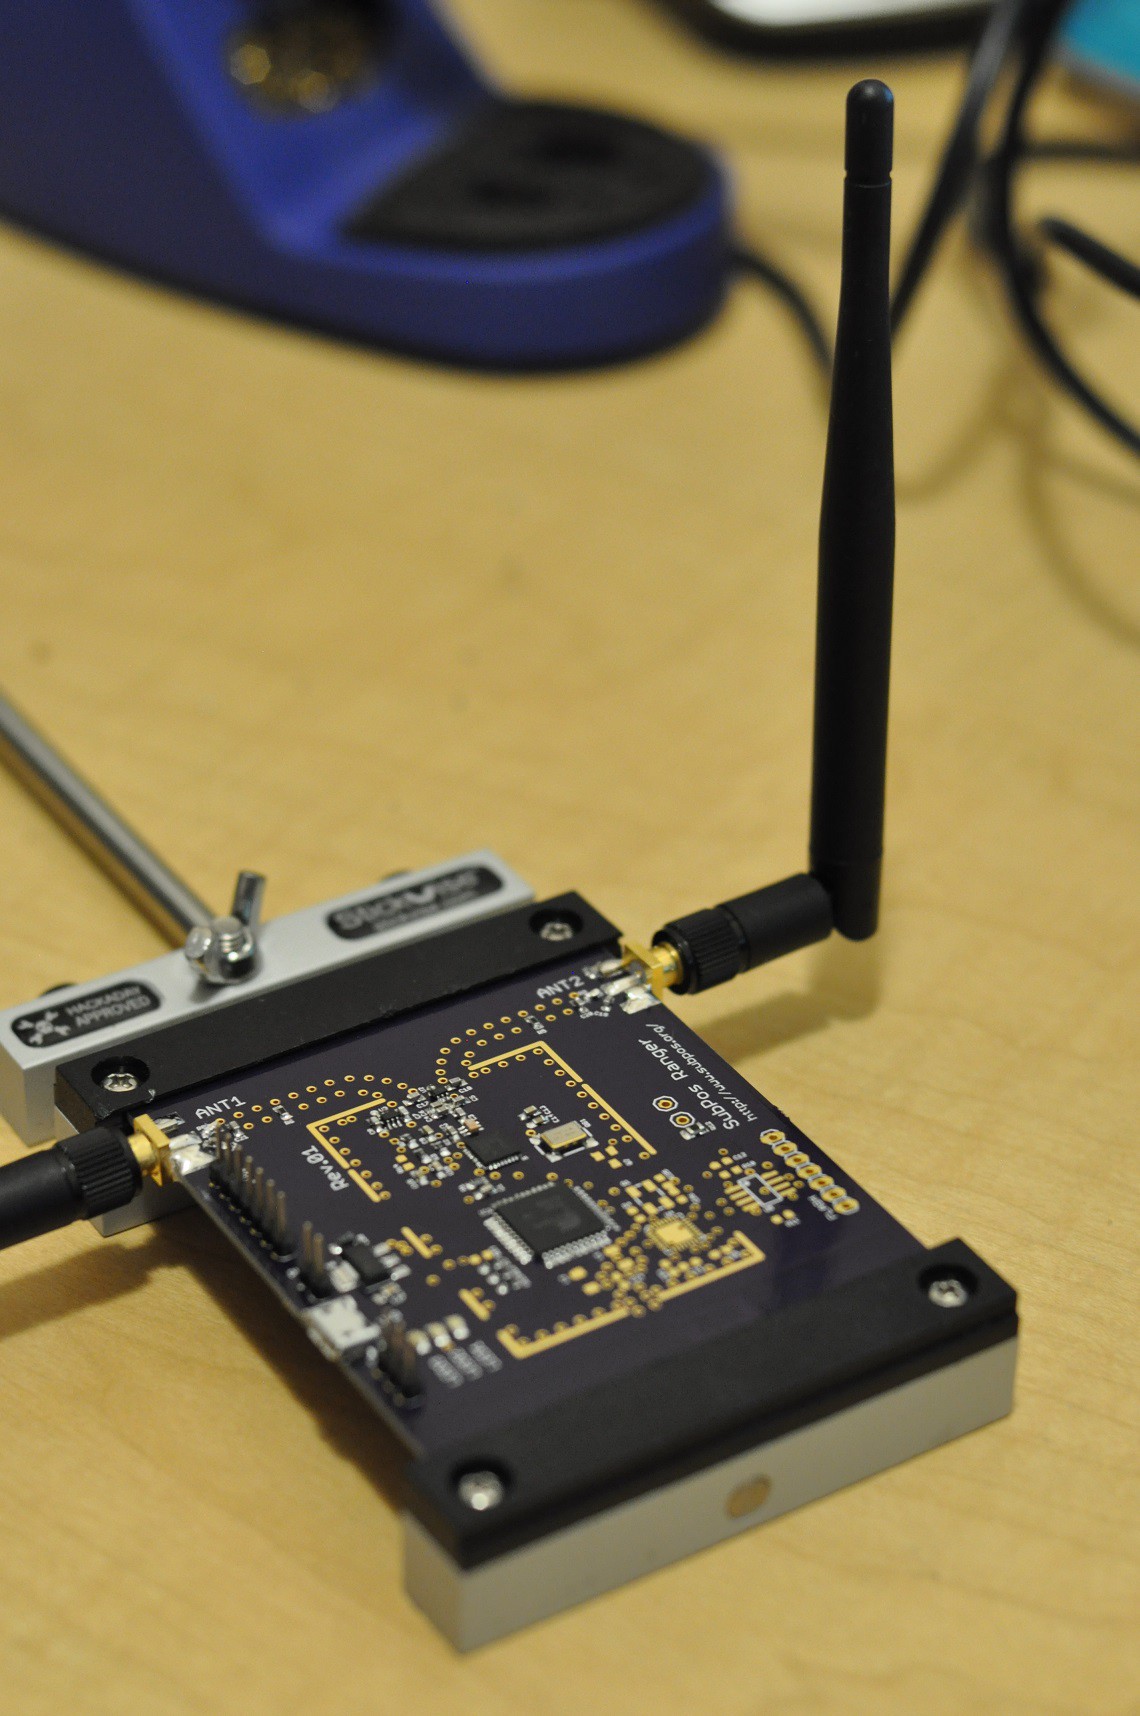
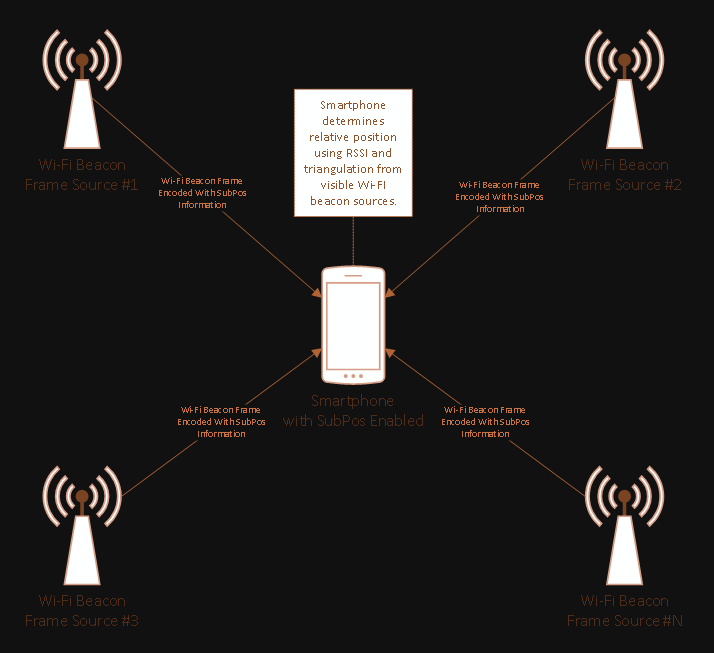
The Standard defines an accurate method for subterraneous positioning in different environments by exploiting all the capabilities of Wi-Fi. SubPos Nodes or existing Wi-Fi access points are used to transmit encoded information in a standard Wi-Fi beacon frame which is then used for position trilateration. The Nodes, while not necessary part of the SubPos standard, provide a pre-calibrated device that is easy to configure and can be dotted about with ease.

The SubPos Standard has been designed for backwards compatibility with existing access points and client devices in mind. It works with most existing access points and almost any Wi-Fi enabled client device (smartphone, laptop). For those wishing to use SubPos on an access point that isn't supported, the SubPos Node provides a great alternative with enhanced functionality.

When a user enters an area littered with one or more SubPos Nodes, they are able to determine their position with a simple smartphone application. Some smartphone applications could include helping users find their parking spot, navigating unfamiliar buildings or determining whether your metro station is soon approaching. It could even be used as a GPS relay for embedded systems.

Unlike traditional Wi-Fi location techniques, which map out an area of Wi-Fi signal strengths while storing it in a database, SubPos Nodes operate much like GPS satellites. In this case however, instead of using precise timing (for time of flight) to calculate distance between a transmitter and receiver (GPS), SubPos uses coded transmitter information as well as the client's received signal strength to determine the distance from this known point.
Read more »

  • 1 × ESP8266 Module (ESP-03) Used to create SubPos node (beacon frame source).
  • 1 × Microchip PIC18LF25K50-I/SO To control and easily program the ESP8266 module as well as providing highly accurate timing on a SubPos Node.
  • 1 × Micrel MIC5209-3.3YS Power Management ICs / Linear Voltage Regulators and LDOs.
  • 1 × LED SMD 0805 Red
  • 1 × LED SMD 0805 Green

View all 14 components

View all 44 project logs

  • 1
    Step 1

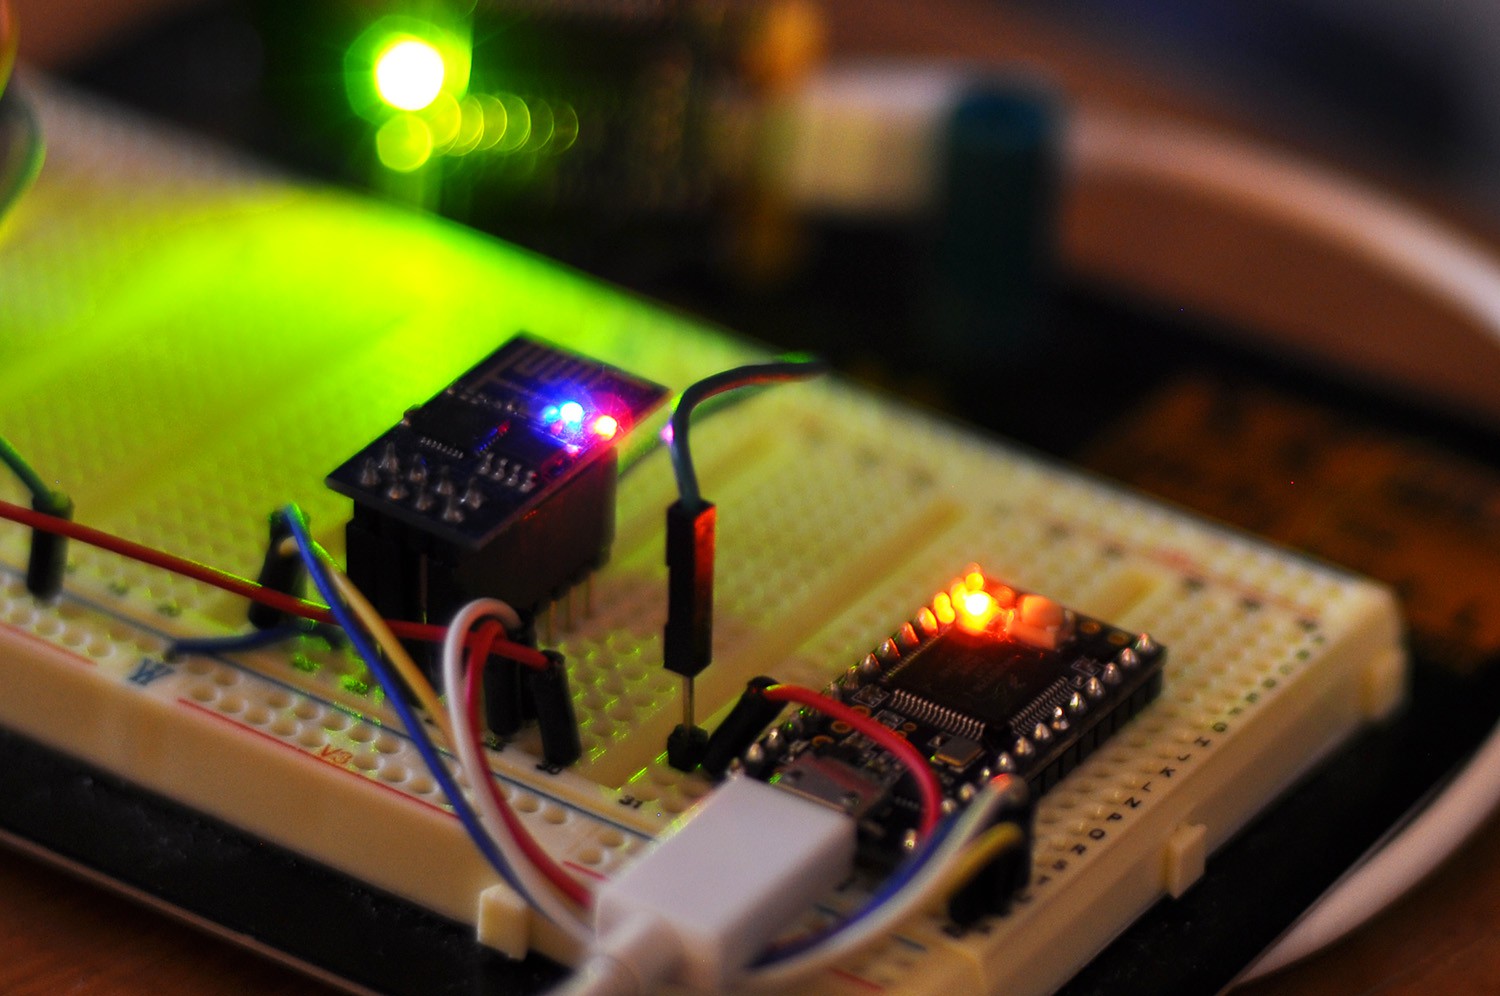
    While the SubPos Nodes make it easier to set up positioning and provide additional features and a USB to UART converter built in, SubPos can be set up with nothing more than ESP8266 modules, a smartphone, USB to UART converter and a power supply for the ESP modules. You can even operate the ESP8266 module with SubPos enabled (AP mode) and as a Wi-Fi client at the same time! You can even use the NodeMCU module if you would like similar functionality to the Node (USB interface and power). The setup commands will slightly differ for the LUA based firmware, but they work just the same. Or you can load the AT firmware on these modules.

    Go to step 2 then 8 if you want to configure a SubPos Node.

  • 2
    Step 2

    Determine the GPS locations that correspond to the physical location of the ESP modules/Nodes (by any means, measuring stick, compass, best guess). Use Scribble Maps to help you determine these coordinates (you can easily draw map overlays and get GPS coords from points).

    You can export the KML of the overlay and get the GPS coordinates from the KML document:


  • 3
    Step 3

    Connect the ESP module to the UART converter and power supply using the standard AT firmware, and plug the UART converter into a PC.

View all 9 instructions

Enjoy this project?

Share

Discussions

Junel Banayag wrote 11/22/2016 at 08:42 point

Hi,

I am new to this site. I have question, how are the remaining components are used in the project? Like the Microchip PIC18LF25K50-I/SO and the rest of the components below it.

Thanks in advance.

  Are you sure? yes | no

willieaames25 wrote 09/09/2016 at 07:36 point

Cool, thats interesting.

  Are you sure? yes | no

CNLohr wrote 10/01/2015 at 17:14 point

I am actually a little confused here... How exactly do you do the timing? I haven't found any way of getting frame times off the ESP8266 with better than 25ns resolution (7.5 meters) and that's a bit of a stretch.  *EDIT* I see in your description where you describe using RSSI, and later using precise times...  Is it purely RSSI?

  Are you sure? yes | no

Blecky wrote 10/01/2015 at 23:20 point

Currently it's purely RSSI. You are right about timing, you just can't do it with the ESP modules. I explain at the end of the latest video (and there was some info in the hackaday.com article) that I'm developing my own beacon frame generator to do this. This will only work with a specialised receiver however (you can only do RSSI with smartphones for example).

In terms of timing, I have actually changed the way I will be doing it. I'm not going to be sending accurate frames anymore due to multiple factors such as collision management and because you can't get decent accuracy over longer periods of time with cheaper oscillators for this method to work well. I am instead modulating the waveform of the beacon frame and using a TDC for a shorter period of measurement so you can opt for cheaper oscillators. This is why you will need a special receiver to do it. But the beacon frame will still be backwards compatible with other devices for RSSI calculation.

  Are you sure? yes | no

0xPIT wrote 09/23/2015 at 18:22 point

Fantastic Project!! 

However, I fail to understand why the PIC is required? Is the ESP8266 controller insufficient?

  Are you sure? yes | no

Blecky wrote 09/23/2015 at 23:02 point

  Are you sure? yes | no

samuele coppede wrote 09/23/2015 at 12:18 point

Fantastic.. when it will be shopable? :D and how time for ios API ? :)

  Are you sure? yes | no

Alex Rich wrote 09/21/2015 at 23:40 point

Great project, thanks for using Stickvise!  Love seeing people using it in these semifinalist videos!

  Are you sure? yes | no

Blecky wrote 09/21/2015 at 23:43 point

Seriously, it is the absolute number 1 most handy thing I have on the desk. Just the right weight to keep projects steady and not falling over the place.

Not to mention it's infinitely handy for soldering too :P

  Are you sure? yes | no

Alex Rich wrote 09/21/2015 at 23:47 point
Thanks, I'm glad people are using it to hold powered projects. That was the whole justification for using plastic instead of metal for the jaws.

  Are you sure? yes | no

chris jones wrote 08/26/2015 at 15:27 point

Great idea!

Another idea came to me via US Navy submarines. They need accurate positioning data underwater where GPS and radio signals don't work. So they use accelerometers, hall-effect compass, and a dead-reckoning application. It is called "inertial navigation". You take a known start reading of your position top-side via conventional GPS. Then the program keeps track of which way you are pointing (including turns) underwater and how much you accelerate forward or backwards. With dead reckoning you can plot exactly where you are within inches (centimeters) on a map. A barometric sensor can detect depth or vertical position (or what floor you are on).

SOTB (Chris)

  Are you sure? yes | no

Blecky wrote 06/18/2015 at 06:33 point

Ha awesome. Cheers!

  Are you sure? yes | no

Blecky wrote 06/18/2015 at 07:13 point

Looks like they are still doing positioning based on ye olde, aggregate data on the server side and calculate your position approach, rather than on the client side. So for the client device that wants to know its position, you would still need a data connection to a server somewhere.

Very novel though. I'd like to see someone hack away at them to see what they are capable of and if you can reverse them somehow (put "tags" all around the place and use an "anchor" as a receiver).

  Are you sure? yes | no

Gabriel Staples wrote 06/11/2015 at 19:52 point

Just a quick check-up: any preliminary successes yet? Scanning the project page, it looks like you haven't gotten a working prototype yet, is that right?

  Are you sure? yes | no

Blecky wrote 06/11/2015 at 23:20 point

Oh it's working, the subpos nodes I'm developing now are designed to give you additional accuracy.

Check out the demo video from a while back:

https://hackaday.io/project/4872-subpos-positioning-system/log/17303-positioning-demo

I am currently in the process of finishing more PCBs to make a mega demo/entry video which shows off the (hopefully as its currently theoretical) better accuracy. Stay tuned!

  Are you sure? yes | no

Gabriel Staples wrote 06/12/2015 at 02:02 point

Very cool. Glad to see it working! Have you calculated accuracy, precision, or resolution yet? Also, have you considered a median filter, instead of just an average? I know for my ultrasonic rangefinders, the outliers really mess up an average. The median of 5 samples, per se, however, is very accurate.  If you want, you can then average the last  X number of median points for additional smoothing.

  Are you sure? yes | no

Blecky wrote 06/12/2015 at 02:37 point

Cheers! I'll have a look into that and include the option in the Android API.

Through current testing with just standalone ESP modules I get about 1.5-2 meters on a single Wi-Fi channel. It depends on where you are located in the "zone" though and how many nodes there are. As you reach the edges, the accuracy drops significantly, so there is definitely a defined border.

I'm excited to see what I get with the Nodes I'm developing. I have a test room lined up and some logging software to get better experimental results (and to properly define accuracy). 

  Are you sure? yes | no

Gabriel Staples wrote 06/12/2015 at 03:55 point

minor correction to my comment above, I meant to say, "accuracy, *precision,* or resolution"...not "accuracy, position, or resolution"

  Are you sure? yes | no

Blecky wrote 06/12/2015 at 05:14 point

You are right about your comment, RSSI doesn't give you the required precision (at most it's 1dp in most receivers). I'm using a precise beacon frame transmission technique as well to hopefully improve this, as well as swapping channels to give frequency diversity.

All of this is still experimental, I'm testing the frequency diversity first. Precise timing to come later.

  Are you sure? yes | no

Gabriel Staples wrote 06/11/2015 at 19:09 point

Ah, now I understand your "UltraPos" reference on my project page! (https://hackaday.io/project/6226-ultrasonic-3d-positioning-system-gps). Your project looks very neat too. Using RSSI though, I don't expect your accuracy will be superb. Perhaps +/- a few feet? Any idea? I've never looked at the consistency or noise levels of RSSI.

  Are you sure? yes | no

Radu Motisan wrote 05/17/2015 at 20:27 point

You surely did some impressive progress here. Congrats on that! The new project name also fits well, and the graphics are nice too. Just a little encouragement!

  Are you sure? yes | no

Blecky wrote 05/17/2015 at 23:29 point

Thank you! When I started I thought it was a nice small project, but I've got a few big ideas for it still yet to come.

  Are you sure? yes | no

Radu Motisan wrote 05/18/2015 at 12:40 point

Sounds great! BTW, since you already did all these tests, what do you think about the opposite mechanism: instead of having 4 emitters used by a receiver to compute its location, use 4 receivers (or 3) to estimate the position from a single emitter? I'm having a few applications in mind. My concern is the distance between the receiving antennas must be too big to be practical (a few meters)

  Are you sure? yes | no

Blecky wrote 05/18/2015 at 12:52 point

That's effectively how most current Wi-Fi positioning systems work (Google's Wi-Fi positioning for example). Basically you sample at multiple points, store in a database and perform analysis on it to "triangulate". It's only as accurate as the number of sample locations though, so the rougher your sample size, the more inaccurate your outcome.

  Are you sure? yes | no

Radu Motisan wrote 05/18/2015 at 13:09 point

I am thinking of a better solution for this: http://www.pocketmagic.net/make-the-robot-follow-you . Instead of ultrasounds, have 3 radio antennas on the robot, to receive the signal from a single emitter (a beacon carried by the user), thus allowing the robot to follow its user. 

  Are you sure? yes | no

Blecky wrote 05/18/2015 at 13:26 point

Hmm interesting, I would never have thought of something like that. I think your main problem might be with actually working out the exact position as the array would be to the side of a single point, rather than surrounding it.

But, saying that, you would be able to work out whether it is left or right of the array (provided it was wide enough) and if it's moving away or towards it. The problem you will have though is, as you get further away the angular resolution will be lower than the Rayleigh criterion, so you will only work out whether you are moving away or towards it.

  Are you sure? yes | no

Radu Motisan wrote 05/18/2015 at 13:33 point

Well, I think three receiver antennas, doing distance measurements would pinpoint the location accurately, if the electronics was fast enough to sense the tiny time shifts between the antennas, considering they would be only a few centimetres/inches apart.

I had to drop this idea and went for the ultrasounds when I built that robo-dog, but I'm still considering the idea. Ultrasounds have lots of limitations.

Getting back to radio, the question is how to measure the distance from the emitter to the receiving antenna, and one approach is using signal strength like you did (yet the neighbours will see almost the same strength because of the close proximity).

The second option would be sending a pseudo-random sequence that encodes time, very much like GPS does. When you receive the data, you can actually extract its timestamp and using the speed of radio waves in the equation you can get the distance.

Probably the latter is the better way to go. Also applicable to your project as well, in case you decide to drop the convenience of Wifi and go for custom protocols.

  Are you sure? yes | no

Blecky wrote 05/18/2015 at 14:08 point

Unfortunately with most Wi-Fi receiver chipsets, they only give you a receive strength indicator with a precision of 1 decimal point or less. So accuracy is highly dependent on your receiver hardware (a custom SDR receiver might help with this).

In terms of timing, one of the things I am experimenting with at the moment is using a highly accurate oscillator in the transmitter to send frames at exact ms values. It will be an additional feature to the RSSI method that different applications can use if they like (it's non compulsory, you only use it if it's enabled). Using a timestamp doesn't quite work, because you are talking about required accuracies in the ns range to calculate distances to meter accuracy (it takes 3.33564095 ns for light to travel 1 meter so you need something less than or equal to this). So to get accuracy of that sort of range, you need a clock that gives you similar precision. More nodes will give you greater accuracy due to averaging though.

The method I'm using will augment RSSI, and help with averaging a more accurate position, but it will still not be as accurate as GPS due to the oscillators I will be using. These are no where near as accurate as GPS due to their error, but they should give a pretty good estimate which should smooth out the sample points, especially when a few of them are in sight.

  Are you sure? yes | no

Radu Motisan wrote 05/18/2015 at 14:45 point

I'll be following your progress to learn more on how you are using the oscillator    - not yet clear to me - but certainly sounds interesting. Indeed, faster electronics would do wonders here, yet we must deal with what we have.

  Are you sure? yes | no

Gabriel Staples wrote 06/11/2015 at 19:36 point

For anyone looking to implement this follow-me solution, according to my calculations, you should look into using an ultrasonic (speed of sound), not radio (speed of light) beacon. A speed-of-light solution would require the antennas be something more like 30 ft apart to get adequate time resolution...and even that is *tremendously* challenging.  You can look at ultrasonic anemometer solutions online for additional guidance and ideas.

Update: I'm new to Hackaday, and a bit bewildered at how the comments get ordered and arranged around here. This was in response to radu.motisan's comment here "Instead of ultrasounds, have 3 radio antennas on the robot, to receive the signal from a single emitter (a beacon carried by the user), thus allowing the robot to follow its user."

  Are you sure? yes | no

chris jones wrote 05/14/2015 at 22:28 point

I had another idea I was toying with that was an alternative to GPS but is also "above ground". It involves a radio receiver that picks up American FM broadcast transmitters (FMT). It uses an Adcock Bay or Doppler non-steerable antenna to obtain your relative azimuth bearing to the FMT. Then a computer does trigonometry to reverse your range (in miles) to the FMT. 

It uses the FMT's documented latitude and longitude recorded at the American FCC (Federal Communications Commission - they regulate USA's radio waves). You'd have to move to another location and take a 2nd bearing of same FMT for the range to be computed correctly OR stay still and take another bearing on a 2nd different but known FMT (either method establishes the 'baseline' [in length] of an obtuse triangle).

In all cases you have to know the FCC call-sign of the station you are shooting a bearing at. Sometimes FCC station call-signs are transmitted on a sub-carrier (SCA). You need this for the FCC coordinates database to work for you. There is a trigonometric algorithm that can compute your coordinate via a known coordinate and how far you are from it (i.e. range in miles or kilometers) and what direction you are from it (i.e. azimuth). 

All of this could be automated in a microprocessor so there would be little or no user interaction to get a correct global position. Much like how GPS requires no human interaction to work. Also close and strong FMT's do sometimes penetrate indoor underground facilities better than GPS. GPS can penetrate some wood frame homes but not steel and concrete like in commercial/governmental buildings.

This could be called FM-GPS. American FM is between 88 to 108 Mhz. That is VHF FM and has better radio direction finding properties than our AM broadcast band which is plagued by fading, static, multipath reflections, ionospheric reflections, etc. Also antenna' electrical lengths are smaller for FM than our AM broadcast band although a small loop could be used.

I actually got a totally manual version of this to work. It is pretty accurate. Manual in that it was totally human interaction for every step. I used a computer to do the complex trigonometry to calculate my coordinates. I had to download the FCC data from their database at:

https://www.fcc.gov/encyclopedia/fm-query-broadcast-station-search

  Are you sure? yes | no

Blecky wrote 05/14/2015 at 22:37 point

That would definitely work, in fact probably better than cell phone positioning at those lower frequencies. As you mention, you need to know the location of the transmitter to do this, but if could code the position in the sub carrier (like SubPos does), you would have a fully workable positioning system.

I  will have the trilateration SDKs available shortly, so you would be able to experiment with these. The main issue you would have is getting the stations to standardise on transmitting positioning information/licencing (hence why I adopted Wi-Fi myself). But it could be done.

  Are you sure? yes | no

chris jones wrote 05/15/2015 at 18:54 point

FYI the maths used in my idea is called polar to rectangular conversion (or visa versa). If you code the lat/long in a WiFi node then you can compute the range in feet via getting azimuth on one more WiFi node (these azimuths are the theta or angle for the algorithm). Using the signal strength for range appears to be problematic to me due to reflections and obstacle RF absorption etc. Also wireless security cameras and microwave ovens in cafeteria restaurants are on same frequency. I don't know how you could get azimuth (RF direction) in your scenario. I would use a small Yagi-Uda. I made one and it worked pretty good. Used metal clothes hanger cut pieces and Styrofoam block. Used a 2.4 Ghz antenna equation from ARRL.

Power for WiFi nodes can be parasitic by using wall outlets in commercial areas (used by cleaning company for vacuum or floor waxers) or high-output photocell placed next to interior bright lights and it recharges a internal LiPo battery. Look for outlets high up on pylons or behind hallway fixtures or under brass-covered outlet in floors. You can disguise outlet dongle to look like power pack (see disguised spy devices at spymall stores). You can also mount behind outlet if you are a electrician and have access to that.

  Are you sure? yes | no

Blecky wrote 05/16/2015 at 01:58 point

I use averaging functions to increase the accuracy. The method I'm using isn't too dissimilar to regular WiFi positioning systems, except you don't require database connectivity or area profiling. The accuracy also increases as you add more nodes in an area.

I have a few things that I want to experiment with once I get the new nodes made up to increase accuracy further (precise timing for example).

You could increase accuracy with certain other techniques as you mention, but I probably won't build that into the final specification s people can build on that from there.

  Are you sure? yes | no

chris jones wrote 05/14/2015 at 20:42 point

I've been toying with an idea for an underground or indoor positioning system that simply uses paper signs on walls that have a QRCODE on it that returns a meaningful position data like lat/long coordinates, Cartesian reference (i.e. A100), or simply a spelled out reference (i.e. Rear Hallway Stairwell). You'd simply aim your smartphone camera at the sign and a QRCODE receiver app would translate the QRCODE to a text display, interactive map, or a url link to Google Maps, etc.

With this system someone must place the signs throughout the target area. The signs QRCODE data must match a database of known locations in the indoor environment. A interactive map display of the area must also be in the database.

Ideally if everything is stored locally on the smartphone or tablet, no outside signal like WI-FI or 3G/4G connection would be needed for this to work. In a underground environment an outside signal is not generally available.

If QRCODE sign placement coordination is to be easier for placement installers, the signs could be printed up with sequential numbers like 1,2,3,4... 1005, 1006, etc. Then when installer puts one up he/she records the number and the exact location and notates that in the public downloadable database. These signs should be placed high enough to avoid vandalism. They could be placed over existing billboards, ads, and public signs. They needn't be large. They could be just big enough for users to scan them from a few feet away. They would have self-adhesive backs like printer mailing labels. The number would also be printed under the QRCODE for user and installer convenience.

Here is an example picture:

http://oi57.tinypic.com/11iltuw.jpg

  Are you sure? yes | no

John Boyd wrote 05/08/2015 at 08:20 point

https://hackaday.io/project/604-marauders-map

The project is old and poorly named (its my undergrad senior design project), but we basically tried to do the same thing as you. Someone from industry came up and told us that his company had spent more than $15M trying to accomplish the same thing and also found it to be impractical. 

Now, that being said, I would LOVE to see someone overcome this challenge, so I do have a few unsolicited tips (take it or leave it, lol). Basically we found the reason the project does not work is because the commercially available radios (In our case we used the TI CC2500, TI CC3000, and the built in WiFi receivers in our phones and laptops) were not sensitive enough to get useful resolution. Basically it would only give us a reasonable approximation if we were very far away from the nodes (hard to do in a small room). The only way we saw that could really overcome this was to use more sensitive radios (something with more precise signal strength information than just 'RSSI'). Maybe if you can find some very nice radios, you will have better luck than us!

This post was not meant to be negative. Just trying to save you the despair of making similar mistakes to us (and others). Best of luck! I will definitely be following your progress closely. Feel free to message me if you ever want someone to help out.

Also, for what its worth, we found 2.4 GHz to be a VERY challenging band to perform triangulation on. Ideally a band with a longer wavelength would produce better results, but of course, this would eliminate the convenience of WiFi. Just food for thought. Best!

  Are you sure? yes | no

Blecky wrote 05/08/2015 at 08:44 point

I did see that project last year in the early days, but definitely didn't see it develop (I should have followed it in hindsight).

Understandably positioning in smaller spaces is quite difficult (especially when nodes are close) as most Wi-Fi receivers only give up to 1 decimal place of precision (if you are lucky), and they do provide a lot of variation between devices.

The main point of this project is to perform traditional Wi-Fi positioning (Google et al.) without the need for database connectivity or area profiling. I do however have a few (dark magic) techniques I would like to flesh out further to help with more accurate positioning in enclosed spaces, but not until I get most of the APIs finalised. Once there, people can build on it further with higher accuracy transmitters and receivers as they see fit.

The system as it stands though isn't any worse than current Wi-Fi positioning techniques and it's arguably better as it's easier to set up. In some instances (such as metro tunnels), it is still useful to get a rough estimate of position. With this project, you can obtain position from even a single node, as you know the position of the node and the rough radius (error).

Thank you for the tips and advice, I'm definitely making some bold claims :P

  Are you sure? yes | no

John Boyd wrote 05/08/2015 at 08:48 point

Very nice! Well I look forward to seeing what you have in store!

  Are you sure? yes | no

Blecky wrote 05/08/2015 at 08:51 point

Are you submitting an entry for the 2015 hackaday prize?

  Are you sure? yes | no

John Boyd wrote 05/08/2015 at 08:53 point

I have a few ideas im toying around with, I just haven't got around to posting them with school sucking up my time. I will probably post them soon though

  Are you sure? yes | no

Gabriel wrote 04/27/2015 at 14:56 point

What compiler do you use for your PIC's? I just bought a wifi module and have no idea where to start...and everything on the net is Arduino, further making me hate Arduino more, since code is so digested and hidden by magic libraries which makes reading code imposible as all i see is unicorns and peppermints.

  Are you sure? yes | no

Blecky wrote 04/27/2015 at 15:04 point

I'm using MPLABX with the free XC8 compiler (less code optimisations). Note that if you are using MPLAB(X), the learning curve is much much steeper than Arduino and if you are using the PIC16 chip variants, you generally have to create everything yourself from scratch as the demo libraries only work for the PIC18 families and up.

I'm not using any special libraries to talk to the ESP8266, just raw UART calls (fill UART byte buffer, flush, fill with next byte, flush...etc).

Another decent PIC IDE is MikroElektronika's MikroC (or any of the other language variants). Although it does cost about $200US and is geared more for their programming kits (although you can still use the PICKit, but you have to program the hex file manually through MPLAB, this means you don't get in circuit debugging).

Unfortunately the PIC community isn't a whole lot better when it comes to your main beef with Arduino. 90% of the time you will try to figure something out or ask a question on the forums, and the response will be, look at the datasheet. This will certainly frustrate you immensely.

It's true, everything you need is in each datasheet, it's just a matter of reading through and deciphering it.

My recommendation might be to start on a PIC family that has been widely used, so you can find lots of example code. Depending on your application the older (but still awesome) PIC18F4550 would be a good start.

  Are you sure? yes | no

Gabriel wrote 04/27/2015 at 15:20 point

I use CCS - its also a paid (and expensive) compiler - but the compiler and forum support are fantastic IMO. I have Olimex, MikroE and DIY boards in PIC16 to PIC18.

There are few libraries available for new stuff which means you must make your own all the time. IOT on PIC's is almost impossible IMO, there is so much missing because the STACK is Gigantic, cumbersome and unreadable as they've tried to make it usable on multiple PICs, each with a different setup...and boards with different Internet modules. miles of #IFDEF's

I am placing all of my IOT hopes on the ESP8266 module i recently bought.

  Are you sure? yes | no

Blecky wrote 04/27/2015 at 15:33 point

I've got it easy with this project, because all I'm doing is using the PIC to encode the positioning information from the user into the SSID and sending that to the ESP8266. The PIC then goes into standby until the user makes changes. I am still yet to make the process nicer, other than currently just setting the position over UART. I could do it by connecting to the ESP8266 with a Wi-Fi client, but that brings about various security implications (storing passwords etc.), plus I'm also looking to lock the firmware down on the ESP8266 so it's just a dumb beacon frame generator.

  Are you sure? yes | no

bmcgarvey wrote 04/25/2015 at 11:00 point

Blecky,

You should add some sort of sonar mapping, This will help with the cavity propagation problems that you will experience in enclosed spaces. 

Bigmac

  Are you sure? yes | no

Blecky wrote 04/26/2015 at 15:50 point

For the hackaday prize I'll be ironing out just the project as it stands. There are a lot of things still to sort out. 

But there are definitely areas that can be improved upon at a later stage. 

  Are you sure? yes | no

CNLohr wrote 04/01/2015 at 02:03 point

I'm a little confused why you don't use the Venerable ESP8266's stand-alone. They appear to be able to give you a RX power on every single packet!

  Are you sure? yes | no

Blecky wrote 04/01/2015 at 02:17 point

You get RX power (this is calculated from the receiver; RSSI), but you don't know the TX power from the client's side (assumedly you do if you only used the ESP8266 everywhere since it's one device, but it's designed to be generic for any AP). This is important when trying to figure out your relative distance to the transmitter (compared to other nodes). Additionally it's designed to be passive and utilise the beacon frame only. Clients don't connect to the AP, they just listen to the frames. This allows for very fast acquisition times (especially for lots of APs for more accurate triangulation; don't have to auth, profile link, disconnect) and simplifies the security model if using existing APs (some organisations might have issues with anyone connecting to their equipment/open APs, even if it's a segregated network/VLAN).

As for using it standalone (I'm guessing you mean without the micro), once again the node design is to be generic, you could drop in a different embedded AP module with the microcontroller without having to reprogram the AP, plus you can add more features/security. If I was to create a product/support module for this, I also probably wouldn't sell it with the ESP8266 as a whole product and have users drop in their own module.

Hopefully this makes sense.

  Are you sure? yes | no

CNLohr wrote 04/02/2015 at 14:17 point

It does.  It was a little backwards from what I expected.  I figured you would be using the ESPs to also receive frames in order to aid in coordination.  You could also modify the ESPs to send out frames more frequently, too... but if the ESP isn't speciifcally part of your engineering effort, I guess it's kinda moot.

  Are you sure? yes | no

Blecky wrote 04/02/2015 at 14:23 point

I'll definitely be playing with beacon update rates, I suspect that it will only be more of a concern when getting a "fix" when moving about. 

There is certainly a lot of experimentation to do.

  Are you sure? yes | no

hyperzap wrote 04/17/2015 at 14:21 point

Isnt the default beacon rate 100ms? thats pretty intense.

  Are you sure? yes | no

Blecky wrote 04/18/2015 at 00:41 point

It depends on the access point mostly. It also depends on the sample rate on the client device too (you can get aliasing/missed frames of packets at the receiver as well as collisions). Unfortunately we can't always do something about this as we don't control certain aspects of the hardware.

The main thing is to find a balance with the number of sample points the trilateration algorithm uses to calculate it's position while moving. The application will try to determine the velocity and disregard points that would have "timed out" at the client's new position. 

This mostly becomes a problem, as the faster you go, the less accurate the position will be (less sample points). But you can overcome this by using an interpolated position to best guess where you are going to be at a certain time, then using that point as a higher weighted sum in the trilateration algorithm.

  Are you sure? yes | no

Radu Motisan wrote 03/30/2015 at 21:36 point

I think you can call this "indoor position system" as well. Personally I had many issues finding a robust non-gps position system, and your project seems to offer just that. Needless to point out the high value of such a technology and how bad it is needed. Looking forward to your first tests, as for now I am a bit concerned on the maximum accuracy possible. Good luck and keep us posted!

  Are you sure? yes | no

Blecky wrote 03/30/2015 at 23:28 point

I'm hoping for a couple of meters of accuracy at worst. Provided this is useful in the applications mentioned I'll be happy. If I get better than that then I'll be super happy.

 Obviously there will be limiting factors like minimum nodes required for decent fix (placement will be key), whether you have travelled outside the bounding area of the nodes and frequency of beacon frames (number sent per second).

Cheers for the skull!

  Are you sure? yes | no

hyperzap wrote 04/17/2015 at 14:29 point

Is the underlying assumption here line of sight to at least 3 nodes? Because I cannot see how this could work in a non-open-plan office or a home. Seems like a large flat open space thing.

On an aside, I am doing an android dev subject next semester. With enough nudging and a bit of luck, I should be able to app daht xD

  Are you sure? yes | no

Blecky wrote 04/18/2015 at 00:55 point

That is certainly the case. The application definitely assumes that there would would be at least 3 access points in a room with relatively decent line of sight (the path loss coefficients will allow for abnormal path loss, e.g. items in the way) to determine a relatively accurate location (you can calculate a position from one point, but it will be somewhere from where the point is to a radius of the distance calculated. The good thing is that the trilateration algorithm already gives lower regard to access points in other rooms as their "distance" or path loss will be much greater.

Ideally this would be used in less confined areas such as shopping malls for example. Although the way around this problem would be to place more nodes if you want to work in a more confined area. Hence the creation of the cheap beacon generators.

It's then up to the person deploying the nodes and the application developer to determine if the accuracy would be useful enough in certain environments. You can only get so much out of such a technology, hence why GPS doesn't work well in areas with tall buildings and areas with lots of multipath propagation.

As for Android dev, you will find it daunting at first while you wrap your head around Google's syntax for things (the language is effectively Java, but the API might warp your brain a little), but it will eventually click. I recommend maybe getting your hands dirty with a task before you start the semester to get yourself ahead of the class. There are plenty of follow by example projects out there and they would help you immensely.

  Are you sure? yes | no

gcouger wrote 03/30/2015 at 03:21 point

To squeeze the most out of a link use UDP not TCIP and SLIP RFC 1055 I used a carnage return \0d13  the START and END datagram per Phil Karns suggestion https://www.ietf.org/rfc/rfc1055.txt to allow me to modify a terminal program to serve as host, repeater or water ever and watch the traffic go by and insert messages by hand. You have to do your onw NAK and ACKs if you need them.


I haven't kept up but $10 links are going to be hard to do unless transceivers have really got cheap.

Gordon

  Are you sure? yes | no

Blecky wrote 03/30/2015 at 03:52 point

It's just using the Wi-Fi beacon frame with a modified SSID. Clients don't connect to the AP, they just passively listen to the frames :)

In fact, the end goal is just to simplify it to the point where you could disable all access point functionality and only send the frames (this would be for the nodes I'm creating, rather than existing infrastructure that you modify).

  Are you sure? yes | no

Similar Projects

Does this project spark your interest?

Become a member to follow this project and never miss any updates