 John Westhoff
I removed all of the screws from my ThinkPad. That might have been a little big overkill, but whatever.
I then removed the keyboard from the laptop by prying it up, and then I detached the plastic molding that covers the hinges.
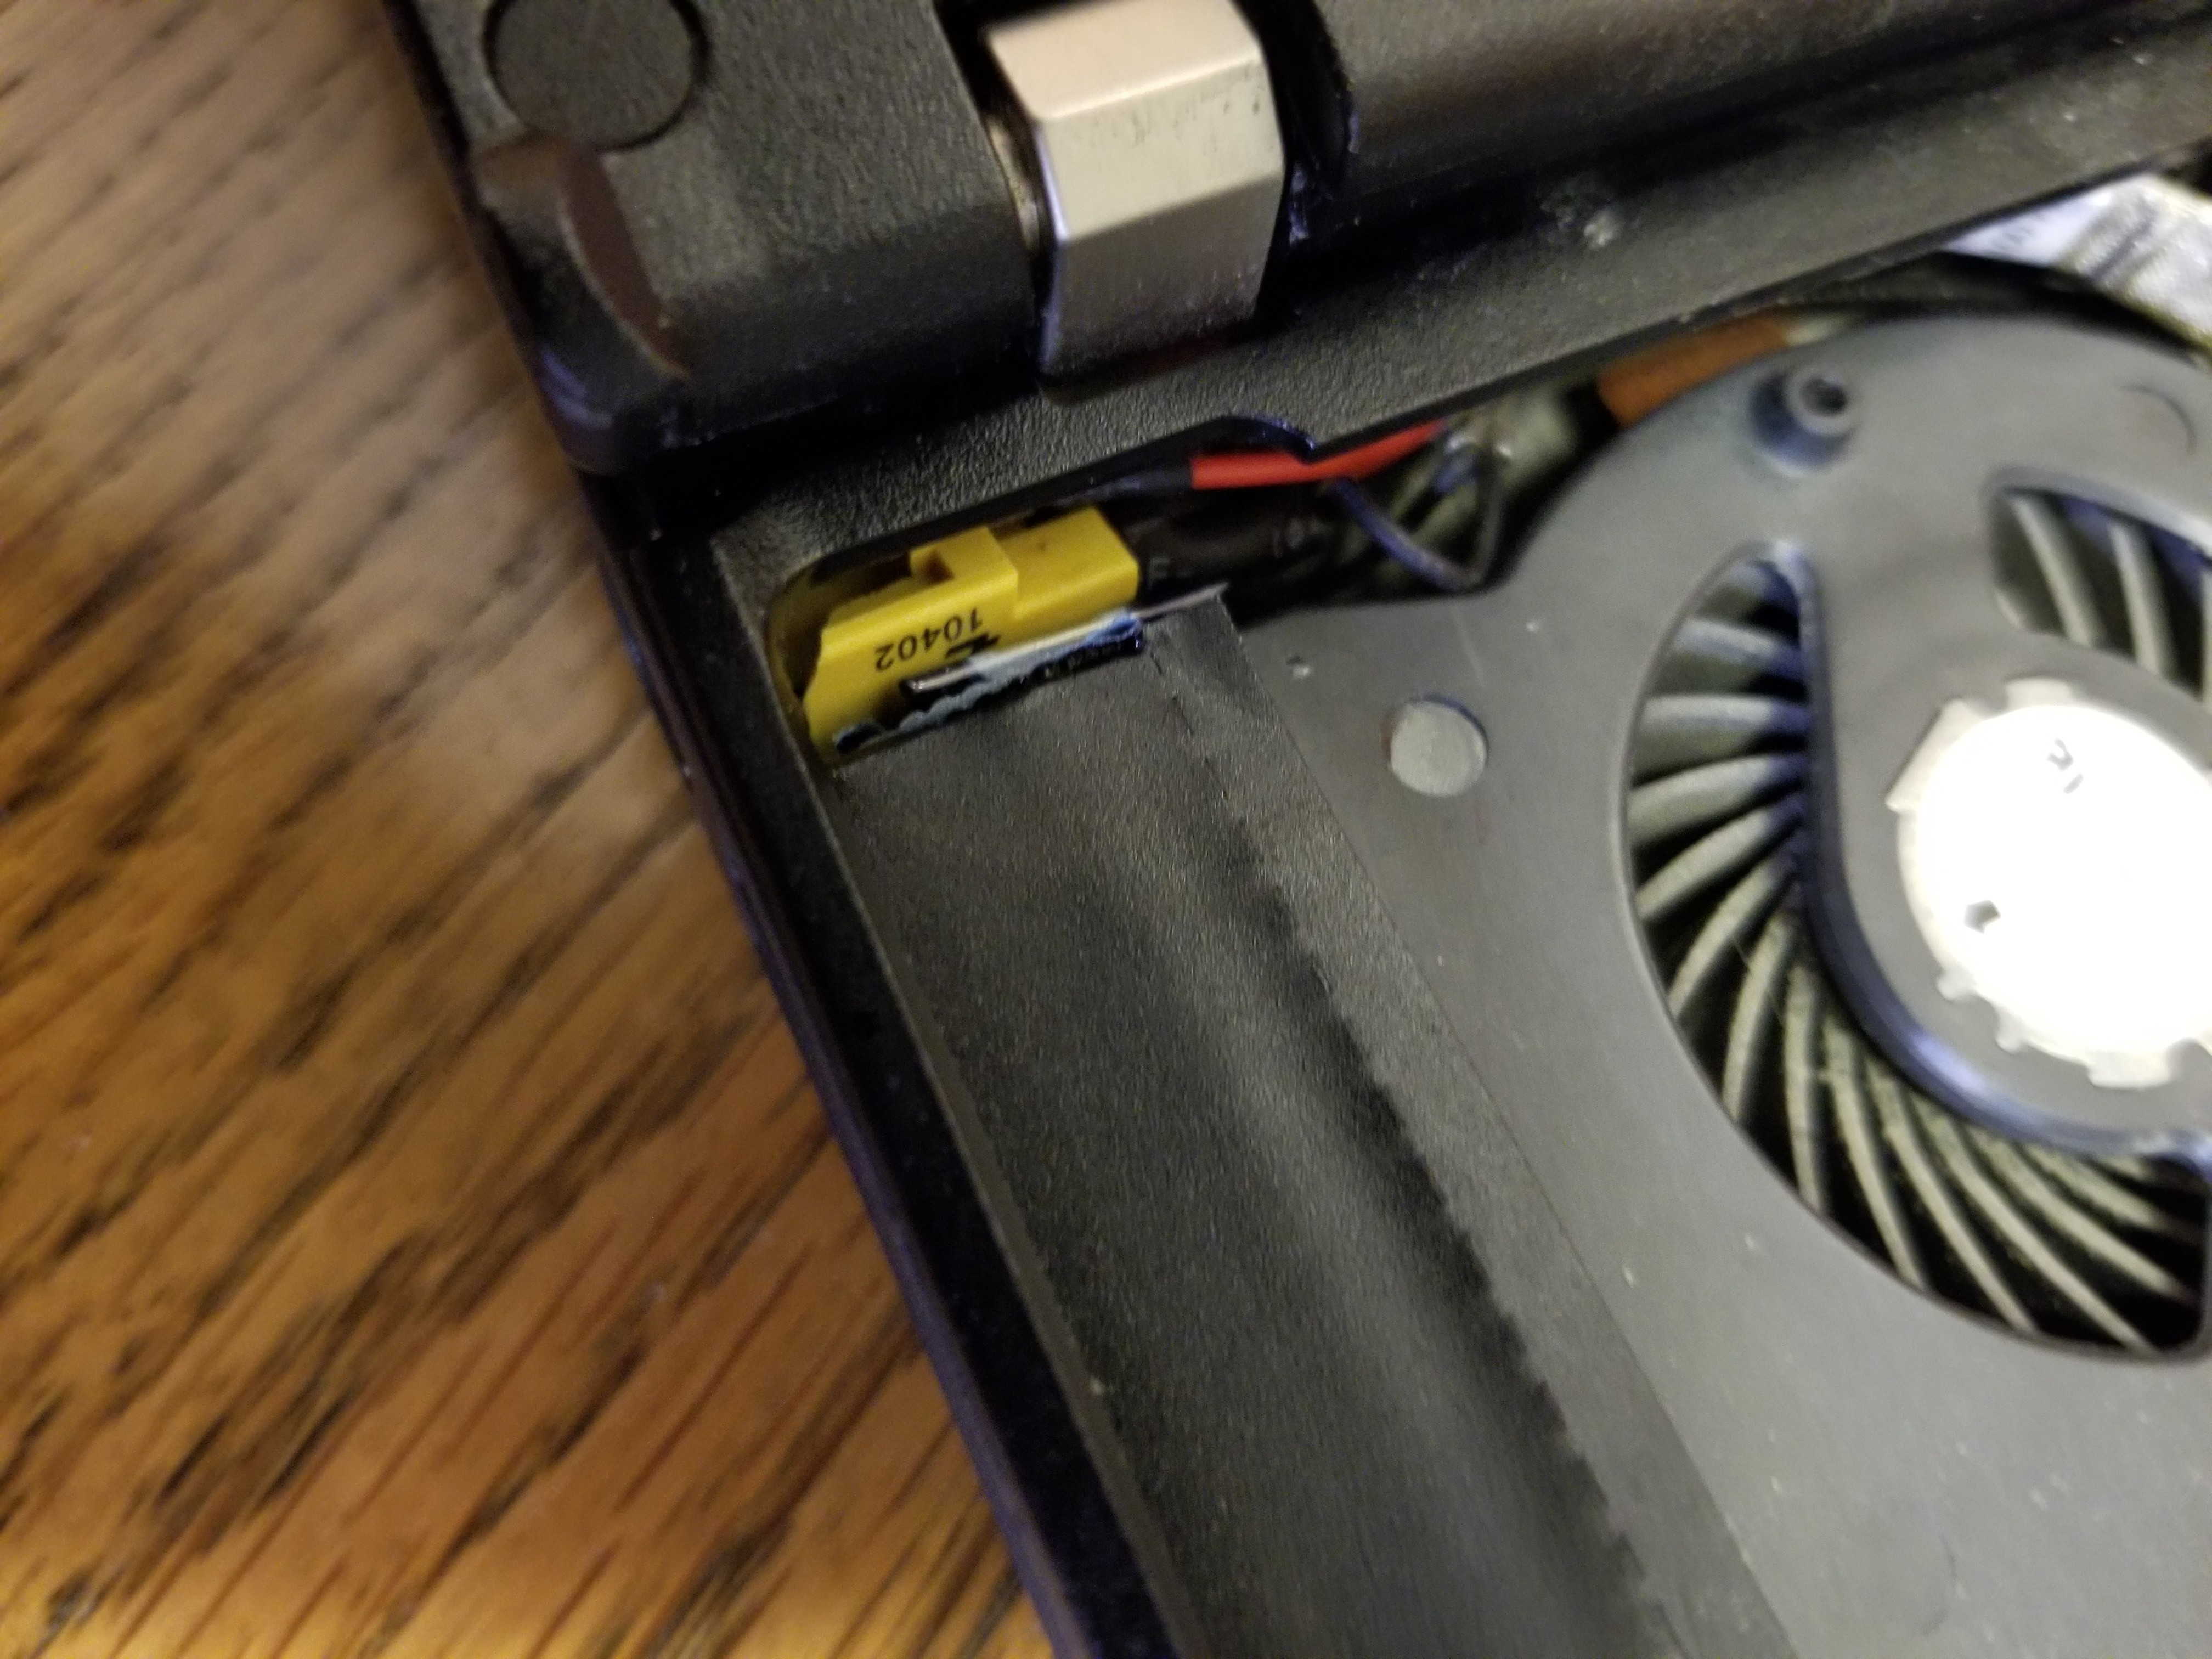
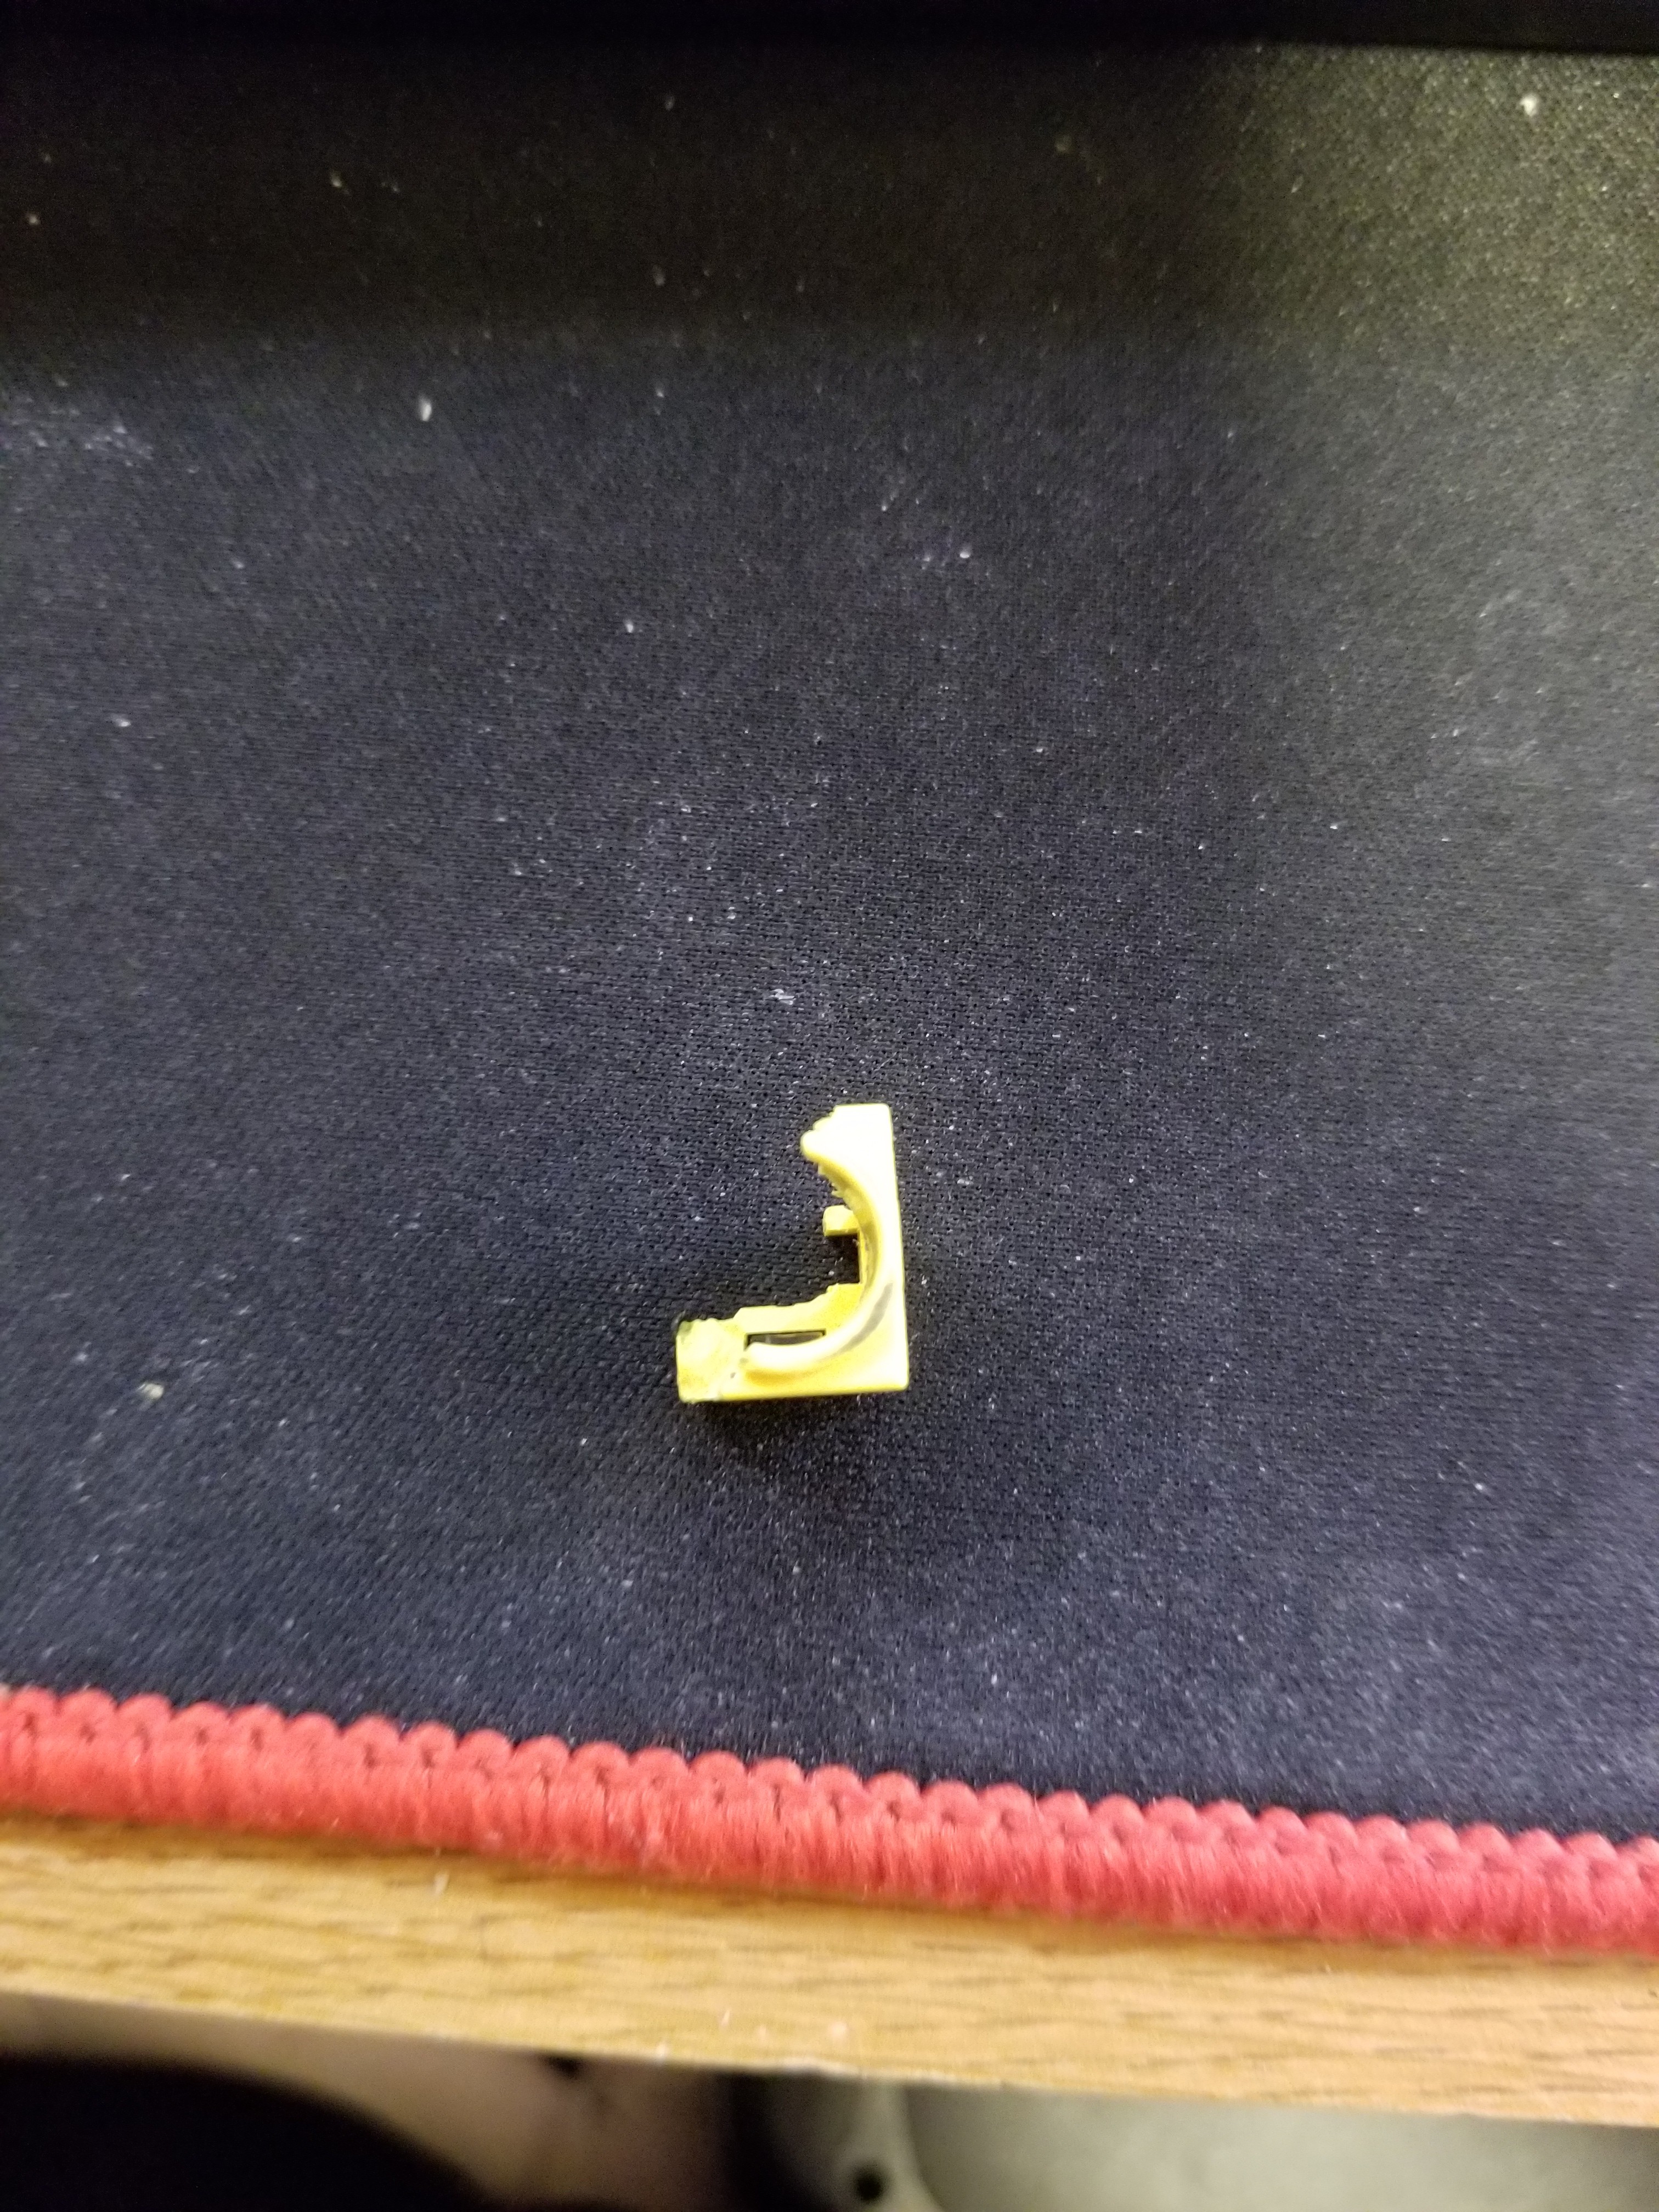
I pulled the screen half up and out of the hinges, and removed the broken bits of plastic. I found one to be a diagonal half of the shell, pictured below.
This seemed like a good place to start, so I measured everything I could with a pair of calipers.
That little plastic chip, if it were a complete rectangular prism, would measure 12mm x 10mm x 11.5mm. It seems that the hole the DC plug would go into is 8mm in diameter, and the little circular lip that is part of that solid is 1mm thick. I also measured the inner pieces of the DC jack.
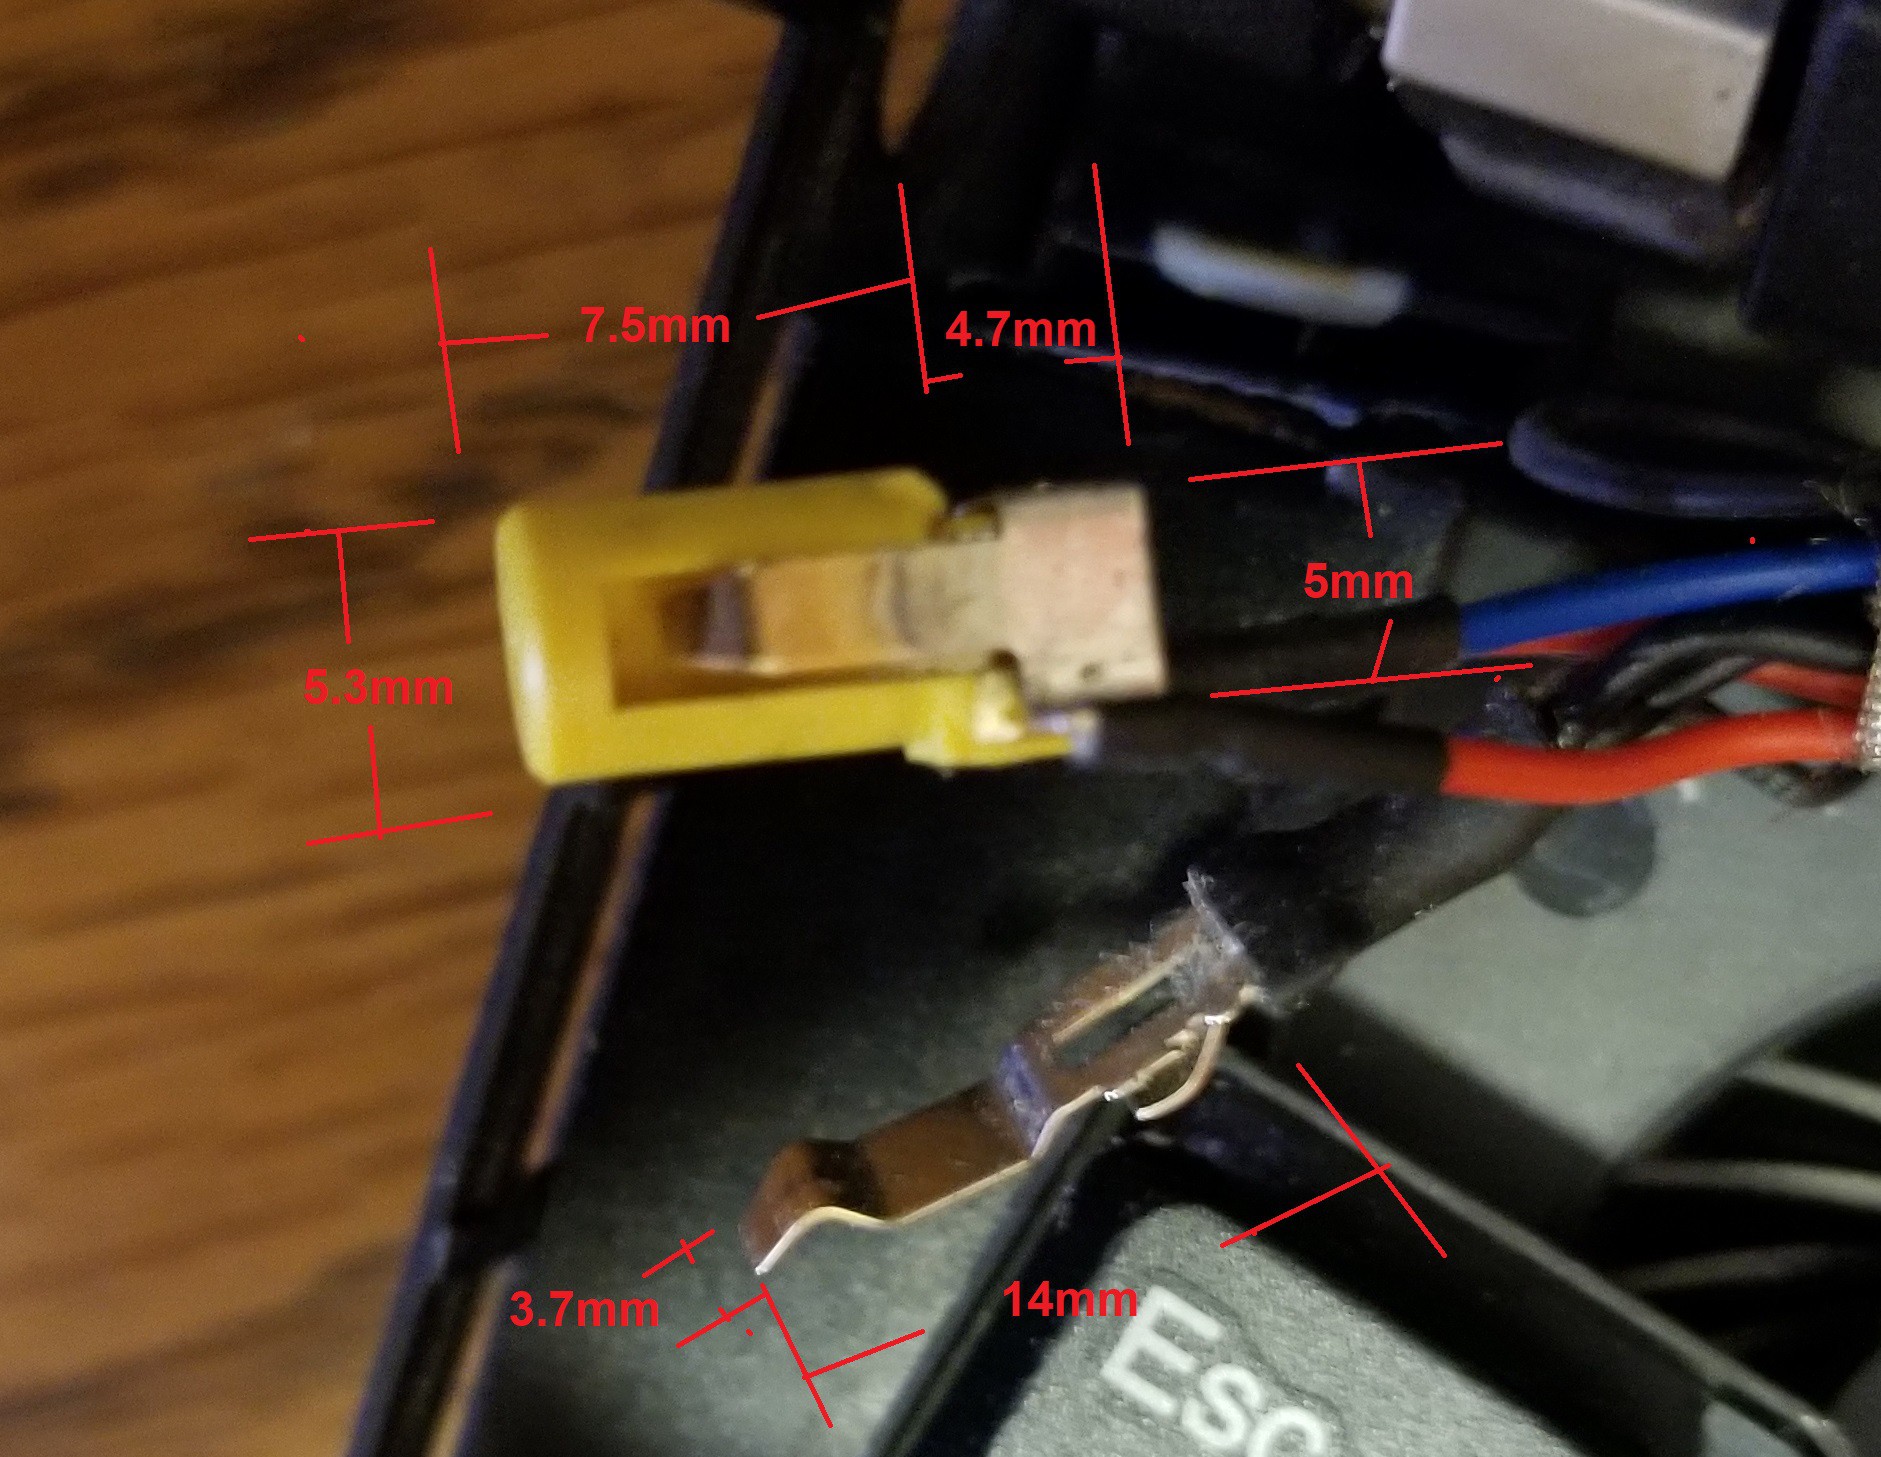
The inner cylinder is about 7.5mm long, and has a diameter of about 5.3mm. Behind the cylinder is a 5mm x 4.3mm rectangular prism that is 4.7mm deep and about half a milliliter below center on the cylinder. The ground tab is about 14mm long and about 3.7mm wide. Towards the tip of the tab the bump is about 1.5mm high and towards the back there is a bump that is about 2.5mm high in the opposite direction.
Then I fired up Tinkercad and started on a model for the outer shell, which is available as one of the project files. I plan on gluing the inner pieces to the completed outer shell once it is printed.
Discussions
Become a Hackaday.io Member
Create an account to leave a comment. Already have an account? Log In.