 Benchoff
This entire project is a little bit of an odd bird. In terms of electronic sophistication, it’s not too different than any of the other homebrew computers you might see on Hackaday. This isn’t a project that will just sit on my workbench until I die and it is subsequently thrown away, though: I’ll need to lug this thing around to Makerfaires, retro computer gatherings and Hackaday not-cons to show it off. This means I need an awesome looking enclosure, and everything needs to fit together perfectly.
This means I should start with the mechanical design of the project - obtaining an enclosure first, then designing the whole thing around that. Yes, it’s completely backwards, but the evil Hackaday overlords are a fickle bunch and I’d like to impress them, lest we have a repeat of the server blade of damocles incident.
The enclosure I’m using is a Hammond instrument case. They’re truly remarkable, sturdy, and undeniably old-school enclosures that really lend an air of being cobbled together in a silicon valley lab in the early 80s. I’ve chosen the 1458VD4B enclosure - eight inches wide and long, and four inches tall. This is great because the Eurocard connectors I plan on using for the backplane are just under four inches long.
Figuring out what’s required
The design of a backplane computer is actually pretty simple. All I need to do is build all the parts of my computer on cards, plug them into the backplane, and hope everything works. It’s a much more modular approach than building an entire computer on a single PCB. With this modularity comes a whole lot of planning, though. I need to figure out how I’m going to power everything attached to the backplane, how to turn the power on and off, and how to fiddle with the reset circuit.
Power
Really old computers based on the S100 bus like the Altair 8800 have huge linear power supplies with transformers and hilariously large capacitors. Even old gear with switching supplies - the Apple II and the Digital VT100 - have power supplies that are still absurdly large. This just won’t do for an enclosure that’s smaller than a shoe box.
There are, however, extremely small ATX power supplies. This little guy comes to mind. It’s the smallest computer power supply available, and just barely larger than the ATX power connector itself. It sips power from an external power adapter that provides 12V, then steps that down to 5V and 3.3V for everything on a modern motherboard. It has all the features you’d find in an ATX power supply, and is impressively cheap.
Using an AXT supply means I need a way to ground the enable pin on the supply, but a small slide switch on the backplane takes care of that.
Connectors
As I said above, I’ll be using Eurocard connectors for this computer, with the female plugs on the backplane, and right angle male plugs on the cards themselves. Normally, Eurocard connectors have 96 individual pins. This is far more than what I need, but it does present a problem: If I want my backplane to be a 2-layer board (and thus not be absurdly expensive for a run of 10), there’s no easy way to route all the connections between three rows of connectors.
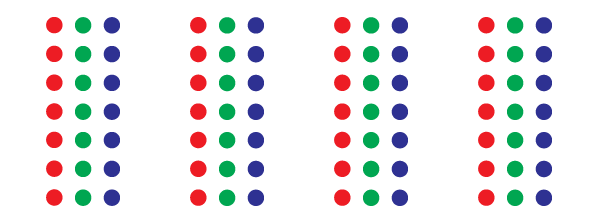
Seriously. Using two different colored lines, connect all the red dots together, all the green dots together, and all the blue dots together. Make sure lines of the same color do not cross.
The solution to this problem is, of course, to give up. I don’t need 96 pins available for each card, and since I’m not using one of the fancier chips in the Motorola 68000 family like the ‘020 or ‘030, I can get away with this. 64 pin Eurocards, with two rows of 32 pins, will do just fine.

There it is. Well, it’s just a render, but there you go. The holes on the short ends line up with the mounting holes in my Hammond enclosure. If you have a keen eye, you may have noticed a small addition to the backplane. Right between the ATX power supply connector and the first Eurocard socket is a 2x32 header. That's for something else entirely, and I'll cover that in another build log.
Discussions
Become a Hackaday.io Member
Create an account to leave a comment. Already have an account? Log In.