Close
0%
0%

RF light switch

Controlling security lights from 35m away

Similar projects worth following
Controlling security lights from 35m away. Don't worry, installation does not look like the attached photo anymore :). Source code is NOT optimal and might not even work for you, but it is a start. Updated dead links to source code

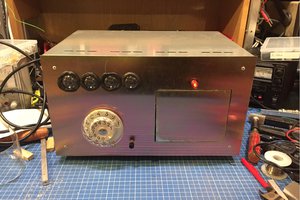
I wanted a way to switch our security lights on when entering the yard without getting out of the car. This resulted.

My biggest fail with this was when I switched from ATmega328p to ATtiny85. I changed the source code, I changed the circuit, I changed my libraries, everything. Then nothing worked. Days and days of trying to fix my code/libraries I realised that one of my connection wires giving power to the RF module is not 100%. Replaced it and all of a sudden everything worked!

  • 1 × 315MHz RF kit Cheap Transmitter and Receiver
  • 2 × ATtiny85 For the transmitter and receiver. Internal oscillator (upgraded after photo)
  • 1 × 12VDC/240VAC relay Because ATmega does not like 240VAC :)
  • 1 × 12VDC wallwart Relay receiver requires 12VDC, ATmega 5VDC
  • 1 × 7805 or something similar Relay requires 12VDC, ATmega 5VDC

View all 8 components

  • 1
    Step 1

    Transmitter: 

    4.5-5V supply must be thrown towards the ATtiny. The RF transmitter works best with 12V, but 4.5V proved to be enough for 35m distance (even with the receiver inside the house).

    The LED is just for an indication that the button press was registered, and you can add a push button (or voice control if you like) to bring the ATtiny out of sleep mode. If you can't wire up a button to a uC without instructions, PLEASE DON'T GO AHEAD

  • 2
    Step 2

    Receiver:

    This end is connected to mains voltage (240VAC for me). Ignore the photos as that was done on old board with other projects, and still used ATmega's. Line up a 7805 or your favourite regulator and feed the uC and RF module. Grab a data line from the module to a pin of your choice.

    Remember to use a transistor and diode to switch the relay, don't do it directly.

    I have added a push button on pin 2 as an override switch so you can still light up the back yard from inside the house while the remote is in the car.

  • 3
    Step 3

    Mains voltage alert:

    Now it's time to connect your mains voltage. In my case I wired the relay in series with the normal switch, so the switch needs to stay on. In retrospect, parallel would have worked much better, but in my case it would have made the wiring difficult.

View all 6 instructions

Enjoy this project?

Share

Discussions

DigiGram wrote 06/23/2014 at 13:15 point
I'll update the links now, did not know those expire. This code is possible UNTESTED since I can't remember which files actually worked, was a long time ago. The Transmitter was written slightly different to work on the ATtiny85 as well, again, can't remember if I actually followed through with the code.

Enjoy

Receiver: http://pastebin.com/c40L2Kks
Transmitter (328p): http://pastebin.com/N0fWNiF5
Transmitter (tiny 85): http://pastebin.com/kzGiTrSp

  Are you sure? yes | no

pedrito wrote 06/23/2014 at 13:02 point
Hey DigiGram, the links to the Transmitter and Receiver code are dead. Have you got them hosted elsewhere?

  Are you sure? yes | no

DigiGram wrote 06/17/2014 at 09:25 point
If you want to hack, build it. It's quite fun. But the kit *should* be better. I've moved house and don't need something like this anymore, so I never bought the kit. It is something similiar to this, just look at the voltages, I chose one for 240V (live in South Africa) (but this link is just the first one I found when searching now http://www.dx.com/p/mtdz007-rf-2-channel-wireless-remote-control-relay-switch-module-green-brown-black-12v-153868 )

  Are you sure? yes | no

pedrito wrote 06/17/2014 at 09:00 point
Hey there, I'm keen to try your project out but I also see you mention that you're probably going to buy a kit from dx. Do you have a link to the kit?

  Are you sure? yes | no

Similar Projects

Does this project spark your interest?

Become a member to follow this project and never miss any updates