Close
0%
0%

Hackberry Feedback System

Assembly of the Hackberry Hand and improvisation of the feedback system.

Similar projects worth following
Ever wondered what if an amputee with a prosthetic hand picks up a hot cup of coffee and drinks it? In this project called Hackberry Feedback System, we are making a feedback system which, will enable the user to get a feedback while grabbing an object with Hackberry Hand. The feedback could be in terms of temperature and strength while grabbing.

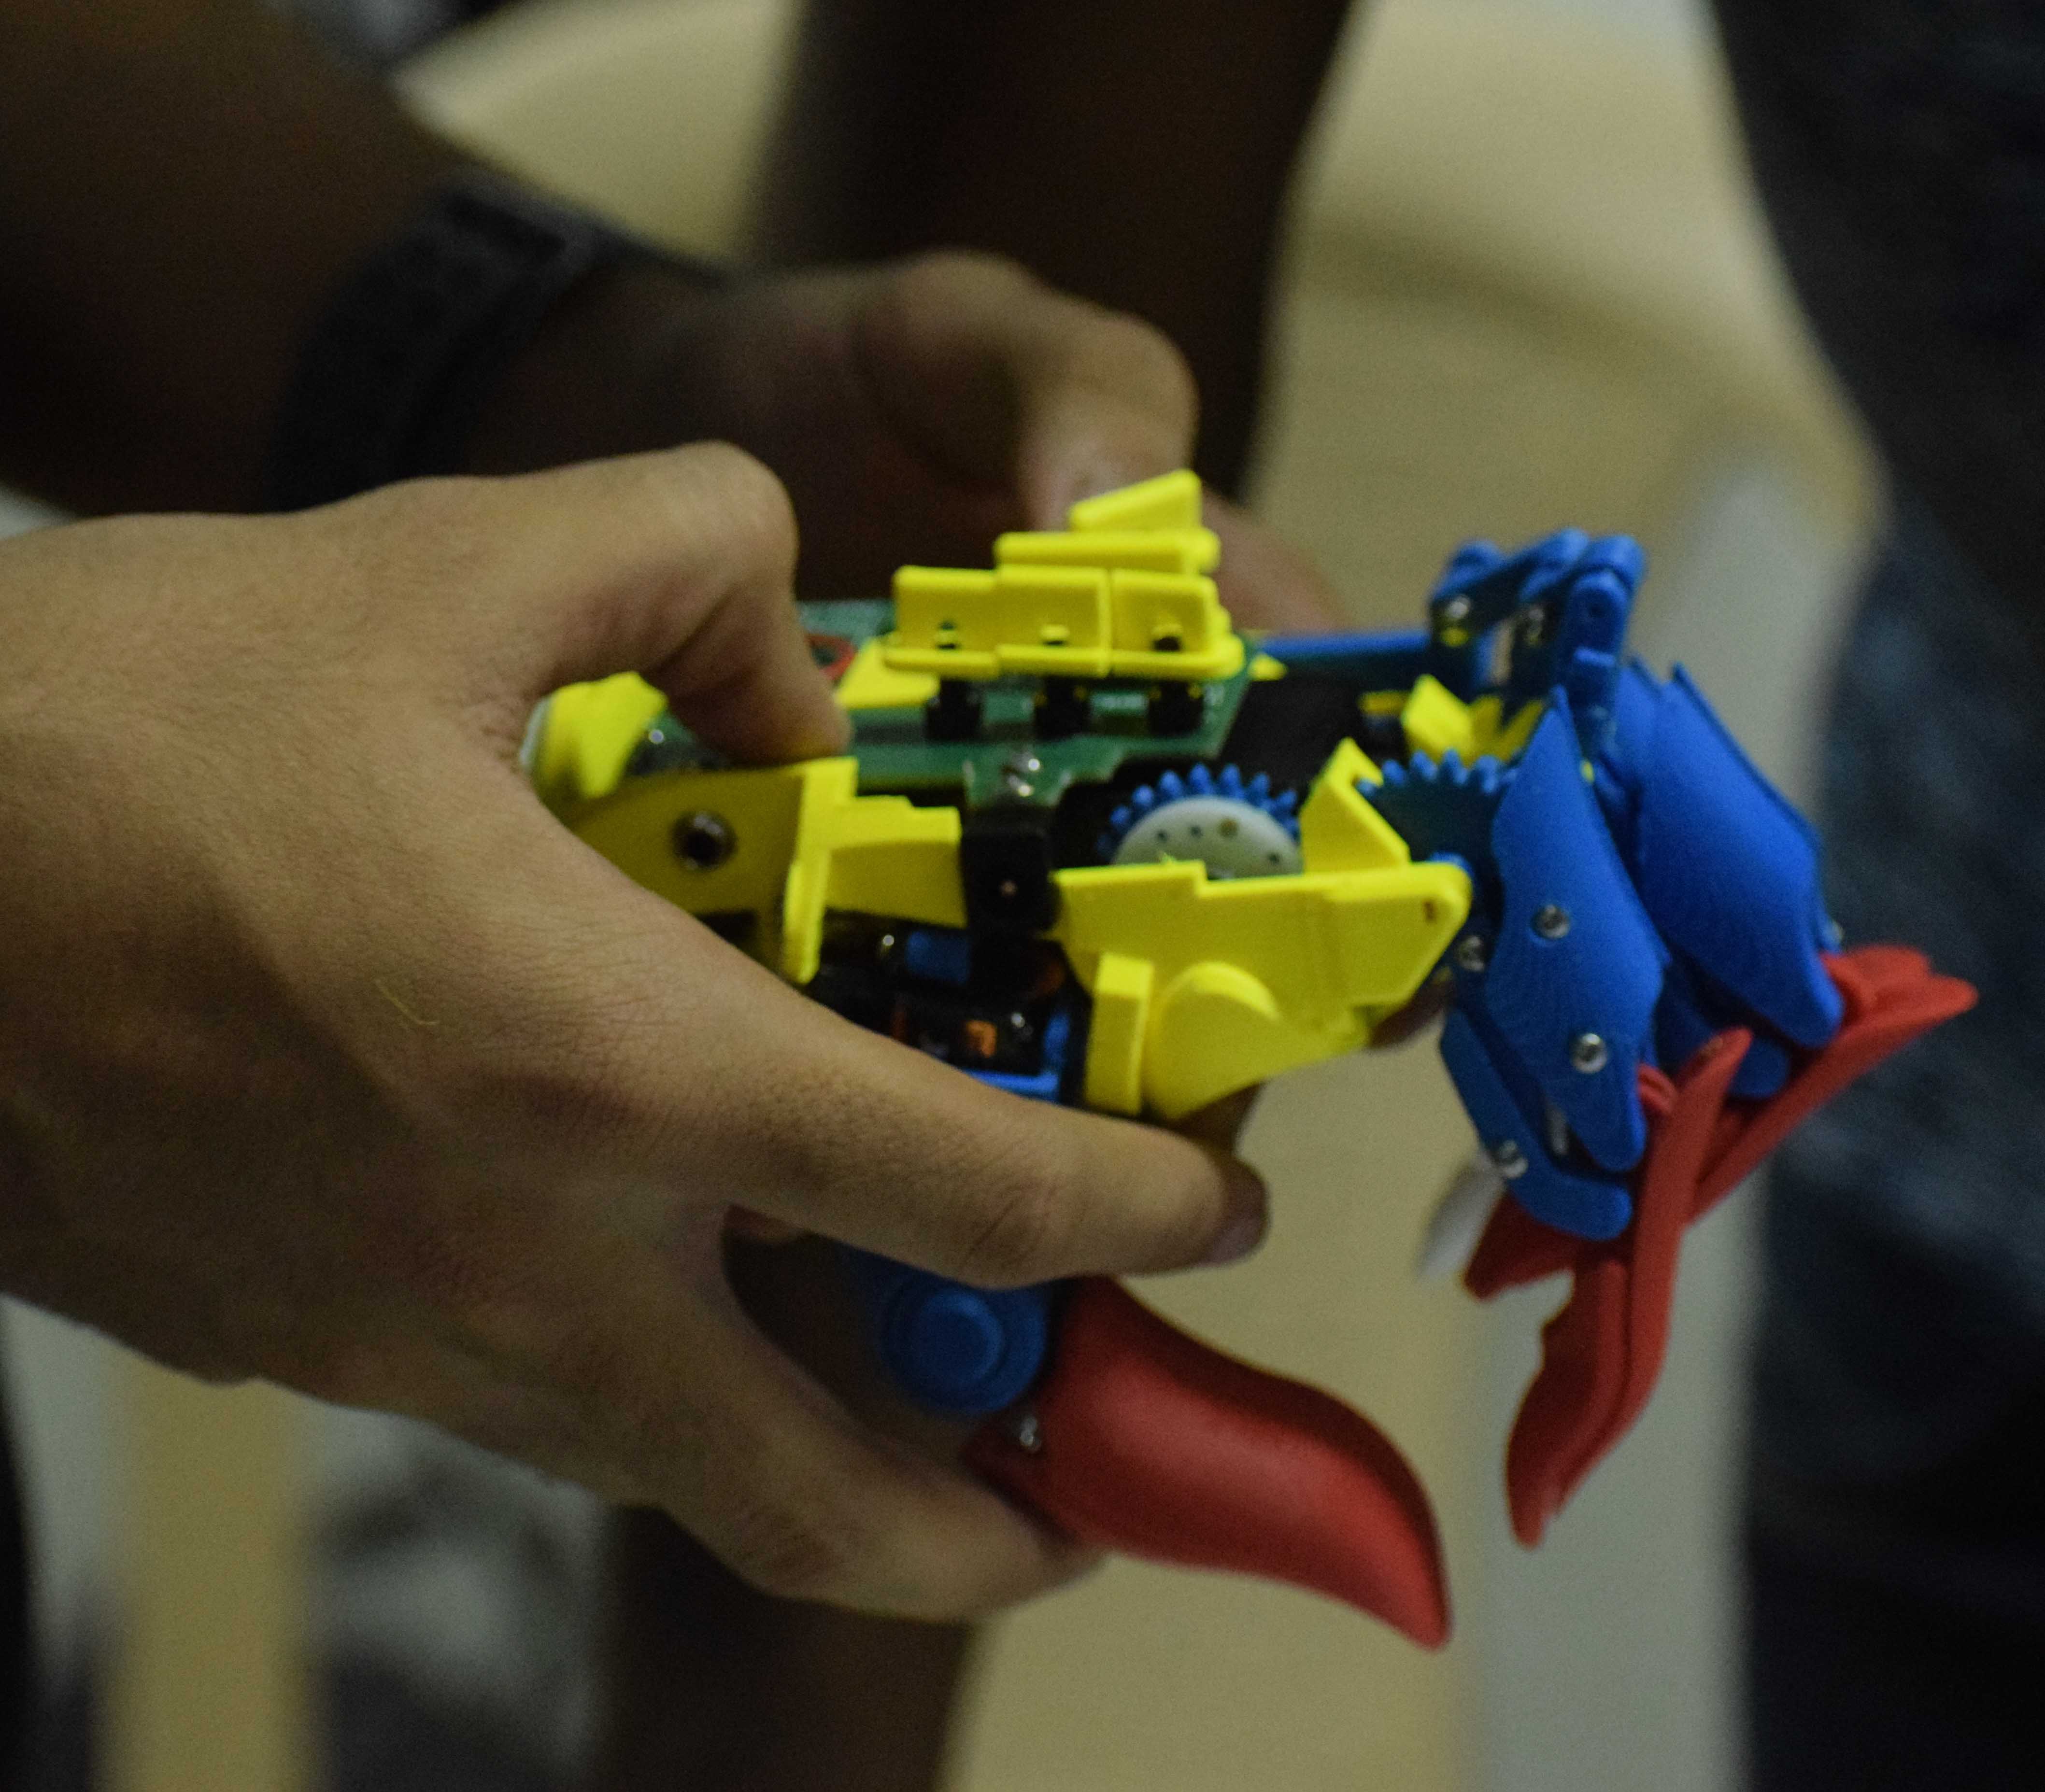
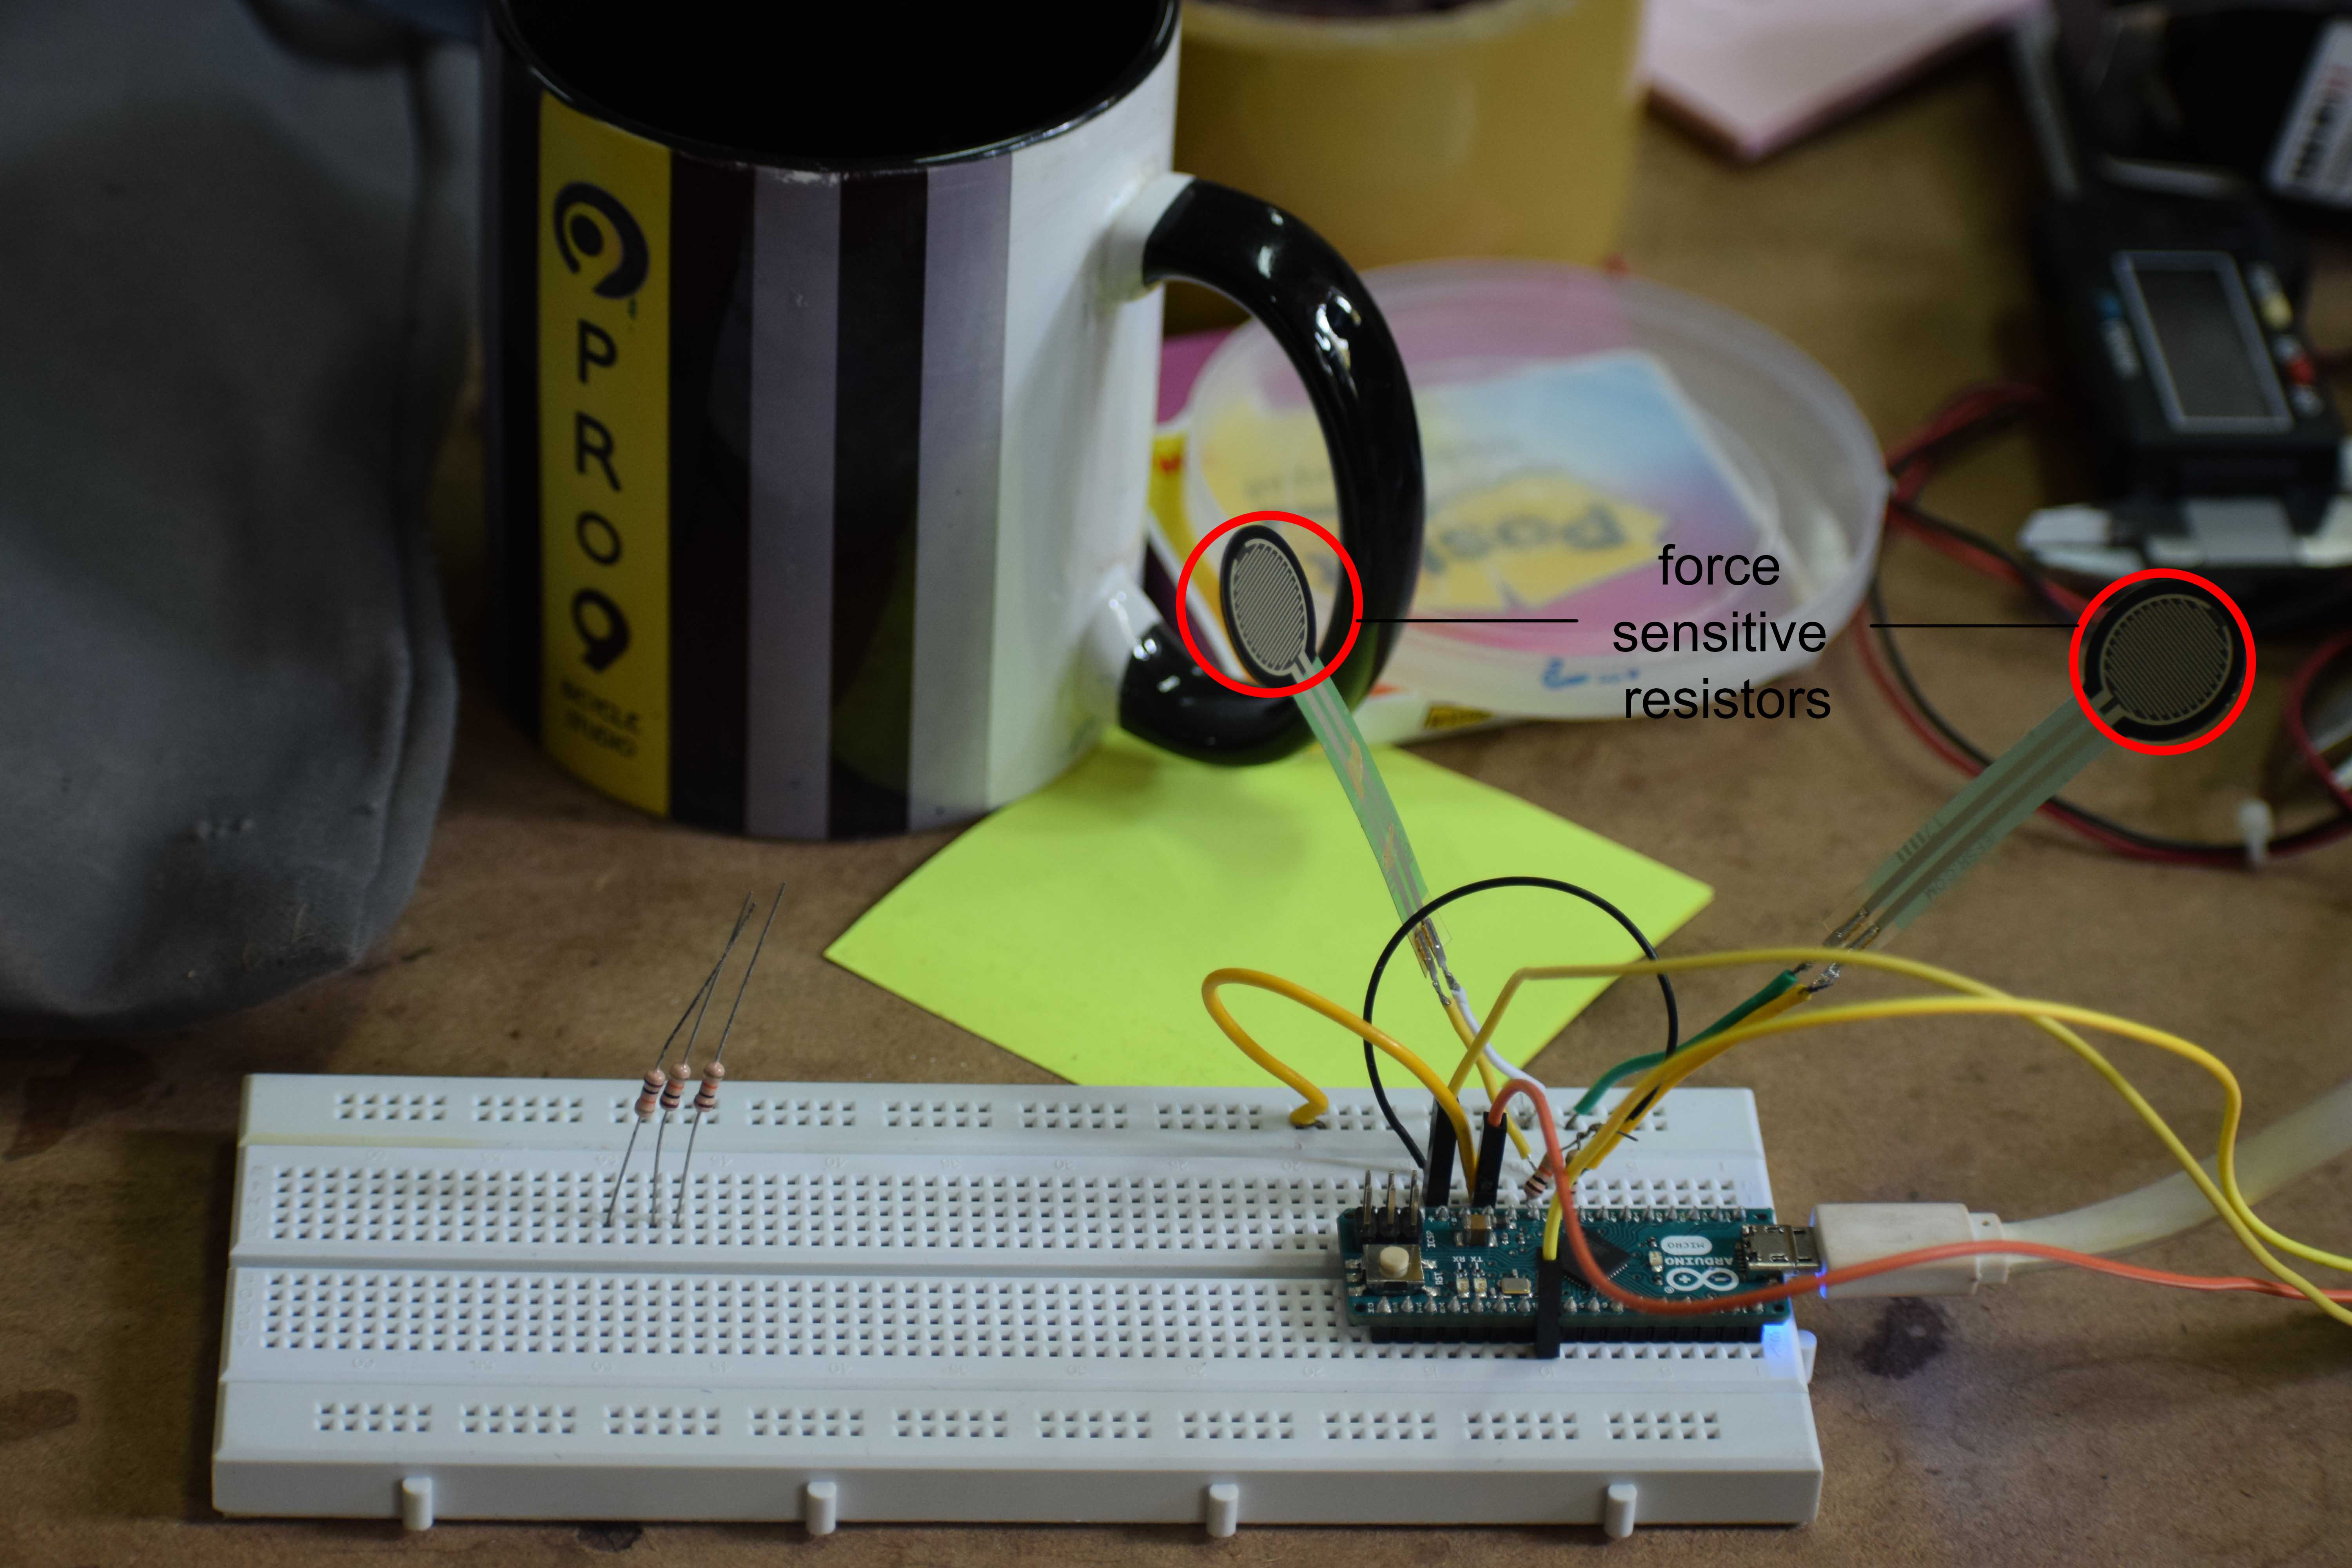
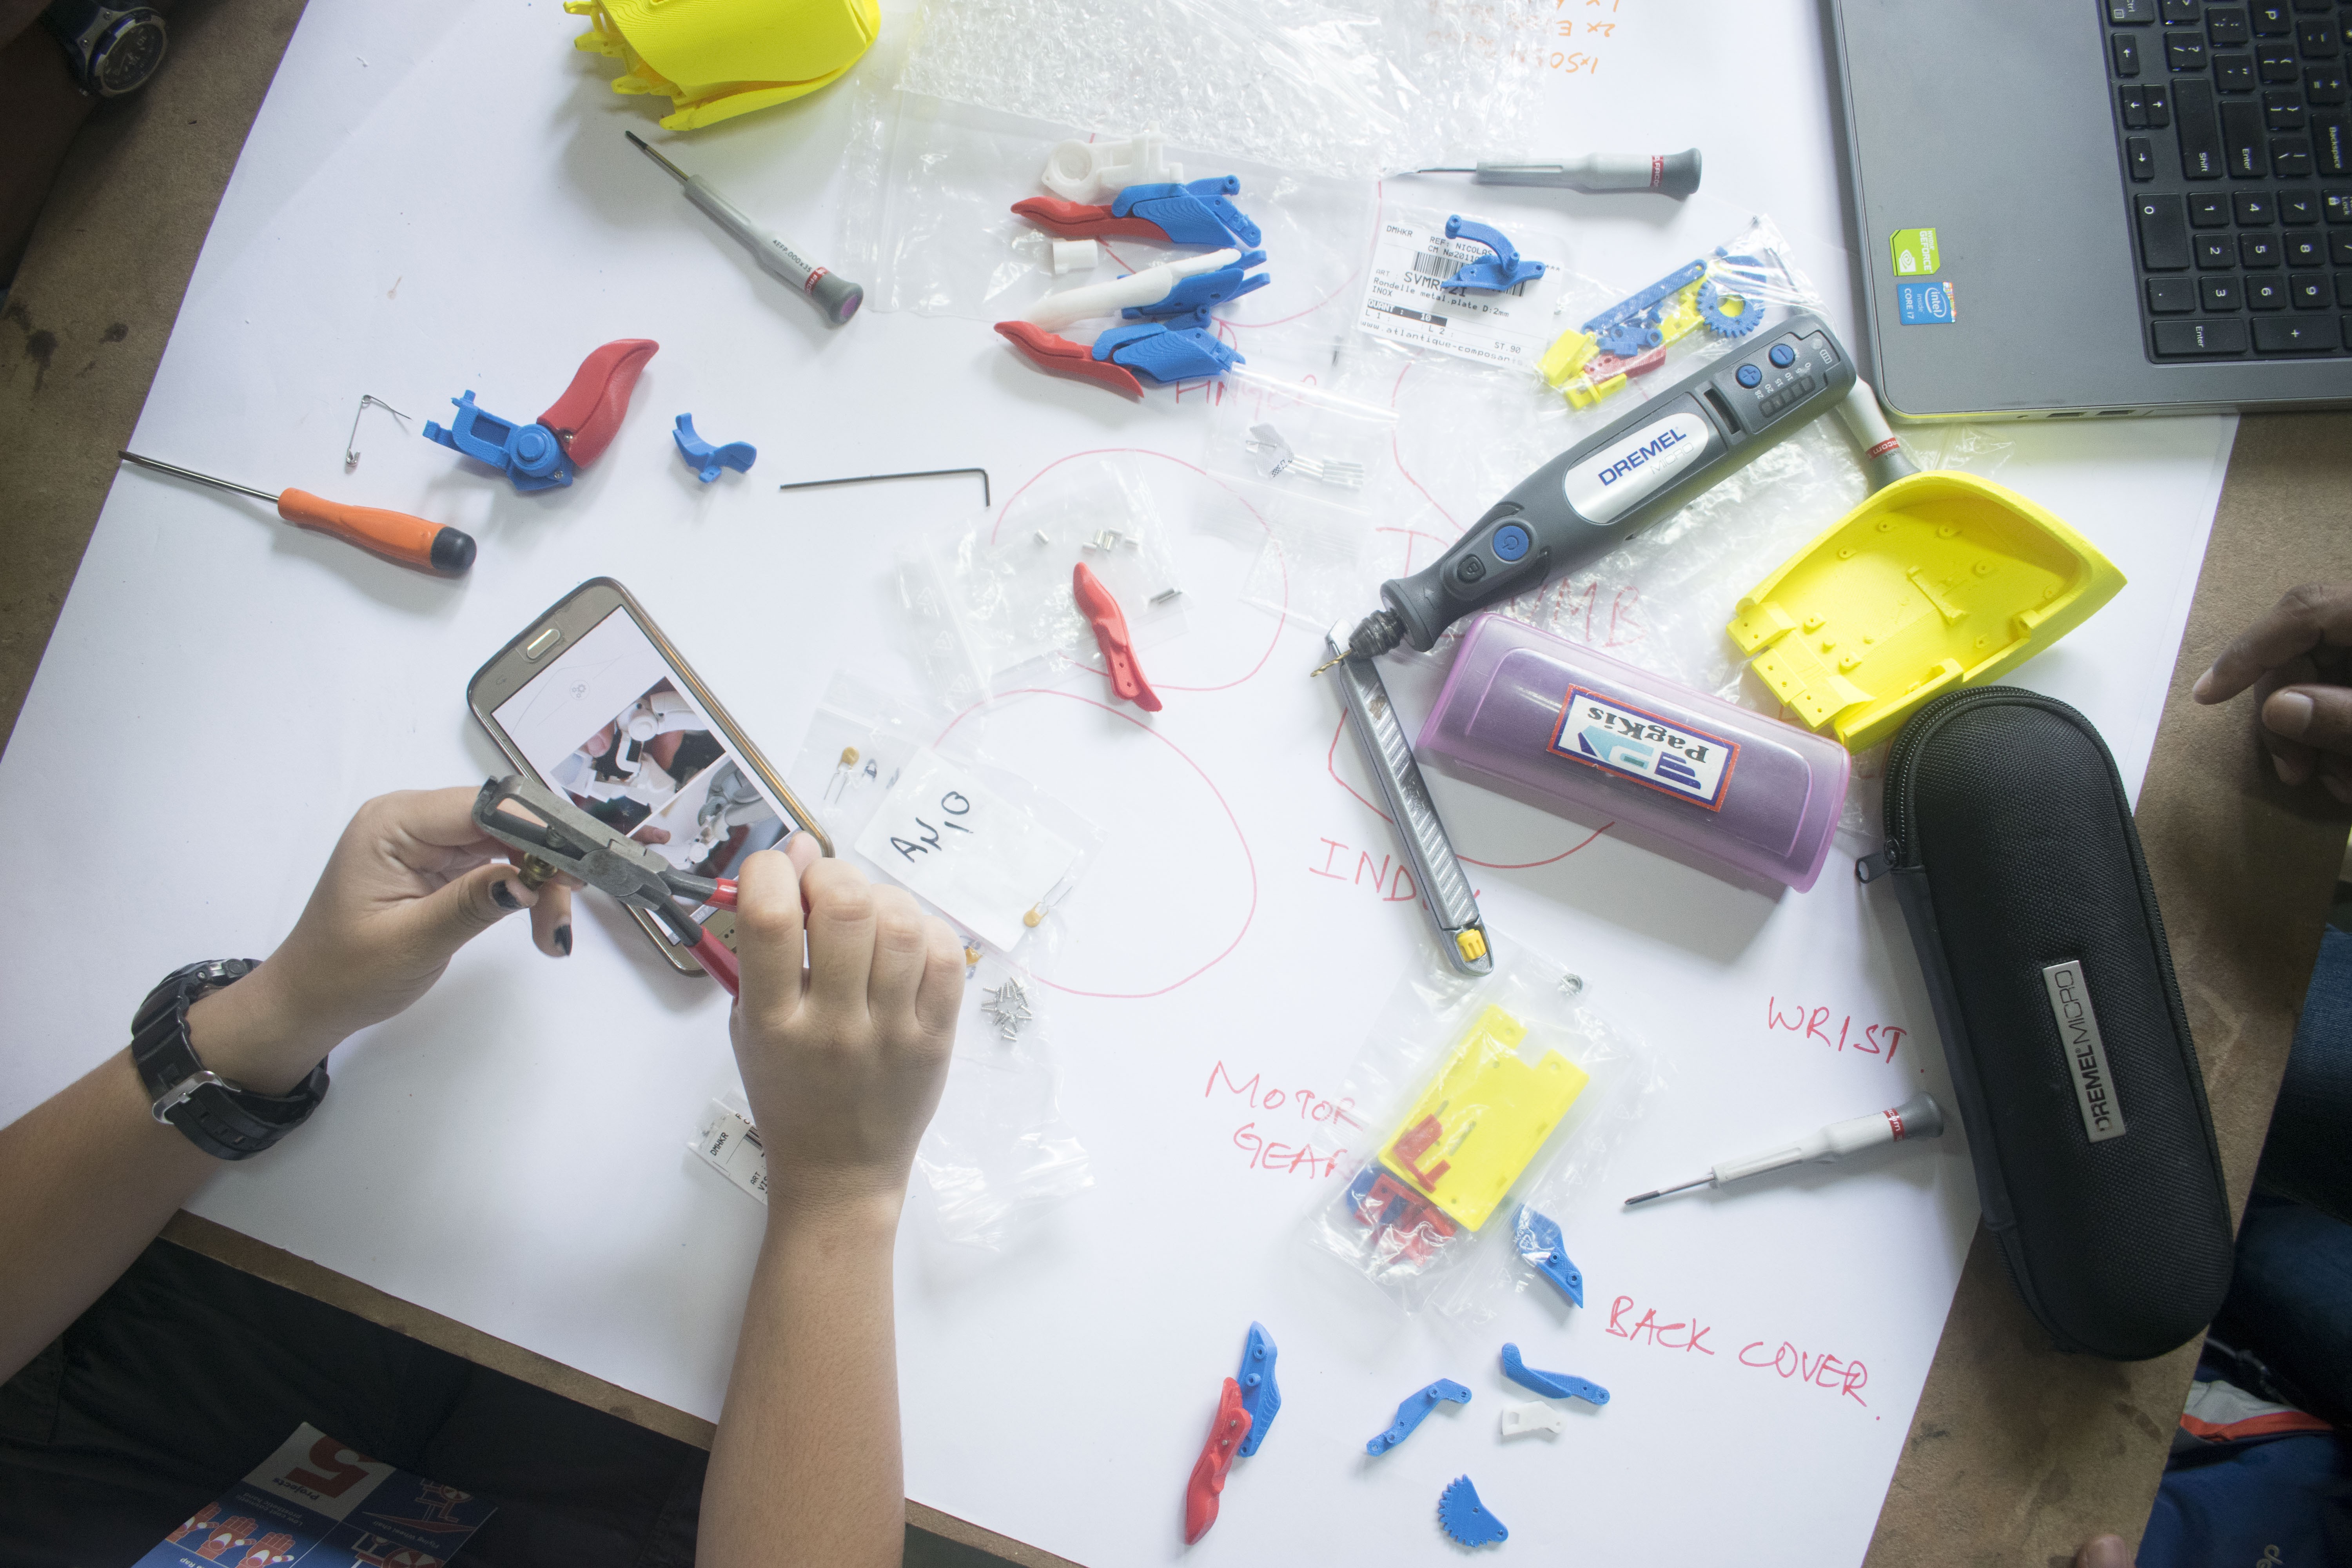
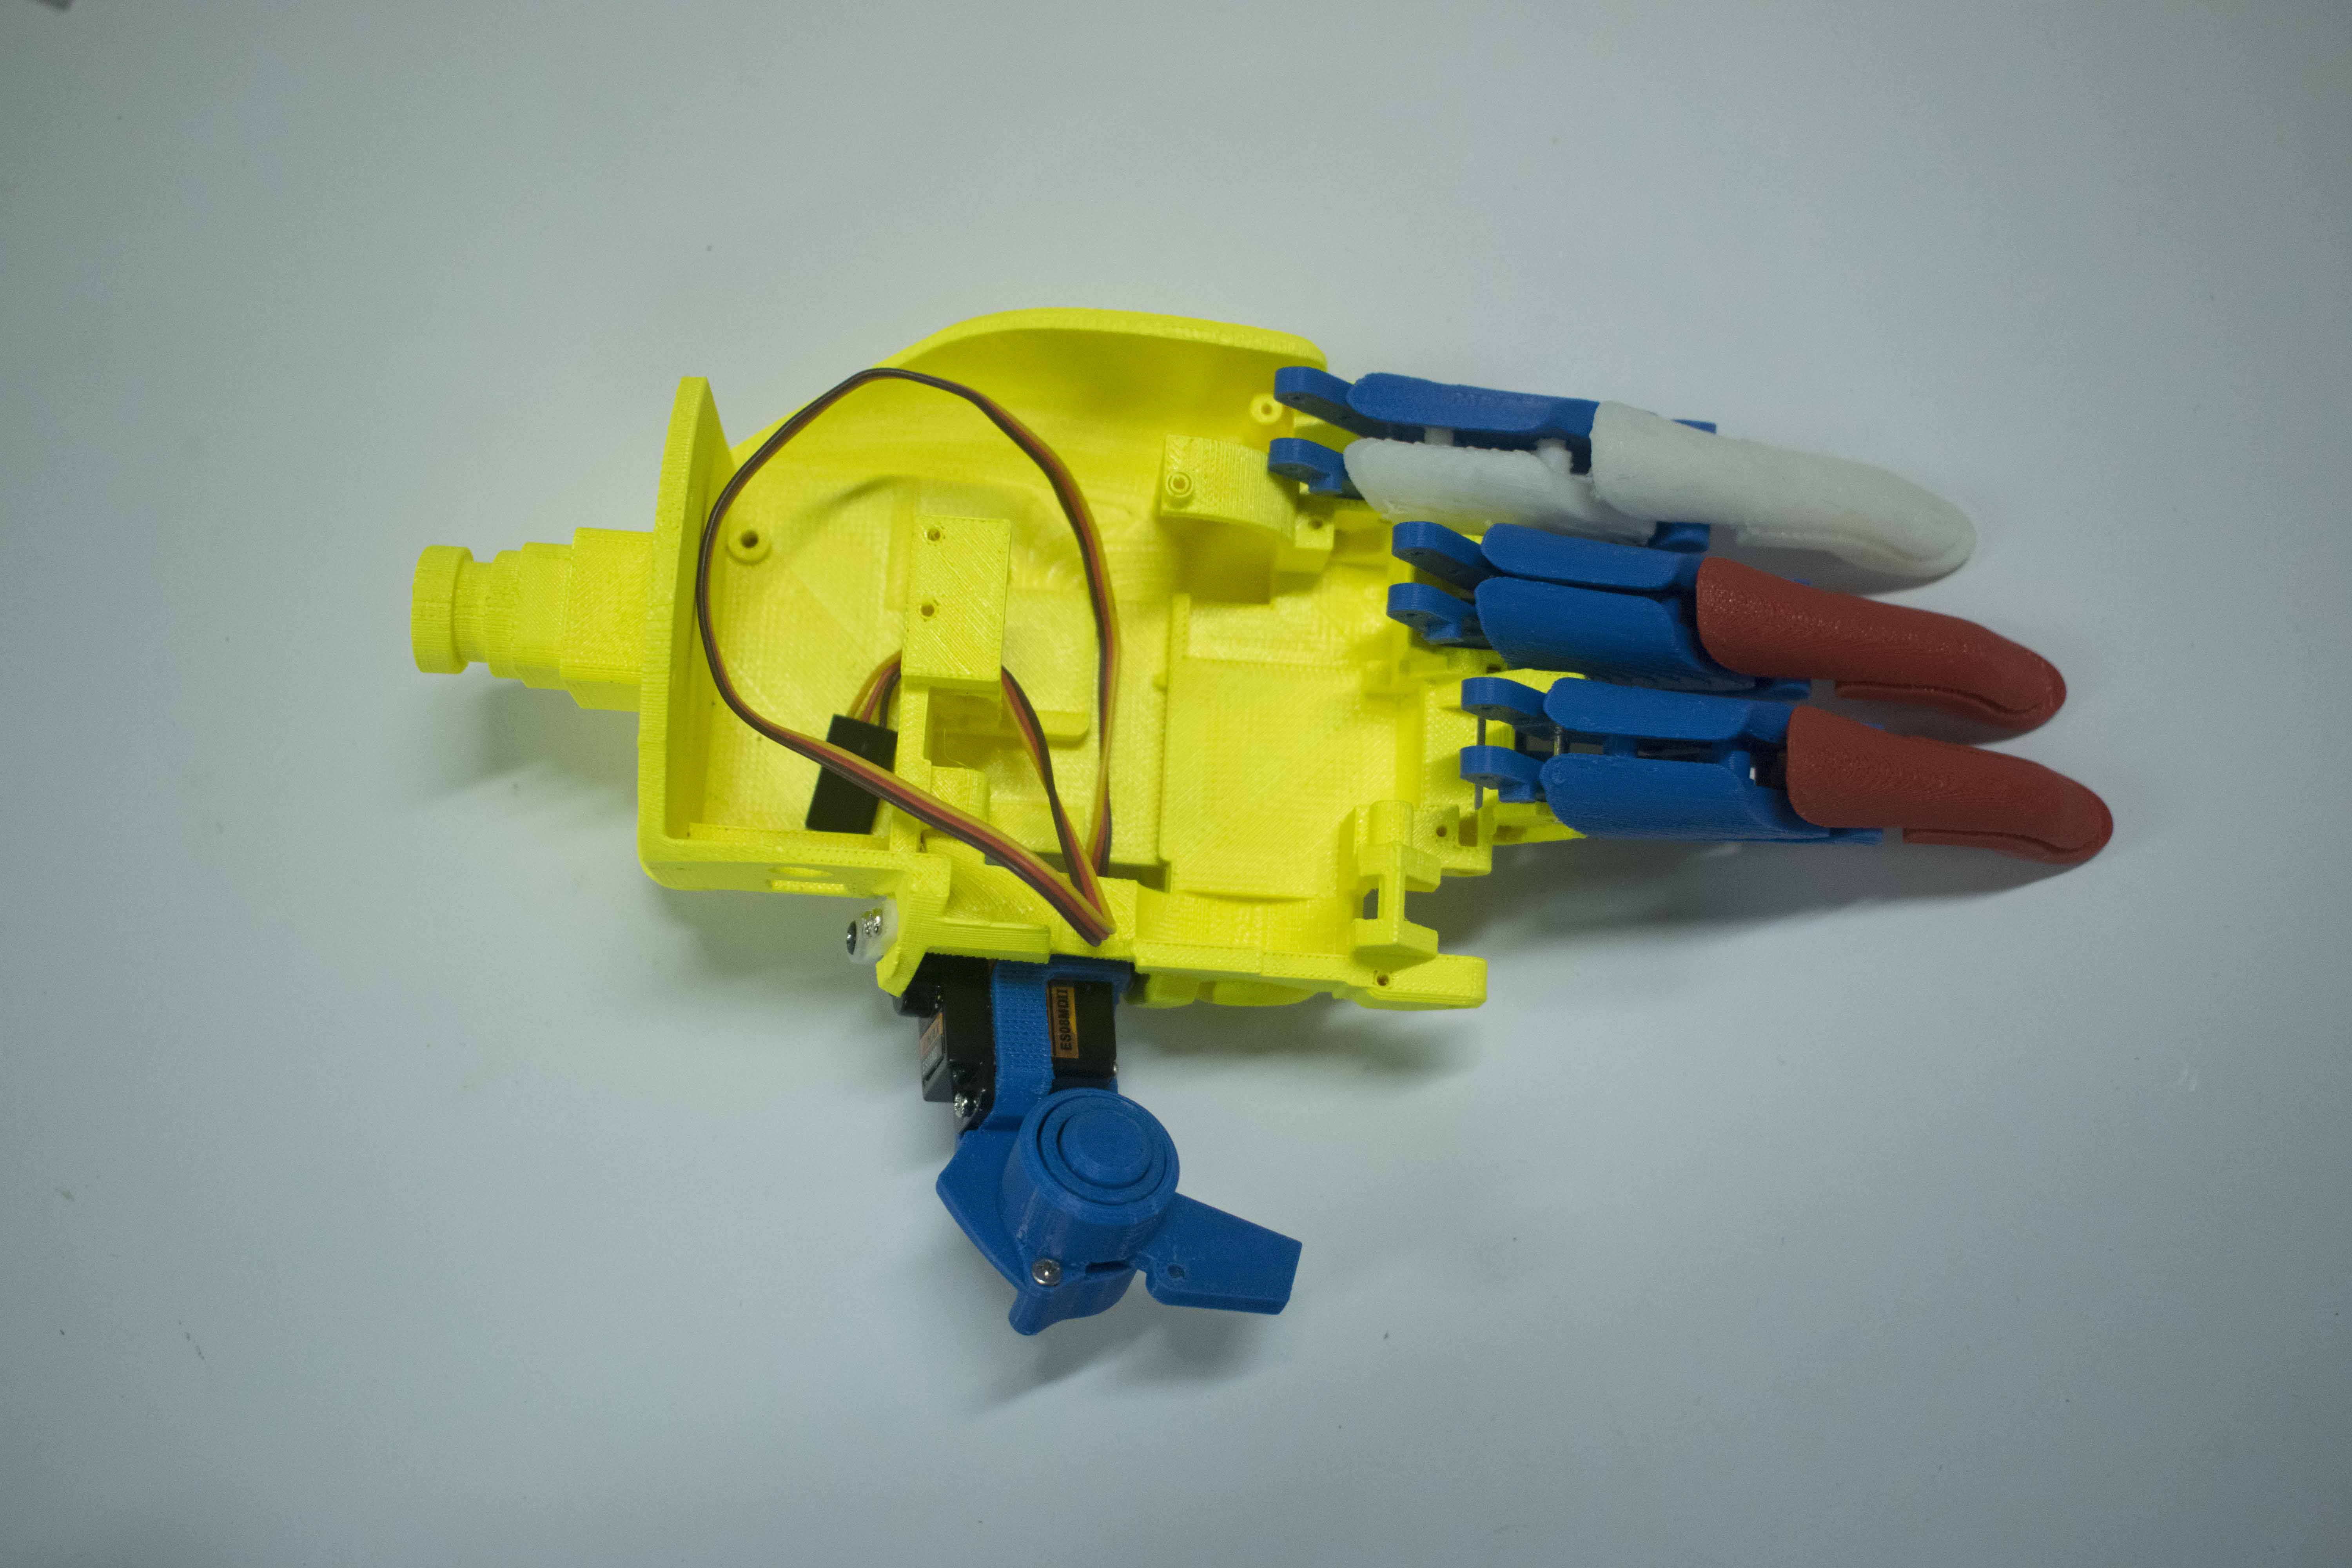
This project includes the attachment of two types of sensors, temperature-sensing and force-sensing on Hackberry 3D printed hand. There will be two force-sensing resistors, one on thumb and other on palm. The temperature sensitive resistor will be attached on the palm. These sensors will enable an amputee to feel temperature and strength while picking or grabbing any object. The attachment of this sensors, stand as an improvement of Hackberry 3D printed hand.

The following schematic diagram summaries the project Hackberry Feedback System

Adobe Portable Document Format - 45.44 kB - 04/13/2018 at 15:04

Preview
Download

BionicHandTemperature_v4.ino

Code for Temperature feedback, using a T° sensor and Neopixel LED strip

ino - 5.08 kB - 02/19/2018 at 19:25

Download

feedback_bionic.ino

This is the code of the Feedback System, the code utilizes mean filtering to filter the noise and the fluctuations recieved with the readings of the FSR. The readings from the two FSR are used to rotate a servo motor to simulate a feedback to the user.

ino - 1.99 kB - 02/14/2018 at 10:13

Download

Hackberry_official.ino

This is the official OpenSource Code of the Hackberry Hand. We have made some modifications to suit the Left Hand of the bionic system.

ino - 5.80 kB - 02/14/2018 at 10:11

Download

  • 1 × Arduino UNO or Equivalent Arduino was used as brain of Bionic hand. We have used Seeedstudio Lotus. The following link provides all the information about the usage of the component: http://wiki.seeed.cc/Seeeduino_Lotus/
  • 1 × Temperature Sensor Temperature sensor was used for temperature sensitive feedback system. The following link provides all the information about the usage of the component:http://wiki.seeed.cc/Grove-Temperature_Sensor_V1.2/
  • 1 × Capacitive Touch button Touch button was used for temperature sensitive feedback system. The following link provides all the information about the usage of the component: http://wiki.seeed.cc/Grove-Touch_Sensor/
  • 1 × WS2813 LedStrip - 144 Leds/meter (20 LEDs) WS2813 LedStrip was used for temperature sensitive feedback system. The following link provides all the information about the usage of the component: https://www.seeedstudio.com/WS2813B-Digital-RGB-LED-Flexi-Strip-144-LED-1-Meter-p-2816.html
  • 2 × 10K ohm resistors The resistors were used potential divider circuitry with force sensing resistors. We require 2 resistors to develop a potential divider circuit across the Force Sensing Resistor. Refer to the circuit diagram for the attachment of this components.

View all 8 components

  • Completion of Hackberry Hand

    Hinal Shah02/14/2018 at 06:05 0 comments

    Today we attached the forefinger and thumb to the palm of 3D printed Hackberry Hand. The forefinger was attached to a separate servomotor with gear system. The thumb too was attached to a different servo motor. Rest three fingers were attached to a single servomotor and hence their movement is synchronised together.

  • FSR Feedback System

    Hinal Shah02/13/2018 at 10:01 0 comments

    Post R&D performed yesterday, today we have integrated two FSRs on the feedback system, one will be used on the thumb and the other on the palm. This simulated the force measured while pinching and grabbing respectively. The force that is measured is converted to a servomotor motion which is used as a feedback for the person which indicates the firmness of the grip. The two red rings encircle the two force sensitive resistors respectively.

  • Temperature sensor

    Hinal Shah02/13/2018 at 06:41 0 comments

    The day-2 of the Prototype session began with Jean improving the temperature sensor circuit for the Bionic hand. When the system works on 'T' mode, the Led strip turns blue and red on touching any cold or hot object respectively. One can change the mode with a push on the touch button. On 'F' mode the user can experience fun of having colourful lights animation which gives a cool disco effect!

  • R&D for Feedback system

    Hinal Shah02/12/2018 at 12:22 0 comments

    As a part of R&D for feedback system of the bionic hand, we have started with the force sensing resistor (FSR) and have begin the calibration in order to get the different values for holding and grasping different objects.

  • Hackberry 3D printed hand

    Hinal Shah02/12/2018 at 12:02 0 comments

    We have assembled the various parts of Hackberry 3D printed hand to make bionic right hand (palm). The forefinger and the thumb is yet to be attached.

  • Prototype Day-1

    Hinal Shah02/12/2018 at 11:47 0 comments

    The team begins to assemble the 3D printed Hackberry hand.

  • Prototype Day-1

    Hinal Shah02/12/2018 at 10:59 0 comments

    1. Assembled the working prototype of hand from Hackberry 3D printed parts.

    2. Initiated the development of feedback mechanism process.

View all 7 project logs

  • 1
    3D printed Hackberry Hand

    The making of 3D printed Hackberry Hand involves the assembling of various 3D printed parts. Attached below is the link which provides all the information regarding the attachment of various parts:

    https://myhumankit.org/en/tutoriels/myoelectric-exiii-hand/

  • 2
    FSR Feedback System

    FSRs i.e. Force Sensing Resistors are sensors that allow you to detect physical pressure, squeezing and weight. The FSR is made of 2 layers separated by a spacer. The more one presses, the more of those Active Element dots touch the semiconductor and that makes the resistance go down. FSRs are basically a resistor that changes its resistive value (in ohms Ω) depending on how much it is pressed. 

    FSR has been pulled up by 5V and pulled down by 10K resistor (a simple voltage divider) so that when pressure is applied we get corresponding resistance as output.

    Refer to the circuit diagram given below to make the FSR Feedback System

    Connect one FSR  to Analog pin A5 to read Thumb force

    Connect one FSR  to Analog pin A4 to read Palm force

    This is how the circuit looks, after completion

  • 3
    Mother Board

    For the making of the mother board involves assembling of various parts as given in the following link: https://myhumankit.org/en/tutoriels/myoelectric-exiii-hand/

    In mother board Arduino micro is used as brain of the system. 

    After mounting all the components on the mother board, this is how it looks.

View all 4 instructions

Enjoy this project?

Share

Discussions

Similar Projects

Does this project spark your interest?

Become a member to follow this project and never miss any updates