 Dave Pedu
The core of this project is figuring out how the Pis will slide into place and have all the necessary ports line up and make contact. Designing the sled gave me a firm grip on the capabilities of my printer, so creating the backplane was next. Having little 3d modeling experience, I turned to the simplest tool available: SketchUp.
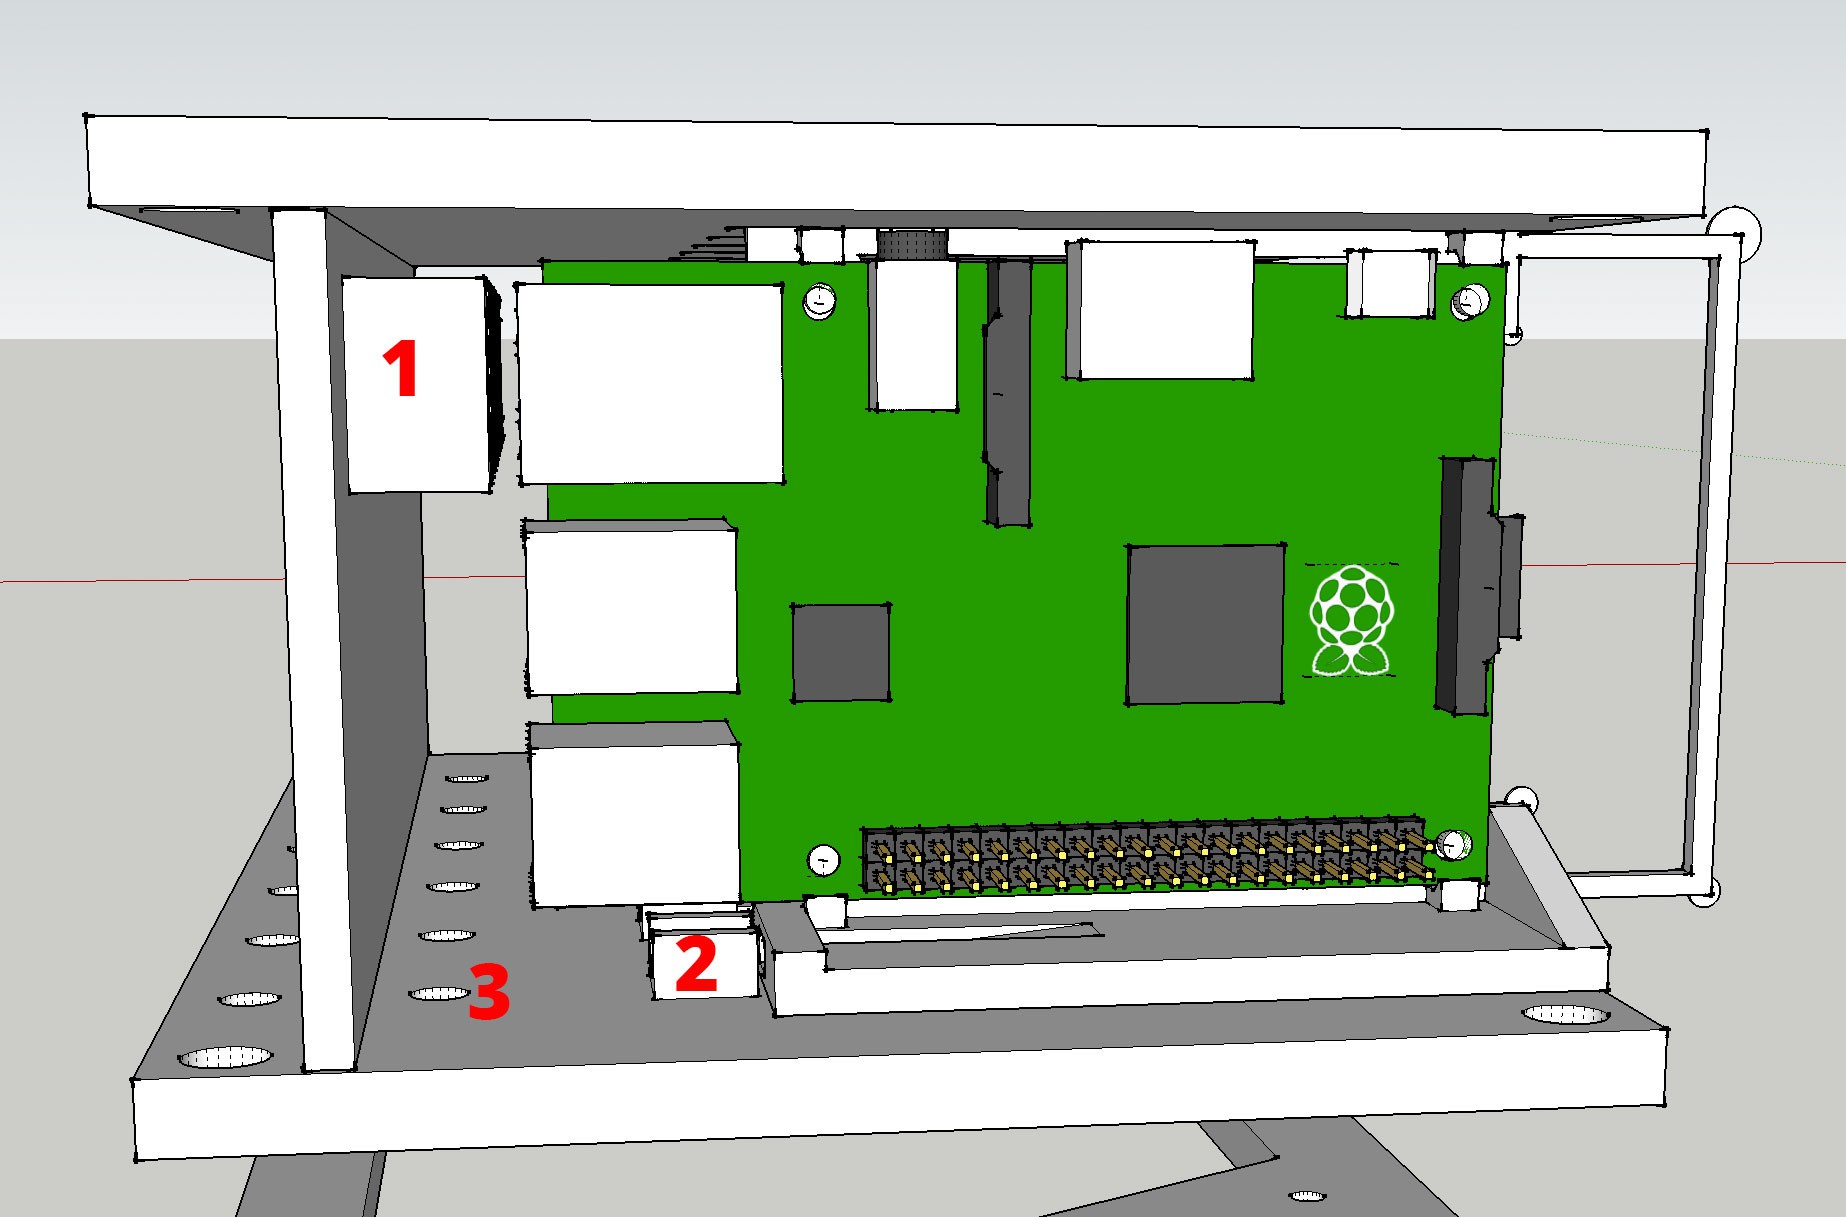
I found a reasonable accurate model of the Pi B+ online, so I used that to mock up the enclosure. Label 1 is a housing for the ethernet plug. Originally I planned to epoxy these into place, but force-fitting them into the 3d printed model seems sufficient. My cheap printer tends to round corners but in this case it only helps hold the RJ45 connector in place. Label 2 is a U-shaped holder for two more breadboard jumper wires, the female end of which is glued in place. The power and ethernet wires all run down through the hole at Label 3, down to the layer where the ethernet switch sits and power will be distributed. The vertical back is fixed to the top/bottom layer with a tongue and groove.
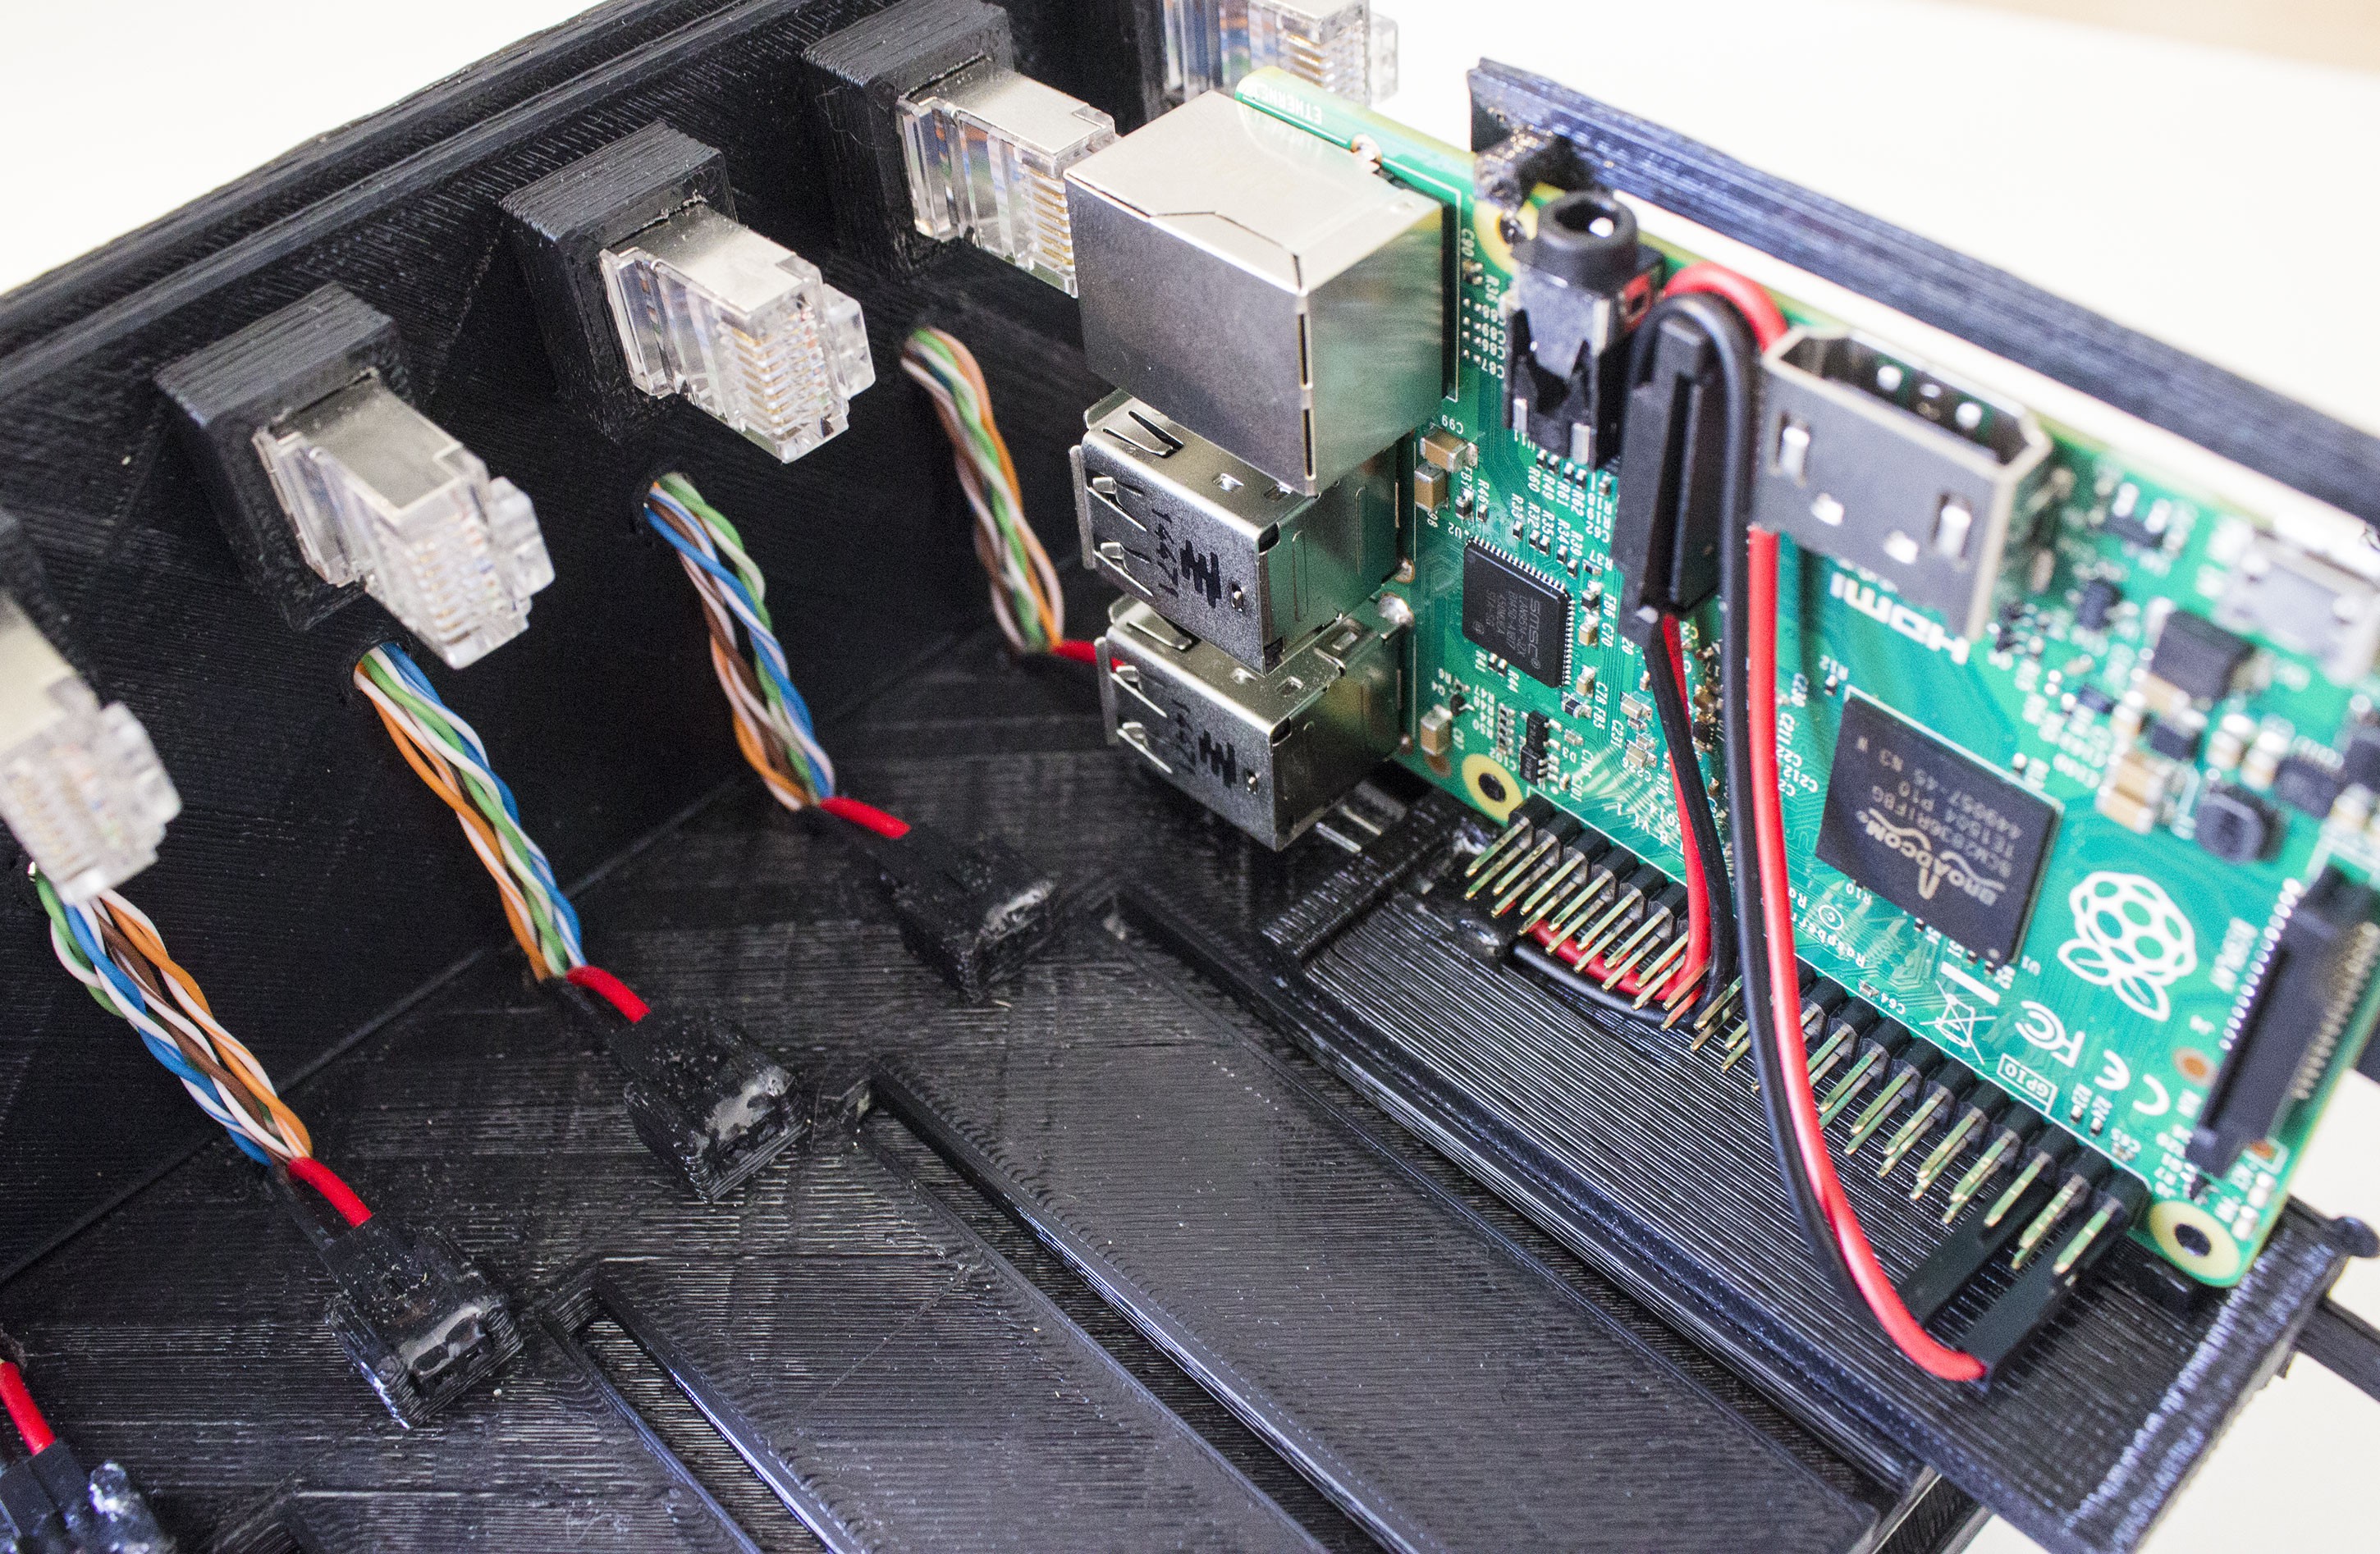
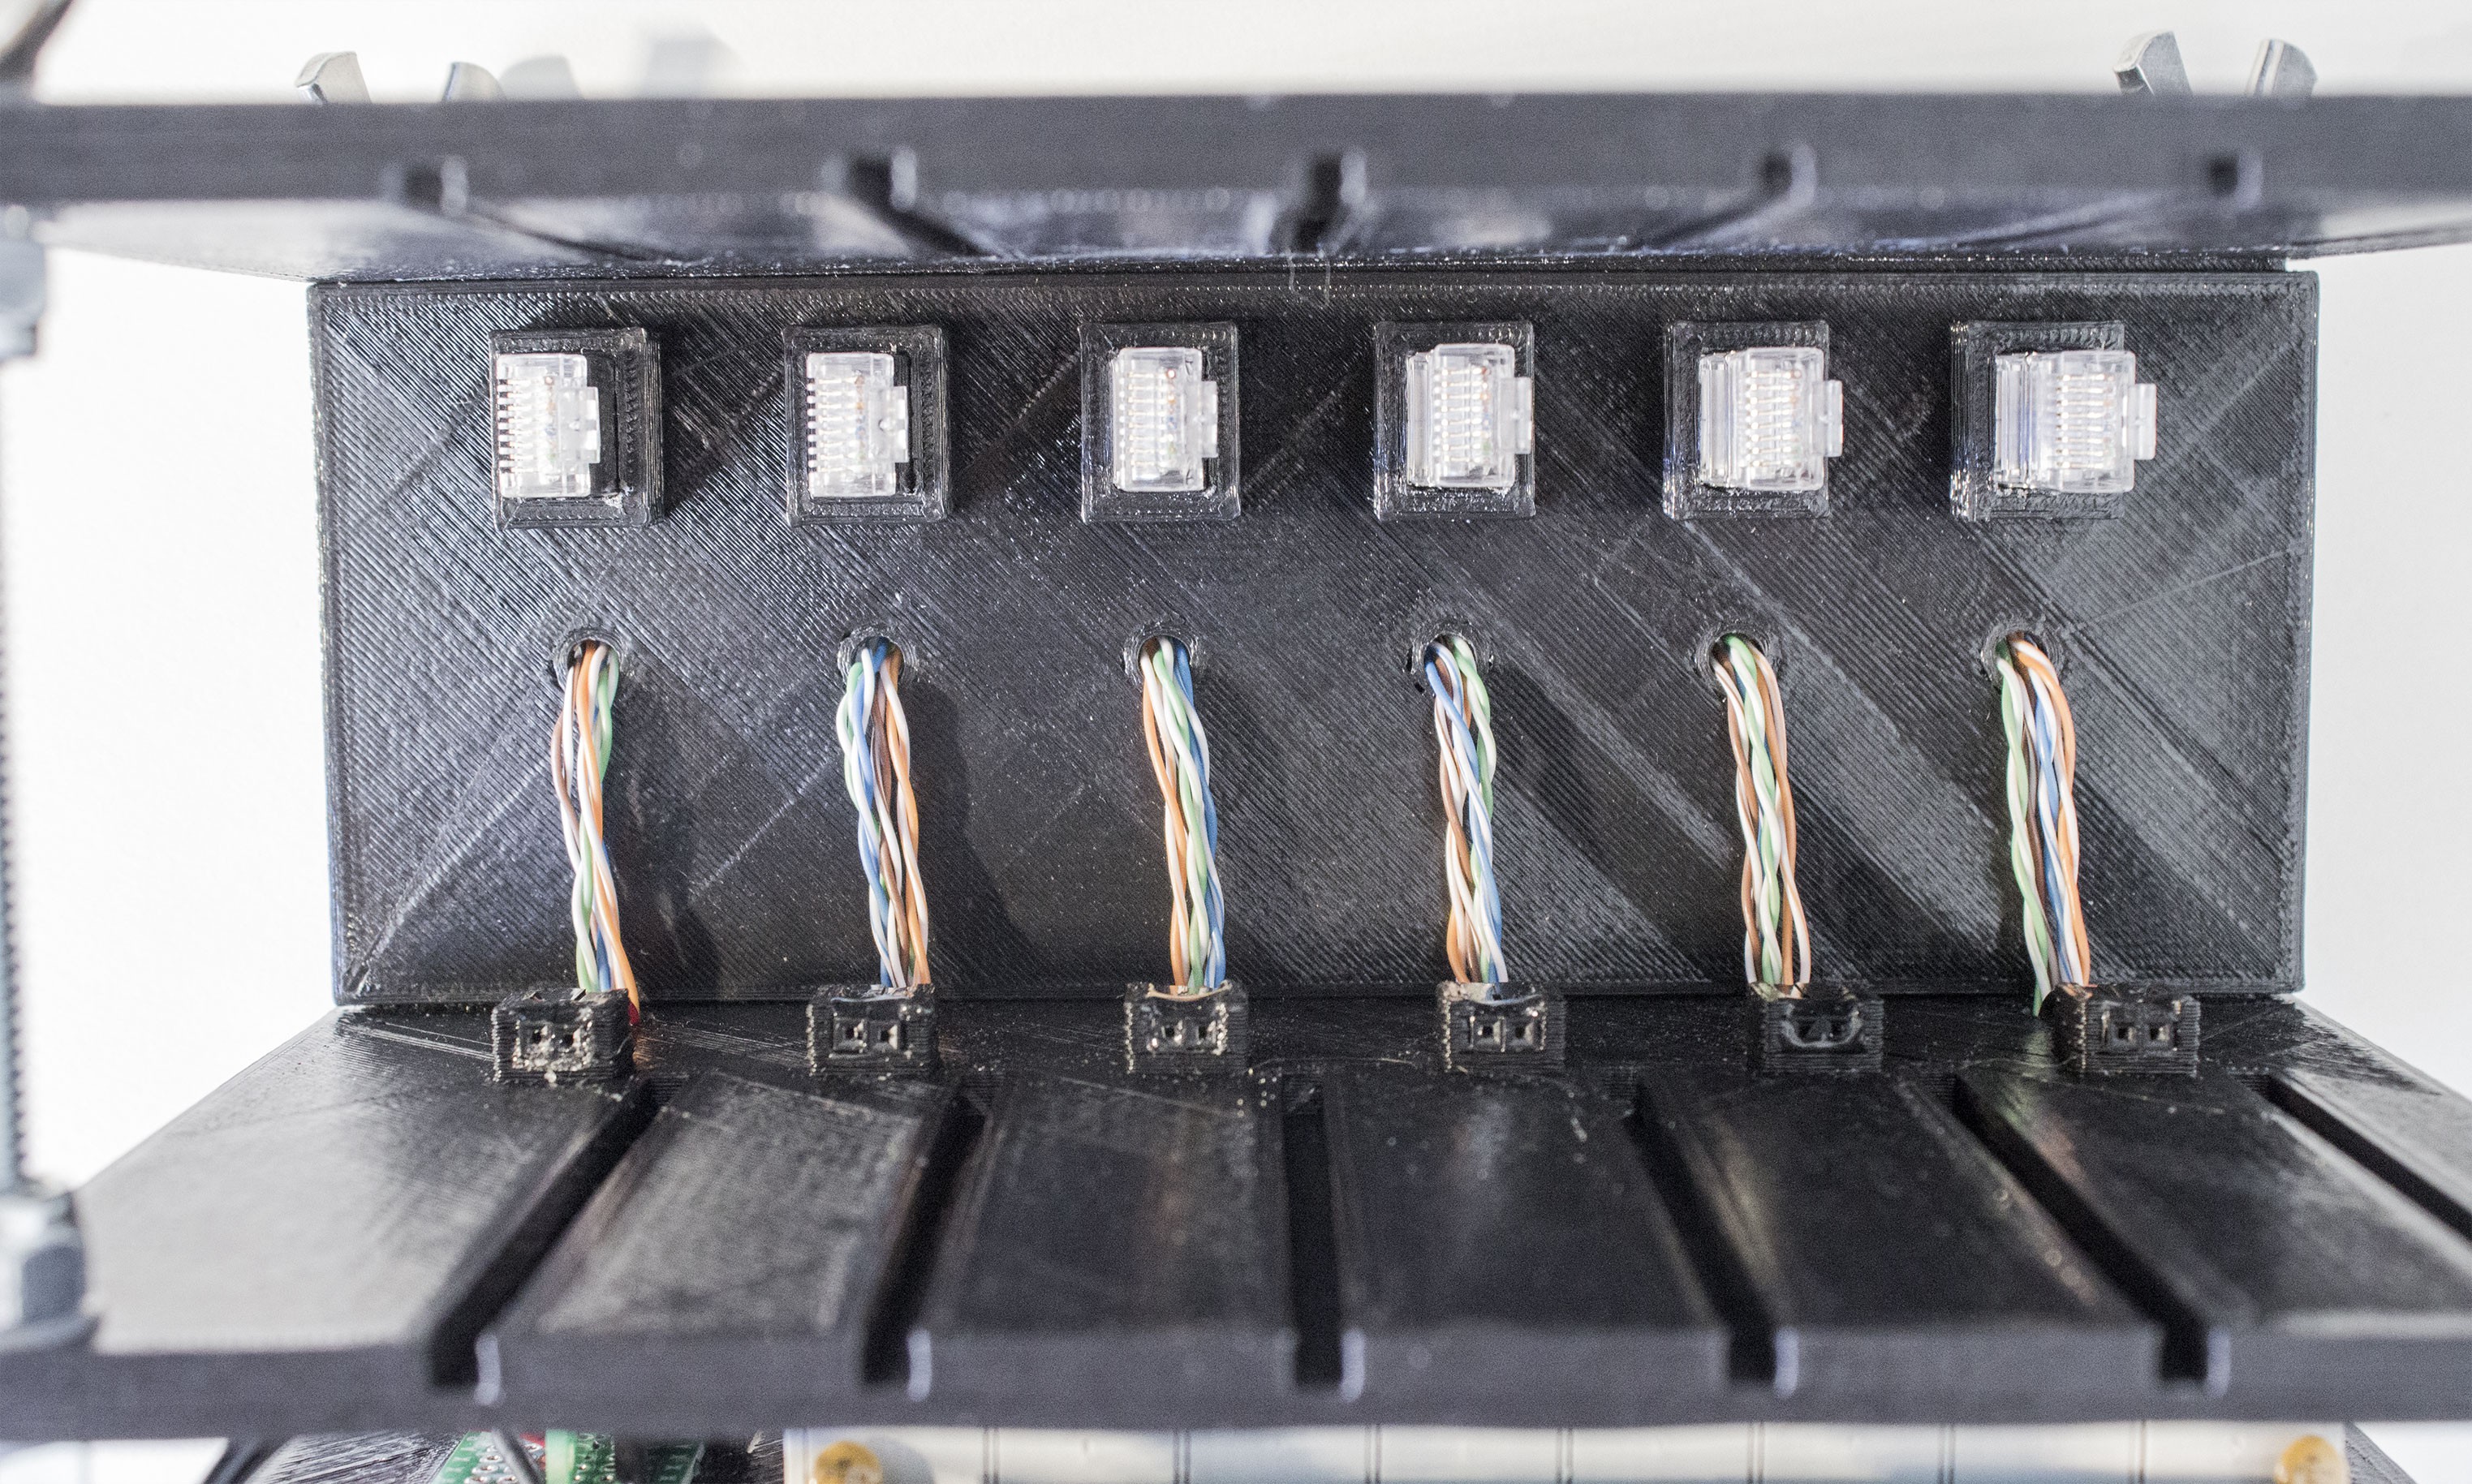
A keen observer would note that in the model pictured above the ethernet wires would have to run through separate holes in the back. I ended up printing the bottom layer first and forgot these holes! I compensated by adding new holes in the rear vertical piece. This is a little more clear when seen here, with a Pi inserted and the top removed:
Assembled with some simple threaded rods, lock nuts, and wing nuts from my local hardware store, the Pi bay looks like this:
Discussions
Become a Hackaday.io Member
Create an account to leave a comment. Already have an account? Log In.