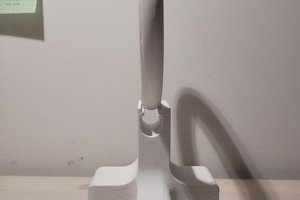
So literally I made this design in a couple hours while sitting on the couch with my calipers. I wish that I could save so many more things from going into the landfill by making simple replacement parts like this.
I have to admit that I am a little of a pencil freak so I was particularly enthusiastic about this fix, but I really hope that more people repair things instead of just throwing them out.
I was a little surprised that this part was so simple to design. There were only several measurements of the basic diameters, size of the notches, and total bore length. I could have easily spend more time to match the profile of the original sharpener or by making it fancy front of side designs. I could also have made an adapter for the front bore hole to align with a variety of standard pencil sizes. But this is totally functional with such a minimal amount of work. I found it a good reminders of not letting perfect be the enemy of good.
Take a look at my simple drawing from my design book on the measurements I took to see how easily and few measurements it took.
Here are a few things to remember in your own design:
- When designing I made sure to put in a stop notch so when "closed" it would align vertically. I neglected to put one on the other side (to stop it "open"). That would make it easier to align when removing the bin, but not really that critical during normal function.
- When you make these kind of "stops" be sure to offset them by half the width of the "pin". I didn't make that mistake this time only because I have made it on another project. You can see that offset in the screenshot from Fusion 360.
- I only put in one stop because it was easier and this feature don't get a lot of stress.
- If you are redesigning for your own sharpener, make sure to check the crank direction of the pencil sharpener. The business end of the pencil sharpener does put a tiny bit of rotational friction against the bin. Make sure that when you crank that this rotation pushes the bin against the stop. This will keep the bin in position when you are sharpening.
- I did design the front a little too thick, and I made the back a little thinner than I would like.
- The two halves have zero offset between the overlapping lip. I think that with this thin of wall (2mm in this case) that it will snap together well with minimal effort and will stay together. I'm not even going to bother glueing the haves together. This simple assembly makes it super easy to print. Both sides then have a flat side for good clean and easy printing. I printed in PLA and it likely will never wear out.
- The wall thickness of the sides is nominally 2mm which prints nicely with a .4 nozzle. The overlap sections are both 1mm. I would have redesigned this so that was also divisible by .4 for more accurate printing, but most slicers these days can handle this without difficulty.
- I suggest printing with 4 or 5 perimeters as this will make sure the walls are not "infilled" and printed solid.
I would really have liked to make this in OpenSCAD. I think with just a few parameters you could have a design that could accommodate nearly any sharpener. I'm just SOOOO much more proficient in Fusion 360.
 Nathan Brown
 secretbatcave


 Giovanni